


As an important indicator for hardware performance in gaming, FPS (Frame per Second) stands for the number of images displayed by your monitor each second. The more frames shown per second, the better visual quality as well as game performance you’ll have. In other words, by raising FPS in games (if possible), you should be able to play them more smoothly, given other factors unchanged. But the point is, how can we see FPS in CS:GO? Read and find out…
How to show FPS in CS:GO
If you wonder what is considered an average or excellent frame rate, here’s a roughly-estimated standard for you.
- Lower than 30: This is rather low as you’ll experience all kinds of lag issues in the game. Most probably it makes you feel like playing a slide-show because you cannot run the game smoothly, which in large part ruins your gaming experience.
- Between 30 and 60: This is a normal range. It’s enough for the game to run normally but not for the display of high-quality graphics.
- Between 60 and 100: It’s a fairly good frame rate. The gaming experience could be enhanced, but is enough for most players unless you’re trying to get the best out of your hardware.
- Above 100: Rather excellent FPS. You can play the game very smoothly with this frame rate. Just enjoy it!
Now let’s cut to the chase – what should we do to see FPS (or other indicators if needed) in CS:GO? Here we recommend you two simple ways. You don’t have to try them all; just pick the one that suits you best.
Way 2: Use CS:GO Console commands
Way 1: Show FPS via Steam
This should be the easiest way to display FPS in CS:GO – enabling the Steam options of In-game FPS counter. Here are the steps:
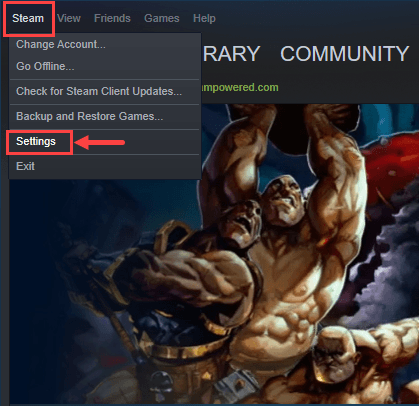
1) Log in Steam. At the top left corner, click Steam > Settings.
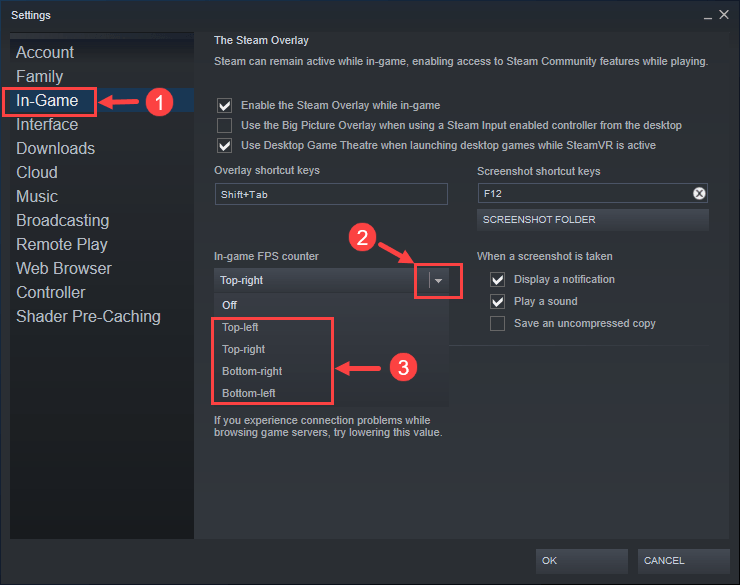
2) Select In-Game from the left pane. Then on the right panel, click the down arrow button below In-game FPS counter to expand the drop-down menu. Choose your desired position where the FPS will be shown.
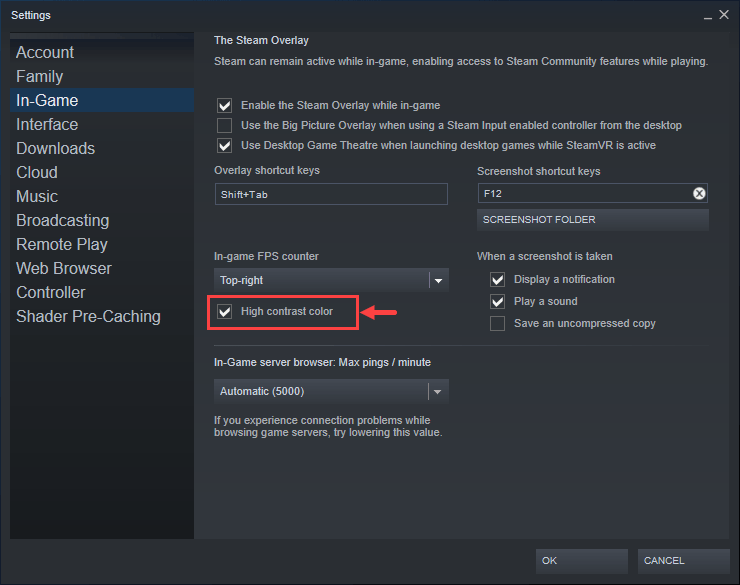
3) Don’t forget to check the High contrast color box so you can see the FPS more clearly.
4) Now launch CS:GO and you should be able to see the FPS on your screen.
Way 2: Use CS:GO Console commands
You can also display FPS in CS:GO by using its built-in command-line tool. Here’s how:
1) Launch CS:GO. In the left pane, click the gear icon to open the Settings window. Then go to the Game Settings > Game tab. Scroll through the list below to locate Enable Developer Console (~) and select Yes.

2) Exit the Settings window. Press the ~ key on your keyboard (the one above Tab) to invoke the command-line window in CS:GO.
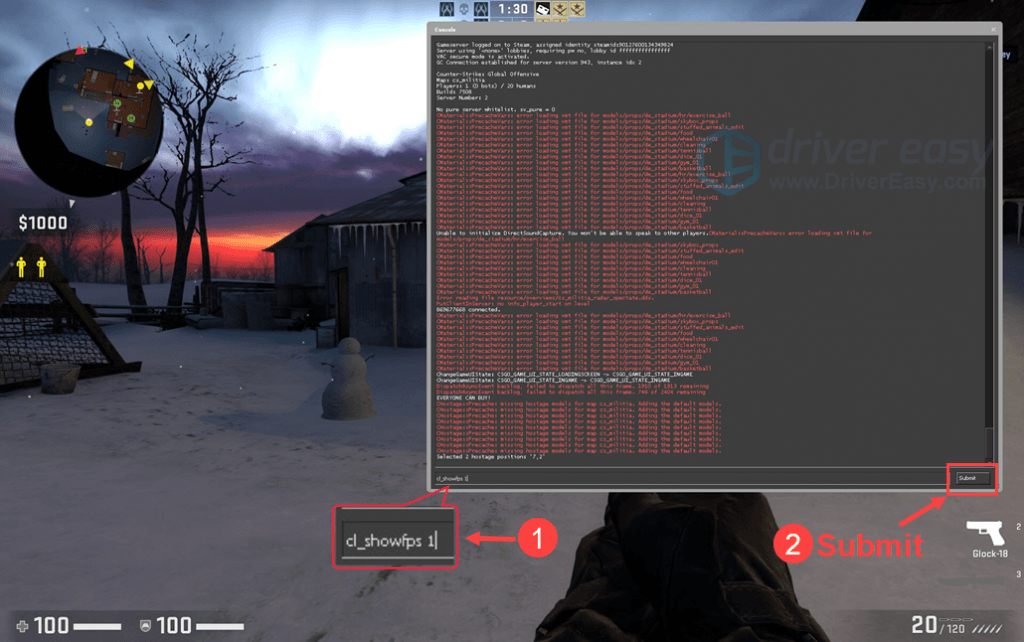
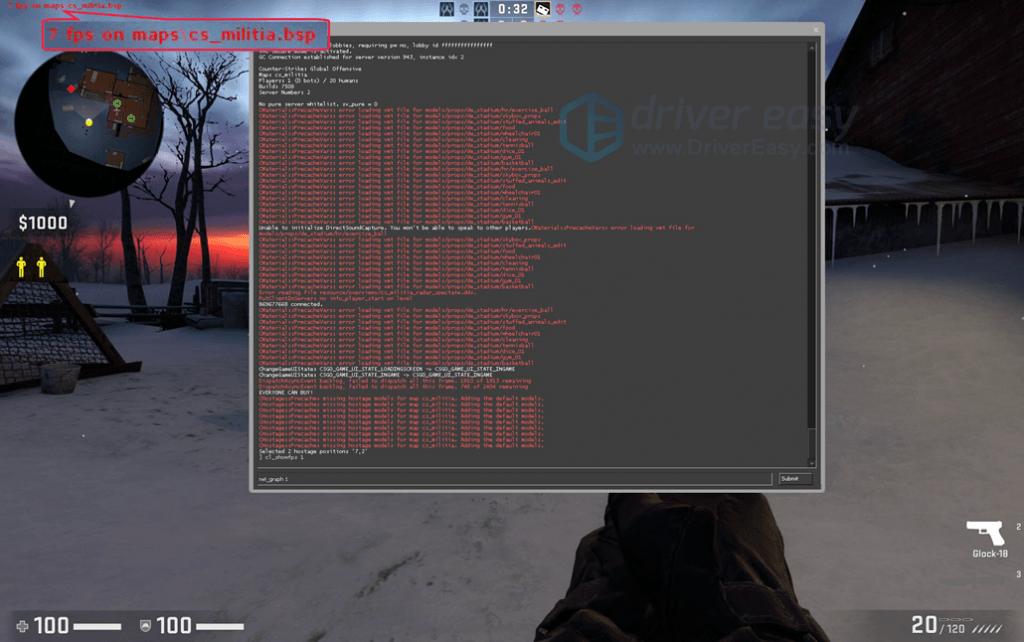
3) Type cl_showfps 1 and click Submit.
4) You’ll see the indicator (a bit small, though) at the top left corner of your screen, as shown below.
Now you’re all set. In case you’d like to show other indicators in CS:GO, say the ping time, you may proceed with the following steps.
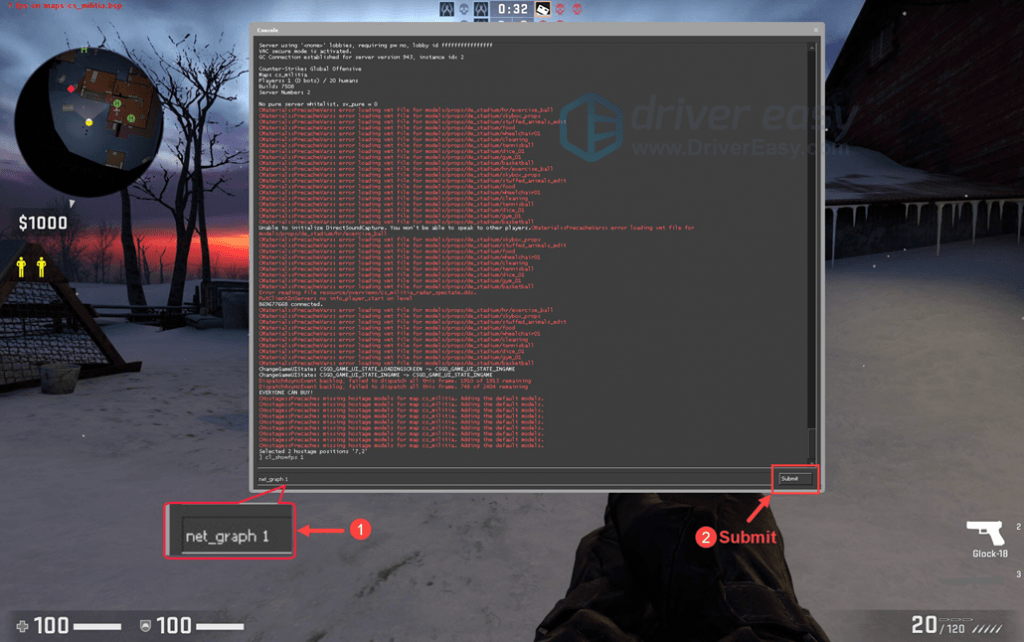
5) In the command-line window, type net_graph 1 and click Submit. (Likewise, you may enter net_graph 0 to revert the change. )
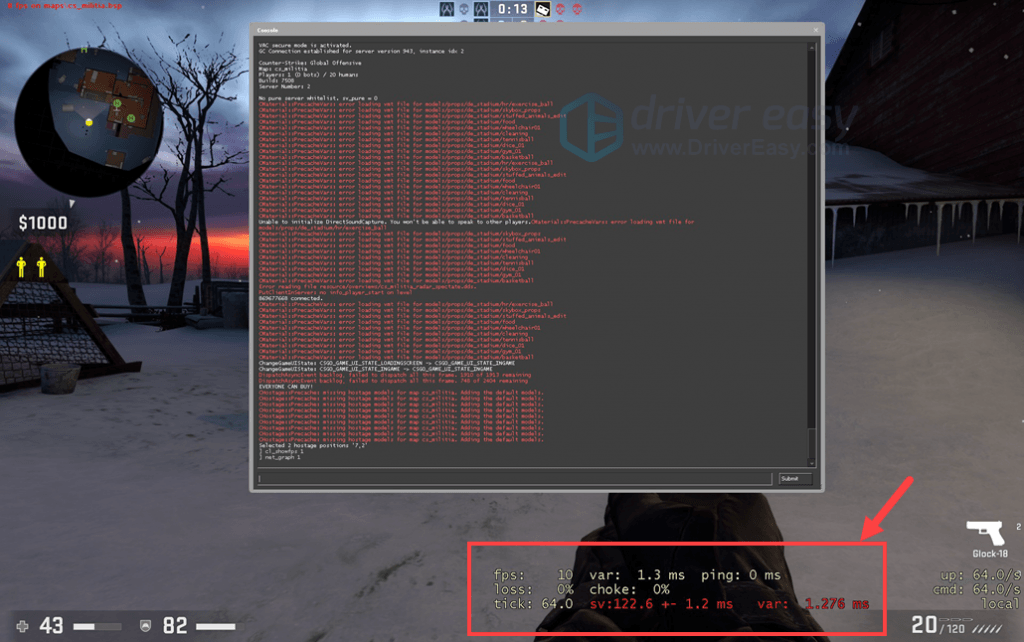
6) Now you can see a few indicators including FPS and ping at the bottom of your screen. Incidentally, if your FPS are as low as mine in the screenshot, you will definitely feel like playing a slide-show.
There you go – two ways to display FPS in CS:GO! If you’re also caught in a serious lag issue, this post is useful to obtain more information relating to solutions that improve your FPS. Please visit https://www.drivereasy.com/knowledge/how-to-fix-csgo-fps-drops-issues/.
Bonus tip: Update your device drivers to improve FPS
Outdated, corrupt or incompatible drivers may lower your FPS and thus put a damper on gameplay. To ensure the stability of your computer and boost game performance, you should verify that all your devices have the right driver, and update those that don’t.
If you don’t have the time, patience or computer skills to update your drivers manually, you can do it automatically with Driver Easy.
Driver Easy will automatically recognize your system and find the correct drivers for it. You don’t need to know exactly what system your computer is running, you don’t need to risk downloading and installing the wrong driver, and you don’t need to worry about making a mistake when installing. Driver Easy takes care of everything.
You can update your drivers automatically with either the FREE or the Pro version of Driver Easy. But with the Pro version it takes just 2 clicks (and you get full support and a 30-day money back guarantee):
1) Download and install Driver Easy.
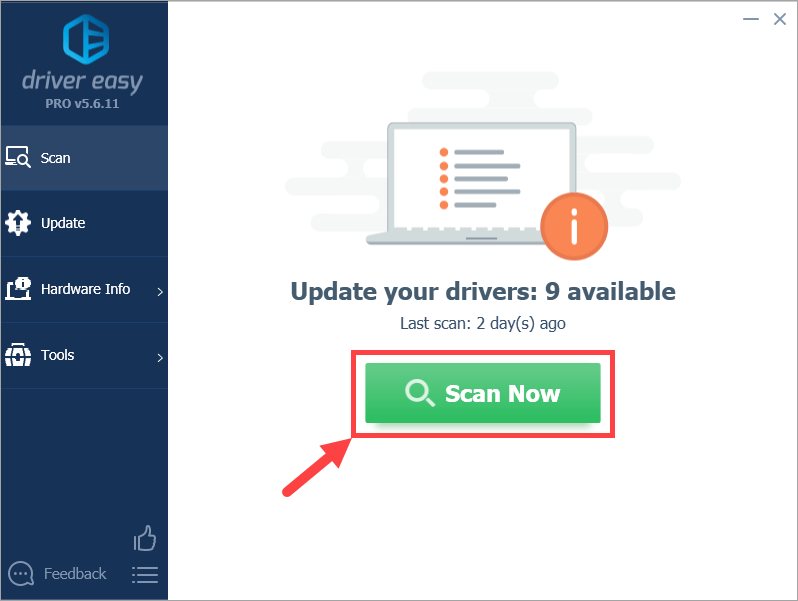
2) Run Driver Easy and click the Scan Now button. Driver Easy will then scan your computer and detect any problem drivers.
3) Click the Update button next to the flagged device to automatically download the correct version of the driver (you can do this with the FREE version). Then install the driver in your computer.
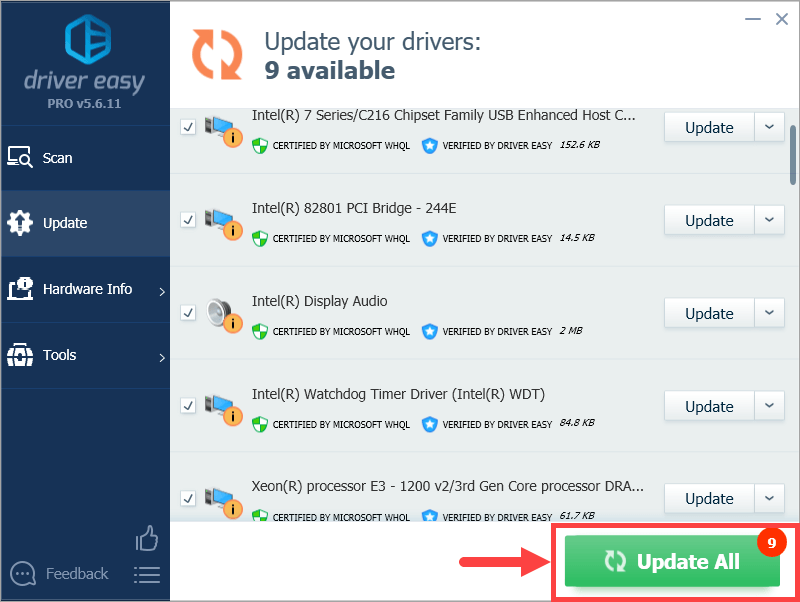
Or click Update All to automatically download and install the correct version of all the drivers that are missing or out of date on your system (this requires the Pro version – you’ll be prompted to upgrade when you click Update All).
Note: you can do it for free if you like, but it’s partly manual.
Hopefully you’ll find this post helpful. If you have any questions or ideas, please feel free to leave comments below. Thanks for reading, and good luck to you all!