


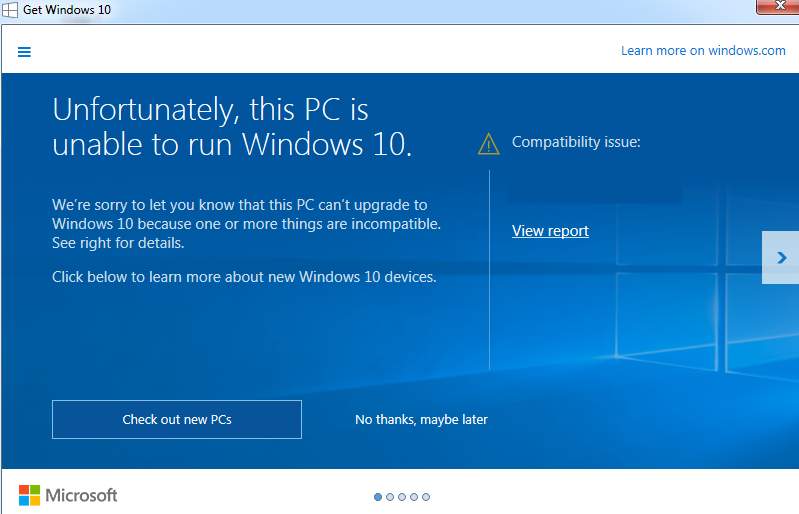
If you’re having problems upgrading your computer to Windows 10, and you see the error message saying that “The display manufacturer hasn’t made your display compatible with Windows 10. Check with the manufacture for support.” you’re not alone. Many Windows users are reporting this problem as well. But no worries, it’s possible to fix.
Here are 3 fixes for you to try. You may not have to try them all; just work your way down until you find the one works for you.Method 1: Re-install LogMeIn Mirror Adapter Method 2: Clean Re-install Display Driver Method 3: Update Display Driver
Method 1: Re-install LogMeIn Mirror Adapter
Remote administration programs such as LogMeIn, TeamViewer, GoToMyPC and LogMeIn could be the cause of this error. To fix it: 1) On your keyboard, press the Windows logo key and R at the same time, type devmgmt.msc and press Enter.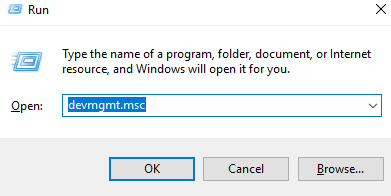
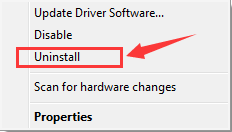
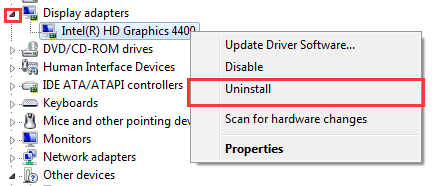
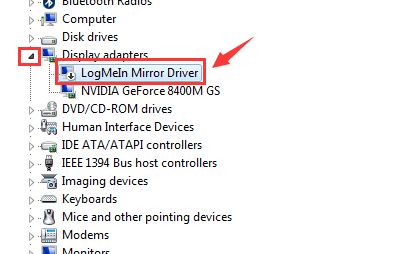 3) Right-click LogMeIn Mirror Driver and click Uninstall.
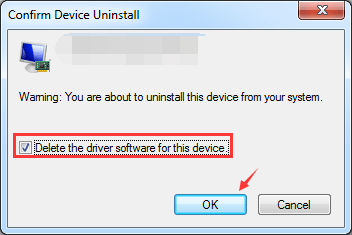
 4) At the prompt window, tick the box for Delete the driver software for this device and OK.
 If you have some other remote access software or some third party device showing up under Display adapters, uninstall them as well.
5) Reboot your computer.
6) Try Windows Update again to see if you can upgrade to Windows 10. If you need, you could install the driver for your LogMeIn Mirror Driver back on again after you have upgraded to Windows 10.
If you have some other remote access software or some third party device showing up under Display adapters, uninstall them as well.
5) Reboot your computer.
6) Try Windows Update again to see if you can upgrade to Windows 10. If you need, you could install the driver for your LogMeIn Mirror Driver back on again after you have upgraded to Windows 10.
Method 2: Clean Re-install Display Driver
NOTE: To proceed with this method, you need to download the latest version of display driver for your computer from the manufacturer’s website first. 1) On your keyboard, press the Windows logo key and R at the same time, type devmgmt.msc and press Enter.
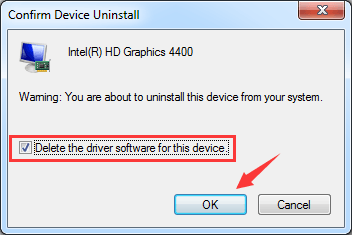
 3) Tick the box for Delete the driver software for this device and click OK.
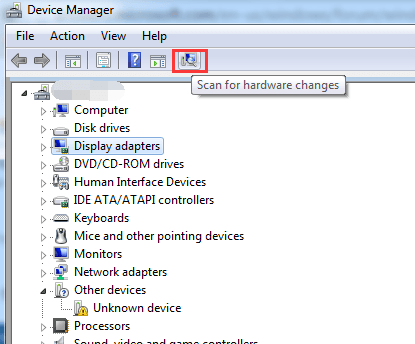
 4) Then go to the icon on the top and click the Scan button.
 5) Open the folder where you place the downloaded graphics card driver and copy its address.
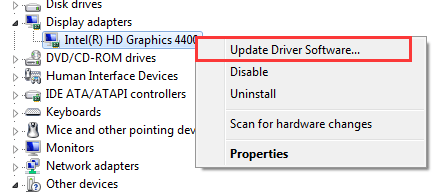
6) Go back to Device Manager and right-click your display device driver, which may be listed under Other devices, and click Update Driver Software…
5) Open the folder where you place the downloaded graphics card driver and copy its address.
6) Go back to Device Manager and right-click your display device driver, which may be listed under Other devices, and click Update Driver Software…
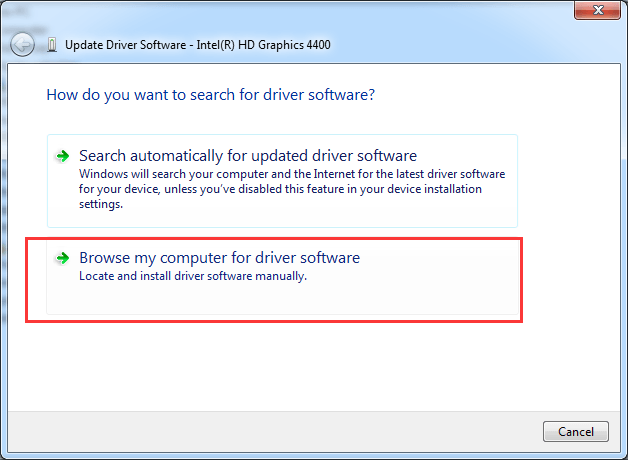
 7) Click Browse my computer for driver software.
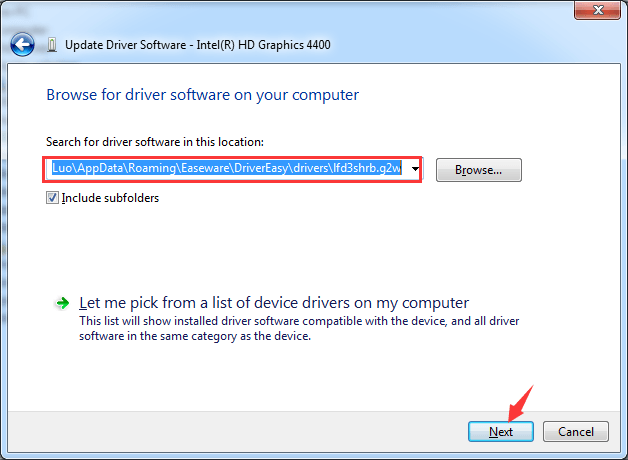
 8) Paste the location of the downloaded file to the input box here and click Next.
 Wait for the system to help you with the installation.
9) Reboot your computer for the change to take effect.
Wait for the system to help you with the installation.
9) Reboot your computer for the change to take effect.
Method 3: Update Display Driver
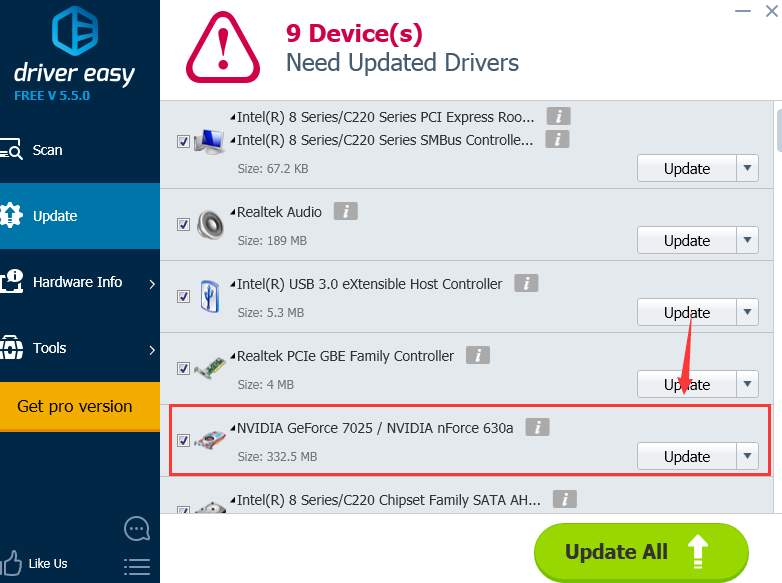
If the above method doesn’t work for you, you need to update your display card driver. If you don’t have the time, patience or computer skills to update your drivers manually, you can do it automatically with Driver Easy. Driver Easy will automatically recognize your system and find the correct drivers for it. You don’t need to know exactly what system your computer is running, you don’t need to risk downloading and installing the wrong driver, and you don’t need to worry about making a mistake when installing. You can update your drivers automatically with either the FREE or the Pro version of Driver Easy. But with the Pro version it takes just 2 clicks (and you get full support and a 30-day money back guarantee): 1) Download and install Driver Easy. 2) Run Driver Easy and click the Scan Now button. Driver Easy will then scan your computer and detect any problem drivers.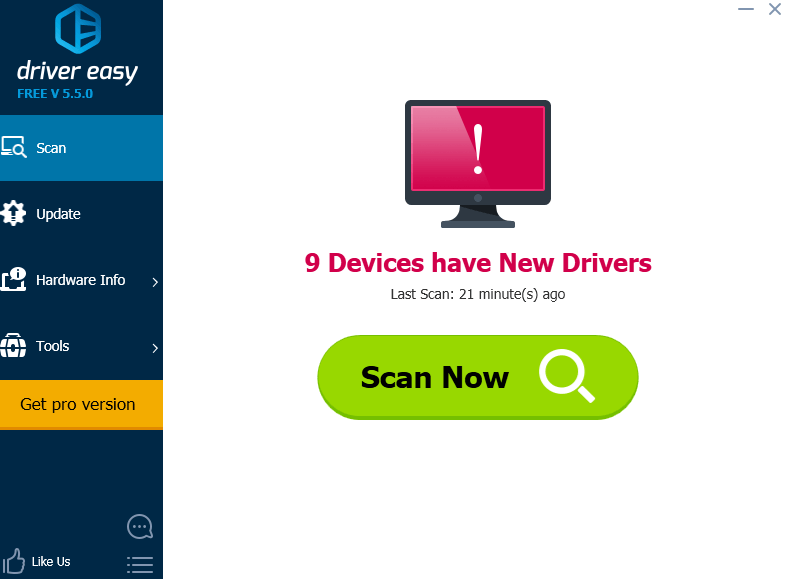 3) Click the Update button next to the flagged display card to automatically download and install the correct version of its driver (you can do this with the FREE version).
Or click Update All to automatically download and install the correct version of all the drivers that are missing or out of date on your system (this requires the Pro version – you’ll be prompted to upgrade when you click Update All).
3) Click the Update button next to the flagged display card to automatically download and install the correct version of its driver (you can do this with the FREE version).
Or click Update All to automatically download and install the correct version of all the drivers that are missing or out of date on your system (this requires the Pro version – you’ll be prompted to upgrade when you click Update All).
1 Comment
Most Voted