


If you’re using an Epson WorkForce DS-30 scanner on your computer, in most cases, the driver software will be installed automatically once you connect the device to your computer. If it didn’t, or if the driver gets corrupted somehow, your scanner won’t be able to function as it should.
But no worries. After reading this, you’ll know exactly how to install or update the Epson DS-30 driver quickly and easily. There are two ways you can do this:
Option 1 – Download and install the Epson WorkForce DS-30 driver manually
Epson keeps updating drivers on the official site. To get the latest correct one for your device, follow the instructions below:
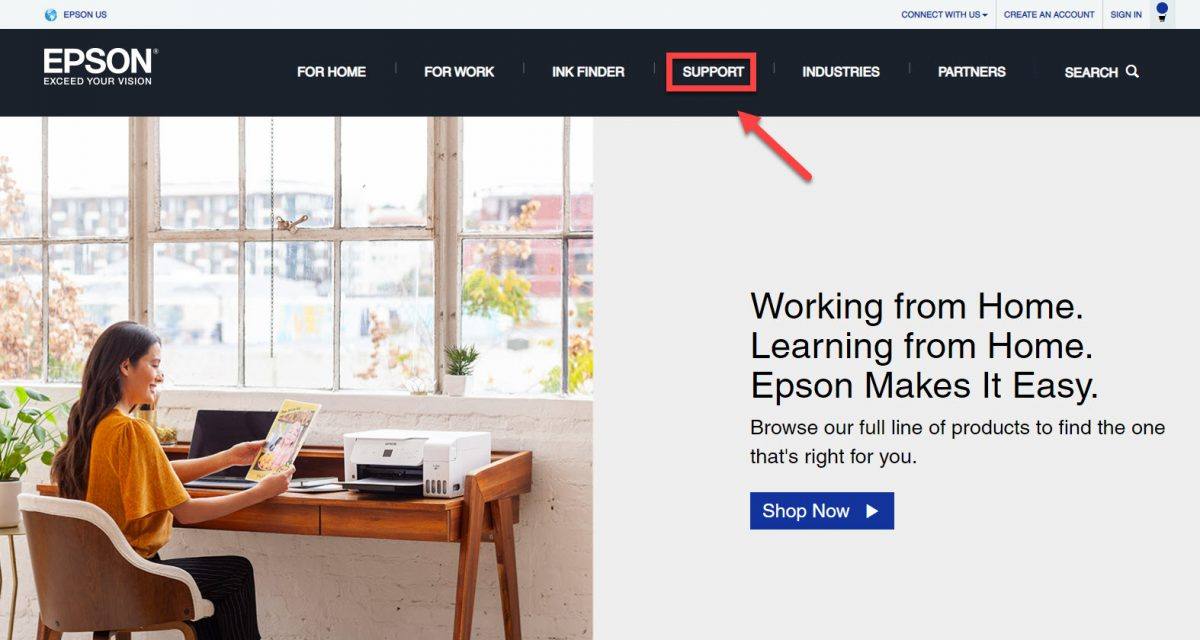
1) Go to the Epson support website, then click SUPPORT.
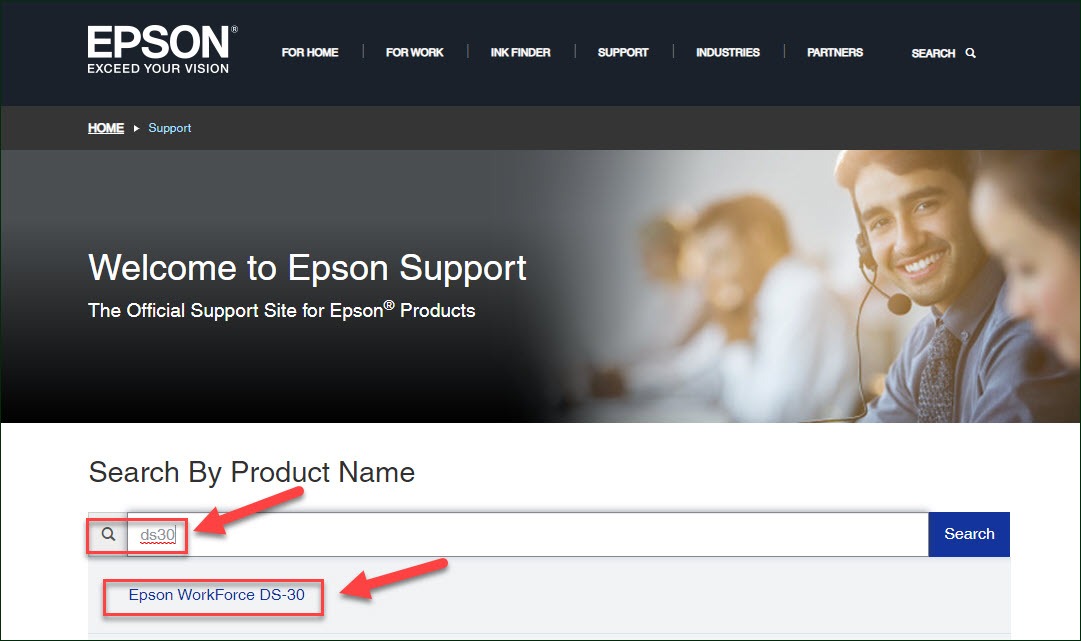
2) Enter ds30 on the search box and select your model from the list.
3) Under Downloads, check if the Operating System shown is correct.
If it’s not, click on the drop-down menu and select your specific flavor of Windows version, for example, Windows 32 bit. Then, click Drivers, select the driver you need, and click Download.
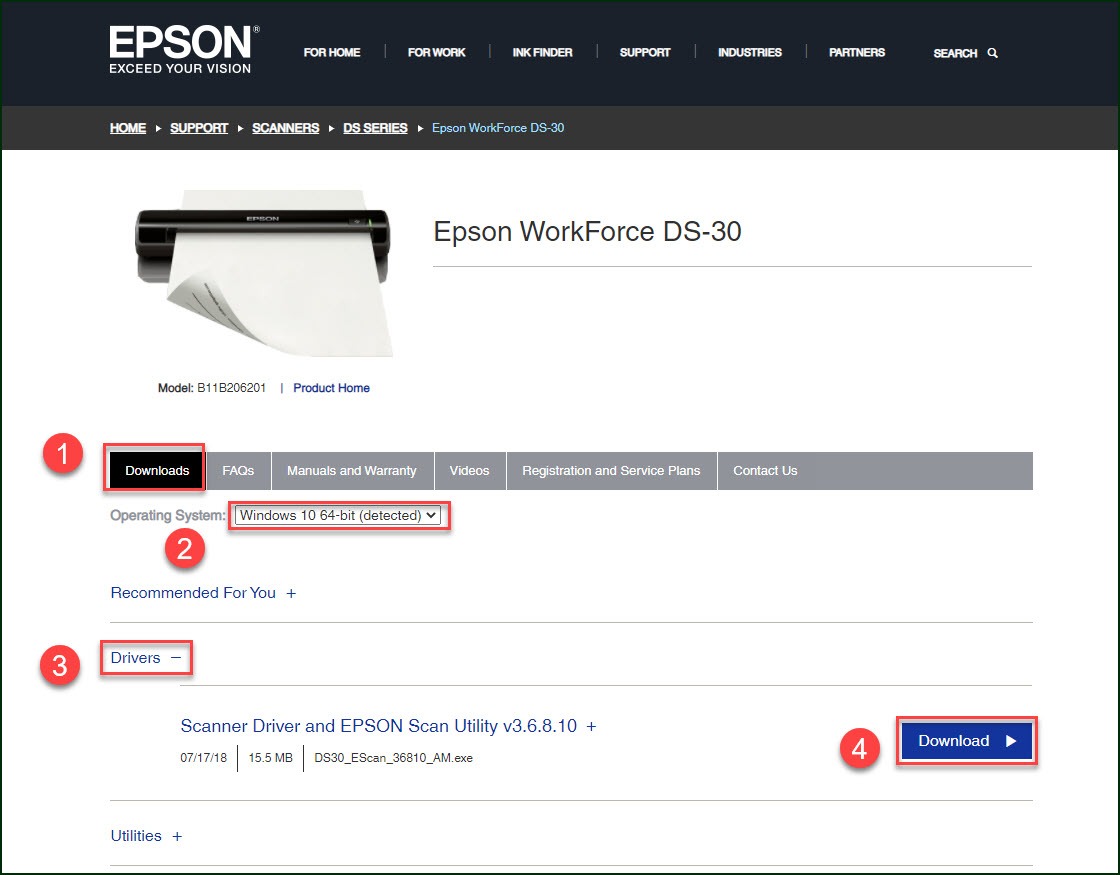
4) Once you’ve downloaded the correct drivers for your system, double-click on the downloaded file and follow the on-screen instructions to install the driver.
You’ll need some computer skills and patience to update your drivers this way, because you need to find exactly the right driver online, download it and install it step by step. If you don’t have the time, patience or computer skills to update the Epson DS-30 driver manually, you can do it automatically with Driver Easy.
Option 2 – Automatically update the Epson DS-30 driver
This is the quickest and easiest option. It’s all done with just a couple of mouse clicks – easy even if you’re a computer newbie.
Driver Easy will automatically recognize your system and find the correct drivers for it. You don’t need to know exactly what system your computer is running, you don’t need to risk downloading and installing the wrong driver, and you don’t need to worry about making a mistake when installing.
You can update your drivers automatically with either the FREE or the Pro version of Driver Easy. But with the Pro version it takes just 2 clicks:
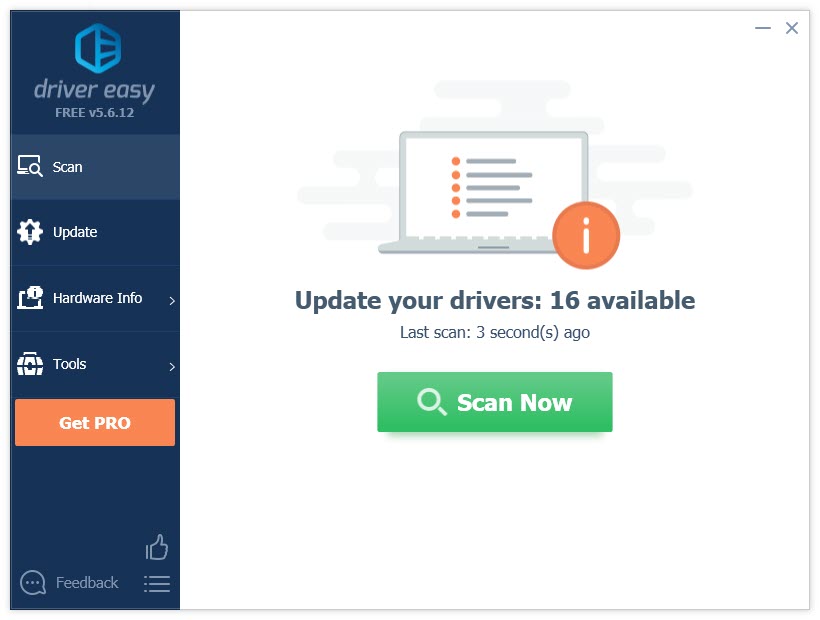
1) Download and install Driver Easy.
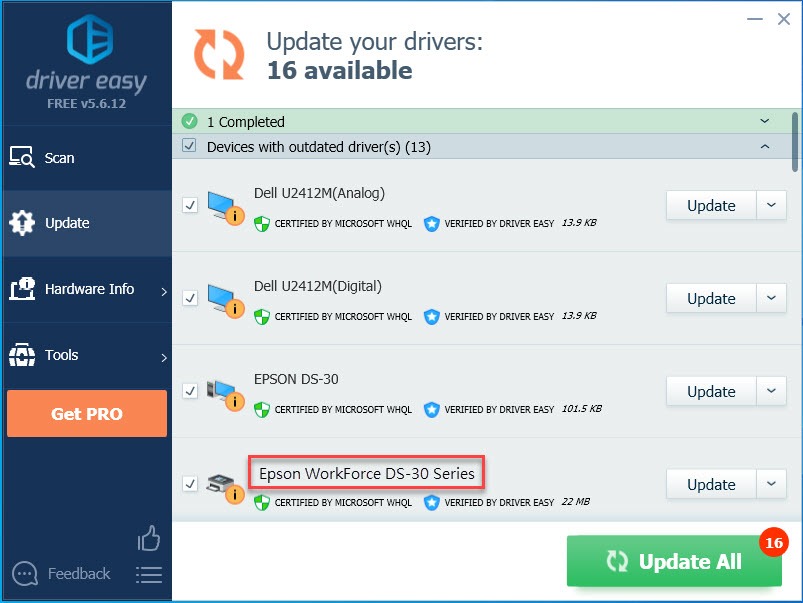
2) Run Driver Easy and click the Scan Now button. Driver Easy will then scan your computer and detect any problem drivers.
3) Click Update next to the driver you need to download it, then you can manually install it.
Or click Update All to automatically download and install the correct version of all the drivers that are missing or out of date on your system (this requires the Pro version – you’ll be prompted to upgrade when you click Update All).
Hopefully, this article helped! Please feel free to leave a comment below if you have any questions or suggestions.