


Running all the applications and programs with Windows can make it quicker to launch when you use them, but this can slow down your computer to a crawl. So you should disable some startup programs in Windows, right?
Don’t worry. This post will show you how to disable startup programs in Windows 10 easily and quickly.
How to manage and disable Windows 10 startup programs
- Manage and disable startup programs
- What programs should be enabled or disabled at startup
- Pro Tip: Update your drivers
1. Manage and disable startup programs
As you know, you can manage and disable startup programs in Task Manager for Windows 10 computers. So you should first open Task Manager in your computer, then manage the startup programs.
Step 1: Open Task Manager in your computer
You should first launch Task Manager in your computer. There’re various ways to open Task Manager:
1) On your keyboard, press Ctrl and Shift and Esc keys at the same time. This is the quick and easy method to bring up Task Manager.
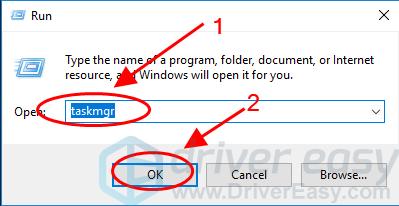
2) Press the Windows logo keyand R at the same time, type taskmgr and click OK to open Task Manager.
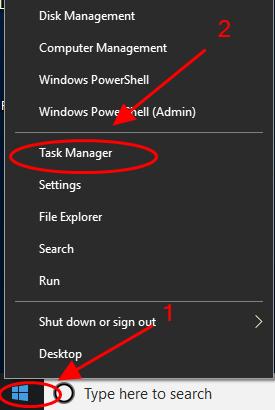
3) Right click the Start button at the bottom left corner, click Task Manager to open it.
Step 2: Disable startup programs in Task Manager
Once open Task Manager, you can start managing or disabling startup programs for Windows 10.
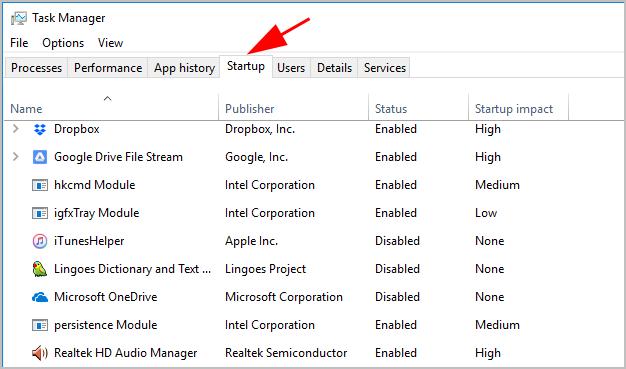
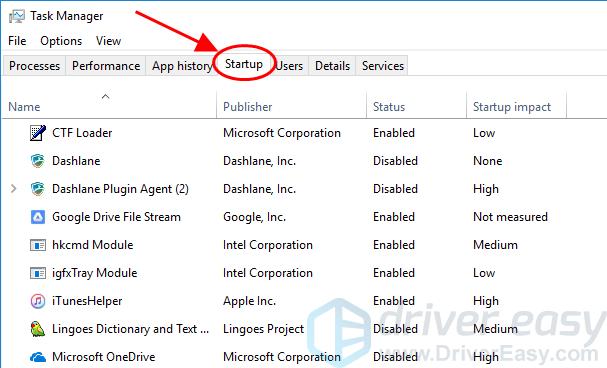
1) In Task Manager, click the Startup tab from the top menu.
2) Select the program that you need to disable, and click the Disable button.
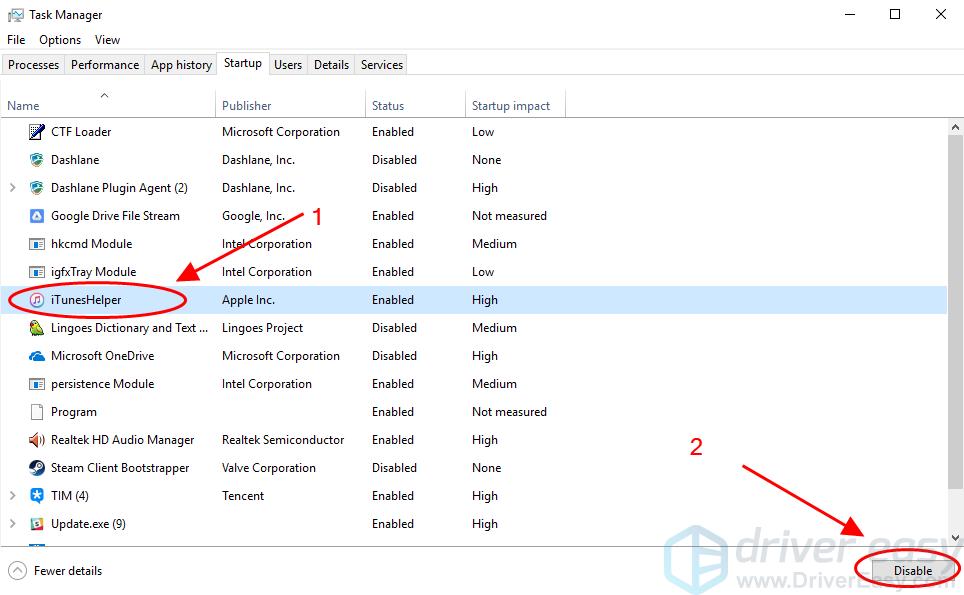
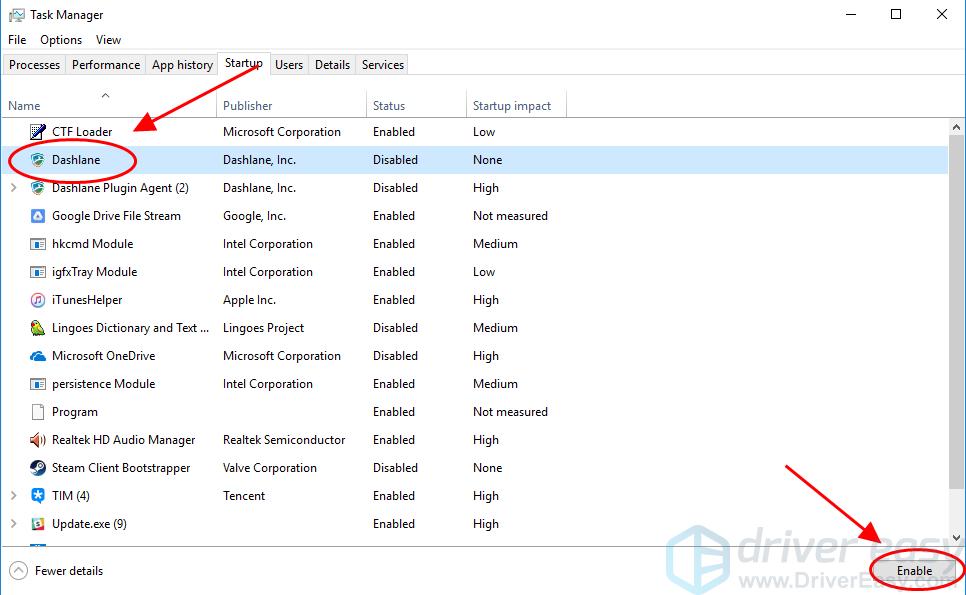
If the program has been disabled, you’ll see Enable at the bottom right corner.
3) You’ll need to repeat the above steps until you’ve disabled the programs you want to.
If you encounter some programs that you’re not familiar with, don’t disable those programs so quickly. And you can do a simple search see if it’s proper to disable.
4) After that, close Task Manager and restart your Windows 10 computer.
After restarting, your computer should take effect and boot faster.
2. What programs should allow or disable at startup
If you’re not sure what programs should be enabled or disabled on startup, you can check these tips.
What programs should be enabled at startup
There are essential programs that should be enabled to make sure your system works properly when booting.
1) Antivirus programs such as Windows Defender and Avira, and the associated services should automatically run on startup Windows 10, to protect your computer from attacks all the time.
2) Microsoft services shouldn’t be disabled obviously.
3) Leave it with services and programs for audio, wireless, touchpad and graphics.
4) Anything you think is required to run automatically at startup.
What programs should be disabled at startup
You should disable services and programs that are not necessary to run and will eat up your system resources. For example:
1) Adobe is a very important service for your Windows 10 computer, and it takes up many system resources to run, so you can disable it at startup programs, and open it whenever necessary.
2) Applications and services about Apple and iOS device, such as iTunes, Apple Push, which you may not need to open every time when booting, then you can disable it.
3) There are more programs that can be disabled at startup Windows 10 and not limit to the ones listed above. As programs and services vary from computers, so we can’t cover it all here. Check it out carefully.
3. Pro Tip: update your drivers
The drivers issues such as missing or outdated drivers in your computer can slow down your Windows system. Therefore, apart from disabling startup programs for Windows 10, you should verify the drivers in your computer have the latest version, and update those that don’t.
You can manually download the latest version of drivers from manufacturers, and install it in your computer. This requires time and computer skills.
If you don’t have time or patience, you can do it automatically with Driver Easy.
Driver Easy will automatically recognize your system and find the correct drivers for it. You don’t need to know exactly what system your computer is running, you don’t need to be troubled by the wrong driver you would be downloading, and you don’t need to worry about making a mistake when installing.
You can update your drivers automatically with either the FREE or Pro version of Driver Easy. It only takes 2 simple clicks with the Pro version (and you will get full support and a 30-day money back guarantee).
1) Download and install Driver Easy.
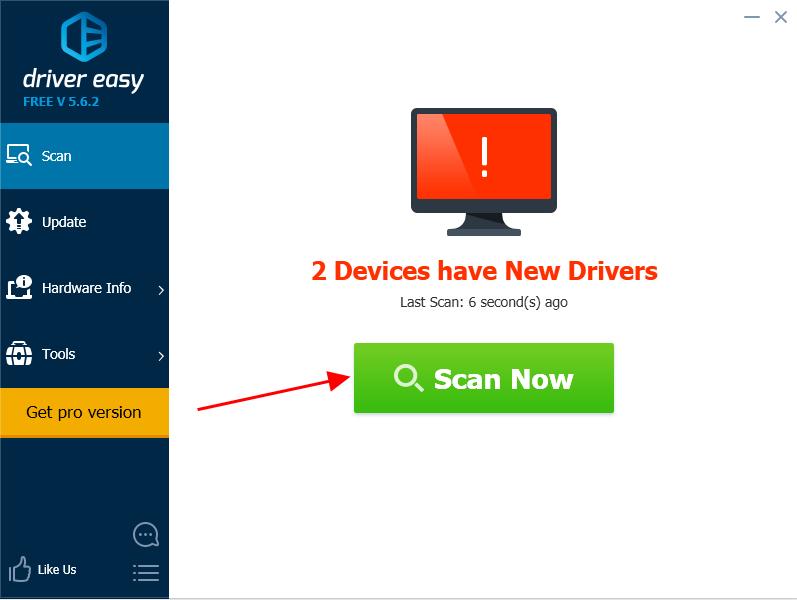
2) Run Driver Easy and click Scan Now. Then Driver Easy will scan your computer and detect any problem drivers.
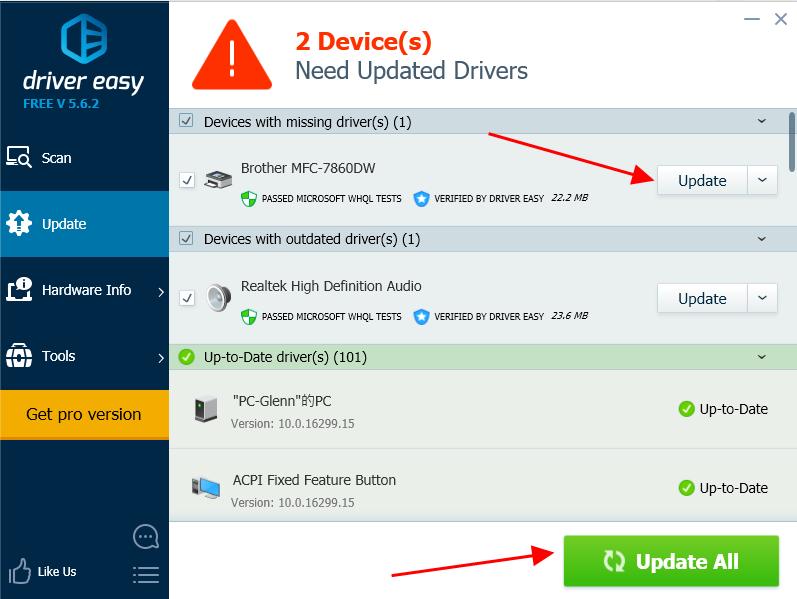
3) Click Update button next to the device name to download the latest driver (you can do that with the FREE version). Then install the driver in your computer.
Or click Update All to automatically download and install the correct version of all the problem drivers (you can do that with Pro version, and you’ll be prompted to upgrade when you click Update All).
4) Restart your computer to take effect.
That’s it. Hope this post helps in disabling startup programs in Windows 10 and booting your system faster.