


If you’re reading this article, you must be struggling the no sound problem in Windows 7. But rest assured, you’re not alone. No sound is one of the very common problems in Windows 7. Many Windows 7 users are having this issue just like you.
But the good news is you CAN easily fix it by yourself. This article is helping you to fix the sound not working problem in Windows 7. Please go through this page and get the sound back on your Windows 7.
Fixes for no sound in Windows 7:
Here’re 4 methods you can try to fix this problem. You may not have to try them all; just work you way down the list until you find the one that works.
- Make sure your audio device is set to default
- Change your audio format
- Reinstall your audio driver
- Automatically update your audio driver
Method 1: Make sure your audio device is set to default
1) Right-click on Speakers/Headphone icon at the bottom right of your task bar. Then click Playback devices.
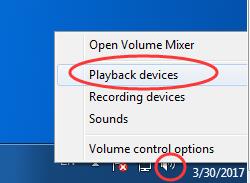
2) Make sure your audio device is set to default.
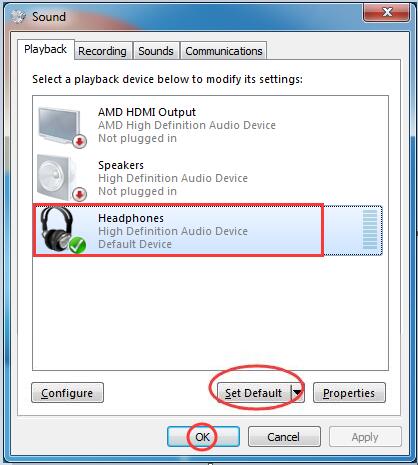
3) Play a music or a video on your Windows 7. Check to see if there is sound.
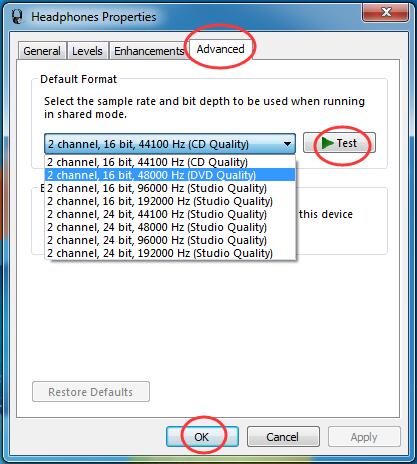
Method 2: Change your audio format
1) Right-click on Speakers/Headphone icon at the bottom right of your task bar. Then click Playback devices.
2) Click your default audio device, and click Properties.
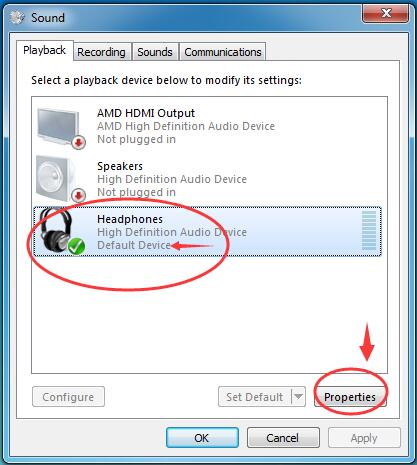
3) In Advanced section, click a different audio rate, then Test.
Play a music or a video to see if there is sound. If you find a format works, set it and click OK.
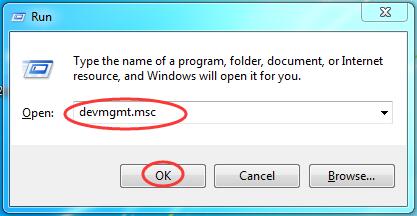
Method 3: Reinstall your audio driver
1) On your keyboard, press the Windows logo key and R at the same time to invoke the Run box.
2) Type devmgmt.msc and press Enter to open Device Manager.
3) In the Sound, video and game controllers section, right-click on your audio device, then click Uninstall.
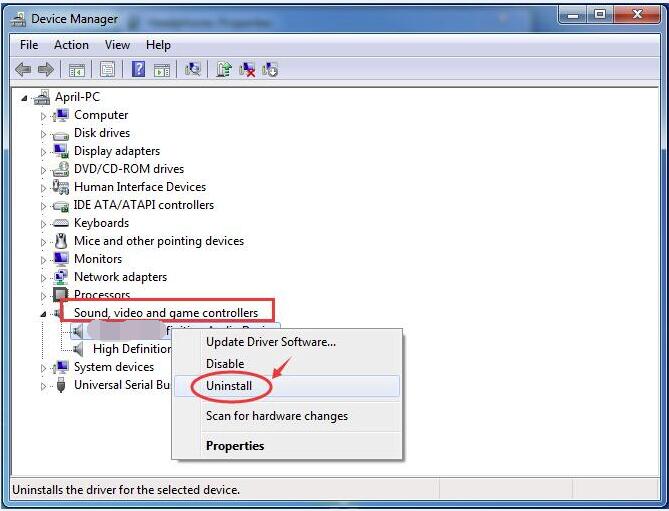
4) Reboot your Windows 7. Windows should reinstall the audio driver automatically.
5) Play a music or a video on your Windows 7. Check to see if there is sound.
If your Windows 7 still keeps no sound, not to be frustrated, move on to the Method 4 to update your audio driver.
Method 4: Automatically update your audio driver
The methods above may resolve the problem, but if they don’t, please update your audio driver. If you’re not confident playing around with drivers manually, you can do it automatically with Driver Easy.
Driver Easy will automatically recognize your system and find the correct drivers for it. You don’t need to know exactly what system your computer is running, you don’t need to risk downloading and installing the wrong driver, and you don’t need to worry about making a mistake when installing.
You can update your drivers automatically with either the 7-day free trial or the Pro version of Driver Easy. It takes just 2 clicks, and you get full support and a 30-day money-back guarantee with the Pro version:
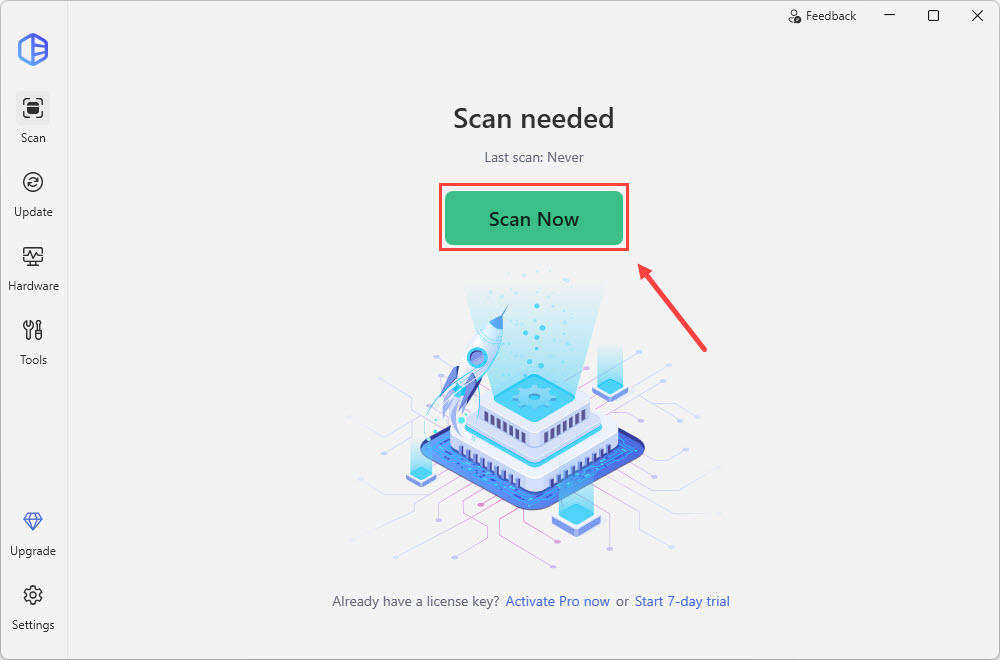
1) Download and install Driver Easy.
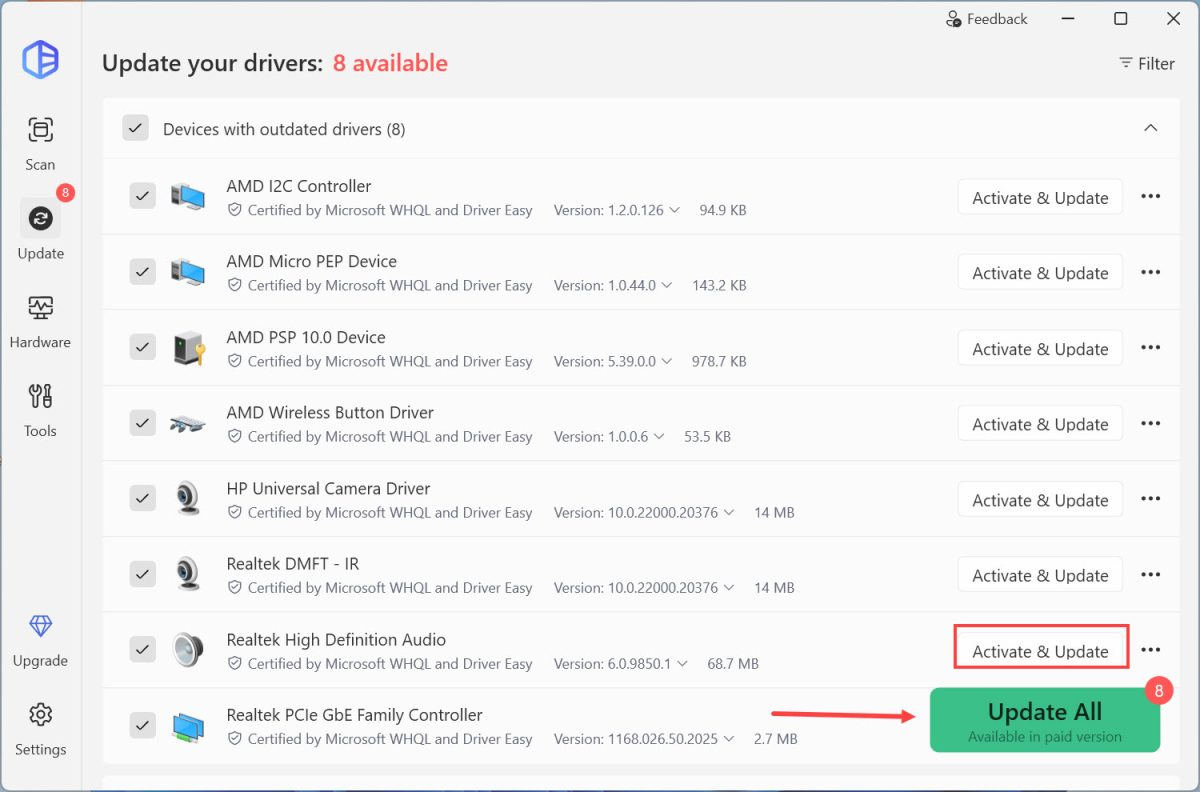
2) Run Driver Easy and click Scan Now. Driver Easy will then scan your computer and detect any problem drivers.
3) Click the Activate &Update button next to a flagged audio driver to automatically download and install the correct version of this driver.
Or click Update All to automatically download and install the correct version of all the drivers that are missing or out of date on your system (this requires the Pro version – you’ll be prompted to upgrade when you click Update All).
4) Reboot your Windows 7.
5) Play a music or a video on your Windows 7. Check to see if there is sound.