


Got a Canon printer but it’s not working as expected? You’re not alone. It’s an issue that may be caused by your outdated printer driver and faulty configurations. In this article, we’ll walk you through the steps to fix your Canon printer not printing issue.
- Check the connection status
- Temporarily disable the firewall
- Update your printer driver
- Set Canon as the default printer
- Delete print jobs from the print queue
Fix 1: Check the connection status
Difficulty printing from your PC can occur for various reasons. The most common reason is because the connection between the computer and the machine is lost. So before heading into the more complicated fixes, you need to take some basic troubleshooting steps to resolve the issue.
First off, you need to verify the machine is powered on and there are no errors. If the Status LED is not lit, then your machine is not powered on. Verify that it’s plugged into a working outlet and that any power switches are turned to the ON position. After you’ve confirmed that the machine is perfectly powered on but the printer still won’t printer, take more steps to check the connection status as follows:
When you use a wired printer
- If you connect the printer to your computer via a USB cable, check whether the cable is properly connected. If it isn’t, re-plug it and make sure they are properly seated into the ports on both your printer and your computer.
- Try another USB port on your computer in case the one you previously used is broken.
When you use a wireless printer:
For users with a wireless Canon printer, it’s essential to confirm the printer has a secure connection between your machine and the router.
If your printer is still not working properly, proceed to the next fix.
Fix 2: Temporarily disable the firewall
Firewall software helps block threats from outside your network, but some settings or configurations can block communication with your printer and may reject the connection needed for your machine to work properly. To resolve this, disable the firewall from your computer and try to print again.
To turn off Windows Firewall:
1) In the Search bar, type windows defender firewall. Then click Windows Defender Firewall from the results.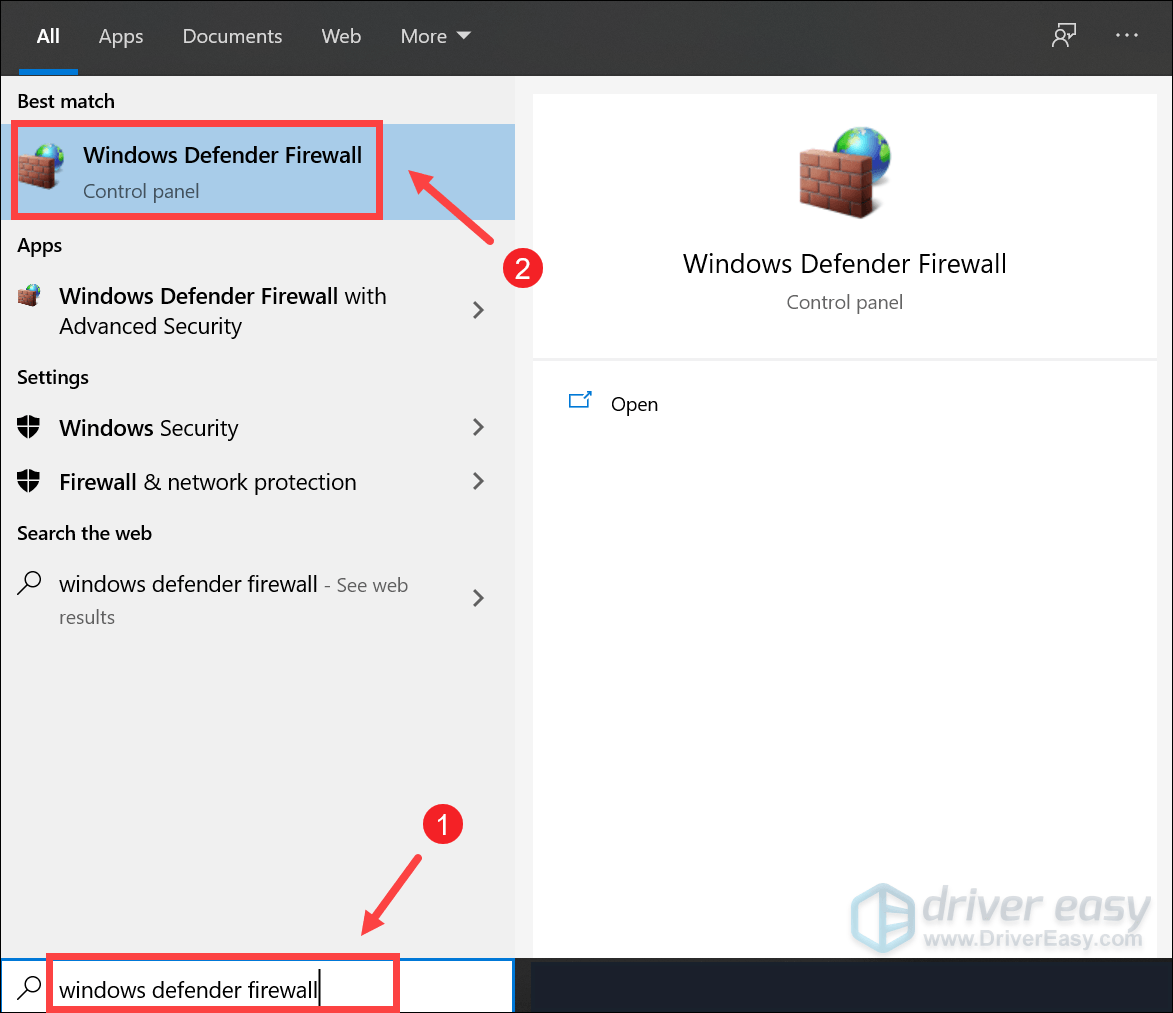
2) On the left side of the window, click Turn Windows Defender Firewall on or off.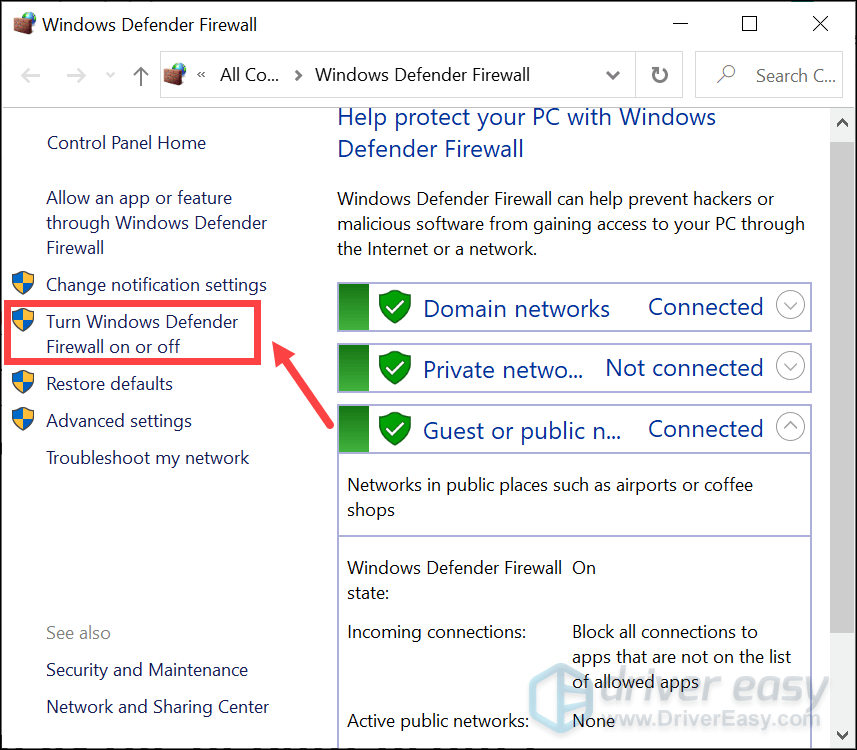
3) Tick Turn off Windows Defender Firewall for both public and private networks. Then click OK to confirm the changes. 
To configure firewall settings in other security software:
You can disable the firewall in software by clicking the link below.
Fix 3: Update your printer driver
After connecting your Canon printer to Windows, to ensure it works properly, you need to install a proper driver. But if your printer driver is faulted or outdated, issues like printer not printing will arise. So if you can’t remember when was the last time you updated your printer driver, do it now as it may fix your issue right away.
There are mainly two ways you can update your printer driver: manually and automatically.
Option 1: Manually update your printer driver
Canon’s website is available to download Canon product drivers. You can go to their website to find and download the driver you need. Below, you’ll find out how to download and install the driver from the official website.
Since Canon has several official websites like Canon UK, Canon USA, Canon Europe, etc., they may not share the same model. So you can use the browser to search for the specific driver directly. Or you can go to the Support Center, enter the model of your device in the search field, and follow the instructions to download and install the driver.
Option 2: Automatically update your printer driver (recommended)
If you don’t have the time, patience or computer skills to update drivers manually, you can do it automatically with Driver Easy.
Driver Easy will automatically recognize your system and find the correct drivers for it. You don’t need to know exactly what system your computer is running, you don’t need to risk downloading and installing the wrong driver, and you don’t need to worry about making a mistake when installing.
Here’s how you can update your drivers with Driver Easy:
1) Download and install Driver Easy.
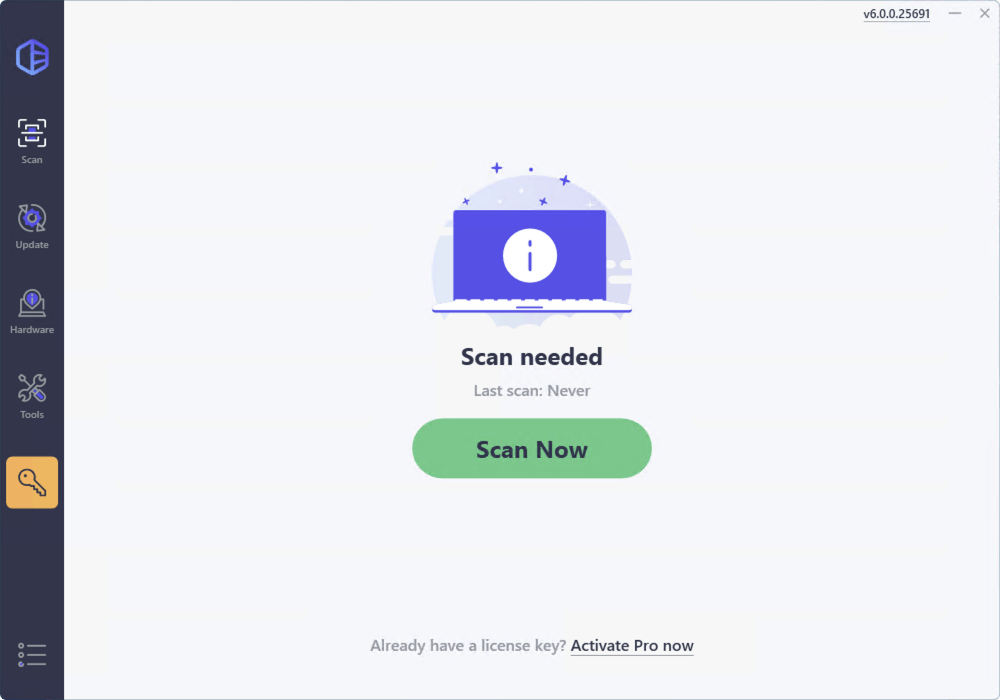
2) Run Driver Easy and click the Scan Now button. Driver Easy will then scan your computer and detect any problem drivers.
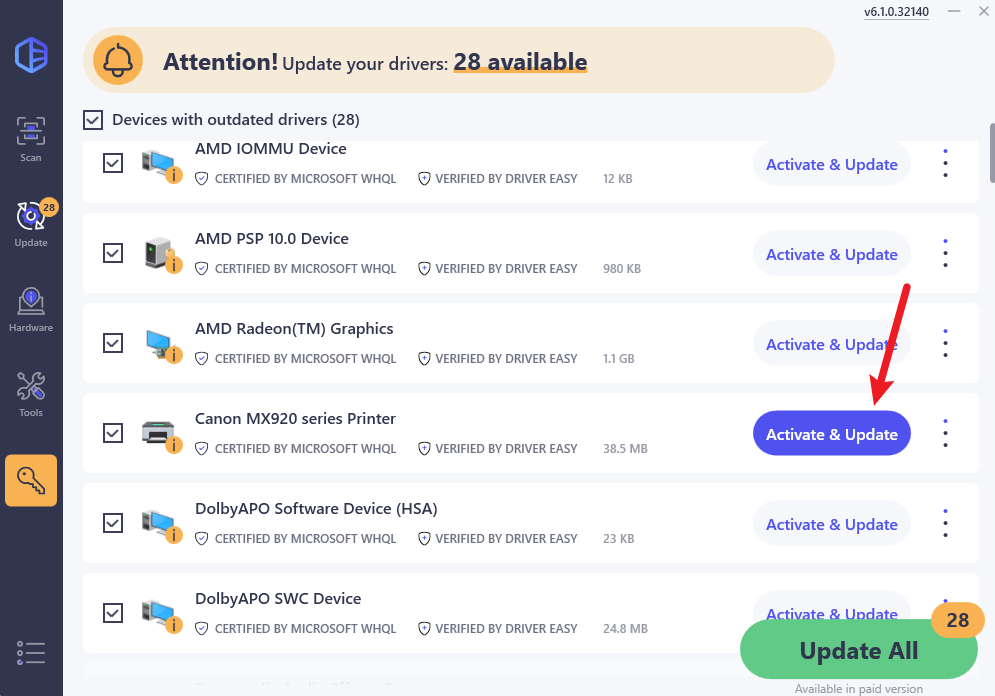
3) Click the Activate & Update button next to any flagged device or click Update All to update all the outdated drivers. You can sign up for the free trial to update drivers with no upfront cost.
If you need assistance, please contact Driver Easy’s support team at support@drivereasy.com.
After updating your drivers, attempt a test print to check if this action helps you.
Fix 4: Set Canon as the default printer
When you’re trying to print something, your computer will automatically assign these printing tasks to the default printer unless you choose another one on purpose. So your printer will not be working if you neither set it as a default option to print nor select it as the dedicated printer.
To set up your Canon printer as the default printer, you can take these steps:
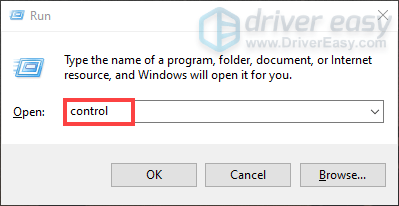
1) On your keyboard, press the Windows logo key and R at the same time to invoke the Run box.
2) Type control in the field and press Enter to open the Control Panel.
3) Select Small icons from the drop-down menu next to View by. Then, click Devices and Printers.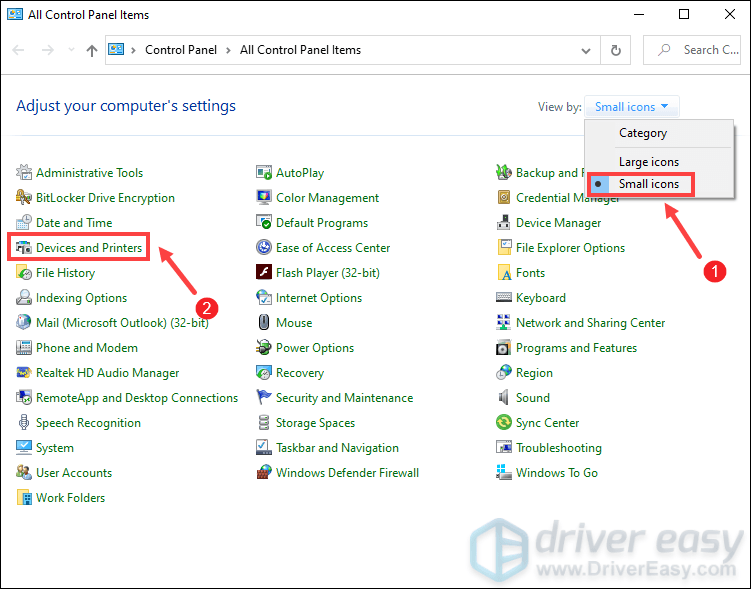
4) Right-click your Canon printer and select Set as default printer from the list. 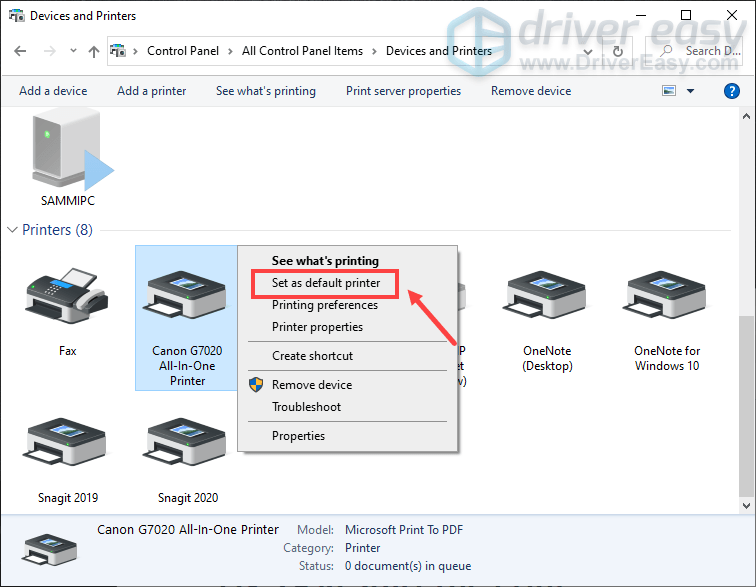
Now perform printing tasks to check if it works.
Fix 5: Delete print jobs from the print queue
If the printer does not start printing, it could be that a canceled or failed print job may exist in the print queue. In this case, you need to delete print jobs from the print queue. Here’s how:
Delete print jobs from the print queue:
1) To display the print job, click Display Print Queue.
2) To delete the print jobs, from the Printer menu, select Cancel All Documents.
3) When the confirmation message appears, click Yes.
If the print items do not clear, you can try the manual process. After the print jobs are deleted manually, the printer spooler will need to be restarted. Please see below to manually delete print jobs and restart the spooler.
Manual process:
1) Press the Windows logo key and R at the same time to open the Run box.
2) Type services.msc in the field and press Enter.

3) In the Services window, scroll down to the Print Spooler. Right-click it and select Stop.
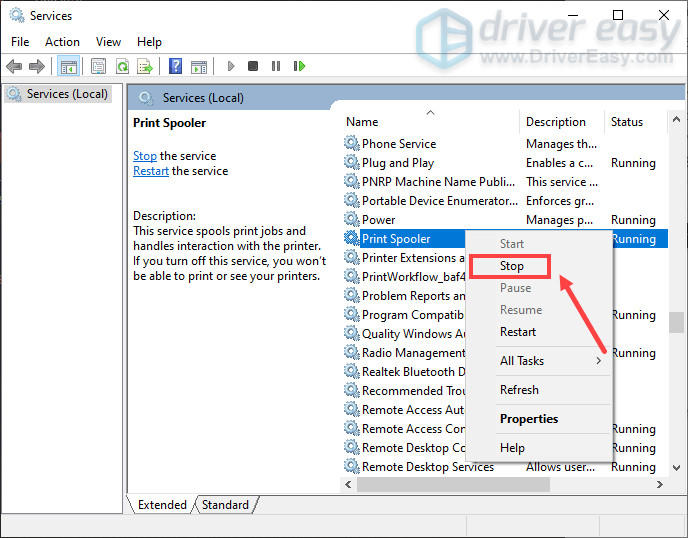
Note: Do not close the Services window, simply minimize it as you’ll go back to it later.
4) After the print spooler service has stopped, press the Windows logo key and R at the same time to open the Run box. Then type spool in the field and press Enter.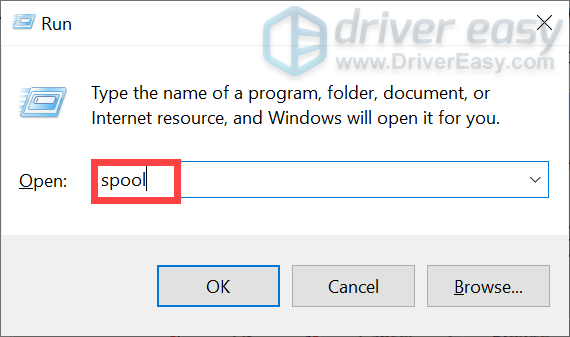
5) Open the PRINTERS folder.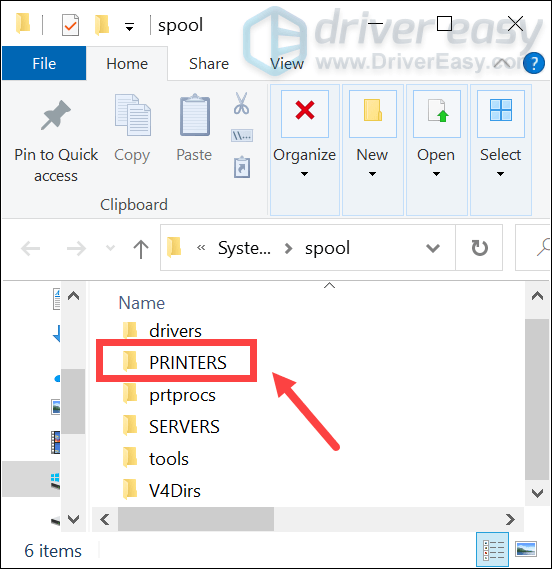
6) Delete any files in this folder.
7) After deleting these files, close the spool folder.
8) Go back to the Services window. Right click on the Print Spooler service and select Start.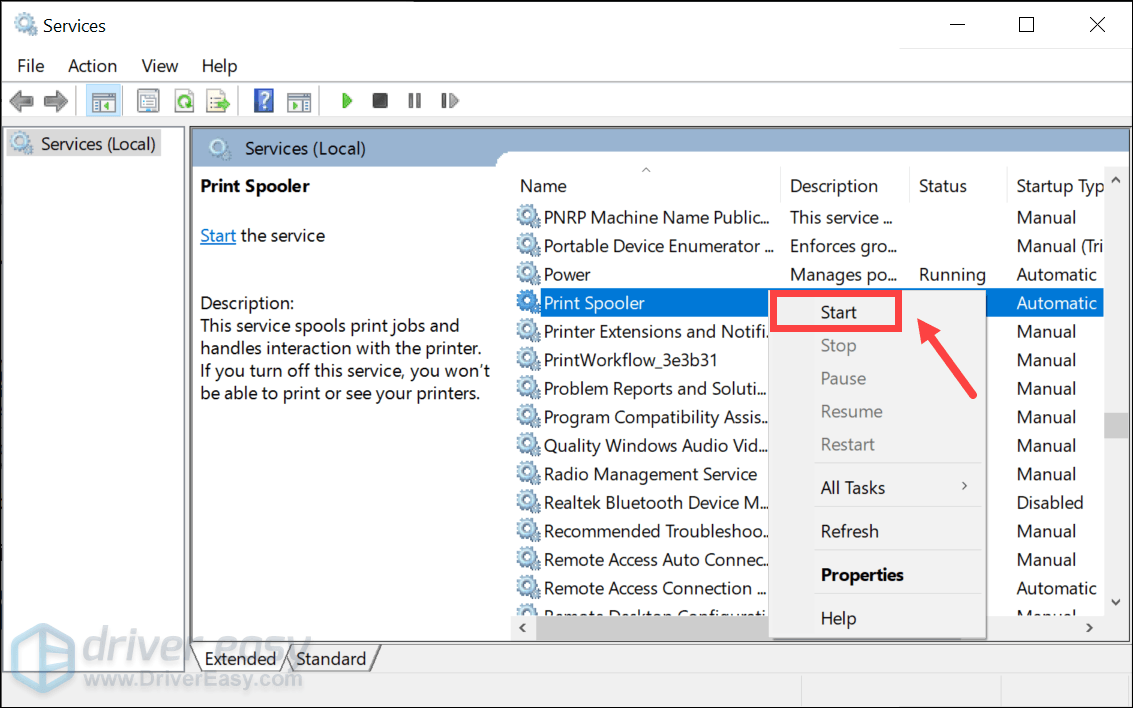
Now attempt a test print to check if it brings your printer back to normal state.
That’s it – the full list of fixes for Canon printer not printing issue. Hopefully, they work for you and your printer is functioning properly now. If you have further suggestions or questions, please drop us a line in the comment section below. We’ll get back to you ASAP.