


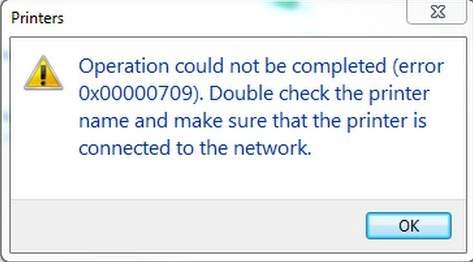
If you get this message Operation could not be completed(error 0x00000709). Double-click the printer name and make sure that the printer is connected to the network when you fail to set your printer as the default one, you’re not alone.
Many Windows users are reporting this problem as well. But no worries, it’s possible to fix by modifying the registry key.
IMPORTANT: Modifying the registry in your computer could cause irrecoverable errors if the modification is done incorrectly, therefore, you need to back up your registry first.
- Click the Windows search bar, then type regedit and press Enter.
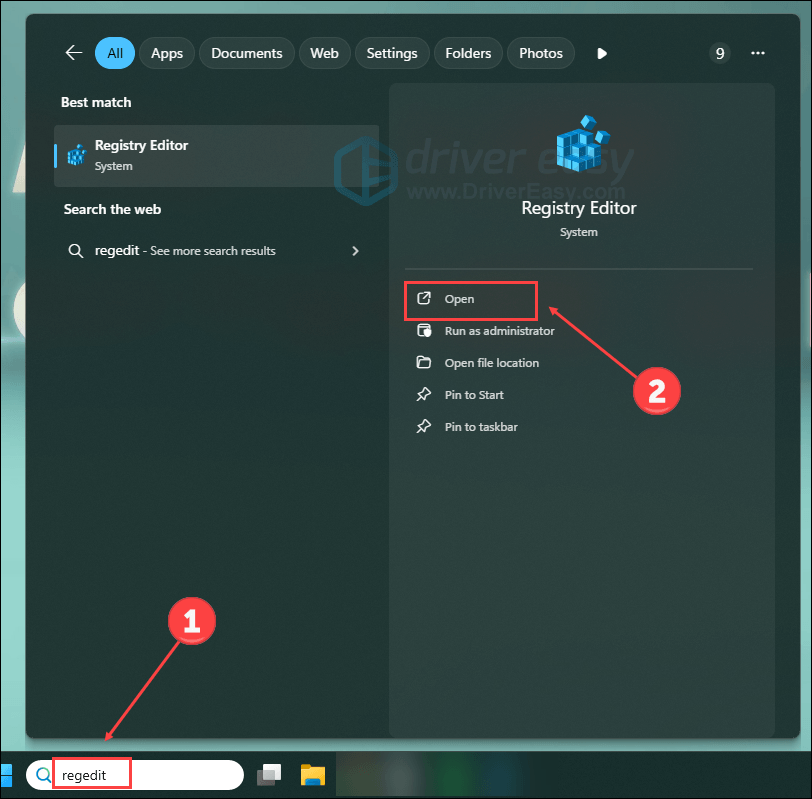
- If User Account Control comes up, please choose Yes at the prompt.
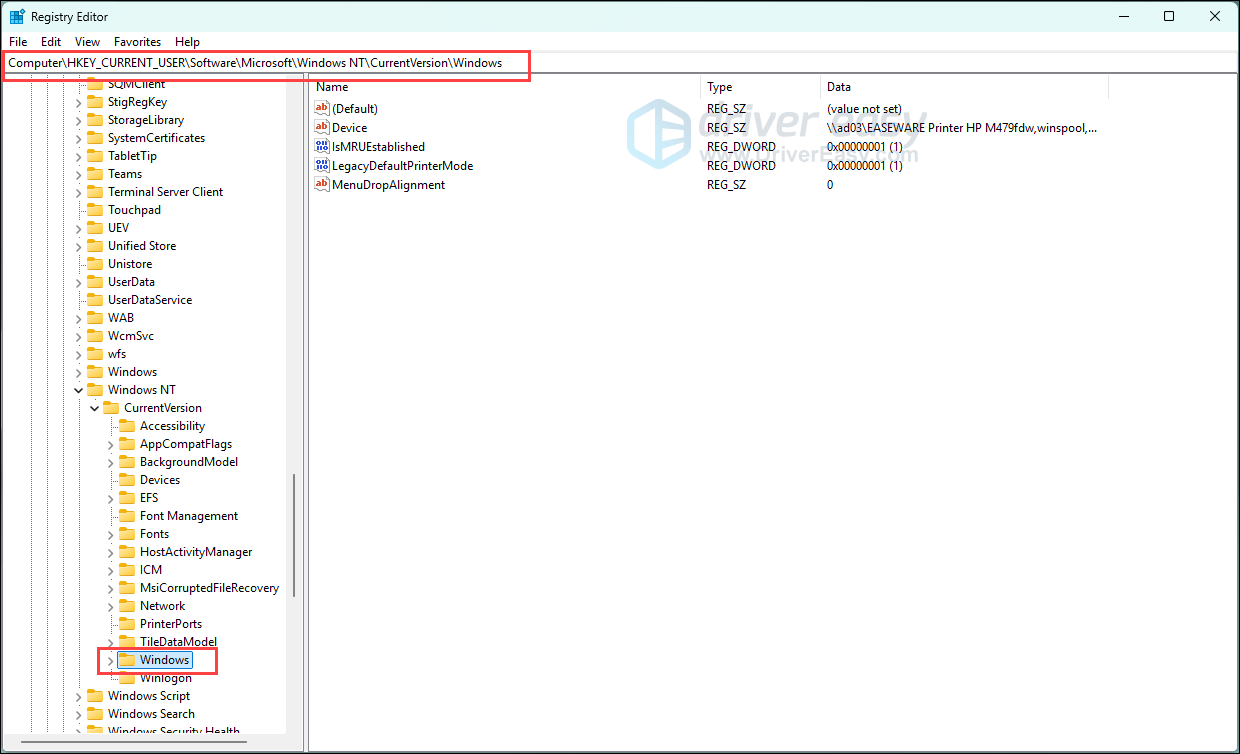
- Follow the path: HKEY_CURRENT_USER\Software\Microsoft\WindowsNT\CurrentVersion\Windows.
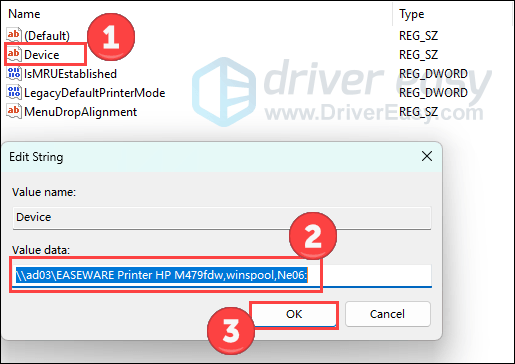
- Double-click Device. Type in your printer name. (The screenshot here is an example only.) Click OK to save the change.
- Right-click UserSelectDefault and click Rename to rename it as your printer name.

Note: If you encounter this sort of error “Cannot edit Device: Error writing the value’s new contents“, please follow the steps below to set the permission of the key.

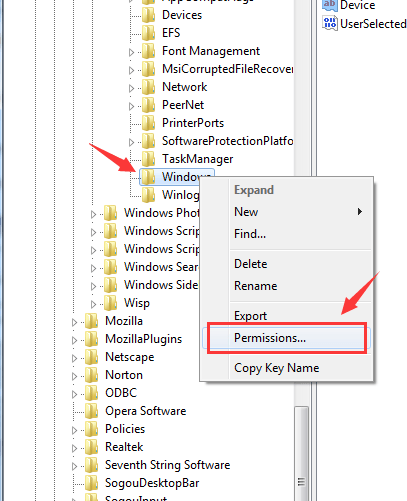
a) Right-click the Windows key on the left side of the panel and then click Permissions….
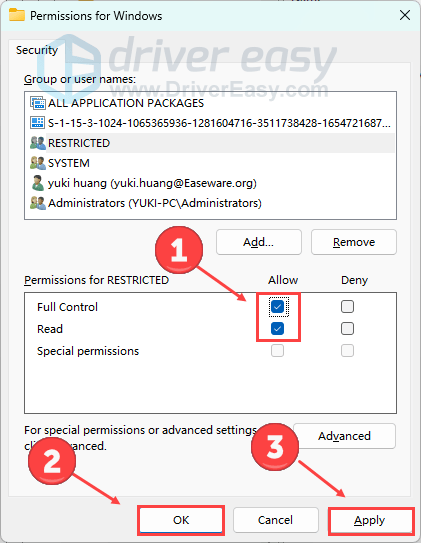
b) Tick the box Allow for Full Control and Read, then click Apply and click OK to save the change.
There you go! You should be able to set up your default printer now!
After setting up your printer, you will need to update your printer driver for it to work more smoothly. If you don’t have the time, patience, or computer skills to update the printer driver manually, you can do it automatically with Driver Easy.
Driver Easy will automatically recognize your system and find the correct drivers for it. You don’t need to know exactly what system your computer is running, you don’t need to be troubled by the wrong driver you would be downloading, and you don’t need to worry about making a mistake when installing. Driver Easy handles it all.
You can update your drivers automatically with either the 7 days free trial or the Pro version of Driver Easy. It takes just 2 clicks, and you get full support and a 30-day money-back guarantee with the Pro version:
- Download and install Driver Easy.
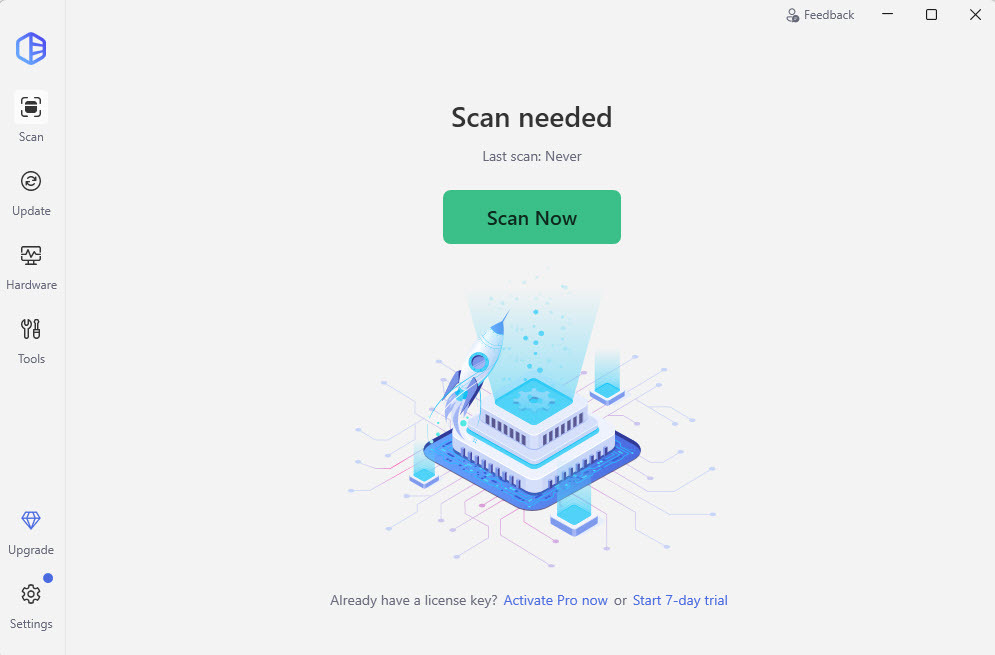
- Run Driver Easy and click the Scan Now button. Driver Easy will then scan your computer and detect any problem drivers.
- Click the Activate & Update button next to the flagged device to automatically download and install the correct version of this driver.
Or click Update All to automatically download and install the correct version of all the drivers that are missing or out of date on your system (You’ll need the Pro version for this – when you select Update All, you’ll get a prompt to upgrade. If you’re not prepared to purchase the Pro version yet, Driver Easy provides a 7-day trial at no cost, granting access to all Pro features like fast downloads and easy installation. No charges will occur until after your 7-day trial period ends.)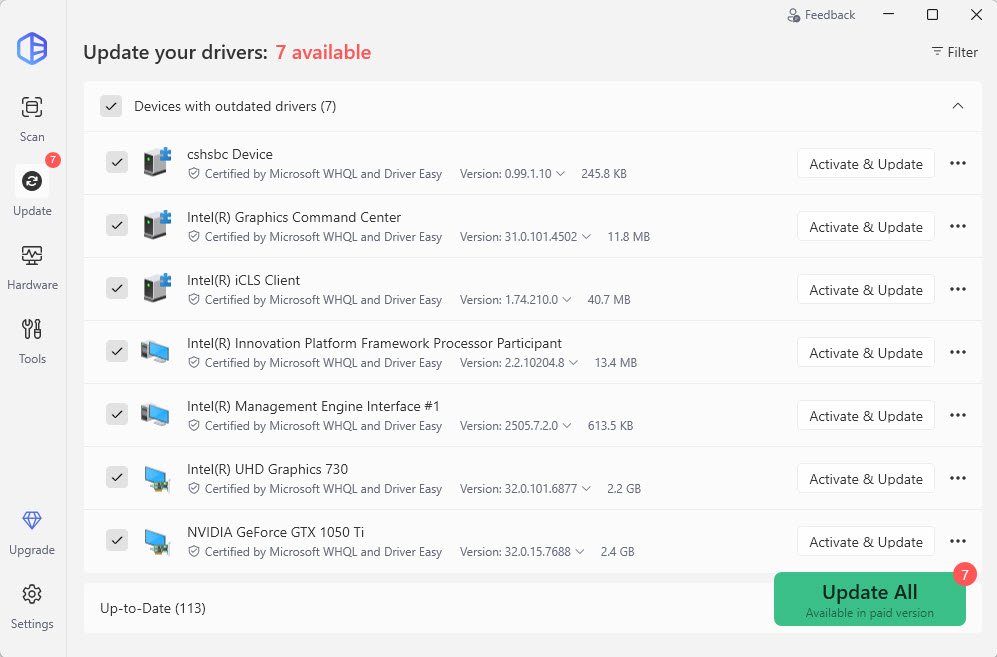
- Restart your computer for the change to take effect.