


If you have an Oculus Quest 2 and want to link it to a PC to play, you’ll need a detailed guide to help you. The process of setting it up is very easy. You don’t need any advanced computer skills to accomplish this. Just follow the steps below, and you’ll be able to use your Oculus Quest 2 to play your Windows games.
Table of contents
Step 1: Check your PC specs
You need to check your PC specifications beforehand. Make sure that your PC can handle the Oculus PC app.
Minimum requirements of Oculus PC app:
| OS | Windows 10 |
| Port | USB 3.0 |
| CPU | Intel Core i5-4590 or an AMD Ryzen 5 1500X |
| Graphics | NVIDIA Titan X, NVIDIA GeForce GTX 970, NVIDIA GeForce GTX 1060 Desktop, 6GB, NVIDIA GeForce GTX 1070(all), NVIDIA GeForce GTX 1080(all), NVIDIA GeForce GTX 1650 Super, NVIDIA GeForce GTX 1660, NVIDIA GeForce GTX 1660 TI. NVIDIA GeForce RTX 20-series (all), NVIDIA GeForce RTX 30-series (all). AMD 400 Series, AMD 500 Series, AMD 5000 Series, AMD 6000 Series, AMD Vega Series |
| Memory | 8GB |
Here’s how to check your PC specs:
1) On your keyboard, press the Windows logo key and R at the same time to invoke the Run dialog.
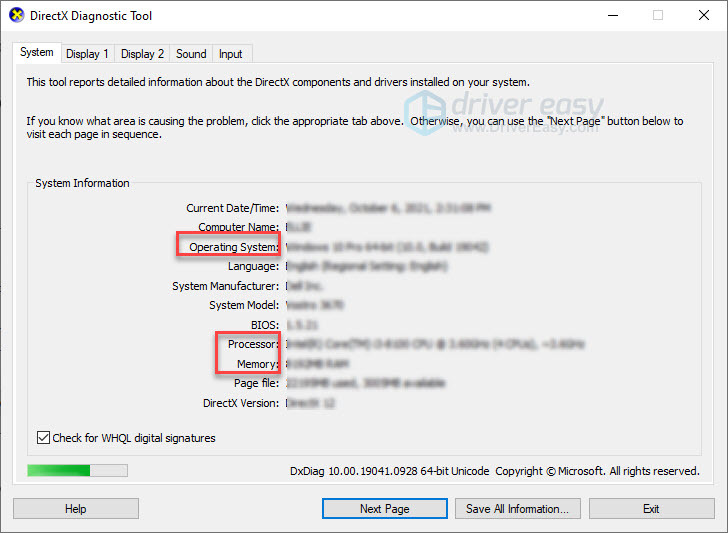
2) Type dxdiag and click OK.

3) Check your Operating System, Processor, and Memory.
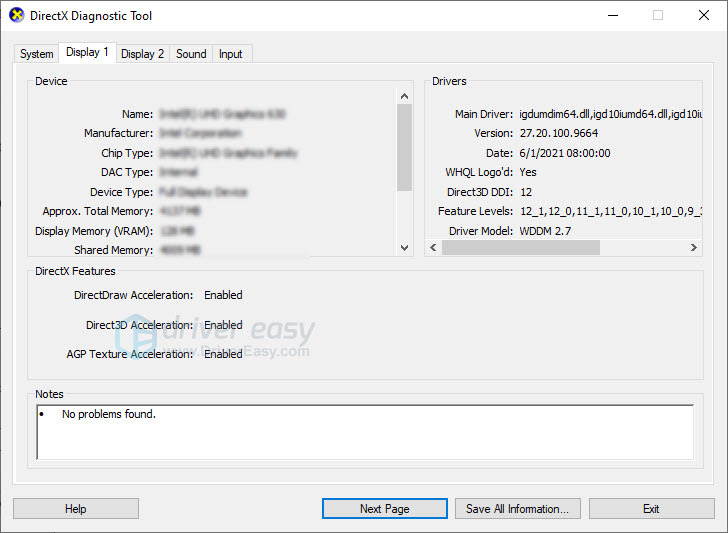
4) Click the Display tab, and then check your graphics card’s information.
Note: If your graphics card isn’t listed in the specification table, it’s possible to have incompatible issues.
If your PC meets the requirements, then move on to the next step.
Step 2: Download the app
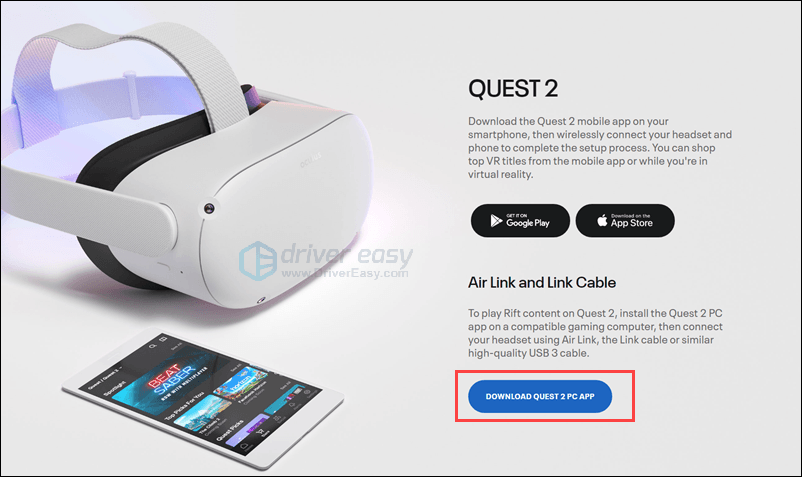
Go to the Oculus official website and click DOWNLOAD QUEST 2 PC APP.
Follow the on-screen instructions to install the Quest software. If you can’t install the software, make sure your PC meets the minimum specifications, then contact the Quest support team.
Step 3: Connect Oculus to PC via link or wireless
There’re two ways to connect Oculus to your PC: with a link or connecting wirelessly. Both ways require your headset to be up to date.
Method 1: Connect Oculus with link
Now, you can connect your Quest 2 or Quest with a link to PC. The Quest 2 includes a charging cable which is a type-c cable on both ends.
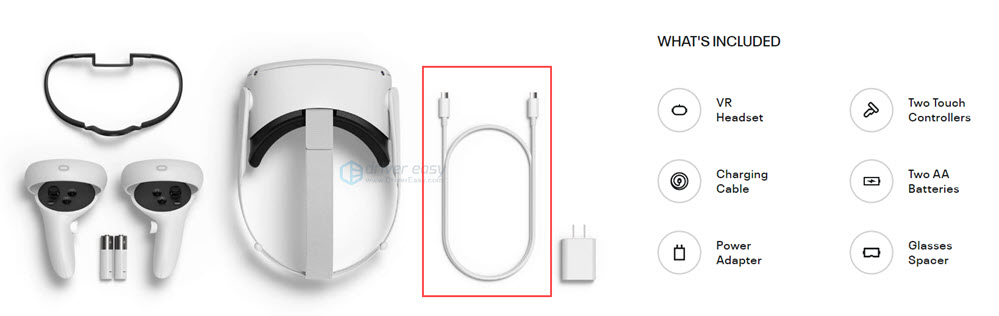
So, you’ll need a high-quality USB port 3 cable if your PC doesn’t have a type-c port. Note, the cable should be long enough to allow you move around while playing.
- Open the Oculus app on your PC and follow the instructions to create your profile.
- Turn on your Quest 2.
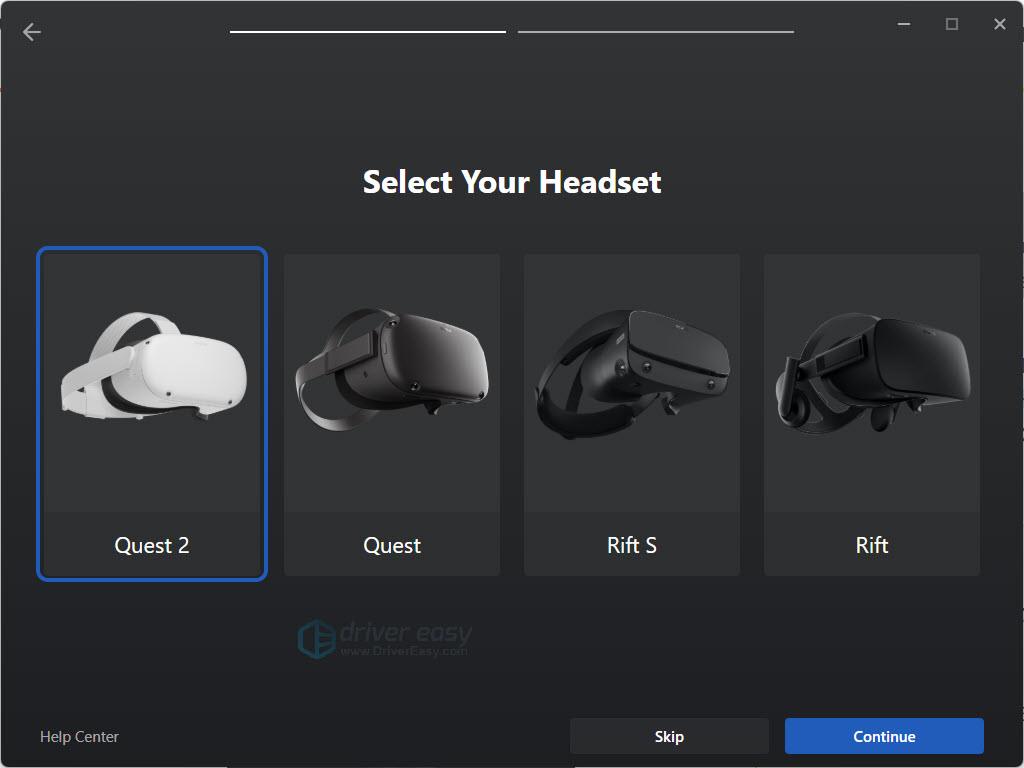
- On the PC, select your headset.
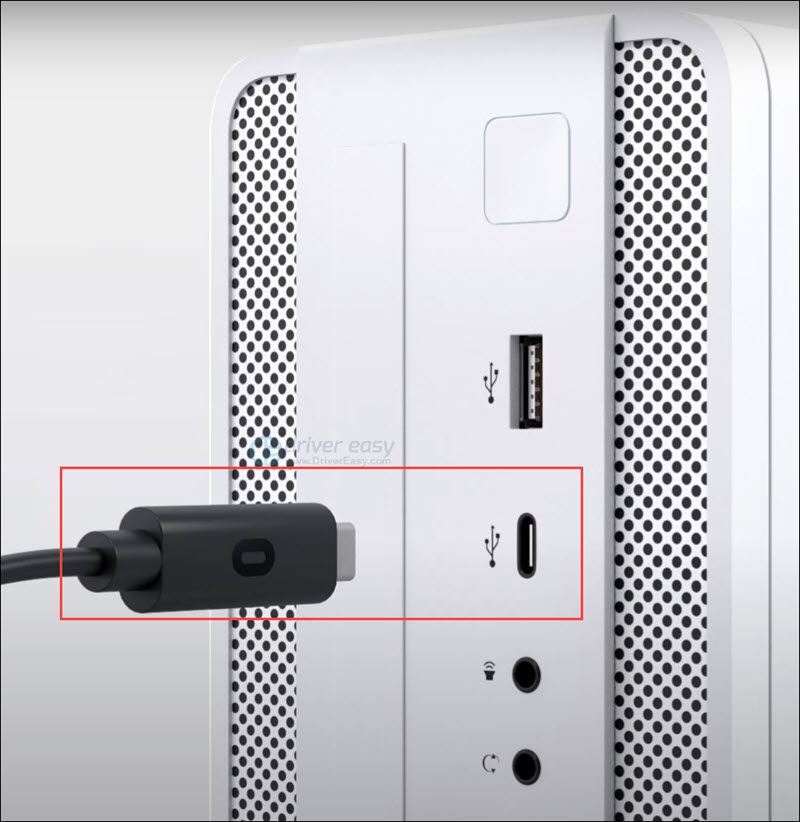
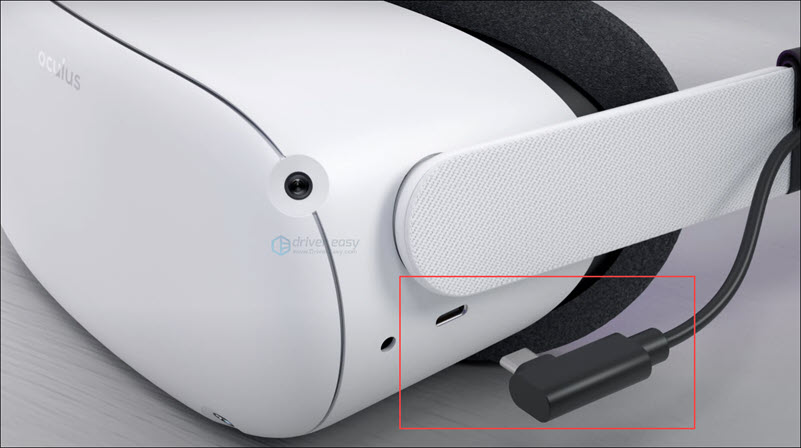
- Plug your cable into your PC, then plug the other end into your headset.
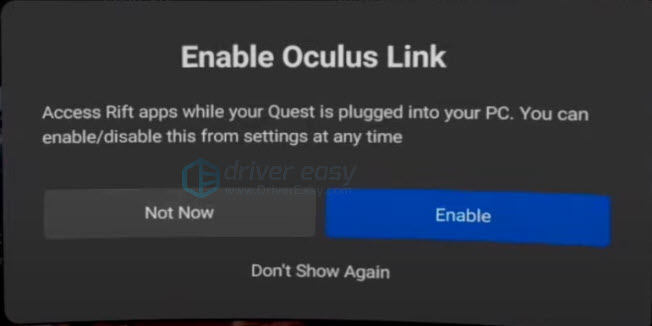
- Put on your headset. Select Enable when you see Enable Oculus Link window.
Method 2: Connect Oculus wirelessly
You may not like cables. Cables knot easily. They tend to create confusion. And you may wonder if you can connect it without a cable.
Yes, Oculus provides a feature called Air Link to let you connect your headset to your PC wirelessly.
Here’s how:
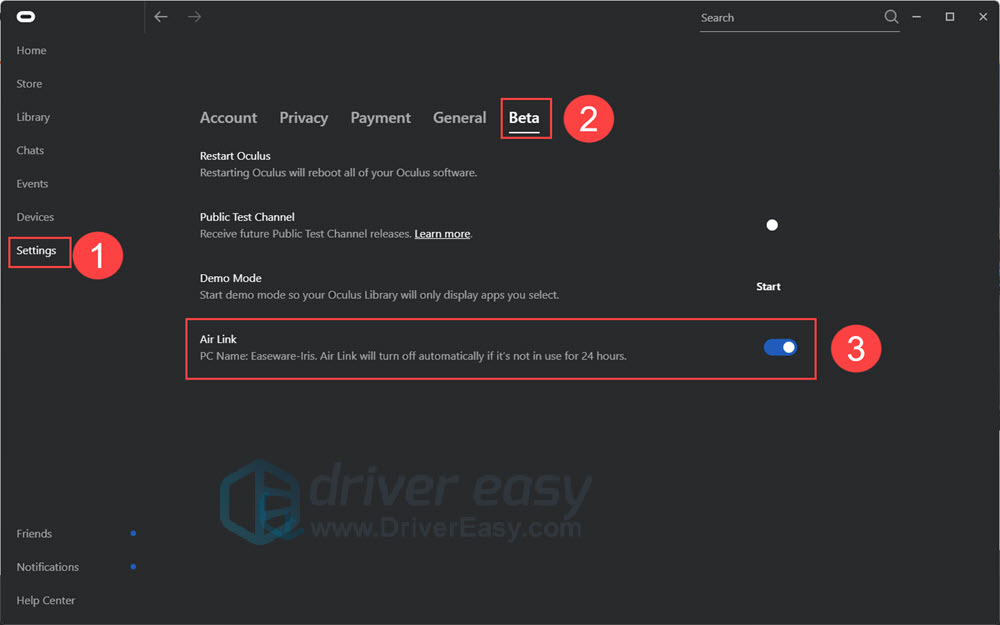
- On your PC, open the Oculus app.
- Click Settings > Beta, then enable the Air Link button.
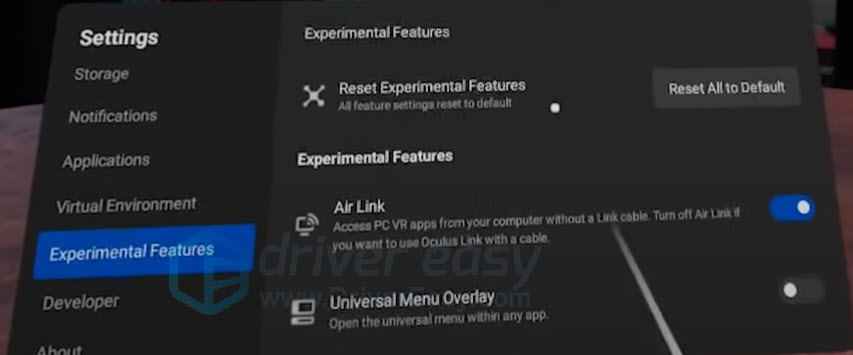
- Put on your headset and press the Oculus button to open the menu.
- Choose the Settings gear icon and select Experimental Features. Enable the Air Link toggle.
- Hit Settings and you’ll be back to the home screen. Open Oculus Air Link and you should be paired with your PC.
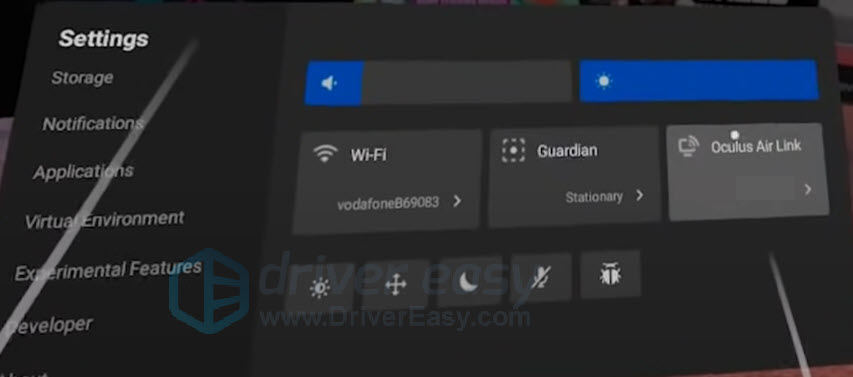
- You’ll see the device name, choose your PC, and hit Launch.

After the first pairing, future connections should only require switching Air Link on via the Quick Actions menu in Settings.
How to fix Oculus Quest 2 can’t connect to the PC
If you can’t connect your Oculus Quest 2 to your PC, there’re 3 methods you can try.
- Log out of the PC software and log back in.
- Completely power off your headset and restart.
- Update your device driver.
This issue might occur when you’re using outdated or faulty drivers, especially your USB driver and Graphics driver.
You can update your device drivers manually by going to the manufacturer’s website of each device, and searching for the driver for your exact module. Or you can update drivers automatically with just a couple of clicks with Driver Easy.
Driver Easy will automatically recognize your system and find the correct drivers for it. You don’t need to know exactly what system your computer is running, you don’t need to risk downloading and installing the wrong driver, and you don’t need to worry about making a mistake when installing.
You can update your drivers automatically with either the FREE or the Pro version of Driver Easy. But with the Pro version, it takes just 2 clicks (and you get full support and a 30-day money-back guarantee):
1) Download and install Driver Easy.
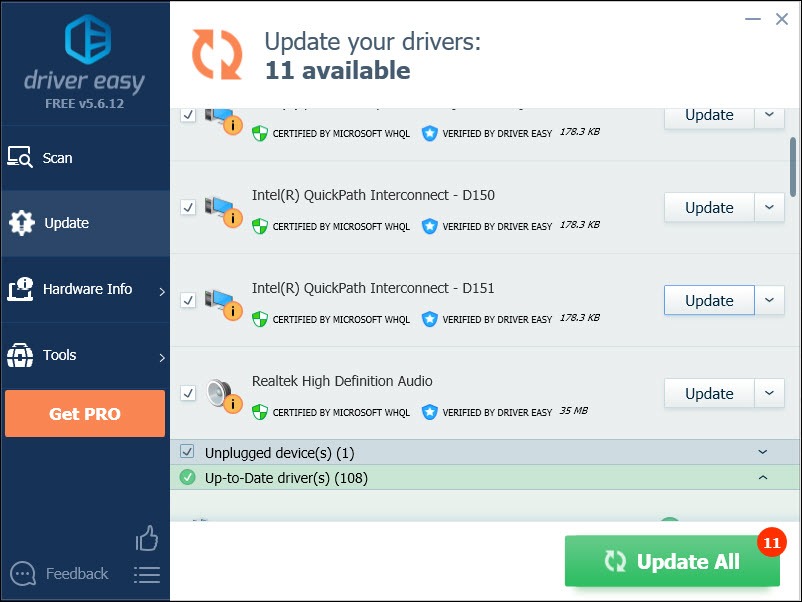
2) Run Driver Easy and click the Scan Now button. Driver Easy will then scan your computer and detect any problem drivers.

3) Click the Update button next to the driver you need to automatically download the correct version of that driver, then you can manually install it (you can do this with the FREE version).
Or click Update All to automatically download and install the correct version of all the drivers that are missing or out of date on your system (this requires the Pro version – you’ll be prompted to upgrade when you click Update All).
If you need assistance, please contact Driver Easy’s support team at support@drivereasy.com.
Step 4: Connect Oculus Quest 2 to Steam
It’s very easy to connect Oculus Quest 2 to Steam, just follow the steps:
- Install Steam on your computer.
- Log into your Steam account and install SteamVR.
- Make sure your Oculus has been connected to your PC.
- Have the Oculus PC app and SteamVR software running at the same time on your PC.
- You can run SteamVR from the computer or run SteamVR from the app library in the headset.
Now you can use your Oculus Quest 2 on your PC computer to play Steam games. Enjoy!