


You wanted to use your printer to print a document. You turned your printer on, opened the file on your computer, and then click the Print button. And … nothing happened! Your printer didn’t print out anything! What’s wrong?
In fact, many printer users have seen the same issue as you have got. Usually, this can result from many reasons, from incorrect settings to poor printer status. But no matter what causes this, it can be an extremely annoying issue. You might want to print something urgently needed but your printer stopped working right at that time. And perhaps you are trying desperately to find out a solution to fix your printer.
Don’t worry! Your printer CAN be fixed! The following are the methods that has helped many users fix their printers. And they are also able to help you! Just give them a try. (You may not have to try them all. Just work your way down the list until you find the one that works.)
Method 1: Check your printer connection
Method 2: Set your printer as default printer
Method 3: Update your printer driver
Method 4: Check the Print Spooler service
Method 5: Clear all print jobs
Method 6: Use another program to print your document
Method 7: Check the status of your printer
Method 1: Check your printer connection
When you find your printer stops working, the first thing you should check is the connection of your printer.
If you are using a USB cable to connect your printer, check if the cable is properly connected. If it isn’t, reconnect the cable and make sure they are properly seated into the ports on both your printer and your computer. Besides, connect your printer directly to your computer without using a hub. In addition, try connecting the cable to another USB port on your computer and see if the printer works. You may also need to experiment with another cable and see if there is any problem with the cable you use.
If you are using a network printer, check the network connection as well as the network devices like your router and modem. View the network connection status of your printer and see if your printer is properly connected to the network. Reconnect or replace the network cable when necessary if your printer is using wired connection. For wireless printer, try reconnecting the printer to the network. Basically, you may need to consult your printer manual for instructions when reconnecting the network printer.
If you connect your printer via Bluetooth, make sure you place your printer close enough to your computer. You can also try re-pairing the printer with your computer and see if this fixes your problem. Check your printer manual to know how to re-pair your printer and your computer.
Method 2: Set your printer as default printer
When your order your computer to print something, it will assign the printing tasks to the default printer unless you specify another. Normally, your printer will be set as default when it is connected to your computer. But sometimes the default printer will be changed due to some reasons and you may not be aware of it. In this case you should make sure you have chosen the correct printer when you try to perform a printing task.
If you want to set your printer as the default printer, you can follow the steps below:
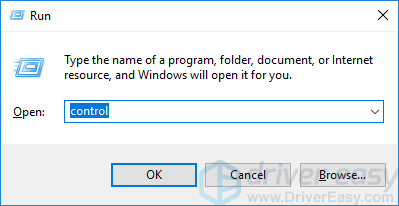
1) On your keyboard, press the Windows logo key![]() and R at the same time to invoke the Run box.
and R at the same time to invoke the Run box.
2) Type “control” and press Enter on your keyboard. This will open Control Panel.
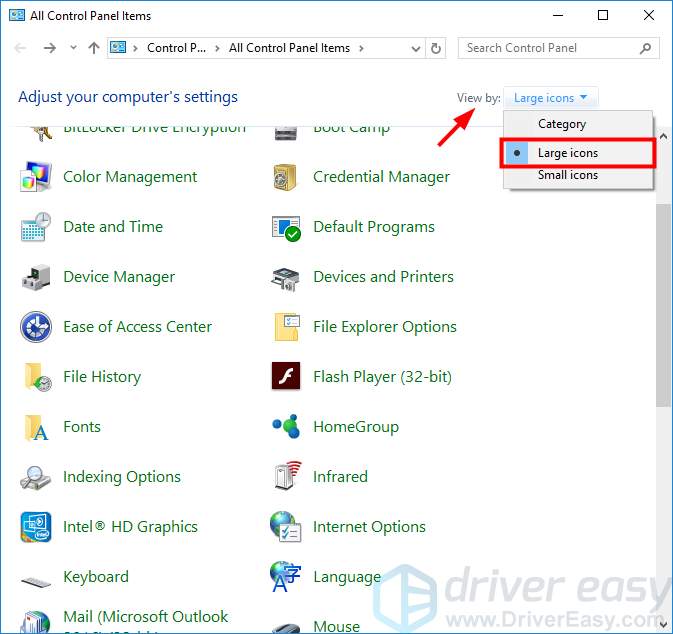
3) Under View by, select Large icons.
4) Click Devices and Printers.
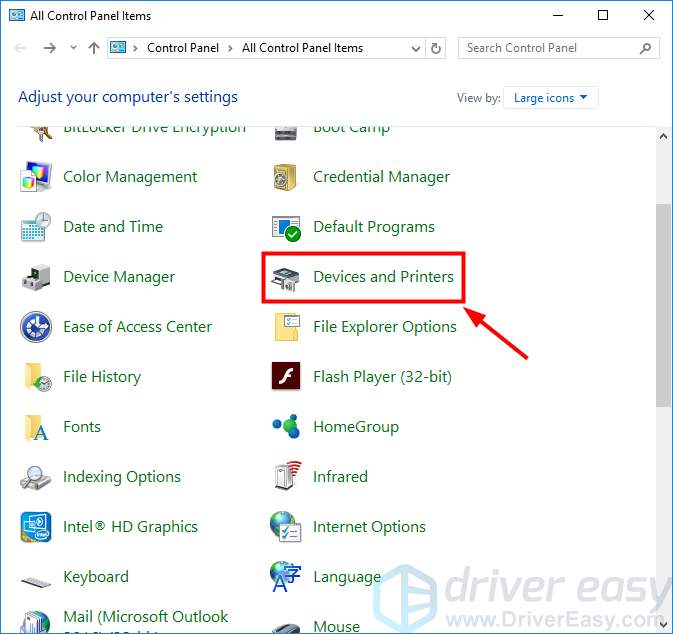
5) Right click your printer, and select Set as default printer.
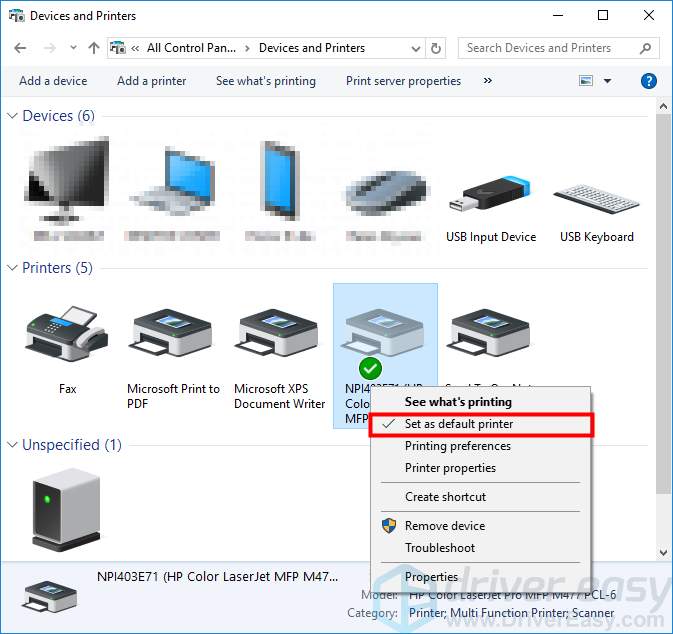
Your printer has already been set as the default printer.
Method 3: Update your printer driver
In many cases, printer problems stem from out-of-date or wrong printer driver. You can update your printer driver and see if this fixes your printer not printing issue. Updating drivers can sometimes be time-consuming. But you can do it easily and quickly with Driver Easy.
Driver Easy will automatically recognize your system and find the correct drivers for it. You don’t need to know exactly what system your computer is running, you don’t need to risk downloading and installing the wrong driver, and you don’t need to worry about making a mistake when installing.
You can download and install your drivers by using either Free or Pro version of Driver Easy. But with the Pro version it takes only 2 clicks (and you get full support and a 30-day money back guarantee):
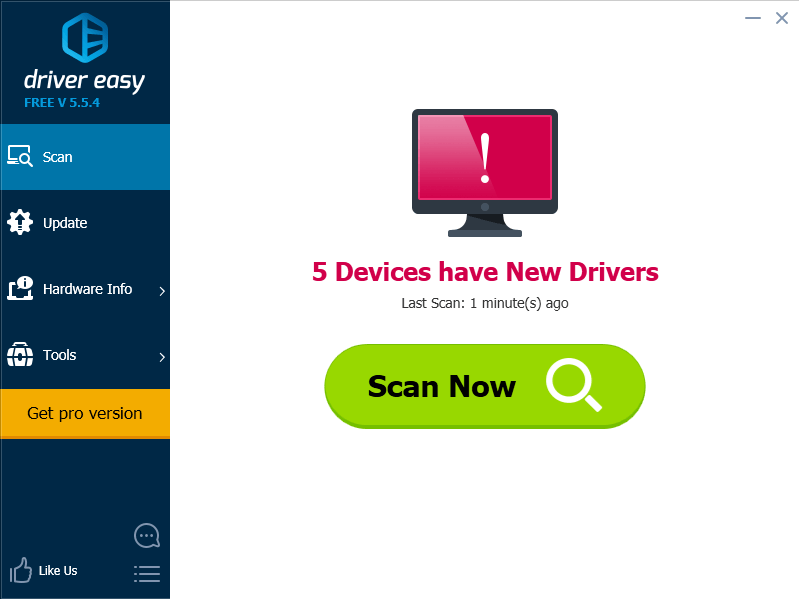
1) Download and Install Driver Easy.
2) Run Driver Easy and click the Scan Now button. Driver Easy will then scan your computer and detect any problem drivers.
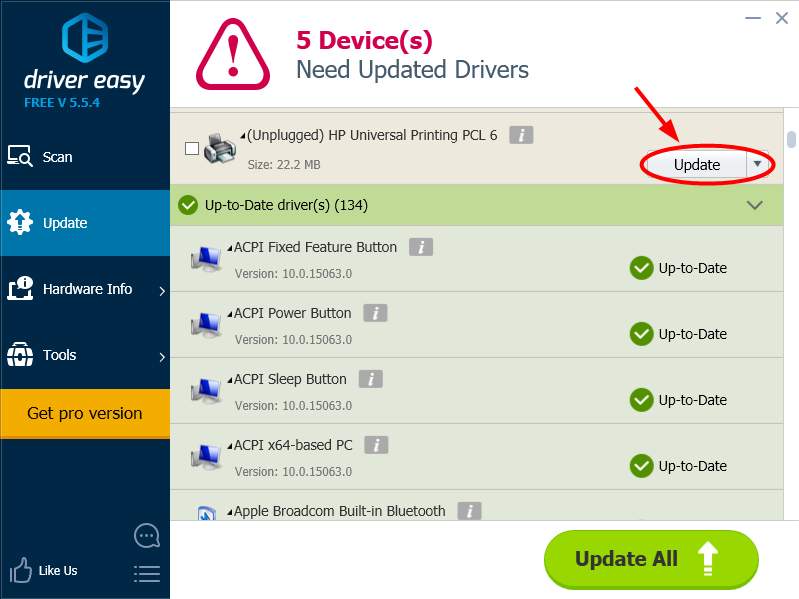
3) Click the Update button next to your printer to download the latest and correct driver for this device. You can also click the Update All button at the bottom right to automatically update all outdated or missing drivers on your computer (this requires the Pro version — you will be prompted to upgrade when you click on Update All).
4) Restart your computer, then check to see if your printer is able to print.
Method 4: Check the Print Spooler service
The Print Spooler service manages the print jobs on your computer and the interaction between your computer and printer. Your printer can’t work properly if this service is turned off or there are problems with it. You should check if it is running correctly, and, if it does, restart it to reset this service.
To check this service:
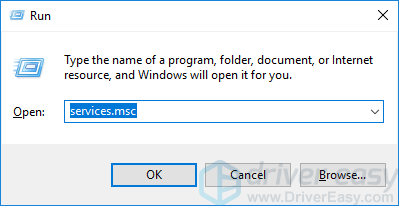
1) On your keyboard, press the Windows logo key![]() and R at the same time to invoke the Run box.
and R at the same time to invoke the Run box.
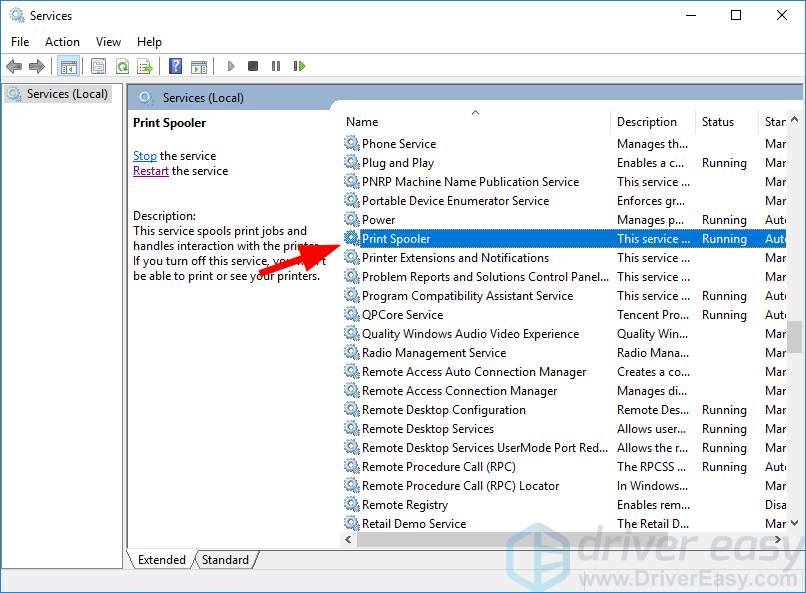
2) Type “services.msc” and press Enter on your keyboard. This will open the Services window.
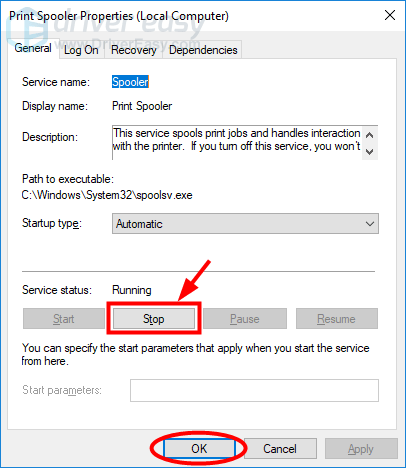
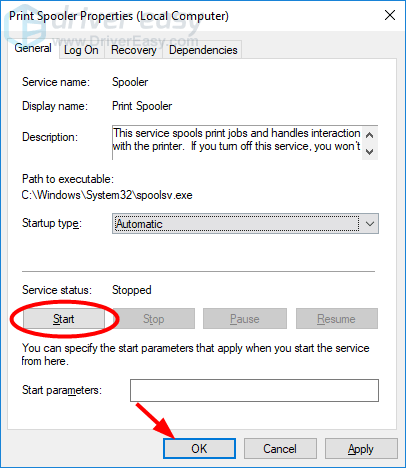
3) Double click Print Spooler in the list of services.
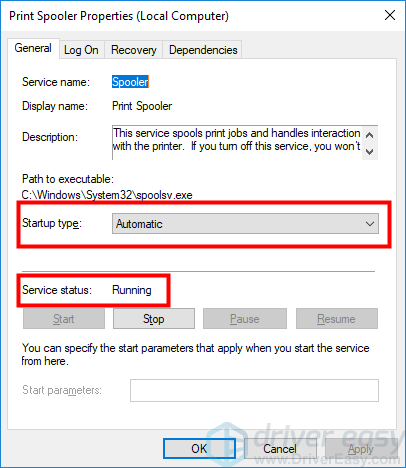
4) Make sure Startup type is set to Automatic and Service status is Running.
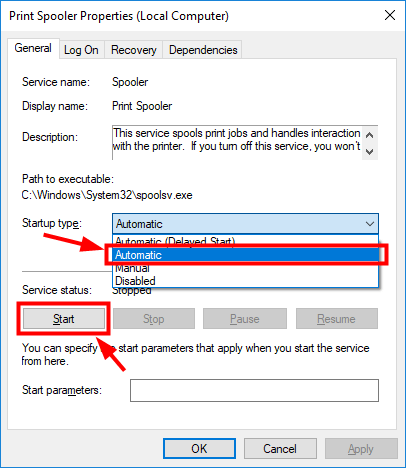
5) If not, set Startup type to Automatic, and click the Start button to start this service.
6) Click OK to save the changes and exit the dialog.
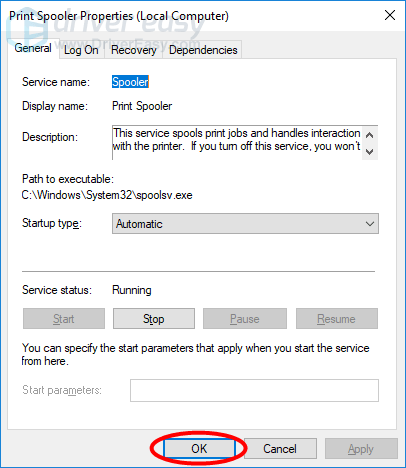
7) Check to see if your printer works.
Method 5: Clear all print jobs
When you try to print a file, your computer will place it as a print job in the print queue (a queue of files that is going to be printed) on your system. It is possible that a print job in the queue gets stuck and stops other documents being printed. In this case, you printer won’t be able to print. You need to clear your print queue before you can use your printer.
So if your printer is not printing, you can try clearing all print jobs and see if this resolves your problem. To do so:
1) On your keyboard, press the Windows logo key![]() and R at the same time to invoke the Run box.
and R at the same time to invoke the Run box.
2) Type “services.msc” and press Enter on your keyboard. This will open the Services window.
3) Double click Print Spooler in the list of services.
4) Click Stop and click OK.
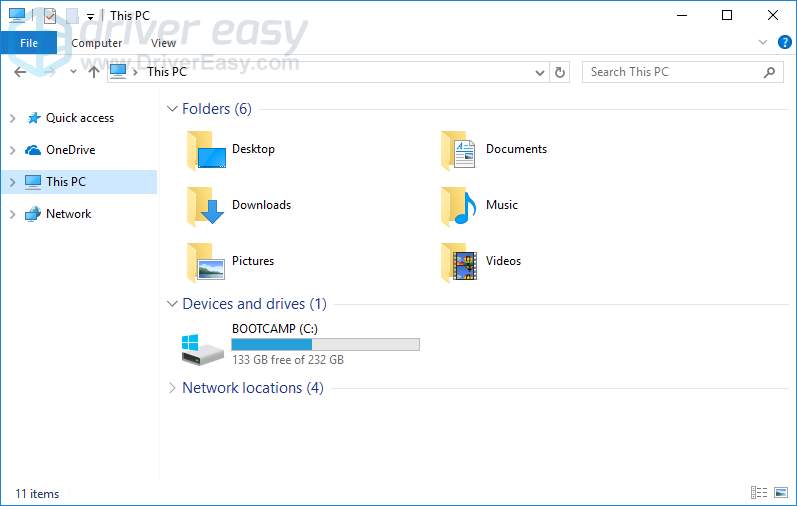
5) Minimize the Services window. Then open File Explorer (on your keyboard, press the Windows logo key![]() and E at the same time).
and E at the same time).
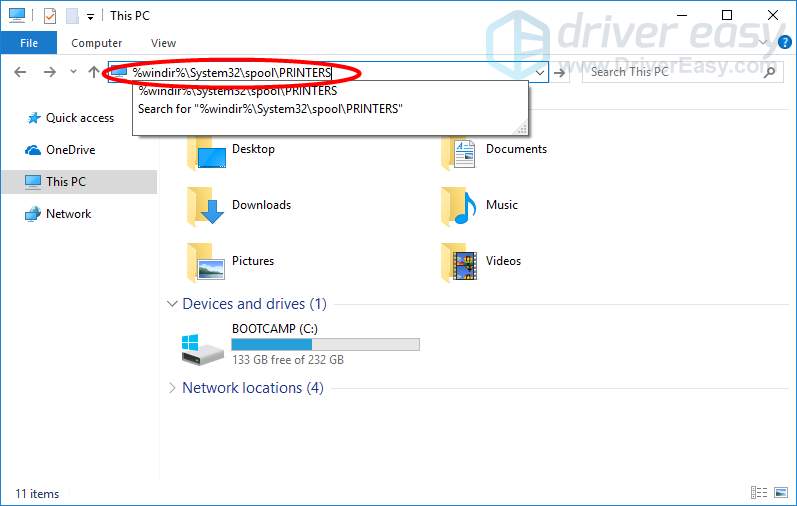
6) Copy and paste the following address to the address bar and press Enter on your keyboard to go to this location (where the print jobs is stored).
- %windir%\System32\spool\PRINTERS
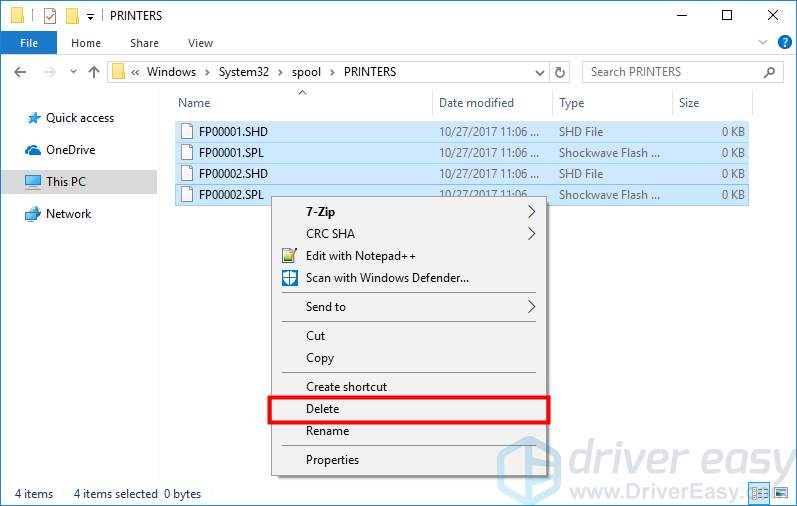
7) Delete all the files in this folder.
8) Restore the Services window. Then double click the Print Spooler service.
9) Click the Start button. After the service is started, click OK to save the change and close this dialog.
10) Close all the opened windows and turn off your computer.
11) Turn off your printer and unplug the power cable from it.
12) Leave your printer for at least one minute.
13) Plug the power cable to your printer and turn it on.
14) Turn on your computer. Then check to see if you can print your documents with your printer.
Method 6: Use another program to print your document
This error is sometimes caused by issues on the program you use. Perhaps there are problems with your document processing application that stop your files from being printed. You can test with another program. If that’s the problem for you, uninstall the application and install it with the latest stable version.
If this resolves the problem, contact the vendor of your software and ask them for advice, or install a different solution.
Method 7: Check the status of your printer
If you have tried all the methods above and your printer still can’t print, you should check the hardware status of your printer.
Check and see if the ink or toner in your printer is running short. You should replace the ink or toner cartridge when necessary.
Sometimes the printer will stop working after a part in it is replaced. If that’s the case, you can install the original part onto your printer and see if the problem is fixed.
You should also check if there is any error displayed by your printer. If you see one, consult the user guide or the manufacturer of your printer for instructions to fix the error.
If you still can’t fix the issue or you get any problem that you can’t deal with yourself, it is recommended that you contact the manufacturer for help. They can offer you advice to fix your printer not printing issue or have your printer repaired.