


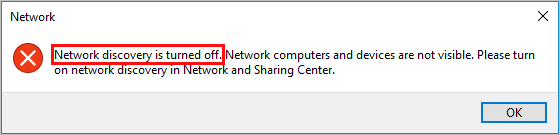
If Windows tells you that network discovery is turned off when you double-click the Network shortcut on your desktop, don’t worry! Although it is a little bit frustrating, you’re definitely not the only person to experience this issue. Many other Windows users have reported the very same issue. More importantly, you should be able to turn it on pretty easily!
Try these tips
Turn on network discovery in Control Panel
Network discovery allows your PC to find other PCs on the Internet. By default, Windows Firewall blocks network discovery. However, you can enable this feature manually. Here is how to do it:
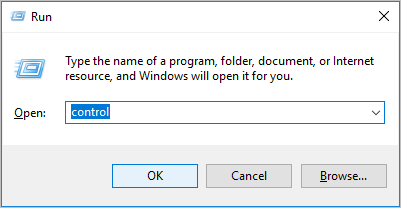
- On your keyboard, press the Windows logo key and R at the same time to open the Run dialog. Type control and press Enter to open Control Panel.
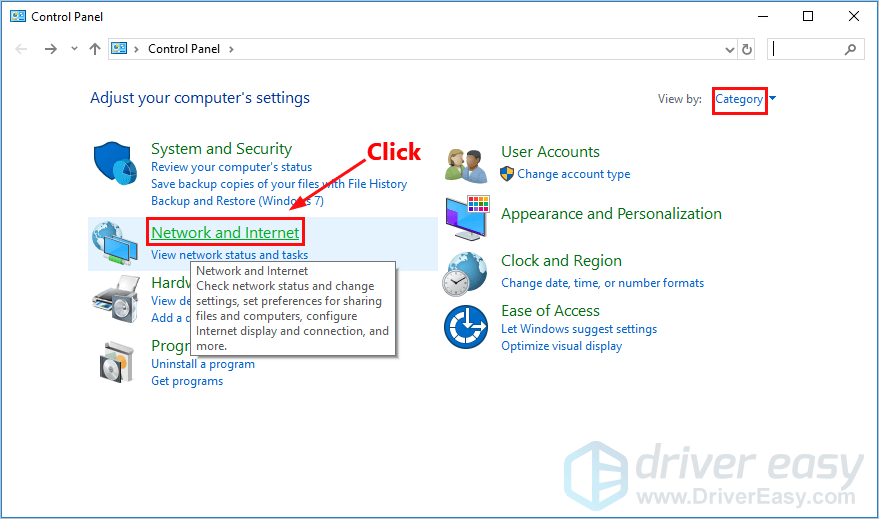
- View Control Penal by Category. Then click Network and Internet.
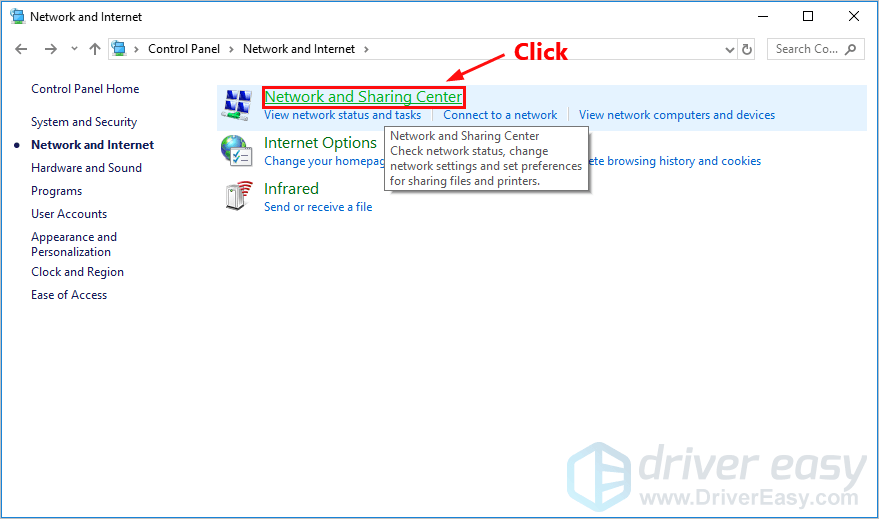
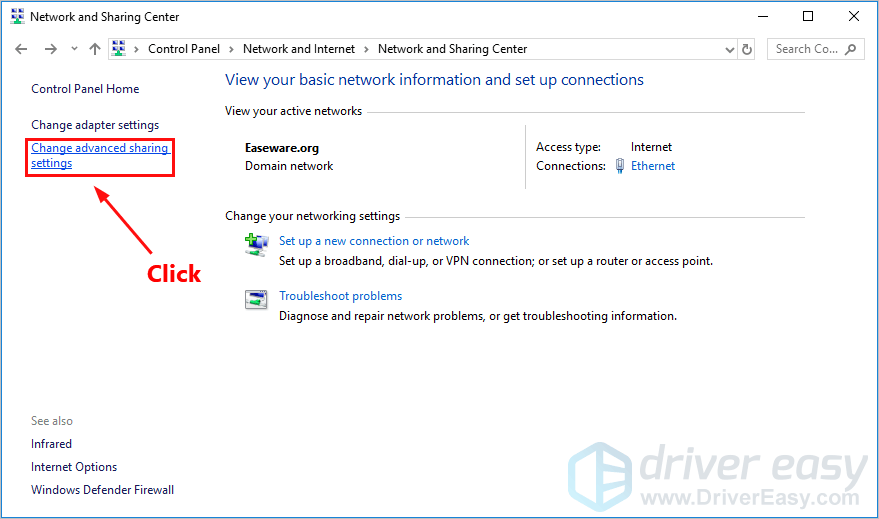
- Click Network and Sharing Center.
- On the left, click Change advanced sharing settings.
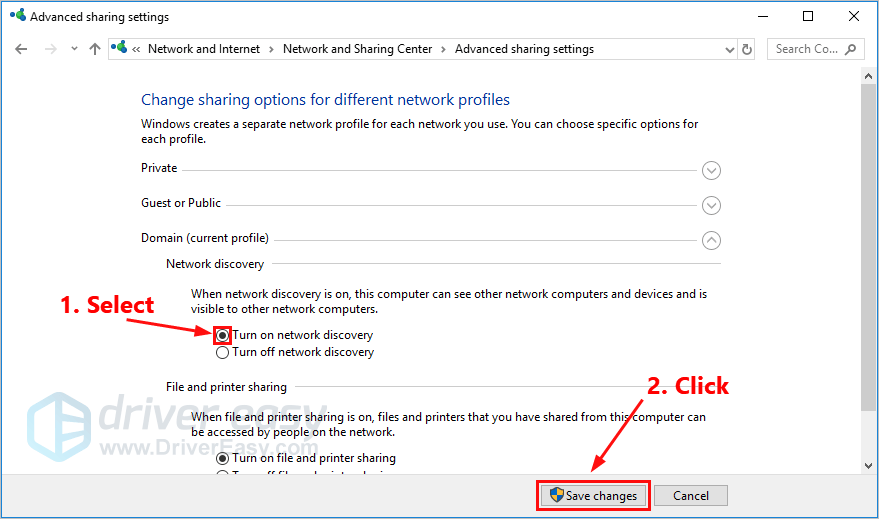
- In the section of Network discovery, select Turn on network discovery and click Save changes. You’ll be prompted for permission. Click Yes to turn on network discovery.
Pro tip: Update your network drivers
It is always a good idea to update your network drivers to the latest version. By doing that, you can enhance your network connectivity and avoid many unexpected network issue.
There are two ways to update your network driver: manually and automatically.
Manually update your network driver – You can update your network driver manually by going to the manufacturer’s website, and searching for the latest driver for your network adapter.
Or
Update your network driver automatically – If you don’t have the time, patience or computer skills to update your network driver manually, you can, instead, do it automatically with Driver Easy. You don’t need to know exactly what system your computer is running, you don’t need to risk downloading and installing the wrong driver, and you don’t need to worry about making a mistake when installing. Driver Easy handles it all.
- Download and install Driver Easy.
- Run Driver Easy and click the Scan Now button. Driver Easy will then scan your computer and detect any problem drivers.
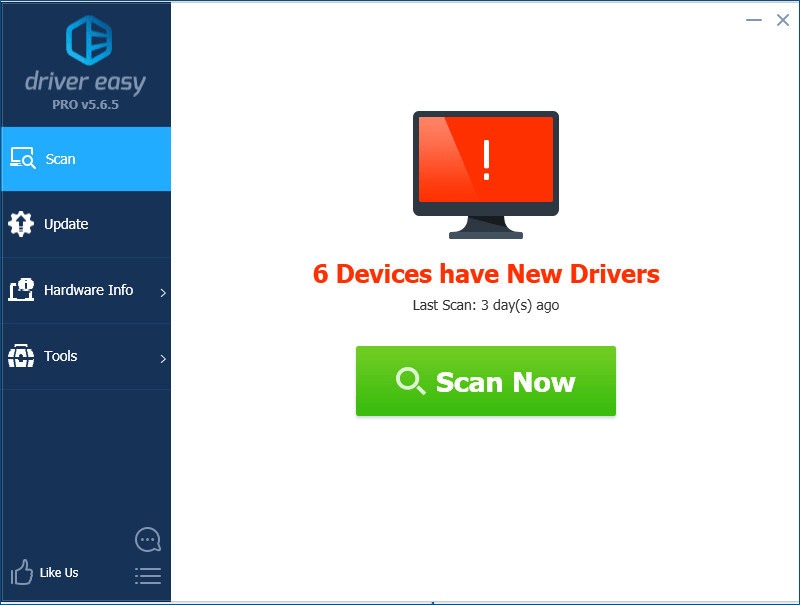
- Click Update next to your network adapter to automatically download the correct version of its driver, then you can install it manually. Or click Update All to automatically download and install the correct version of all the drivers that are missing or out of date on your system (This requires the Pro version – you’ll be prompted to upgrade when you click Update All. You get full support and a 30-day money back guarantee).

You can do it for free if you like, but it’s partly manual. If you need assistance, please contact Driver Easy’s support team at support@drivereasy.com.
If you have any questions or suggestions, please leave your comment below.