


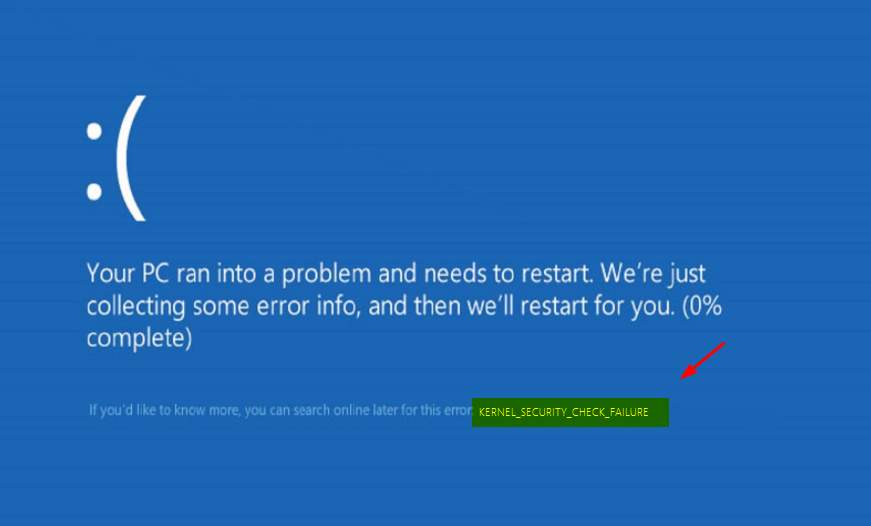
When encountering the dreaded KERNEL_SECURITY_CHECK_FAILURE stop code — usually accompanied by a Blue Screen of Death — it signals that Windows has detected a serious issue within its core (kernel) processes. This can stem from corrupted system files, incompatible drivers, or even faulty memory. In this guide, you’ll learn how to identify and resolve these potential culprits.
1. Download and Install All Windows Updates
Keeping Windows fully up to date plays a critical role in preventing the KERNEL SECURITY CHECK FAILURE error. Microsoft regularly releases patches that address system stability, security, and kernel-level fixes. To apply the latest updates:
Note that screenshots below come from Windows 11. If you’re running Windows 10, your screen may look slightly different, but the steps you take should remain consistent.
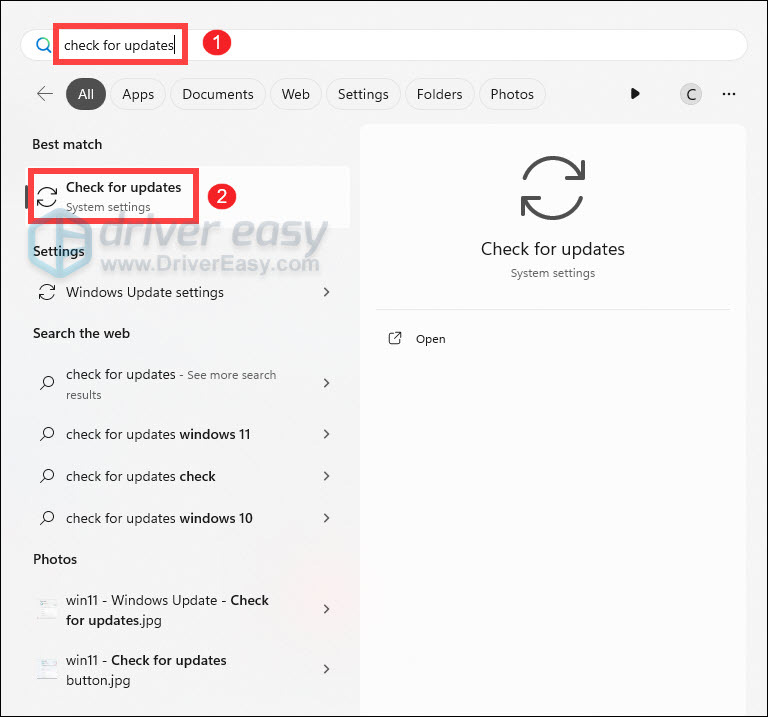
- Press the Windows logo key to invoke the Search. Type check for updates, then click Check for updates from the list of results.
- If you’re told that “Updates available to install”, simply click on the Install all button.

Or you can click on the button Check for updates to see if there are updates available.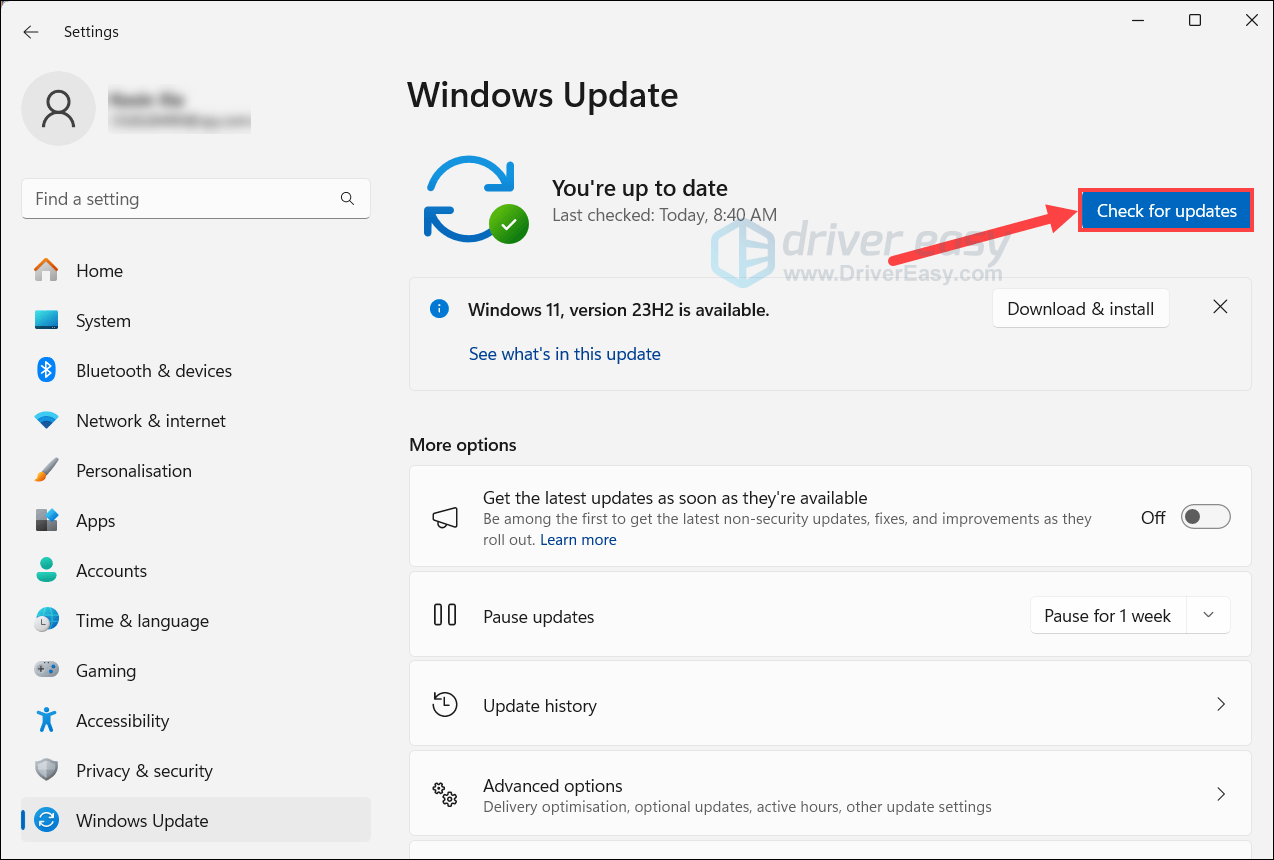
2. Update Your Device Drivers
Updating your drivers is one of the most effective ways to resolve the KERNEL SECURITY CHECK FAILURE error. Outdated or incompatible drivers, especially for graphics, can trigger kernel crashes.
Driver Easy simplifies the process of updating drivers by automatically detecting all outdated or missing drivers on your system, downloading and installing the latest versions. With Driver Easy, there’s no need to identify your Windows version, and you don’t risk installing compatible drivers. All the drivers you get are certified and directly from manufacturers.
- Download and install Driver Easy.
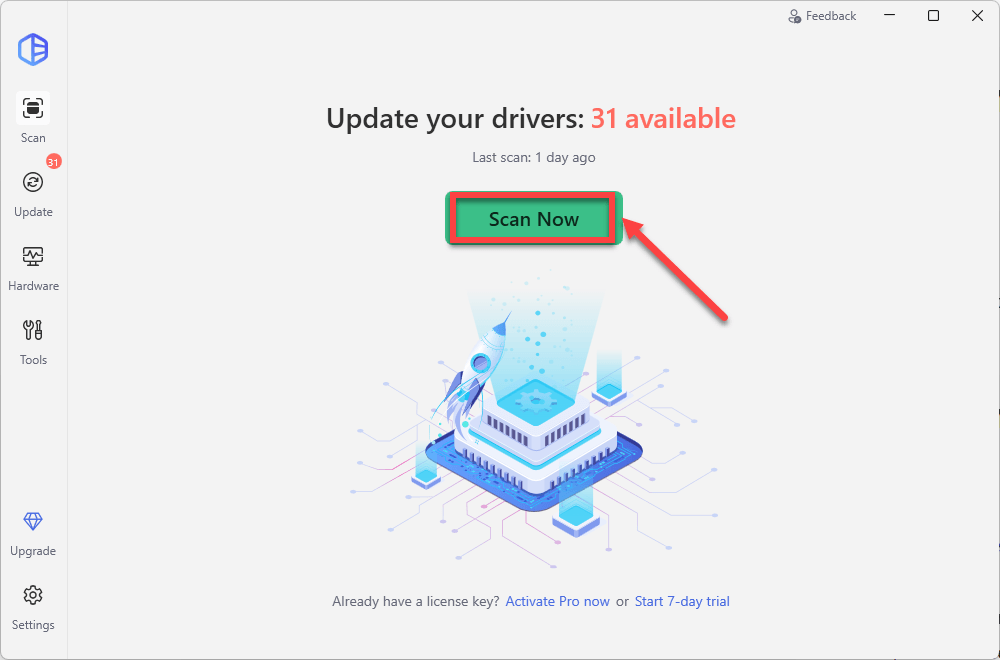
- Launch the app and click Scan Now. Driver Easy will detect all missing, outdated, or problem drivers.
- Review the scan results and click Activate & Update next to each flagged device (such as your GPU or storage adapter). For updating all at once, choose Update All.

- Once downloads and installations complete, restart your computer.
If you prefer the manual route, go to Device Manager or visit the official website of your device’s manufacturer to download and install drivers for your system. Note that Windows may not always offer the latest versions — it only shows drivers that have been validated and added to its catalog—so in some cases you will need to search and install newer ones yourself.
3. Run Memory Diagnostic Tool
Testing your system’s RAM is crucial when facing a KERNEL SECURITY CHECK FAILURE stop code, as faulty memory modules are one of the most common culprits behind kernel crashes.
- Press the Windows logo key to invoke the Search. Type windows security diagnostic and select it from the list of results.

- Click Restart now and check for problems (recommended).
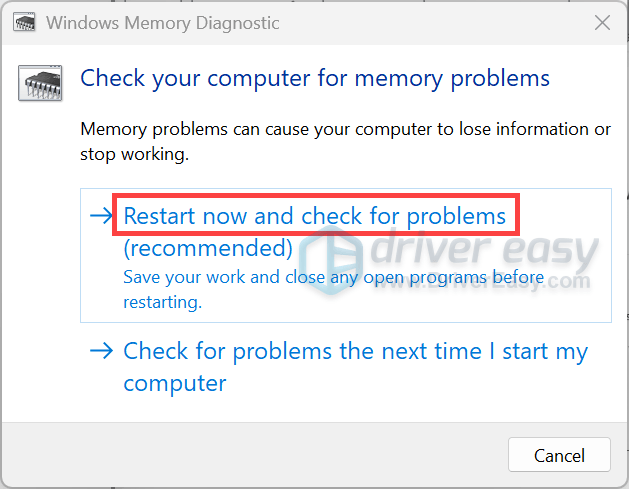
- Your PC will reboot and start the test. Then, a blue screen with white text will display the scan progress. Let it run — this can take 20-30 minutes or more, depending on your RAM size.
- Once the test completes, the PC will autoamtically restart and return to Windows.
4. Check for Malware
Malware can corrupt kernel files. You can open the Windows Security and run a full scan to see if there’s virus. For extra coverage, you can use a trusted tool like Malwarebytes.
5. Repair System Files
Repairing corrupted system files is a crucial fix for the KERNEL SECURITY CHECK FAILURE error, as damaged Windows files often trigger kernel-level crashes. Below we’ll show you how to use the built-in System File Checker (SFC) tool to scan and repair protected files automatically.
- On your keyboard, press the Windows logo key to open the Search menu. Type cmd, right-click Command Prompt from the list of results, and select Run as administrator.
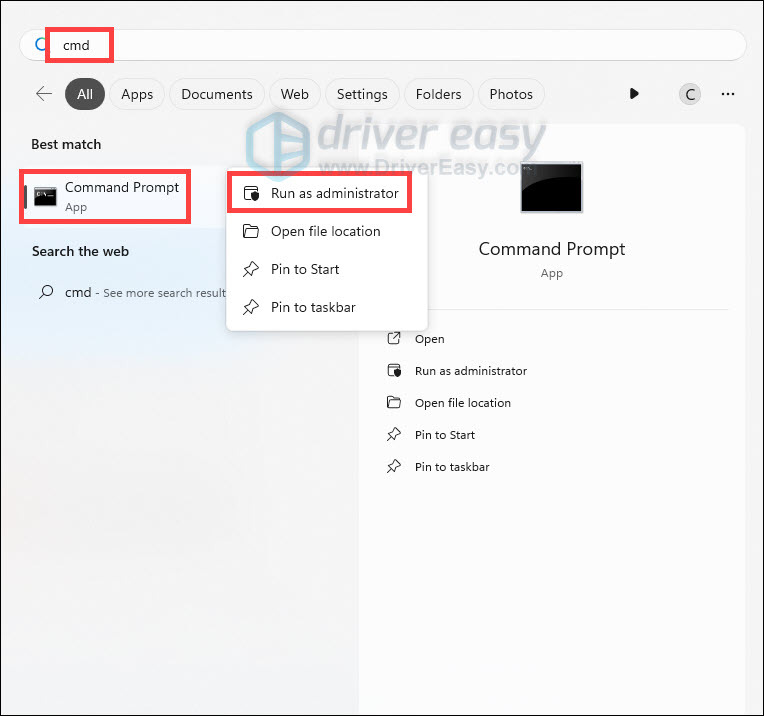
- In the Command Prompt window, type sfc /scannow and hit Enter.
The sfc /scannow command scans and repairs protected system files using a cached copy. Do not close the Command Prompt window until the process is complete.
After the process is finished, you may receive one of the following messages:
| sfc /scannow result | What it means |
| Windows Resource Protection did not find any integrity violations. | The SFC tool did not detect any corrupted, missing, or damaged system files on your computer. This is a good sign! It indicates that your system files are intact and functioning as they should. |
| Windows Resource Protection could not perform the requested operation. | The SFC tool encountered an issue preventing it from completing the scan. Try rebooting into safe mode, running the DISM command, and running the sfc /scannow again. *To run the DISM command, you just need to execute the following commands sequentially: DISM /Online /Cleanup-Image /CheckHealth |
| Windows Resource Protection found corrupt files and successfully repaired them. | The operation was successful. |
| Windows Resource Protection found corrupt files but was unable to fix some of them. | It has detected corrupted system files but couldn’t repair them. To address this issue, view details of the System File Checker process to find the corrupted file, and then manually replace the corrupted file with a known good copy of the file. |
