


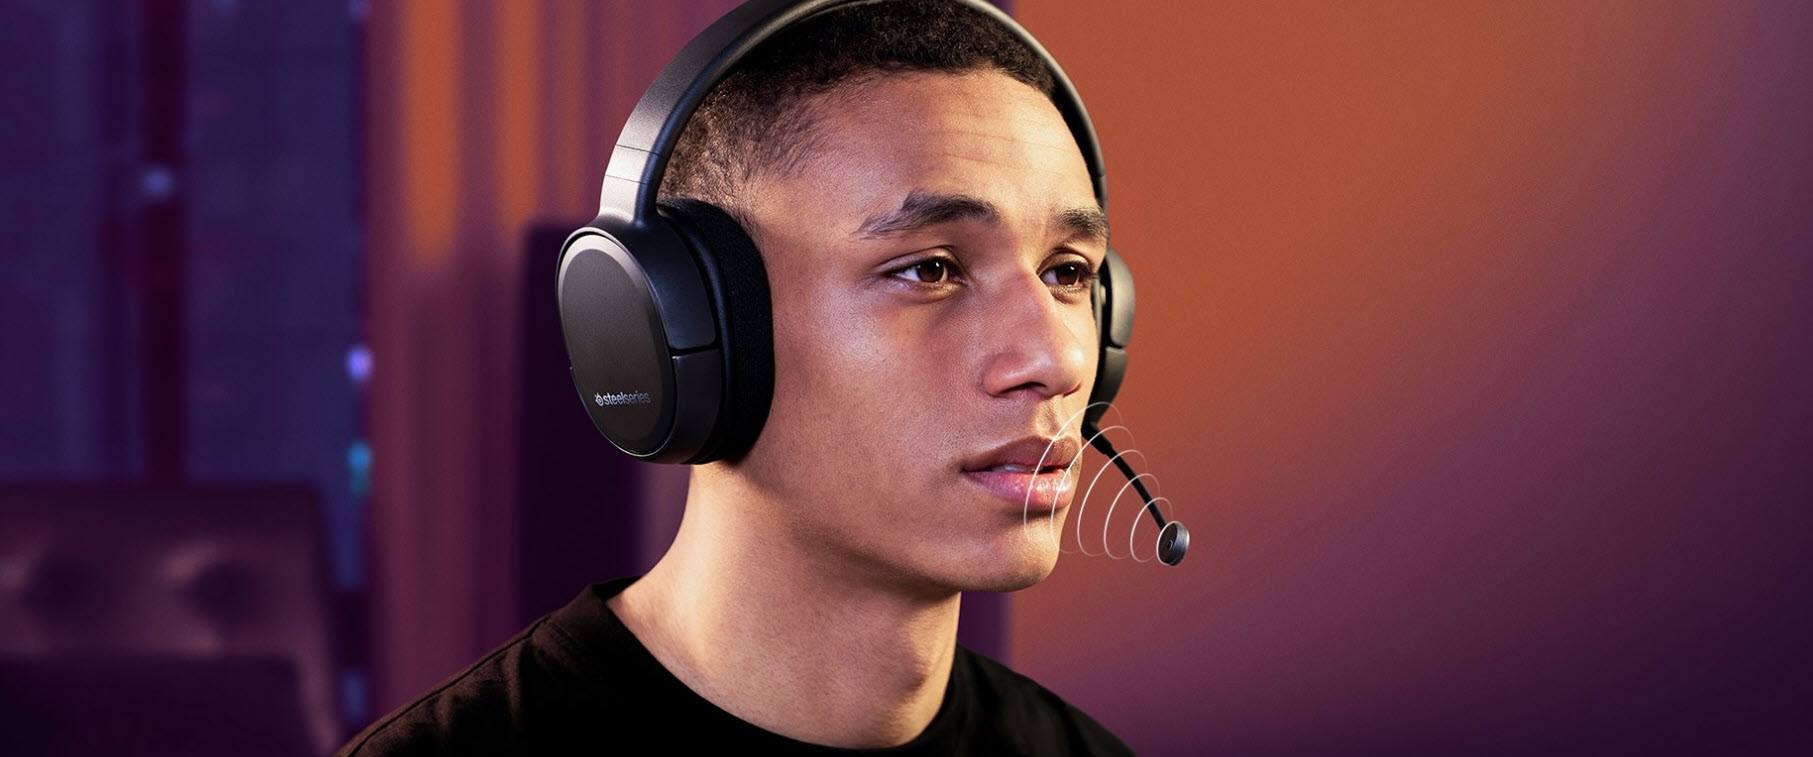
The Arctis 1 is an all-platform gaming headset with a detachable mic and high-quality speaker drivers so you can enjoy the award-winning performance of Arctis no matter where you are. But some users are reporting the SteelSeries Arctis 1 mic working issue. If you’re experiencing the same problem, don’t worry. You can fix SteelSeries Arctis 1 mic not working issue quite easily.
Try these fixes
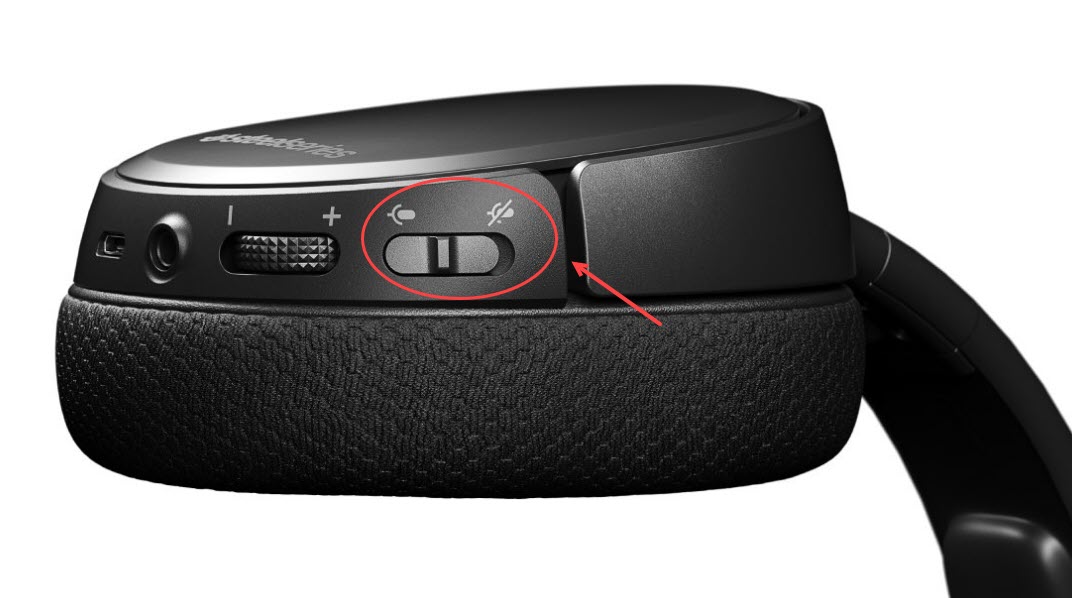
1. Make sure the microphone is not muted
For basic troubleshooting, you can first check if your SteelSeries Actics 1 is muted. On the left earcup, make sure this button is not pushed towards the mute end.
If the microphone is still not working even if you’re sure it’s not muted, you can try the following workarounds to fix it.
2. Allow access to the microphone
Unlike SteelSeries Arctis 7, 9, and 9X, there’s no factory reset button on Arctis 1. So if the issue is not on your headphone’s end, please check if you have allowed access to your microphone. Here’s how:
in Windows 10
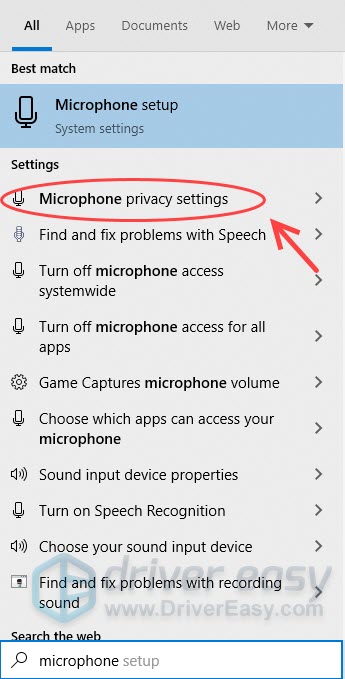
- On your keyboard, press the Windows logo key to invoke the Search box and type microphone.
- Select Microphone Privacy Settings from the results list.
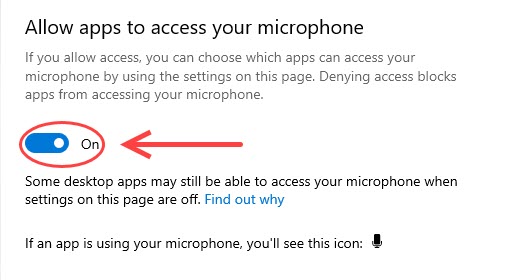
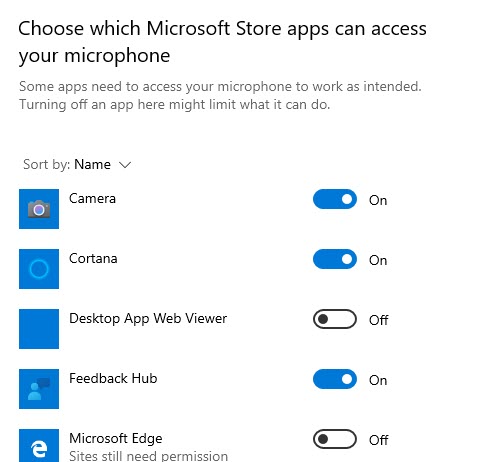
- Under the Allow Apps To Access Your Microphone tab, ensure that the toggle is in the On position so that other apps can use your microphone.
- Scroll down to choose which app can access your microphone, and make sure that you have it set for all the apps you want.
- Now check if your mic is working for the app you’re using.
in Windows 11
- On your keyboard, press the Windows logo key
 and I at the same time to open the Windows Settings.
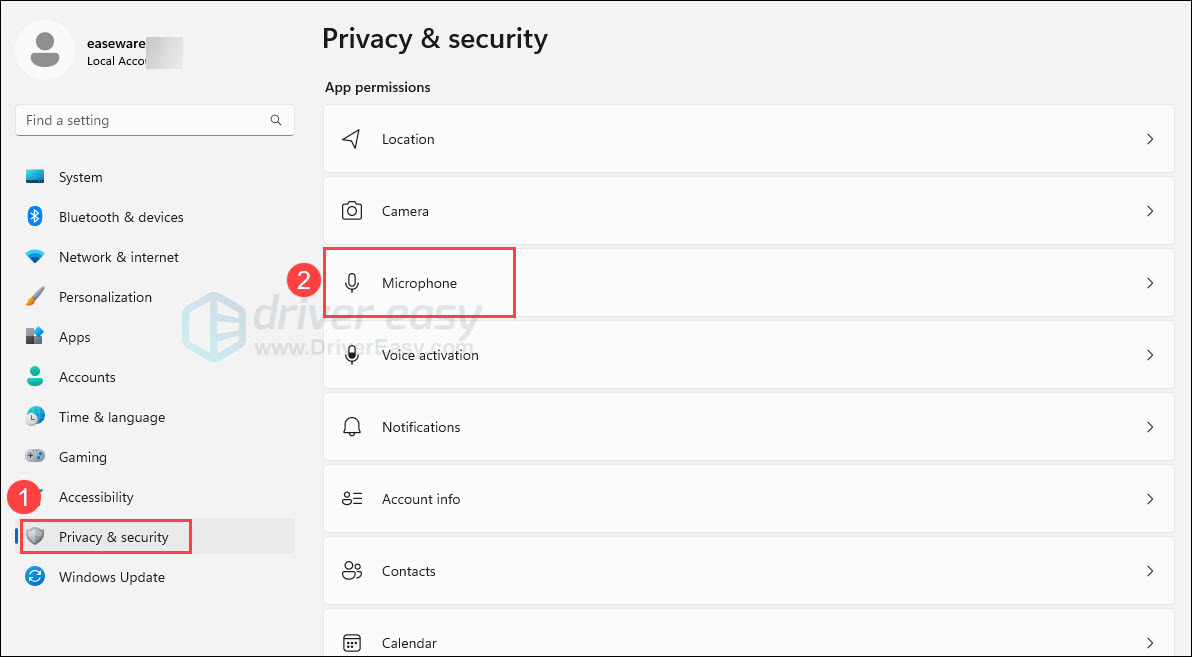
 - From the left pane, select Privacy & security. Then scroll down to the App permissions section, and click Microphone.
- You will now see a toggle switch labeled Let apps access your microphone. Click on this toggle switch
 to enable microphone access for your apps.
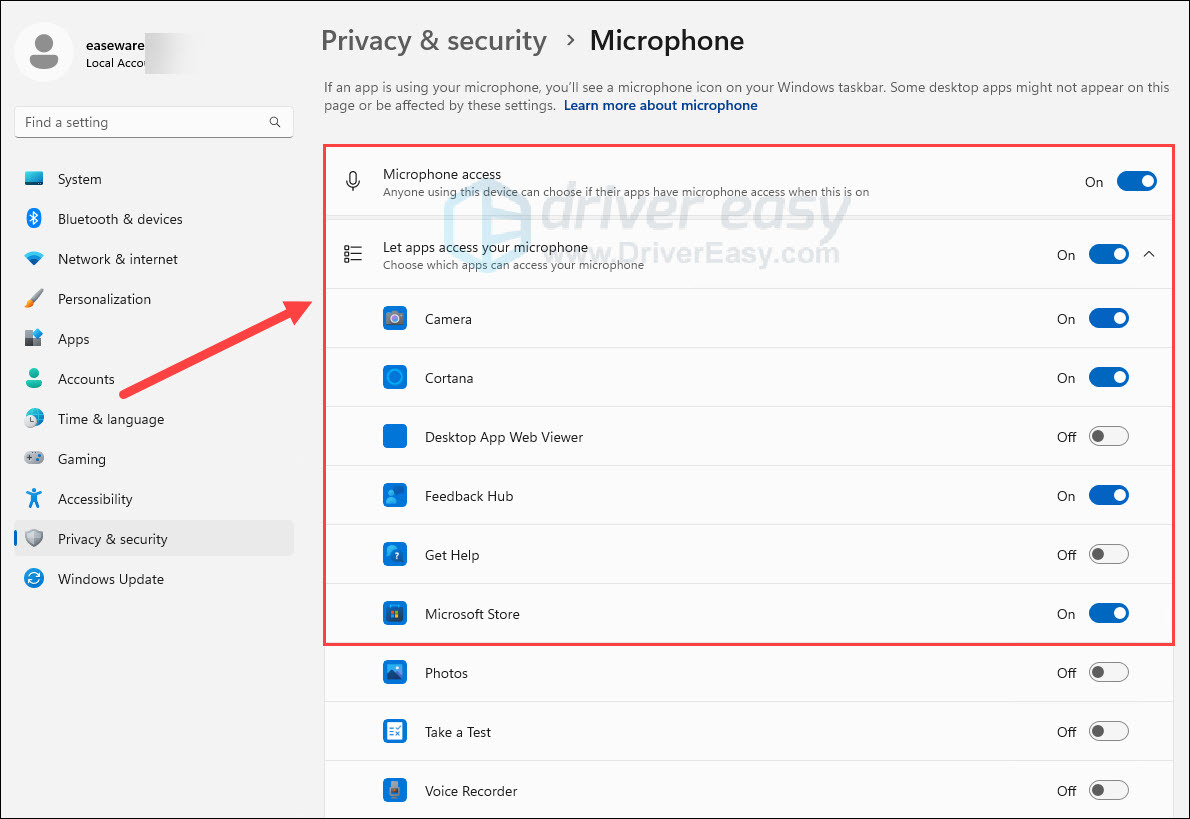
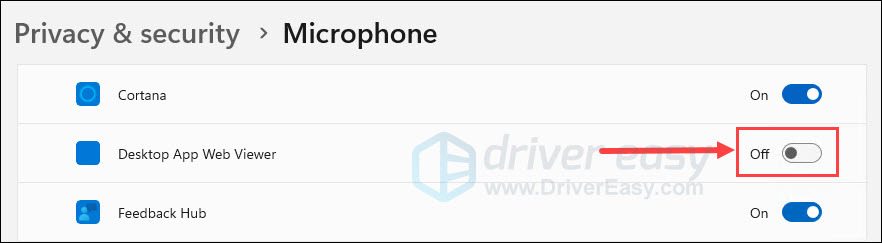
- If you want to grant microphone access to specific apps, just scroll down to find the App you want in the list, and then toggle the microphone access on or off as needed.
- Once you’ve made your selections, close the Settings window. Your microphone permissions are now set up as desired on Windows 11.
Did this fix your SteelSeries Arctis 1 mic not working? If not, move on to the next method.
3. Change your microphone settings
Normally, Windows can automatically detect your microphone and set iy as the default input device once your headphone is plugged into it. But sometimes you’ll need to set it as the default device manually:
in Windows 10
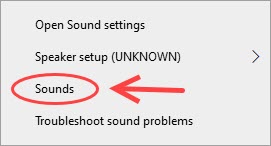
- Right-click on the sound icon in the lower-right corner of your desktop, and select Sounds.
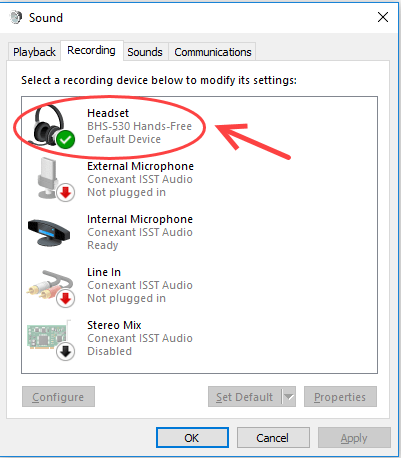
- Go to the Recording tab, and make sure your Headset Microphone is set as the default device. If not, select your headphone and click Set Default.
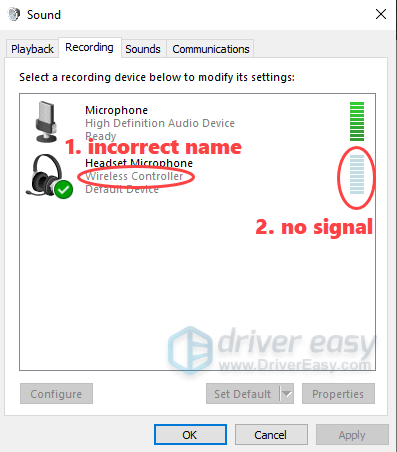
- Also, make sure it displays your headphone name correctly and shows strong signals, which means your computer successfully recognizes your device. If your headphone is shown as something else such as Wireless Controller (below), there’s something wrong with your mic settings, so you should re-connect your headset.
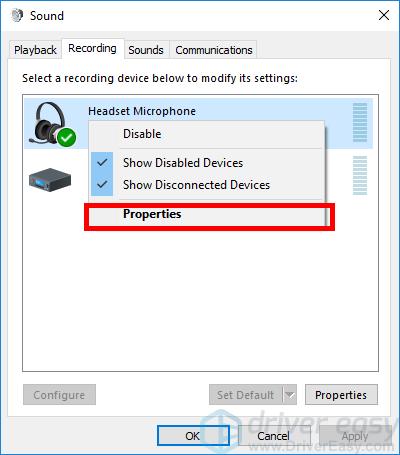
- If the display name and signal are normal, right-click Headset Microphone and click Properties.
- Click the Levels tab, then drag the volume slider towards the largest value (100).
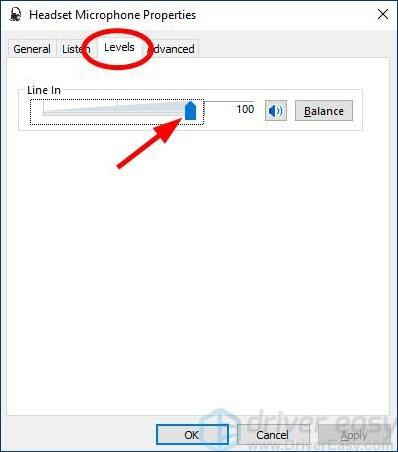
- Click OK to apply the changes, and then click OK on the last window.
in Windows 11
- On your keyboard, press the Windows logo + I keys simultaneously to open Settings.
- Select System from the left navigation panel. Then click Sound from the right.
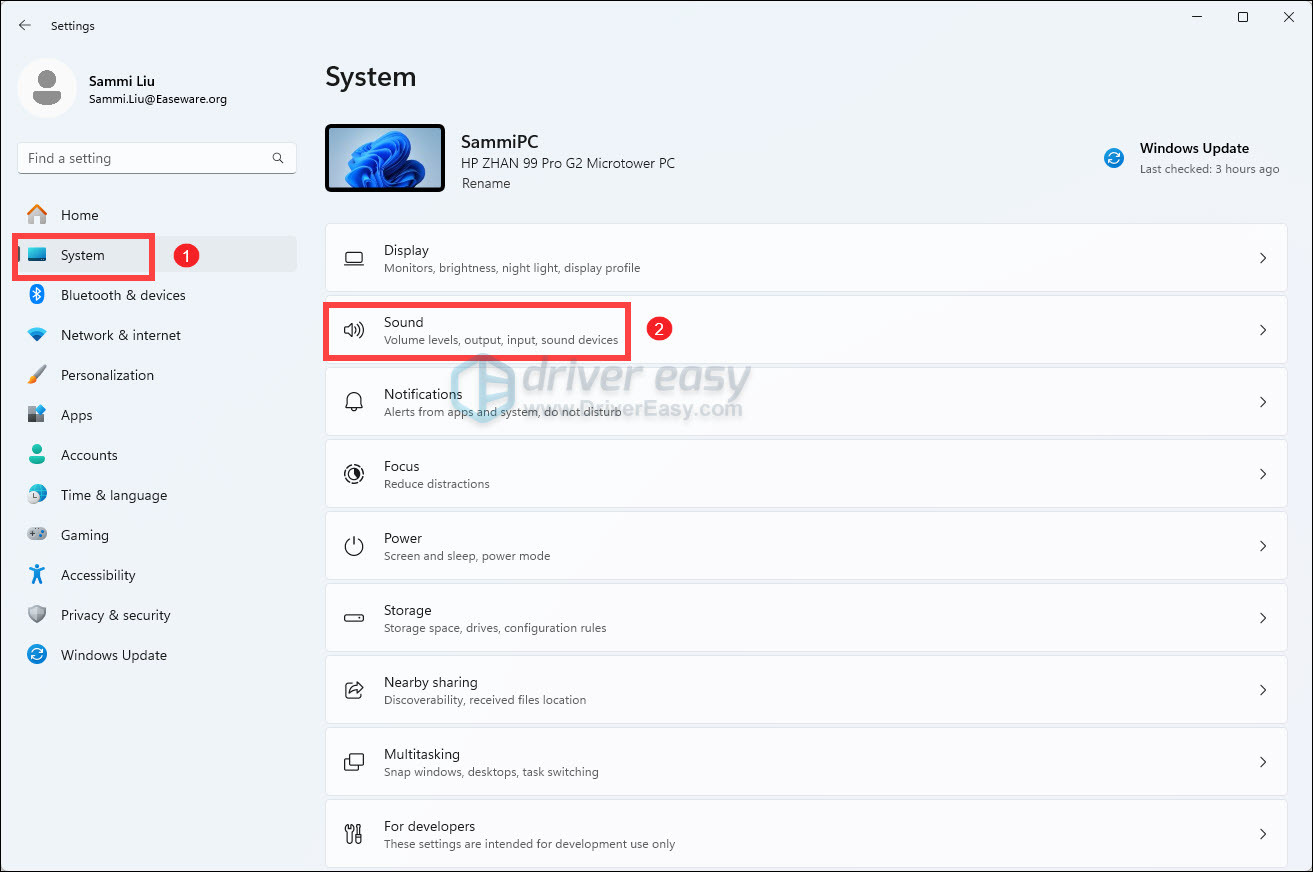
- Scroll down and click More sound settings.

- In the Properties window, select the Sound tab. make sure it displays your headphone name correctly and shows strong signals, which means your computer successfully recognizes your device. If your headphone is shown as something else, there’s something wrong with your mic settings, so you should re-connect your headset.
- If the display name and signal are normal, right-click Headset Microphone and click Properties.
- Click the Levels tab, then drag the volume slider towards the largest value (100).
- Click OK to apply the changes.
Now your microphone should be set correctly, and you’ve turned up your microphone volume. Try your headphone and see if your microphone is working. If it does, then congratulations. But if not, you can follow the next fix to solve this problem.
4. Update your audio drivers
The mic on your SteelSeries Arctis 1 headset won’t work if you’re using incorrect or outdated audio or headset drivers. So you should update both the Realtek audio driver and your headphone driver to see if that fixes the issue.
You can update your driver manually or automatically. The manual process requires visiting the manufacturer’s website to download the latest drivers and install them manually, which is time-consuming, technical, and risky. We don’t recommend it unless you have excellent computer knowledge.
Updating your driver automatically, on the other hand, is very easy. Simply install and run Driver Easy, and it will automatically find all the devices on your PC that need new drivers, and install them for you. Here’s how to use it.
You can update your drivers automatically with either the 7 days free trial or the Pro version of Driver Easy. It takes just 2 clicks, and you get full support and a 30-day money-back guarantee with the Pro version:
- Download and install Driver Easy.
- Run Driver Easy and click the Scan Now button. Driver Easy will then scan your computer and detect any problem drivers.

- Click the Activate & Update button next to the flagged device to automatically download and install the correct version of this driver.
Or click Update All to automatically download and install the correct version of all the drivers that are missing or out of date on your system (You’ll need the Pro version for this – when you select Update All, you’ll get a prompt to upgrade. If you’re not prepared to purchase the Pro version yet, Driver Easy provides a 7-day trial at no cost, granting access to all Pro features like fast downloads and easy installation. No charges will occur until after your 7-day trial period ends.)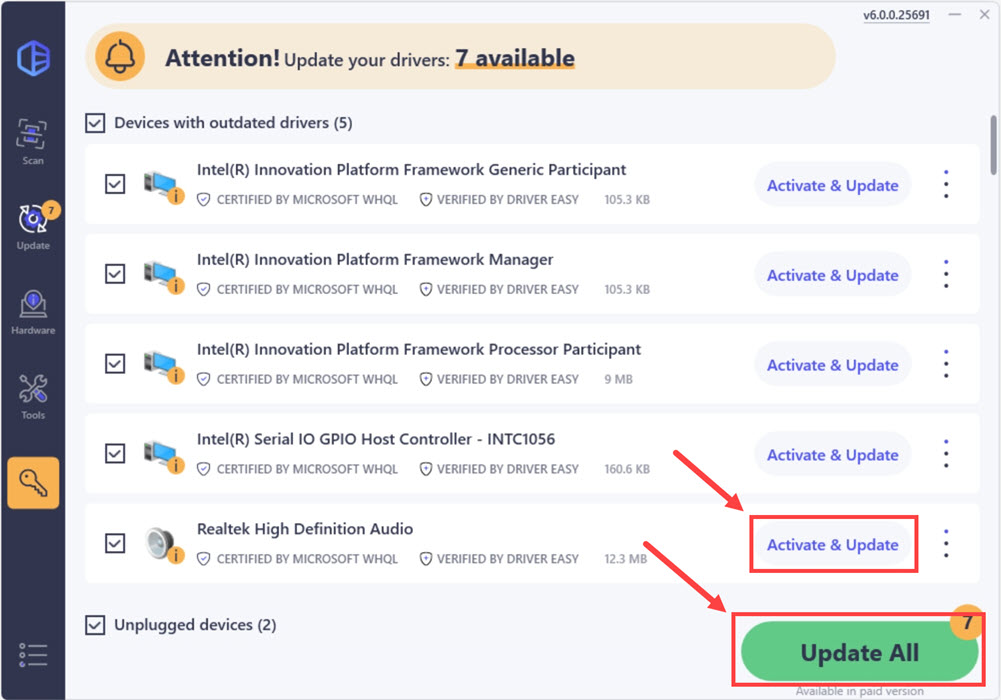
- After updating, restart your computer to take effect.
Did it fix your SteelSeries Arctis 1 not working issue? If the answer is still a no, don’t worry. You can head onto our next fix, below.
5. Install the latest SteelSeries Engine software
The microphone problem might be on your SteelSeries Engine software’s end. To fix it, you need to update ut to the latest version.
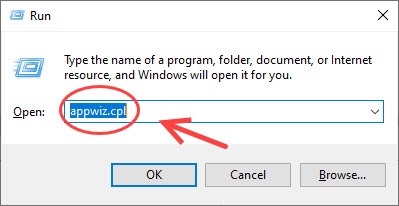
- On your keyboard, press the Windows logo key and R at the same time to open the Run box. Then type appwiz.cpl and press Enter.
- Right-click SteelSeries Engine and click Uninstall.
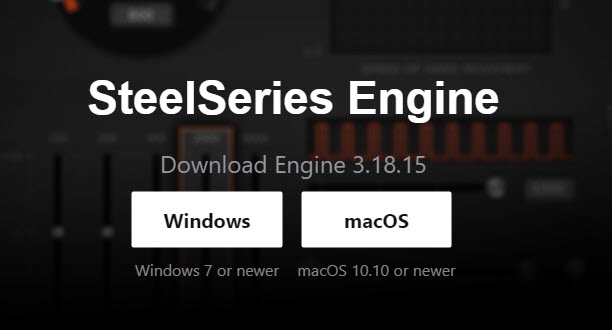
- Download the latest SteelSeries Engine.
- Select your operating system to start downloading.
- Once complete, run this executable file and follow the on-screen instructions to finish.
- Replug your SteelSeries Arctis 1 into your computer and run this software. Your headset now should be recognized successfully.
Did the fixes above fix your SteelSeries Arctis 1 mic not working issue? Feel free to leave us a comment if you have questions or suggestions. We would appreciate your valuable feedback.