


Arctis Pro sounds as amazing as it feels. But if you find your SteelSeries Arctis Pro has no sound or the mic is not working, we’ve put together all the troubleshooting methods for you in our post.
Why your headset mic is not working
The reasons why your SteelSeries Arctis Pro has mic problems are listed below:
- The mic is muted
- Poor positioning
- Your headset is not set as the default device
- The sound card driver is outdated/corrupted
- Your microphone cannot access your device
How to fix your mic issues
You may not have to try them all; just work your way down the list until you find the one that works for you.
- Set up the microphone correctly
- Allow access to your microphone
- Set your headset as the default device
- Update the headset driver
- Make sure to use the correct Default Format
Note: The screenshots below have been mostly taken from a Windows 10 operating system. If you are using Windows 11, please be aware that the visual appearance of your screen may vary slightly, but the steps to perform the task remain consistent.
Fix 1: Set up the microphone correctly
Before you try the following fixes, please make sure the mute button is not activated.
Also, the microphone is highly directional, so it must be placed properly to achieve the best sound quality.
Fix 2: Allow access to your microphone
The first thing you need to make sure of is that your device allows apps to access your microphone. This is especially true if you can’t be heard in any apps.
Here’s how to do it:
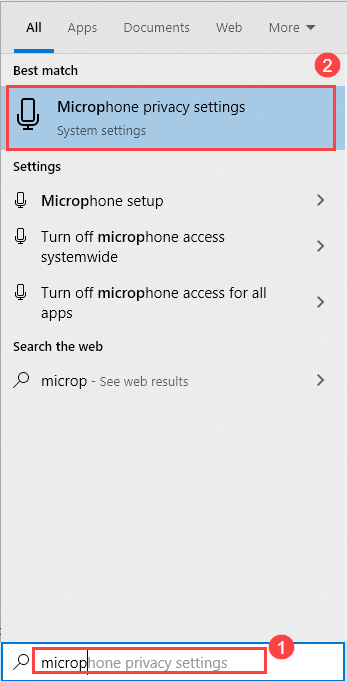
1) In the Windows Search box, type microphone, and select Microphone privacy settings.
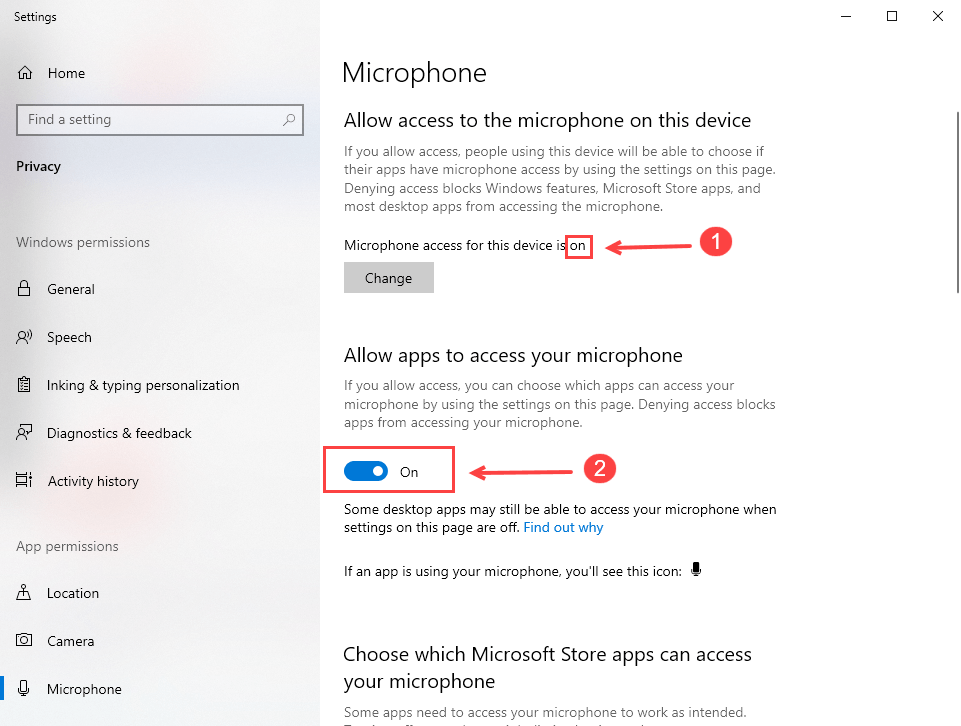
2) Please be sure to turn on “Allow access to the microphone on this device” and “Allow apps to access your microphone“.
3) Scroll down to allow microphone access for the Microsoft apps and desktop apps.
Now you can test recording and see if your SteelSeries Arctis Pro mic is working right now. But if not, please move on to the next fix.
Fix 3: Set your headset as the default device
In most cases, when you plug your headset into the computer, it will be set as the default device on the computer. But sometimes it can bump into issues. If your SteelSeries Actis Pro mic is not working, your headset may be disabled or not set as the default device.
Here’s how to do it:
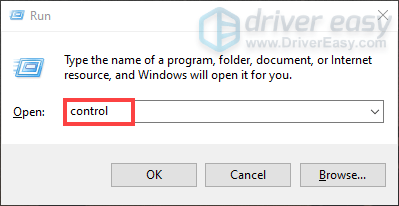
1) On your keyboard, press the Windows logo key and the R key at the same time to open the Run box.
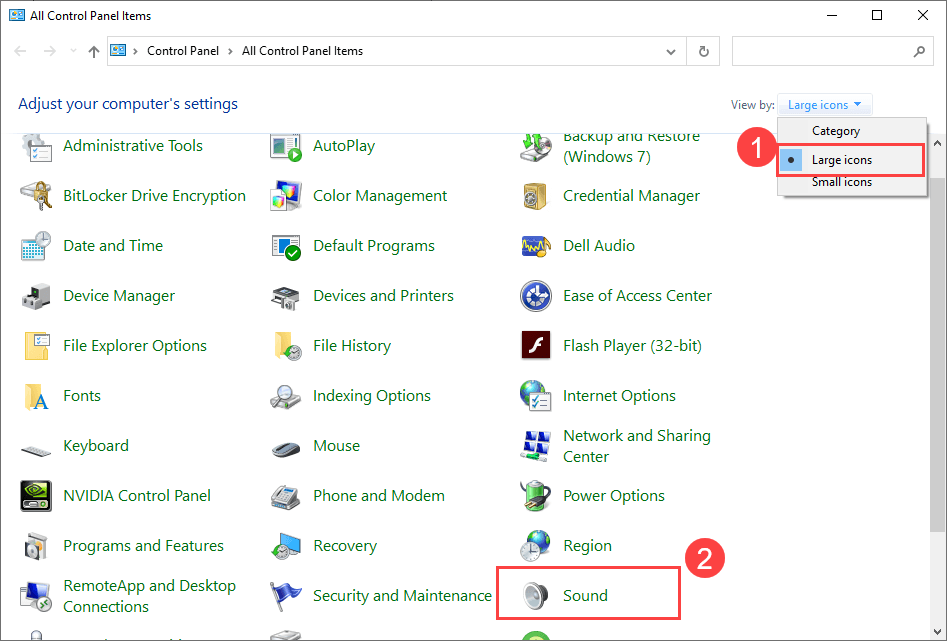
2) In the Control Panel window, view by Large icons, and then select Sound.
3) In the Sound windows, select the Recording tab.
4) Make sure your Actis Pro is Enabled (shows a green checkmark) and set it as the Default Device. If not, you can right-click it and select Set as Default Device and Set as Default Communication Device.

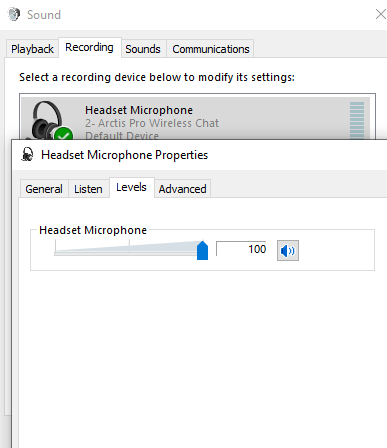
5) Select the microphone and click Properties.
6) Click the Levels tab, and drag the slider to a proper volume.
7) Also go to the Enhancements tab, and check the box Disable all sound effects.
8) Click Apply > OK.
Now your SteelSeries Actis Pro should be working, and if you still have problems with the microphone, you can try the next fix below.
Fix 4: Update the headset driver
The microphone on your SteelSeries Arctis Pro won’t work if you’re using an incorrect or outdated driver. So if the fixes above didn’t work, you should try updating the driver to see if it does the trick.
You can update your driver manually or automatically. The manual process is time-consuming, technical, and risky, so we won’t cover it here. Nor do we recommend it unless you have excellent computer knowledge.
Updating your driver automatically, on the other hand, is very easy. Simply install and run Driver Easy, and it will automatically find all the devices on your PC that need new drivers, and install them for you. Here’s how to use it.
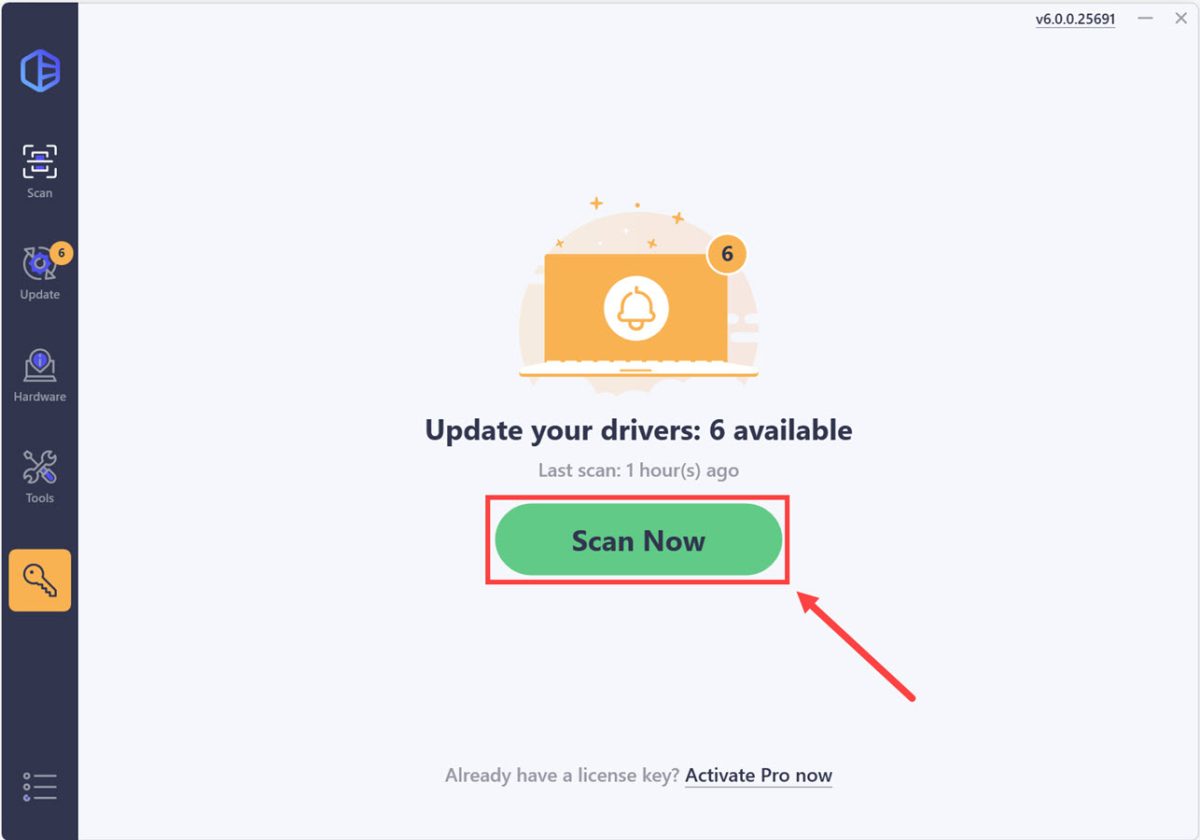
1) Download and install Driver Easy.
2) Run Driver Easy and click the Scan Now button. Driver Easy will scan your computer and detect any problem drivers.
3) Click the Activate & Update button next to the headset to download the latest and correct driver for it.
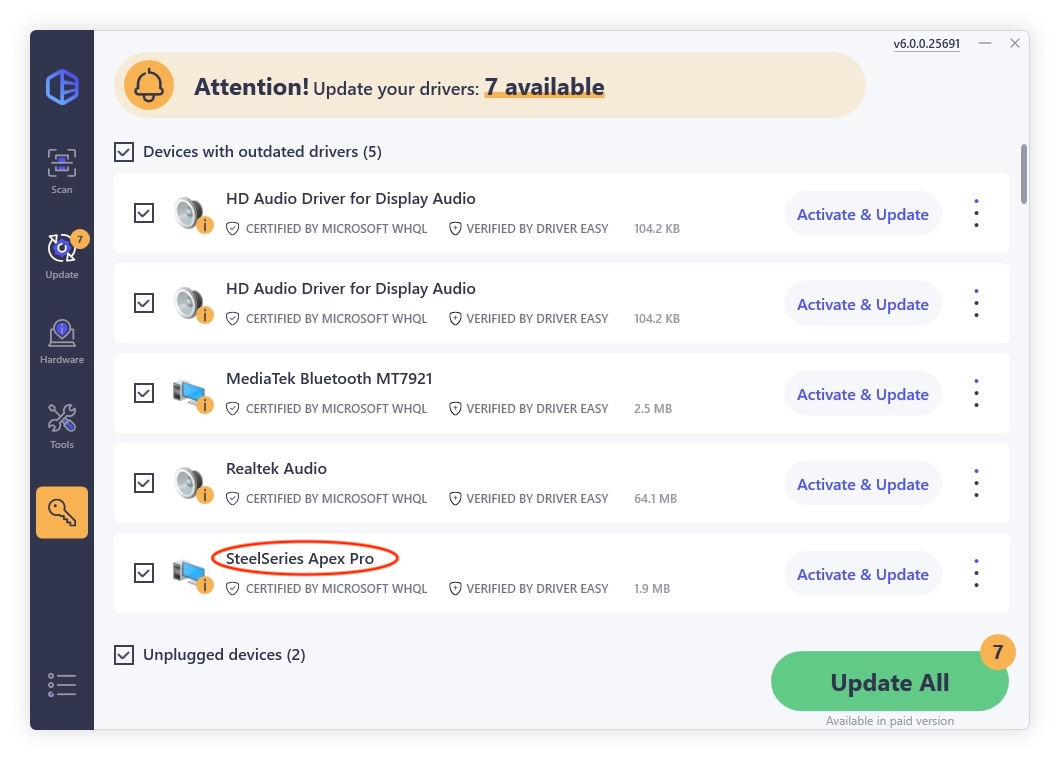
You can also click the Update All button at the bottom right to automatically update all outdated or missing drivers on your computer. (You’ll need the Pro version for this – when you select Update All, you’ll get a prompt to upgrade. If you’re not prepared to purchase the Pro version yet, Driver Easy provides a 7-day trial at no cost, granting access to all Pro features like fast downloads and easy installation. No charges will occur until after your 7-day trial period ends.)
Once you’ve updated the driver for your SteelSeries Actis Pro, you can restart your computer and check if the microphone is working.
Fix 5: Make sure to use the correct Default Format
1) On your keyboard, press the Windows logo key and the R key at the same time to open the Run box.
2) In the Control Panel window, view by Large icons, and then select Sound.
3) In the Sound windows, select the Recording tab.
4) Right-click the microphone you are using and select Properties.
5) Under the Advanced tab, make sure the Default Format is set to 48000 Hz.
If unfortunately, the fixes above failed to fix the microphone not working for you, you should check if this is a hardware-related issue. You can connect it to another port or another device.
If it’s working properly on other devices, you can back up your files and use the Windows 10 reset guide to reset/reinstall the Windows.
But if none of these works, you can contact SteelSeries Support and let the professionals do the work for you.