


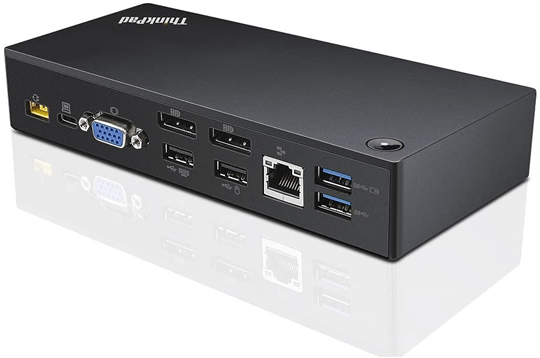
Lenovo USB-C Dock is a new-gen docking station that takes care of your multitasking needs by offering a full array of device connection options. Versatile as it is, it’s important that you keep its drivers up-to-date to make sure the peripherals connected to the station work properly.
In this tutorial, we’ll guide you through the process of updating the drivers for your Lenovo USB-C Dock, both automatically and manually.
To update Lenovo USB-C Dock drivers in Windows
Option 1 – Automatically (Recommended) – This is the quickest and easiest option. It’s all done with just a couple of mouse clicks – easy even if you’re a computer newbie.
OR
Option 2 – Manually – You’ll need some computer skills and patience to update your drivers this way, because you need to find exactly the right the driver online, download it and install it step by step.
Option 1 – Update Lenovo USB-C Dock drivers for Windows automatically (Recommended)
If you don’t have the time, patience or computer skills to update Lenovo USB-C Dock drivers manually, you can do it automatically with Driver Easy.
Driver Easy will automatically recognize your system and find the correct drivers for it. You don’t need to know exactly what system your computer is running, you don’t need to risk downloading and installing the wrong driver, and you don’t need to worry about making a mistake when installing. Driver Easy handles it all.
You can update your drivers automatically with either the FREE or the Pro version of Driver Easy. But with the Pro version it takes just 2 clicks:
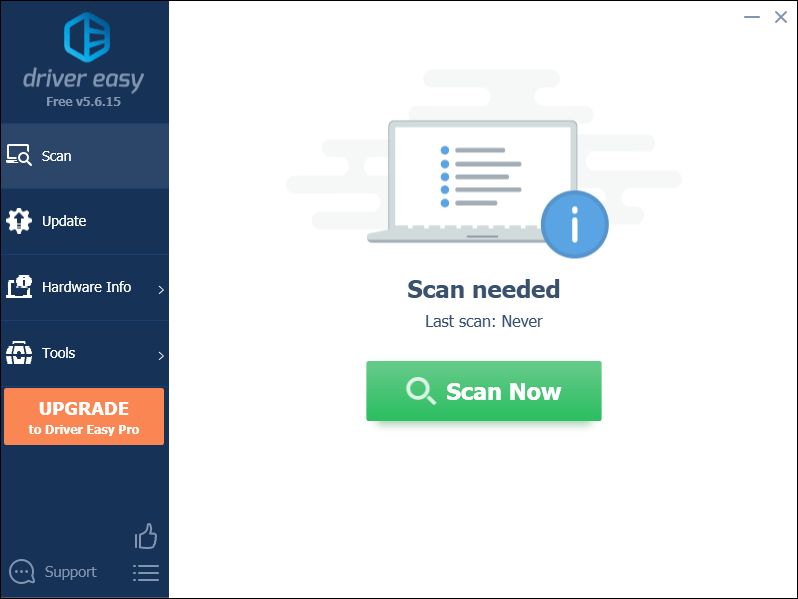
- Download and install Driver Easy.
- Run Driver Easy and click the Scan Now button. Driver Easy will then scan your computer and detect any problem drivers.
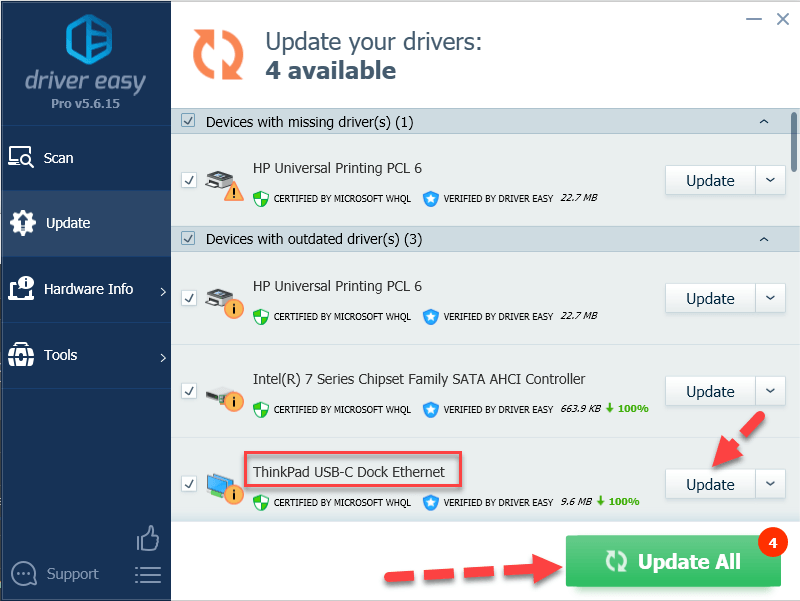
- Click Update All to automatically download and install the correct version of all the drivers that are missing or out of date on your system (this requires the Pro version – you’ll be prompted to upgrade when you click Update All).
- Restart your computer for the changes to take effect.
Now congrats – you’ve already updated the USB-C Dock driver for your Windows PC.
Option 2 – Update Lenovo USB-C Dock drivers manually
Updating the USB-C Dock drivers involves going to the manufacturer’s official website, sorting through the drivers for the one matching your model of the station and the specific flavor of Windows version (for example, Windows 64 bit), downloading the driver and manually installing it. It may sound complicated, but here I break it down step by step so that it can be easier for you to follow.
If you don’t mind getting your hands dirty, let’s jump right in.
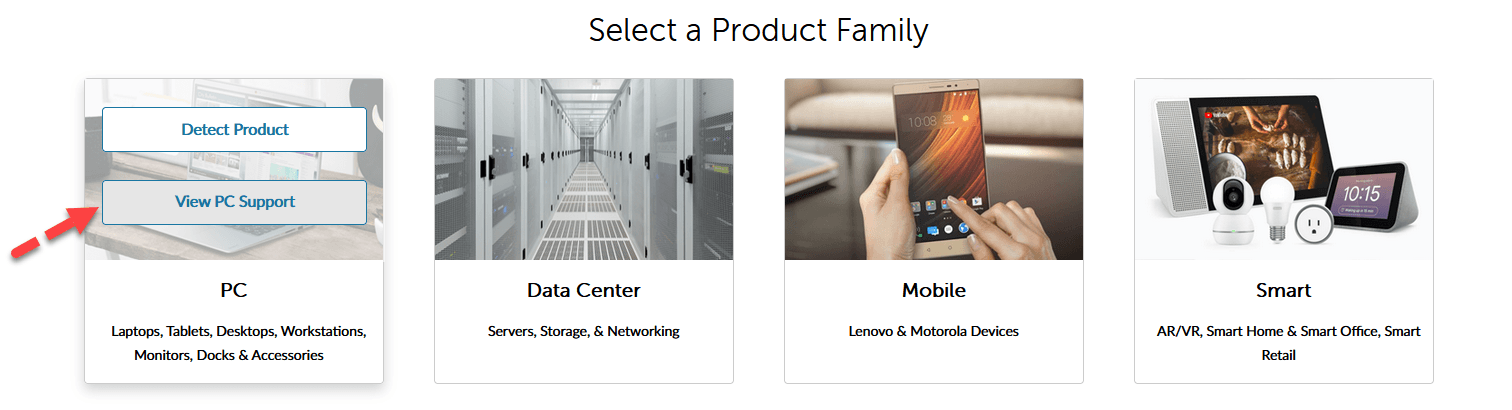
- Go to Lenovo official website, then click SUPPORT in the top navigation section.

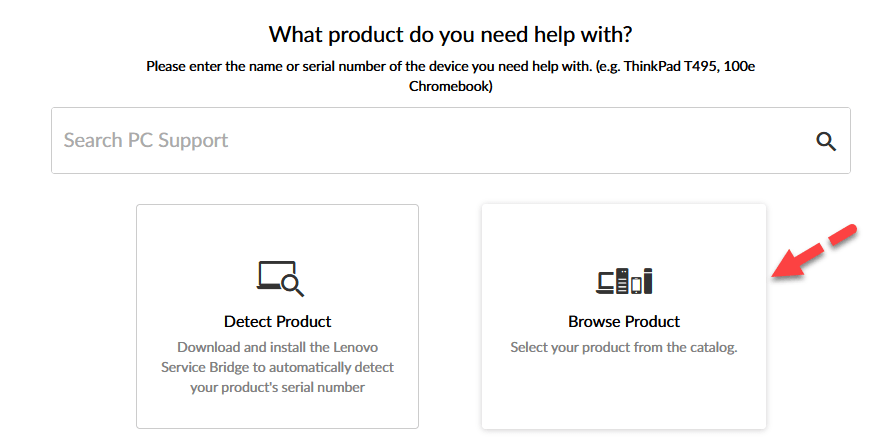
- From Select a Product Family, choose View PC Support. Alternatively, you can choose Detect Support to make Lenovo do the legwork. Since this is the manual method, I make it purely manual.
- Select Browse Product.
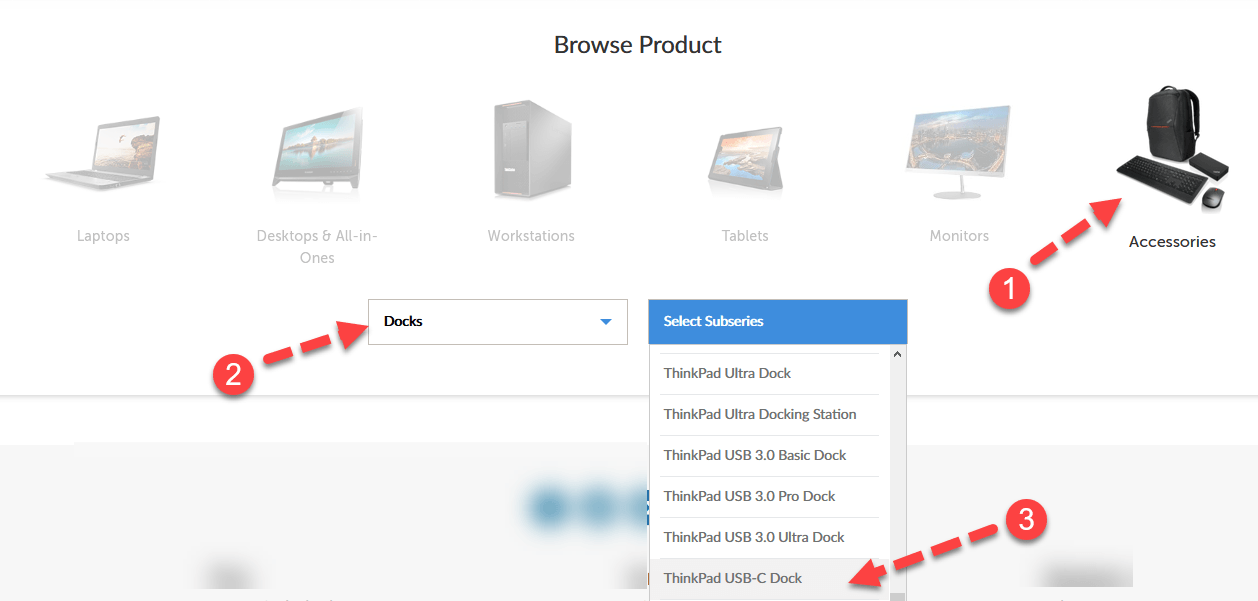
- Choose Accessories, then in the drop-down menus, choose Docks > Thinkpad USB-C Dock respectively.
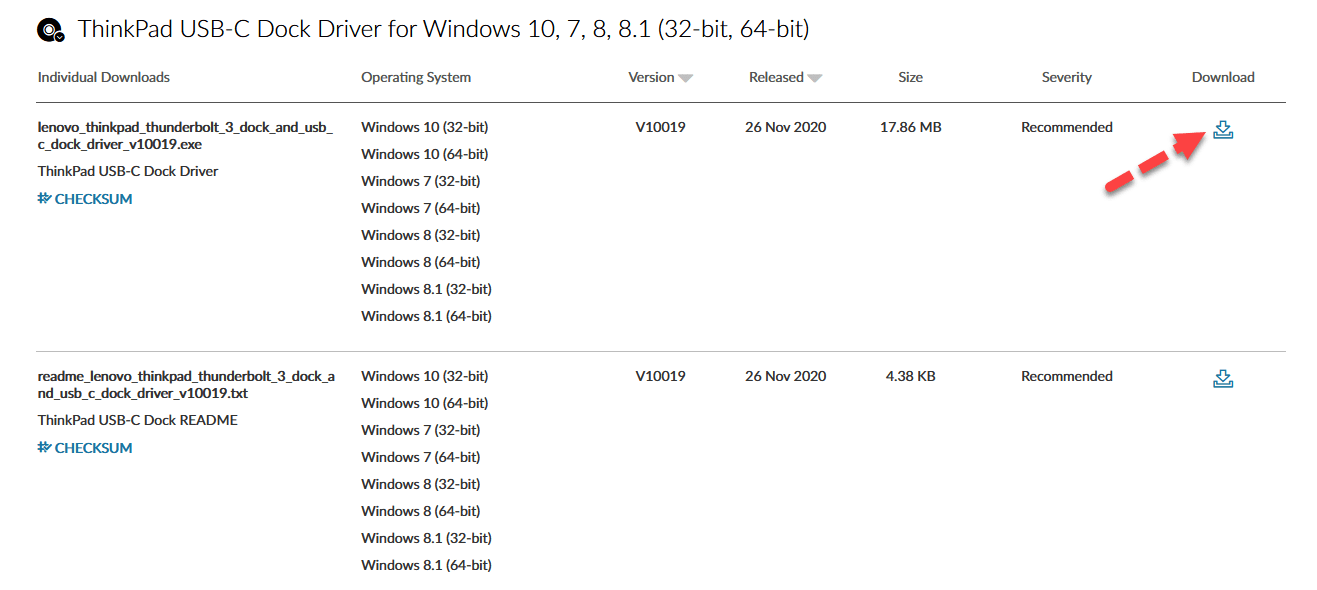
- In the result page, choose the driver corresponding to your Windows version and click the Download icon. Be sure to select the first download for the latest release.
- Once the download is complete, extract the file.
- Double-click on the execution file and follow the on-screen instructions to install.
- Don’t forget to restart your computer for the changes to take effect.
Now congrats – you’ve already updated the USB-C Dock driver for your Windows PC.
That’s it – hopefully this post helped. If you have any questions, ideas or suggestions, you’re more than welcome to leave us a comment below.