


If you’re using an AMD graphics card but randomly run into display issues, you could reinstall the AMD drivers to fix it. In this post, we’ll walk you through the entire process to reinstall AMD drivers easily and quickly.
2 steps to reinstall AMD drivers:
Step 1 – Uninstall AMD drivers
Use Device Manager
First off, you need to remove the AMD drivers completely from your PC. You can do this in Device Manager, a Windows built-in tool for viewing and controlling hardware.
- On your keyboard, press the Windows key and the R key at the same time, then type devmgmt.msc and hit Enter.

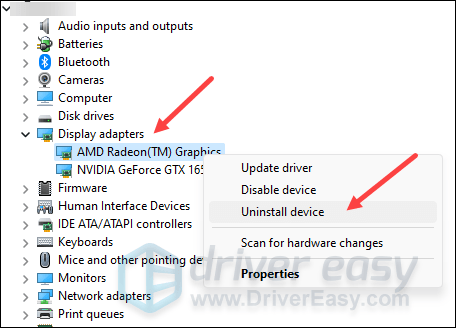
- Double-click to expand the Display adapters category, then right-click your display card and select Uninstall device.
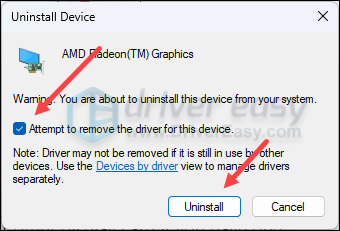
- Tick the box for Attempt to remove the driver for this device and click Uninstall.
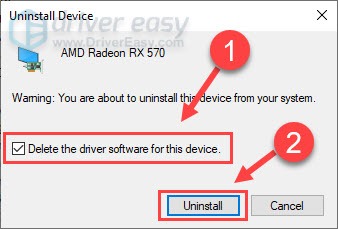
- On Windows 10, 8.1, 8 and 7, the option says Delete the driver software for this device, but it works the same. Tick the box and click Uninstall.
When it’s done, the AMD graphics card will disappear from the list. Restart the computer, and Windows should automatically install the AMD driver for you. However, Windows usually installs the generic device drivers instead of the latest versions. So for the next step, you can install the newest AMD drivers.
Use Display Driver Uninstaller (DDU)
If you want to perform a clean reinstall of the AMD graphics driver, you can use Display Driver Uninstaller (DDU), one of the most powerful driver removal utilities, to completely uninstall the graphics driver.
Step 2 – Install the latest AMD drivers
To get the most out of your hardware and fix the issues once and for all, you need to keep your drivers up to date. An outdated device driver can lead to performance drops and system instability. There are two easy ways for you to get the correct and up-to-date AMD drivers: manually or automatically.
Option 1 – Manually download and install drivers from AMD
AMD keeps updating its drivers to fix bugs or add features. You can go straight to AMD’s support website, find the drivers corresponding to your specific flavor of Windows version (for example, Windows 11, 64-bit), and download the driver manually.
Once you’ve downloaded the correct drivers for your system, double-click the downloaded file and follow the on-screen instructions to install the driver.
Option 2 – Install the AMD drivers automatically (recommended)
If you don’t have the time, patience or computer skills to install the AMD driver manually, you can do it automatically with Driver Easy.
Driver Easy will automatically recognize your system and find the correct drivers for it. You don’t need to know exactly what system your computer is running, you don’t need to risk downloading and installing the wrong driver, and you don’t need to worry about making a mistake when installing.
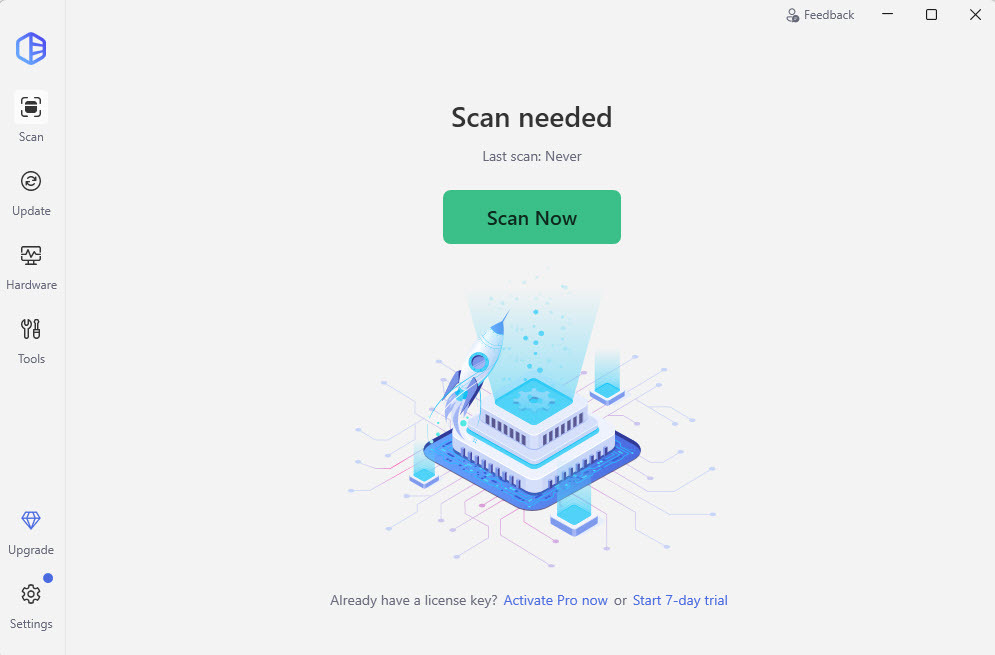
- Download and install Driver Easy.
- Run Driver Easy and click the Scan Now button. Driver Easy will then scan your computer and detect any problem drivers.
- Click Update All to automatically download and install the correct version of all the drivers that are missing or out of date on your system.
(This requires the Pro version, which comes with automatic driver downloads and updates as well as full technical support. You’ll be prompted to upgrade when you click Update All. If you’re not ready to buy the Pro version, Driver Easy offers a 7-day free trial that includes access to all the Pro features. You won’t be charged anything until your 7-day trial has ended.)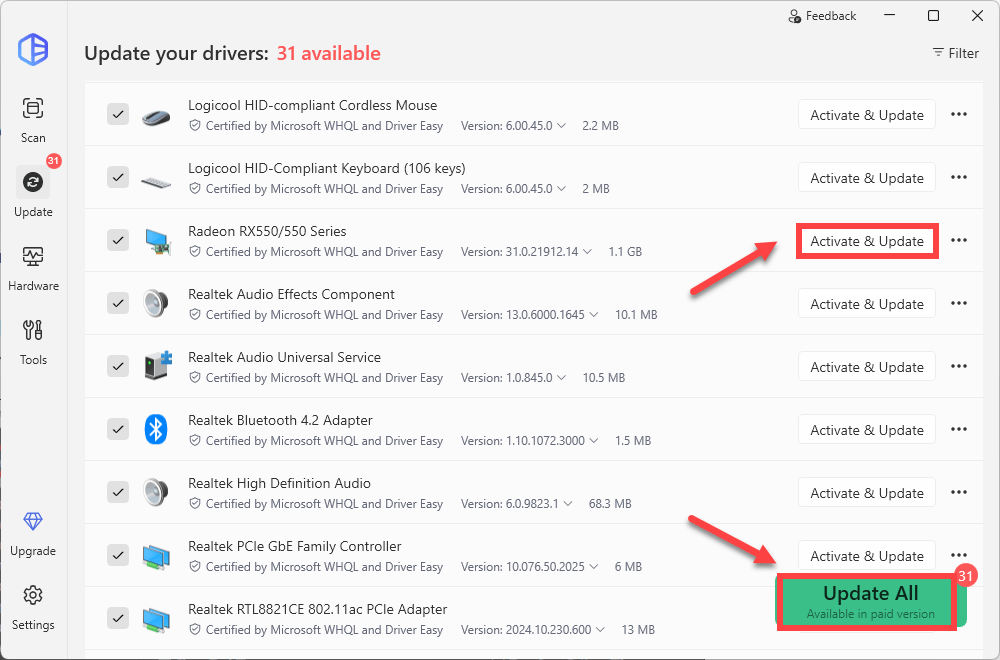
- Restart your computer for the changes to take effect.
If you need assistance, please contact Driver Easy’s support team at support@drivereasy.com.
So these are 2 steps to reinstall AMD drivers. Hopefully the reinstallation resolves your issues. If you have further questions or suggestions, please let us know by leaving a comment below.
