


Astro gaming headsets are equipped with a highly sensitive uni-directional mic that focuses on your voice and minimizes background noise. However, it can bump into problems sometimes. If you happen to be one of them and wonder how to fix it by reinstalling Astro drivers, here’s a step-by-step guide for you.
About Astro drivers
Astro Gaming doesn’t provide specific drivers for their headsets and controllers. Instead, Logitech (which bought Astro back in 2017) or Windows will do the job for you.
This means you don’t need to install Astro-specific drivers. But if you have problems with your headsets or other Astro products, you can update or install related drivers such as NVIDIA or Realtek audio drivers.
If you have no idea how to fix the problem yourself, below we’ll walk you through the steps to either do it manually or automatically.
How to update Astro drivers
If your Astro headset is not working properly, it’s very likely the related audio drivers are corrupted or outdated. You can reinstall or update the driver to fix sound or microphone issues:
There are mainly two ways for you to update the Astro driver:
Automatically – If you don’t have the time, patience, or computer skills to update your drivers manually, you can do it automatically with Driver Easy. Driver Easy will automatically recognize your system and find the correct drivers for any devices, such as the audio driver and graphics driver, and then it will download and install them correctly.
Manually – The manual updating takes time and requires computer skills. To update the Astro driver manually, you’ll need to update the HyperX Virtual Surround Sound driver via Device Manager. Then you need to download the latest Realteck High Definition Device driver from the support page of your device manufacturer, and then install it manually.
Method 1. Automatically
To save your time, or make sure you’re doing it the right way, you can keep all your device driver (including drivers to make your Astro headsets work) up to date automatically.
Driver Easy will automatically recognize your system and find the correct drivers for it. You don’t need to know exactly what system your computer is running, you don’t need to risk downloading and installing the wrong driver, and you don’t need to worry about making mistakes when installing.
You can update your drivers automatically with either the 7 days free trial or the Pro version of Driver Easy. It takes just 2 clicks, and you get full support and a 30-day money-back guarantee with the Pro version:
- Download and install Driver Easy.
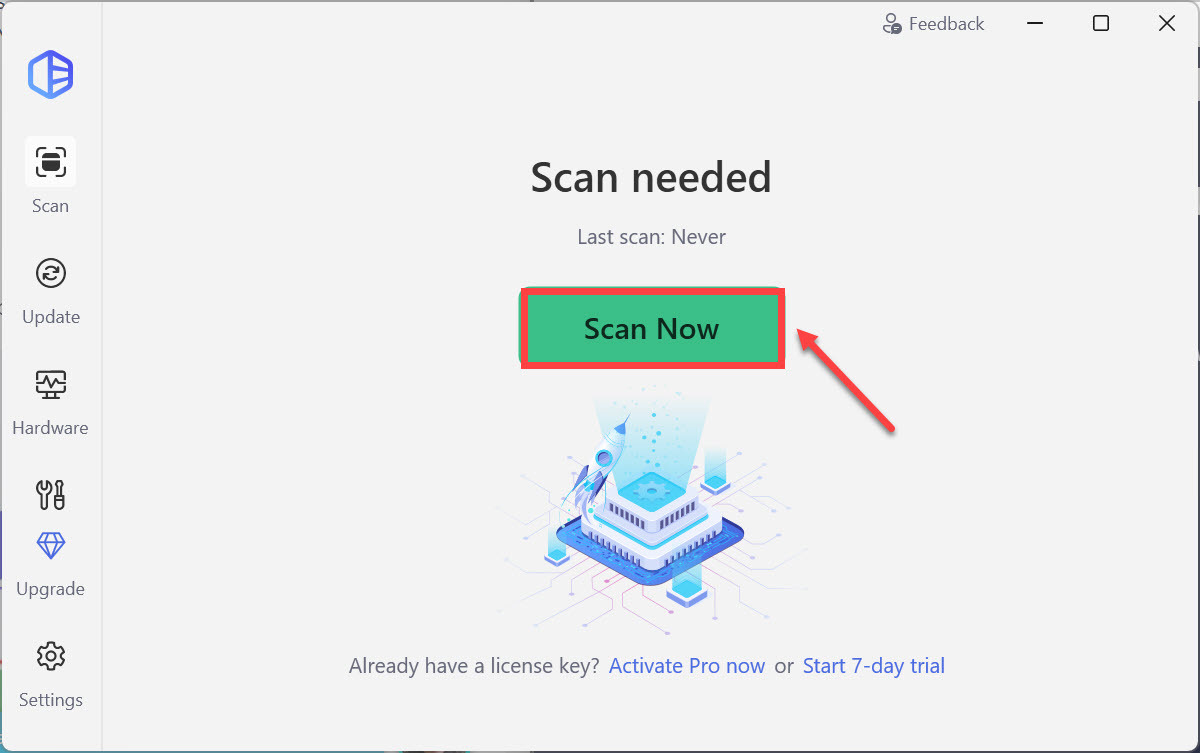
- Run Driver Easy and click the Scan Now button. Driver Easy will then scan your computer and detect any problem drivers.
- Click the Activate & Update button next to the flagged device to automatically download and install the correct version of this driver.
Or click Update All to automatically download and install the correct version of all the drivers that are missing or out of date on your system (You’ll need the Pro version for this – when you select Update All, you’ll get a prompt to upgrade. If you’re not prepared to purchase the Pro version yet, Driver Easy provides a 7-day trial at no cost, granting access to all Pro features like fast downloads and easy installation. No charges will occur until after your 7-day trial period ends.)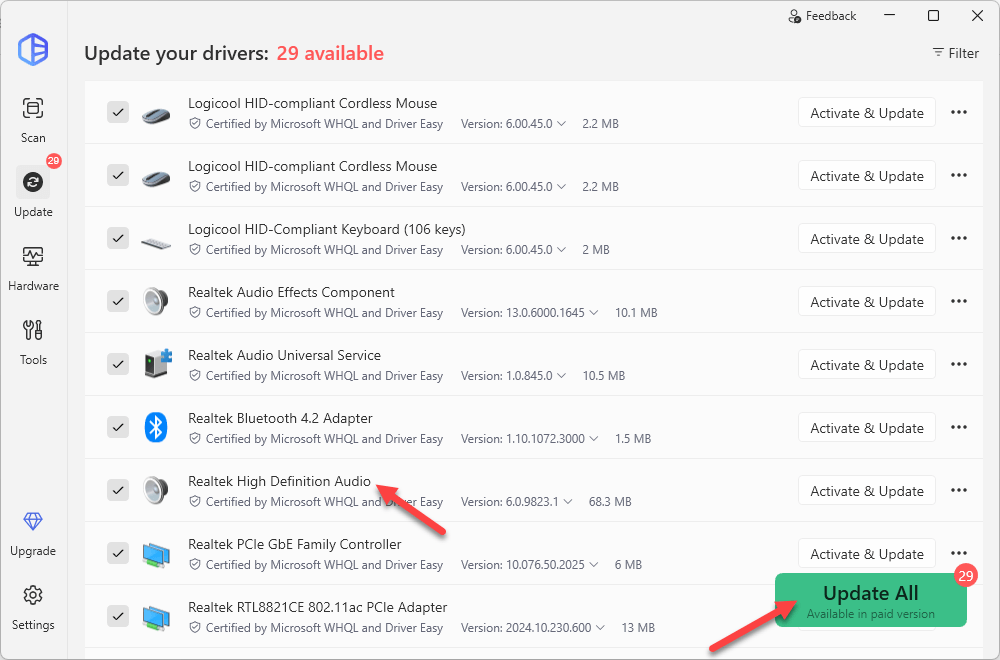
- After updating, restart your computer to take effect.
Method 2. Manually
Astro drivers are automatically provided and updated through Microsoft, but you can’t rely on Windows to get the latest driver because it doesn’t always deliver the latest one (learn why…). If you prefer to do it the Windows way, here’s how to update or reinstall Astro drivers manually.
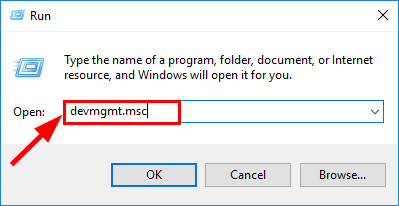
- On your keyboard, press the Windows logo key + R at the same time. Enter devmgmt.msc to open the Device Manager.
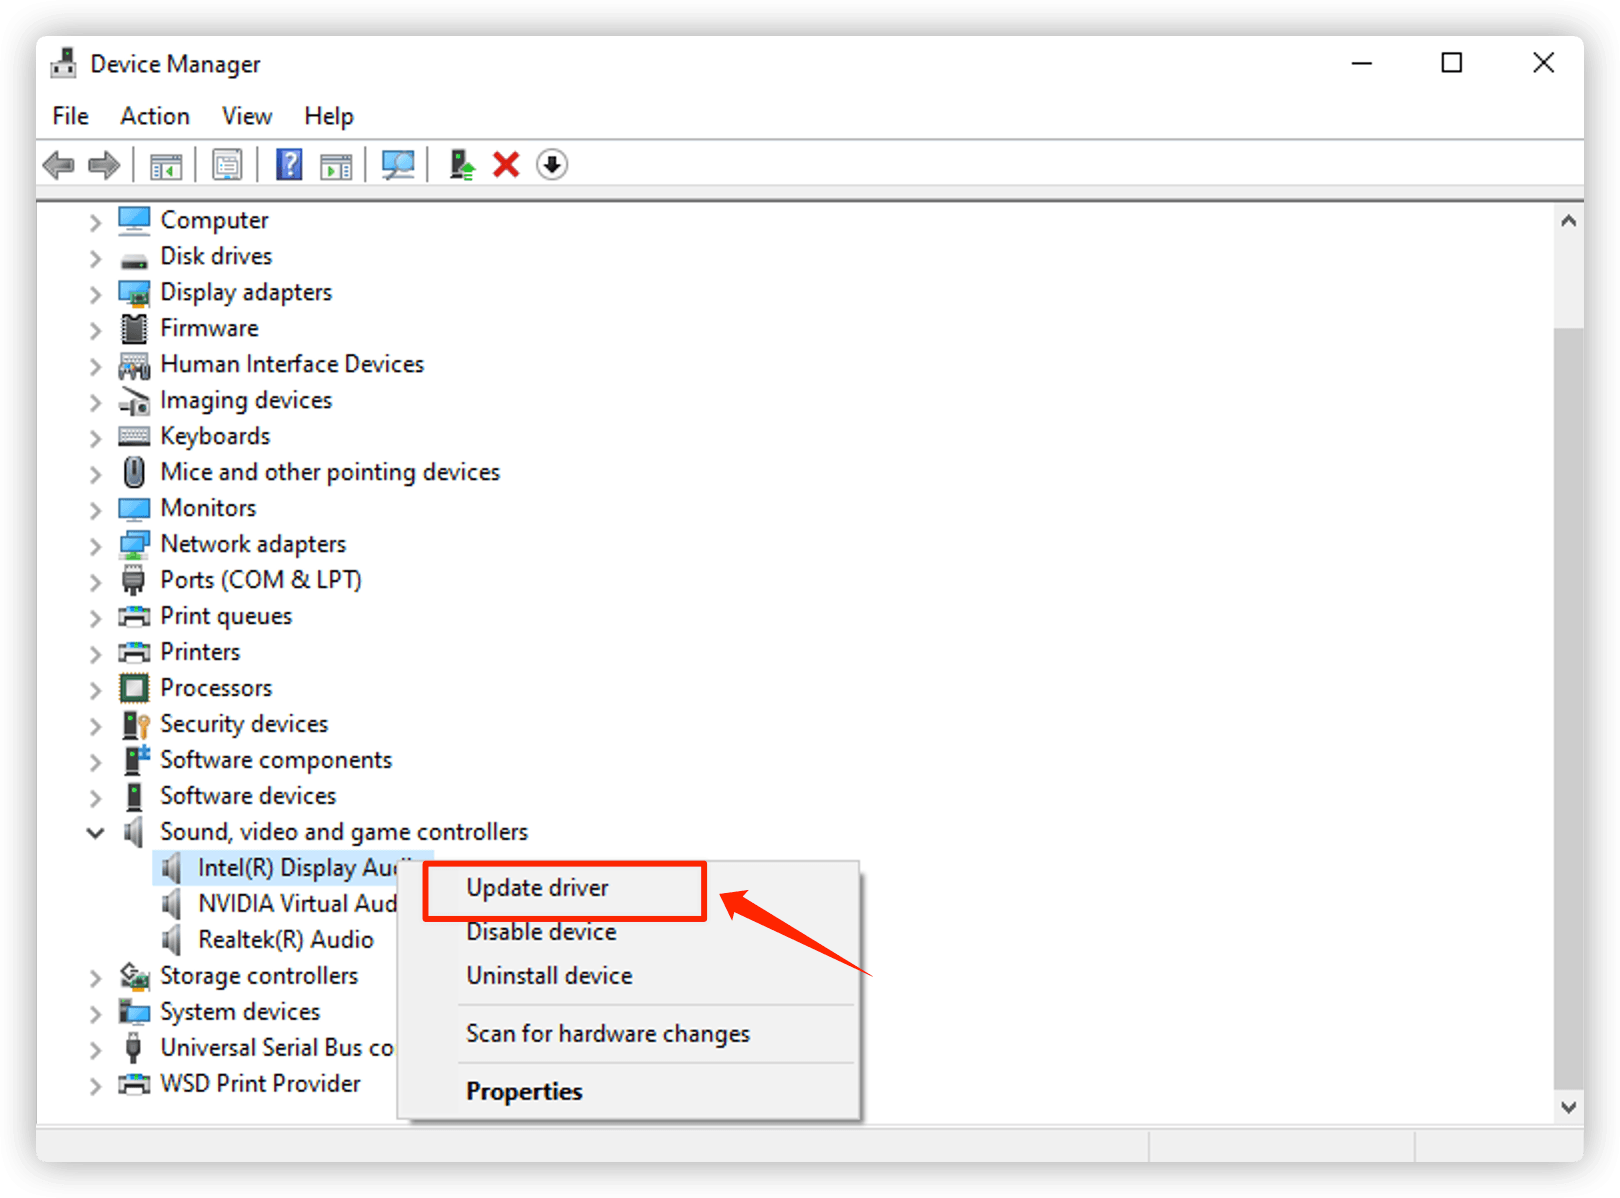
- Expand the Sound, video and game controllers category. Right-click the listed audio drivers, and select Update driver.
- If there’s no update available, you can uninstall these devices, and reboot your PC. Once completed, the driver will be installed automatically.
If you want to update Astro drivers to fix some audio issues, you can either update related drivers automatically, or you can go to Device Manager to update/uninstall them one by one.