


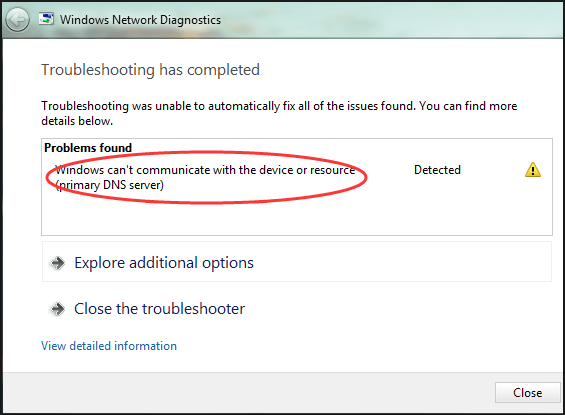
After powering on your computer, you find you can’t have access to the internet, then you troubleshoot the problem using Windows Network Diagnostics tool. After the troubleshooting completed, you get this error message: Windows can’t communicate with the device or resource (primary DNS server). You’re not sure how to fix the problem, right? But don’t worry. You can fix the error with one of the solutions below.
This network problem is probably caused by DNS (Domain Name Server) issues and network driver issues. There are five solutions you can try to fix it. You may not have to try them all. Just work your way down at the top of the list until you find the one that works for you. All steps apply to Windows 10, 7, 8 & 8.1.
- Update network driver
- Obtain the DNS server address and IP address automatically
- Change the DNS to Google’s public DNS
- Clear DNS cache
- Modify the hosts file
Solution 1: Update the network driver
The problem can be caused by a faulty network driver. To resolve the problem, you can update the network driver. There are two ways for you to update the network driver: manually or automatically.
Manual driver update – You can update your network driver manually by going to the manufacturer’s website for your network card, and searching for the most recent correct driver. Be sure to choose only drivers that are compatible with your variant of Windows version.
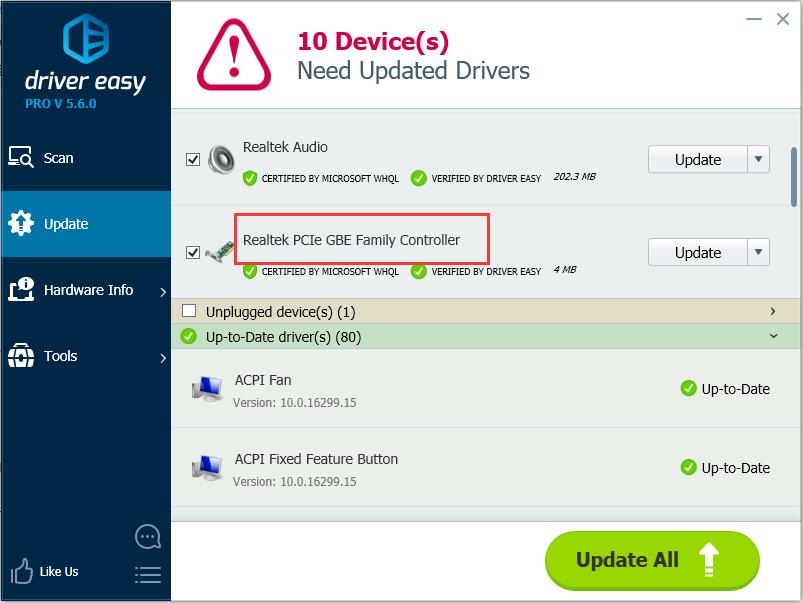
Automatic driver update – If you don’t have the time, patience or computer skills to update your network card driver manually, you can, instead, do it automatically with Driver Easy. Driver Easy will automatically recognize your system and find the correct drivers for your network card, and your variant of Windows version, and it will download and install them correctly.
1) Download and install Driver Easy.
2) Run Driver Easy and click the Scan Now button. Driver Easy will then scan your computer and detect any problem drivers.

3) Click the Update button next to the flagged network driver to automatically download and install the correct version of that driver (you can do this with the FREE version).
Or click Update All to automatically download and install the correct version of all the drivers that are missing or out of date on your system. (This requires the Pro version which comes with full support and a 30-day money back guarantee. You’ll be prompted to upgrade when you click Update All.)
4) After updating the driver, check to see if the problem is resolved.
If updating the network driver doesn’t work for you, you can check if you get DNS pollution cache issue, which may be the cause of Windows can’t communicate with the device or resource (primary DNS server) error.
Follow steps below to verify if your get DNS pollution cache issue:
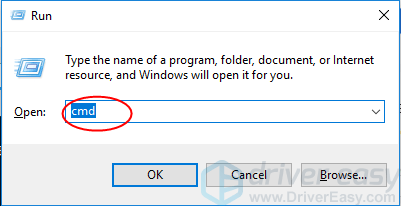
1) On your keyboard, press Win+R (Windows logo key and R key) at the same time to invoke the Run command box.
2) Type cmd and press Enter to open the command prompt window.
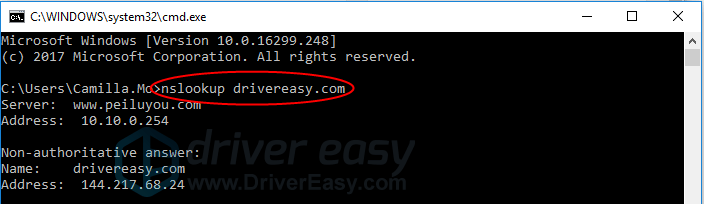
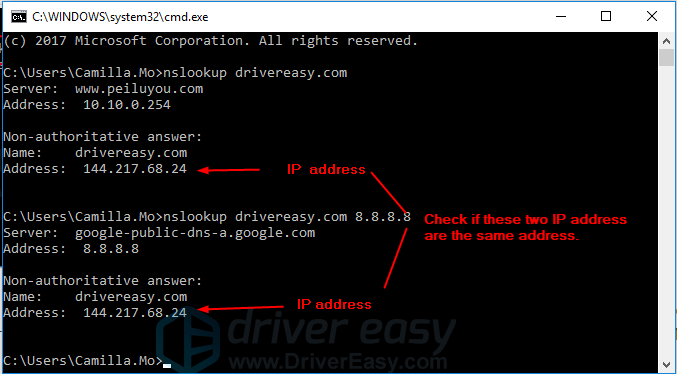
3) Type nslookup + a website address you wish to open, then press Enter on your keyboard.
For example: nslookup drivereasy.com
4) Type nslookup + a website address + 8.8.8.8 you wish to open (8.8.8.8 is Google’s free public DNS.), then press Enter on your keyboard.
For example: nslookup drivereasy.com 8.8.8.8
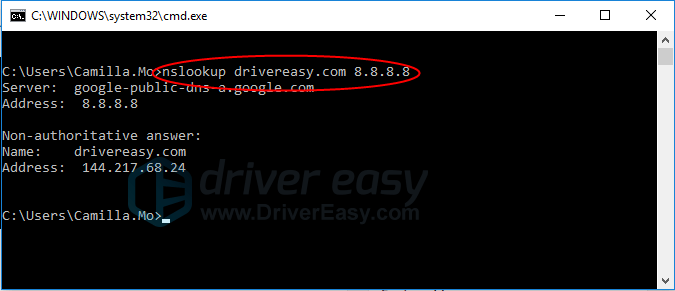
Check if Step 3) and Step 4) return a same IP address. If they return a same IP address, you probably don’t get DNS pollution cache issue. If they return a different IP address, your network problem is caused by DNS polluiton cache. Then try Solution 2 to Solution 5.
Solution 2: Obtain the DNS server address and IP address automatically
Follow these steps:
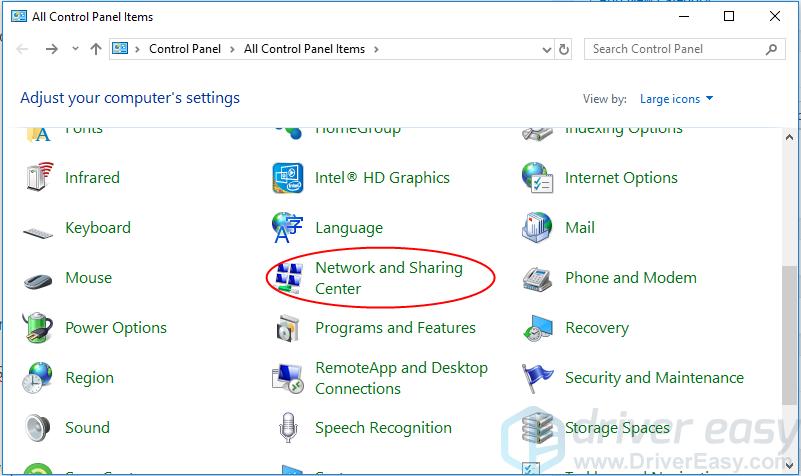
1) Open Control Panel.
2) View by Large icons. Click Network and Sharing Center.
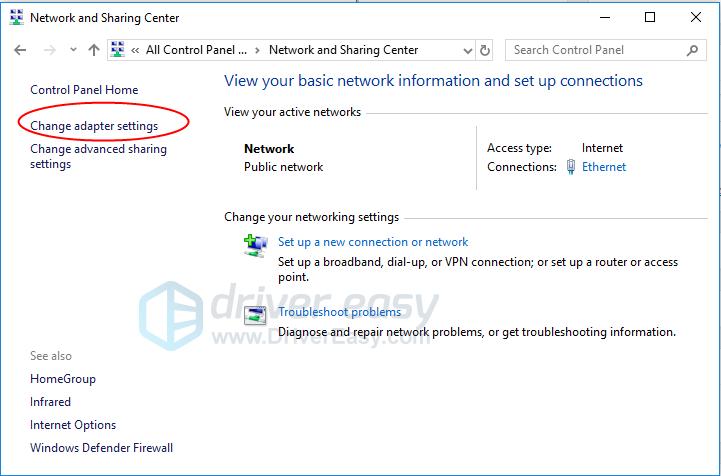
3) Click Change adapter settings.
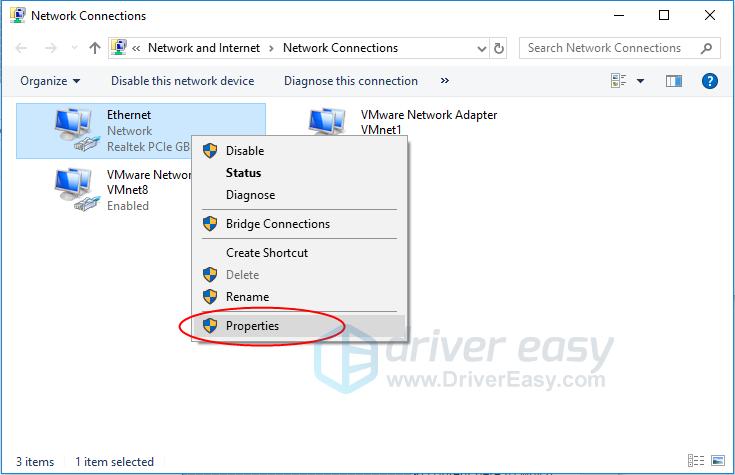
4) Right click the network you’re using and select Properties.
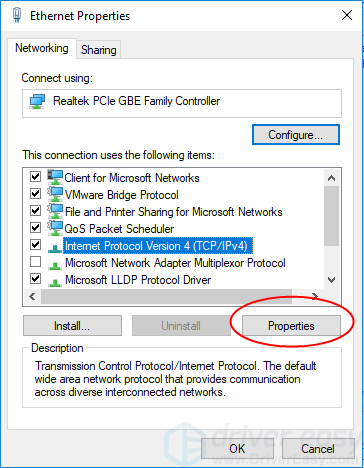
5) High-light Internet Protocol Version 4 (TCP/IPv4) and click Properties.
6) Check Obtain and IP address automatically and Obtain DNS server address automatically.
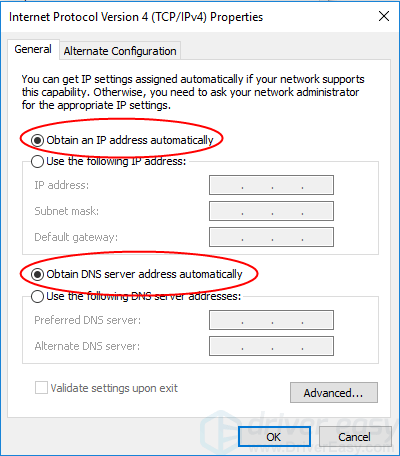
7) Click OK to save the changes.
8) Repeat above steps for Internet Protocol Version 6 (TCP/IPv6).
9) Restart your computer and see if the problem is resolved.
Solution 3: Change the DNS to Google’s public DNS
Follow these steps:
1) Open Control Panel.
2) View by Large icons. Click Network and Sharing Center.
3) Click Change adapter settings.
4) Right click the network you’re using and select Properties.
5) High-light Internet Protocol Version 4 (TCP/IPv4) and click Properties.
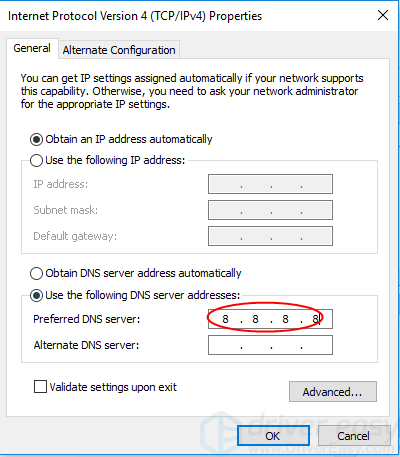
6) Check Use the following DNS server addresses. In the Preferred DNS server field, type 8.8.8.8.
7) Click OK to apply the changes.
8) Restart your computer and see if the problem is resolved.
Solution 4: Clear DNS cache
Follow these steps:
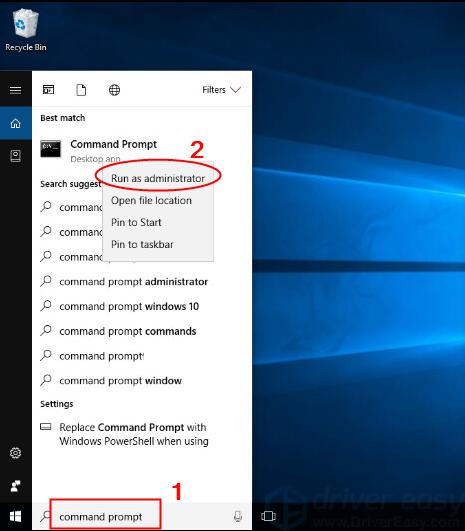
1) Type command prompt in the search box. Right click Command Prompt and select Run as administrator.
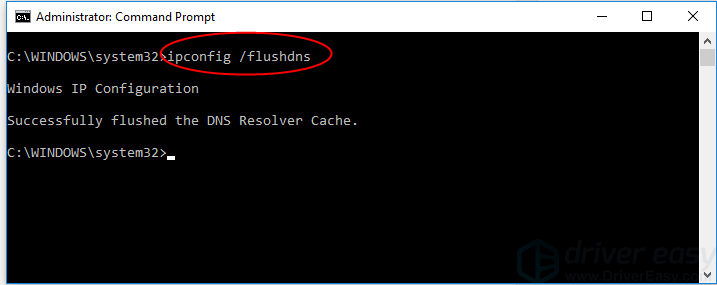
2) Type ipconfig /flushdns and press Enter on your keyboard.
3) Check to see if the problem is resolved.
Solution 5: Modify the hosts file
Follow these steps:
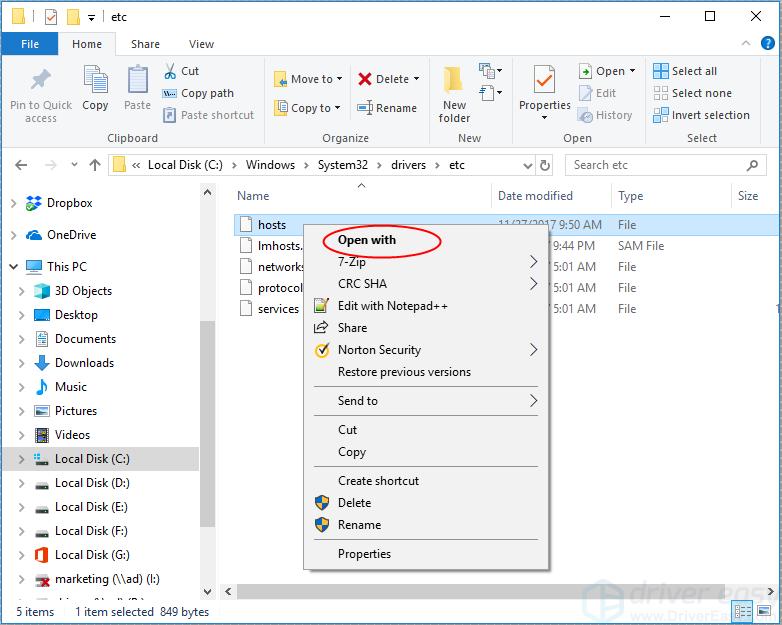
1) Open C:\Windows\System32\drivers\etc.

2) Open hosts file with Notepad.
3) Delete all content.
4) On your keyboard, press Ctrl + S (Control key and S key at the same time) to save the file.
5) Check to see if the problem is resolved.
Hope the solutions here help you fix the Windows can’t communicate with the device or resource error. If you have any questions, please leave your comment. I’d love to hear of any ideas and suggestions.
You may also like…