


AMD Radeon R9 series of graphics card is one of the perfect choices for gamers. Windows 10 users have reported that they are having some problem with their AMD Radeon R9 series of graphics card.
For example, some users reported that the screen would go blank after 5 to 20 minutes into the games and the only thing left to do was to restart. And that the screen flickered when they are playing games and the screen brightness could not be adjusted.
In such case, you might need to consider getting your graphics card driver checked and fix any problem it has by yourself.
In this post, we will show you exactly how to do it. So, just read along and follow the instructions to get your graphics card back to normal.
Step one: Run DISM command
Step two: Run SFC command
Step three: Clean install AMD Radeon R9 display driver
Before we proceed with the following resolutions, please make sure that you have done the following things:
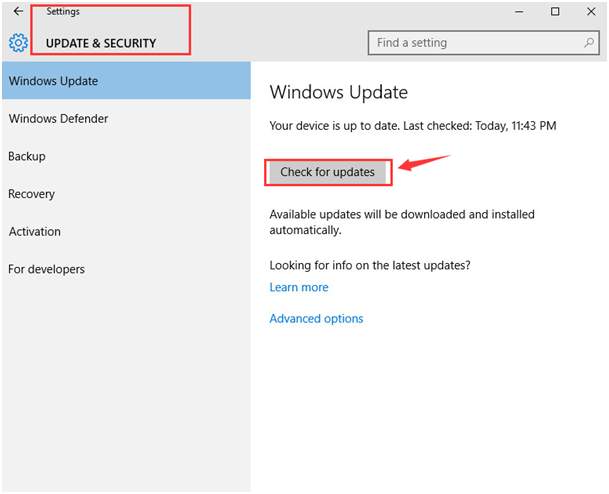
1) Check to see if you have installed the latest patches and fixes updates provided by Windows.In Windows, most patches and fixes are available through Windows Update. It is suggested that you check whether your computer has installed the latest released patches in Settings > Updates & security.
2) Make sure you have installed the latest version of the Microsoft .Net Framework. For more information as to how to install the latest version of Microsoft .Net Framework, please visit this post here.
Step one: Run DISM command
DISM stands for Deployment Image Servicing and Management, which is a tool that helps you scan the integrity of your Windows image.
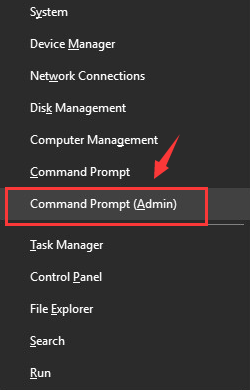
1) Press Windows key and X at the same time, then choose Command Prompt (Run as administrator).
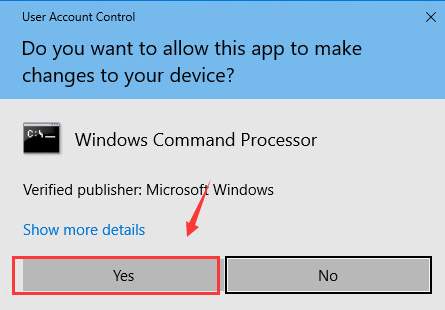
When prompted with administrator permission, press Yes to continue.
2) In the command prompt window, type in the following command:
DISM /Online /Cleanup-Image /RestoreHealthMake sure that you have made no typo, and hit Enter.
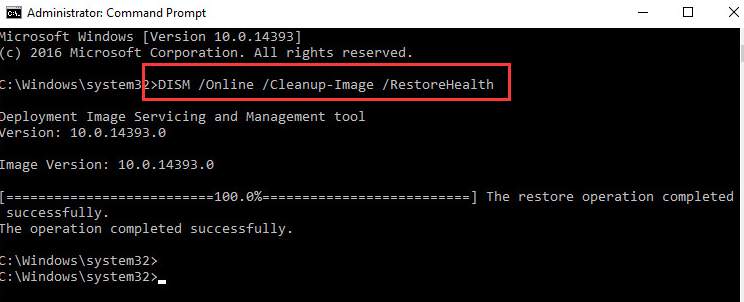
3) You need to wait for a while with patience for the process to finish, especially when it reaches 20%. The operation will finish in a few minutes.
Step two: Run SFC command
SFC stands for system file checker, which is another tool that helps you scan for all protected system files and will replace the corrupted, damaged and/or incorrect versions with correct Microsoft versions.
1) Press Windows key and X at the same time, then choose Command Prompt (Run as administrator).
When prompted with administrator permission, press Yes to continue.
2) In the command prompt window, type in command: SFC /SCANNOW. Make sure that you have made no typo and hit Enter.
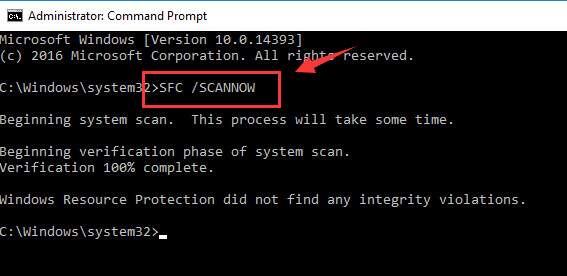
3) Wait for a while for the process to finish. If no problem is found here, please move on to the next step.
Step three: Clean install AMD Radeon R9 display driver
Note: Before proceeding with the steps below, it is highly suggested that you create a restore point first.
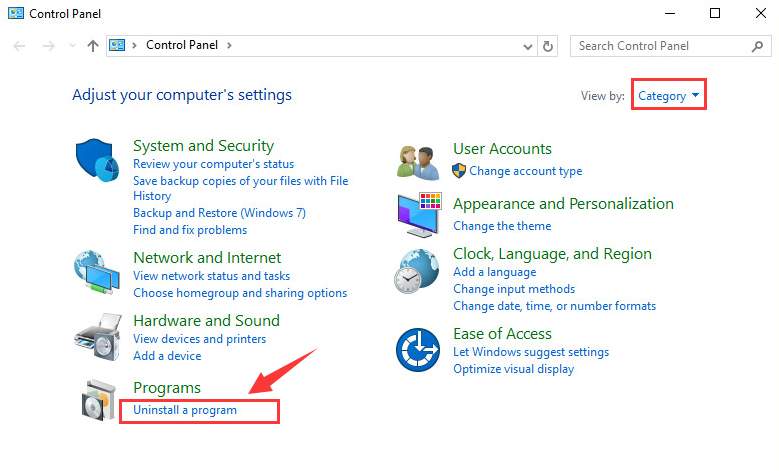
1) Follow the path: Start button > Control Panel > Uninstall a program (View by Category).
2) If you are with AMD processors, select Catalyst Control Center and choose Uninstall.
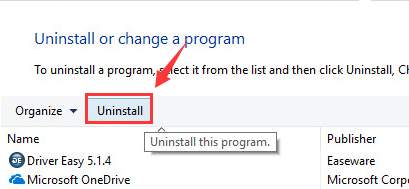
If you are with Intel processors, select to uninstall ALL AMD software that you can see in this window.
3) Press Windows key and X at the same time, then choose Device Manager.
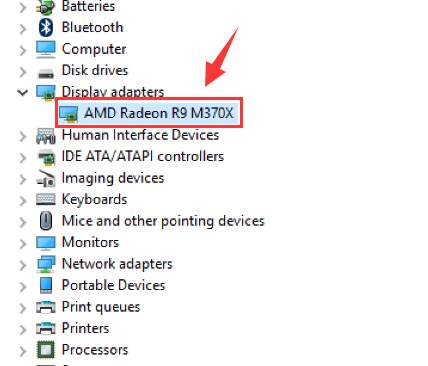
4) Locate Display adapters category, then double click the AMD Radeon R9 series of display driver that you have.
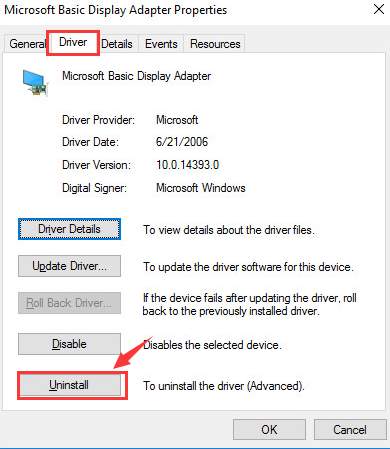
5) Under Driver tab, choose Uninstall.
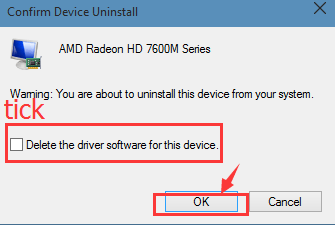
Tick the box for Delete the driver software for this device option and click OK to continue.
6) Reboot your PC.
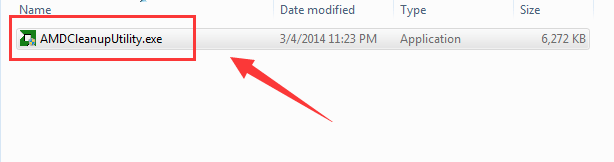
7) Then download the AMD Clean Uninstall Utility from its support website. Then double click the AMDCleanUtility.exe icon to run the application.
Then just follow the instructions on screen to get all your AMD driver and application components removed.
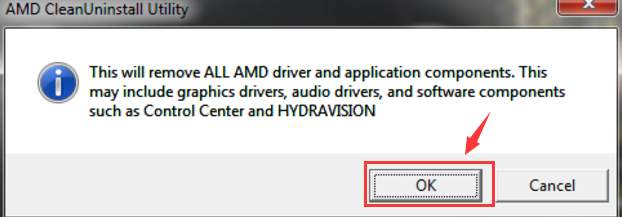
Your computer will restart when the whole process if finished.
Note: If you already have a trusted application or driver remover, you can use it to do the full uninstall too.
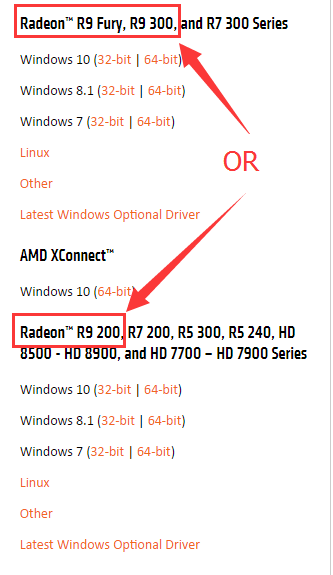
8) When your computer restart again, download the latest version of the AMD Radeon R9 series driver from AMD website and then install it manually.
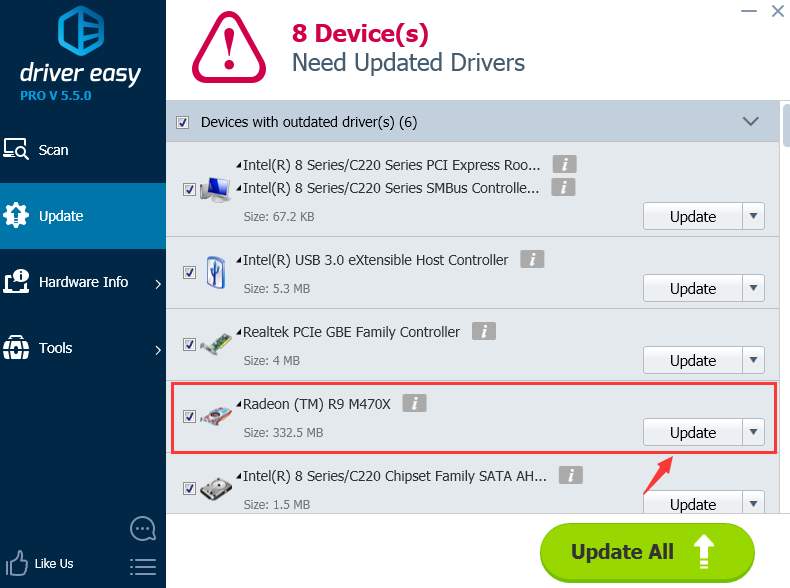
If you want to save yourself more time and energy for other things, you can leave your driver problems to Driver Easy. It automatically help you detects, downloads and updates device drivers that are missing or outdated on your computer. And, there are only two steps you take to do it:
Step one: press the Scan Now button so Driver Easy can help you detect for needed drivers.

Step two: press the Update button so Driver Easy can help you download the setup file for the device driver that you need.
If you want to enjoy more features such as driver backup and driver restore, as well as professional tech support waiting to solve your driver problems, you can have a try at the professional version of Driver Easy. If you are not satisfied with it, you can always ask for a refund thirty days within the purchase. Guaranteed.
What’s with the waiting, come on and have a try at Driver Easy now!