


If your Dell webcam is not working, especially when the operating system is reinstalled, you should reinstall or update your device drivers. But if you have no idea of how to do it, we’ve put together everything you need to know.
About Dell webcam drivers
When the integrated webcam on your Dell laptop is not working, the main cause is the webcam driver.
A driver is a small but essential software, working as the translator for your device and operating system. Without a webcam driver, your camera may not work properly.
2 ways to update your Dell webcam drivers
You’ll need some computer skills and patience to update your drivers this way because you need to find exactly the right driver online, download it and install it step by step.
This is the quickest and easiest option. It’s all done with just a couple of mouse clicks – easy even if you’re a computer newbie.
Method 1 – Manually reinstall Dell webcam drivers
Microsoft Windows operating system includes drivers for most devices, so you can perform a Windows Update before you try to download a specific driver. If this method doesn’t work, you can follow these steps:
1) On your keyboard, press the Windows key + R to invoke the Run box.
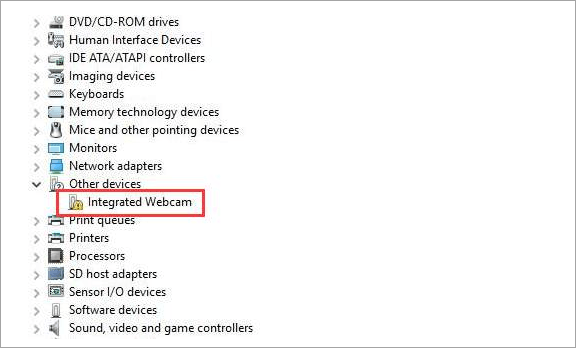
2) Type devmgmt.msc in the box, and press Enter.

3) The device may list under the entry Imaging devices or Other devices. Under Other devices, the device name could probably be Unknown Device.
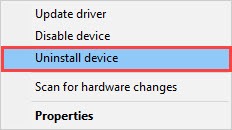
4) Right-click the device, and select Uninstall device.
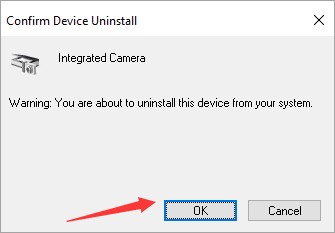
5) Click the OK button to confirm the uninstall.
6) Reboot your computer. Your webcam driver will be automatically installed after that.
However, if this doesn’t work for you, you may need to download the latest Windows 10 driver for the Dell integrated webcam from Dell Driver & Downloads.
Before you get started, ensure that you know the PC model and the specific operating system that you are using. Download the Dell webcam driver and install it manually (learn how…).
Or you can use SupportAssist to update your driver within their official support app.
Method 2 – Automatically update all device drivers
If you don’t have the time, patience or computer skills to update the webcam driver manually, you can do it automatically with Driver Easy.
Driver Easy will automatically recognize your system and find the correct drivers for it. You don’t need to know exactly what system your computer is running, you don’t need to risk downloading and installing the wrong driver, and you don’t need to worry about making a mistake when installing.
You can update your drivers automatically with either the FREE or the Pro version of Driver Easy. But with the Pro version it takes just 2 clicks:
1) Download and install Driver Easy.
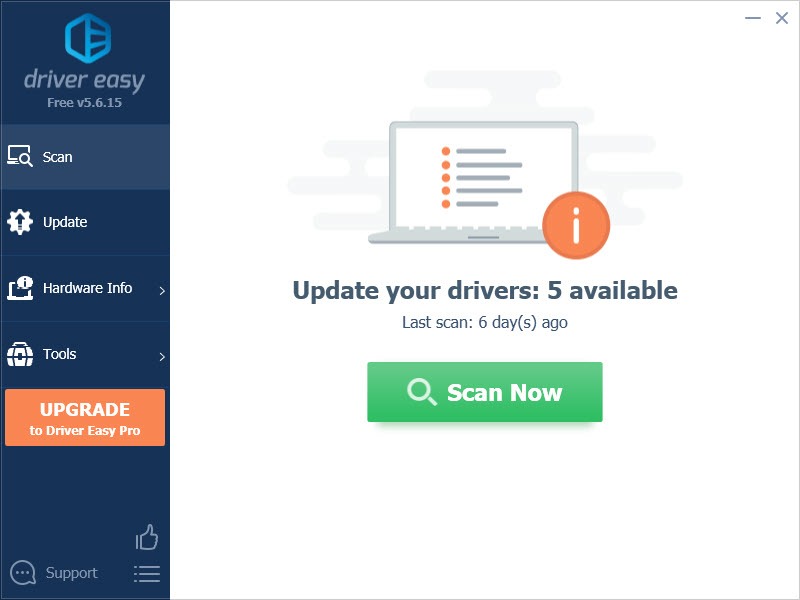
2) Run Driver Easy and click the Scan Now button. Driver Easy will then scan your computer and detect any problem drivers.
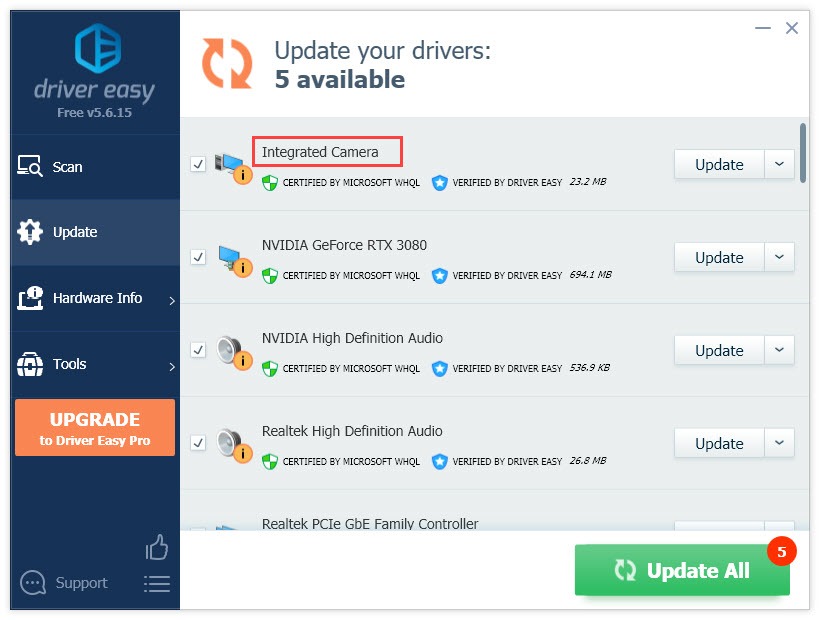
3) Click the Update button next to the flagged Logitech device to automatically download the correct version of the driver (you can do this with the FREE version), then install the driver on your computer.
Or click Update All to automatically download and install the correct version of all the drivers that are missing or out of date on your system (this requires the Pro version – You get full tech support and a 30-day money back guarantee.).
4) Restart your computer to take effect.
If you need assistance, please contact Driver Easy’s support team at support@drivereasy.com. Our support team would be happy to help you resolve this issue.
Hopefully, you find the article helpful. If you have any questions, ideas or suggestions, feel free to leave a comment below.