


If you receive an error message that says, “Your video adapter does not have the 3D Acceleration option“, or “Your video adapter does not meet the game requirements.”
It may be because:
- Direct3D Acceleration is disabled;
- The latest version of DirectX is not installed or is damaged;
- Your graphics card driver is outdated or missing;
- Your computer doesn’t meet the minimum 3D hardware requirements to run the application.
How to fix Direct3D Acceleration not available
Solution 1: Verify your Direct3D is enabled and DirectX version is up to date
Solution 2: Update your graphics card driver
Solution 3: Reinstall Visual C++ Redistributables
Solution 1: Verify your Direct3D is enabled and DirectX version is up to date
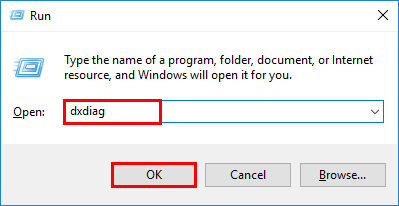
- On your keyboard, press the Windows logo key
 and
and R key at the same time to invoke the Run box.
- Type dxdiag and click OK.
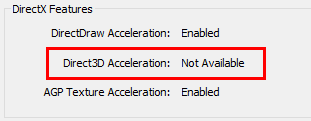
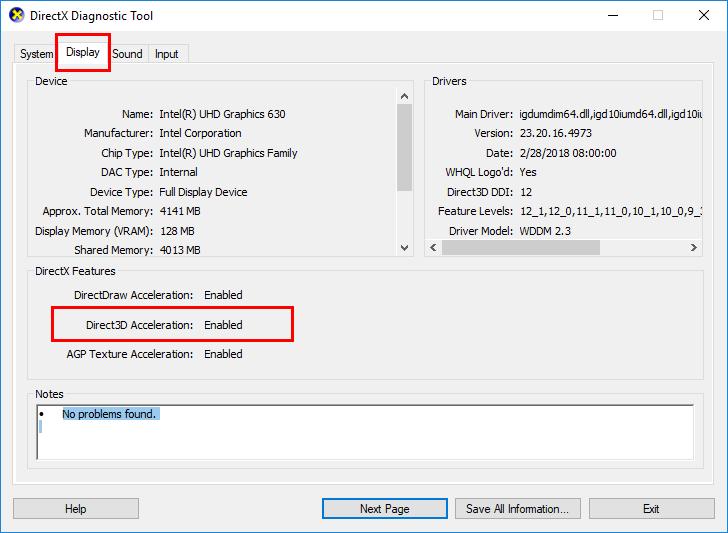
- In DirectX Diagnostic Tool, click on the Display tab to check if your Direct3D Acceleration is enabled. If not, click to enable it.
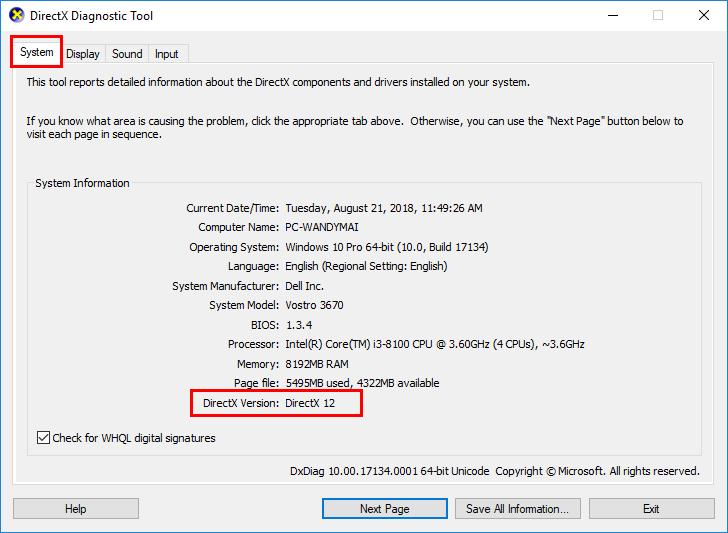
- Click on the System tab to check your DirectX Version. If it doesn’t meet the requirement (DirectX 9.0 and later), you should update your DirectX version in your system. Updating DirectX varies from Windows versions.
If you’re using Windows 10, 8 or 8.1, you’ll need to update and install the latest DirectX; if you’re using Windows 7, Vista or XP, you should install a service pack to update. Check the Microsoft support to update DirectX in different Windows system: How to install the latest version of DirectX.
- Check if your problem is now resolved. If not, try Solution 2, below.
Solution 2: Update your graphics card driver
A missing or outdated graphics card driver may also cause your Direct3D Not Available problem. You should update your graphics card driver to better troubleshoot the problem.
There are two ways to update your graphics card driver: manually and automatically.
Update your graphics card driver manually — You can update your driver manually by going to the hardware manufacturer’s website, and searching for the latest driver for your graphics card. But if you take this approach, be sure to choose the driver that’s compatible with the exact model number of your hardware, and your version of Windows.
OR
Update your graphics card driver automatically — If you don’t have the time, patience or computer skills to update your graphics card driver manually, you can do it automatically with Driver Easy. You don’t need to know exactly what system your computer is running, you don’t need to be troubled by the wrong driver you would be downloading, and you don’t need to worry about making a mistake when installing. Driver Easy handles it all.
- Download and install Driver Easy.
- Run Driver Easy and click Scan Now. Driver Easy will then scan your computer and detect any problem drivers.
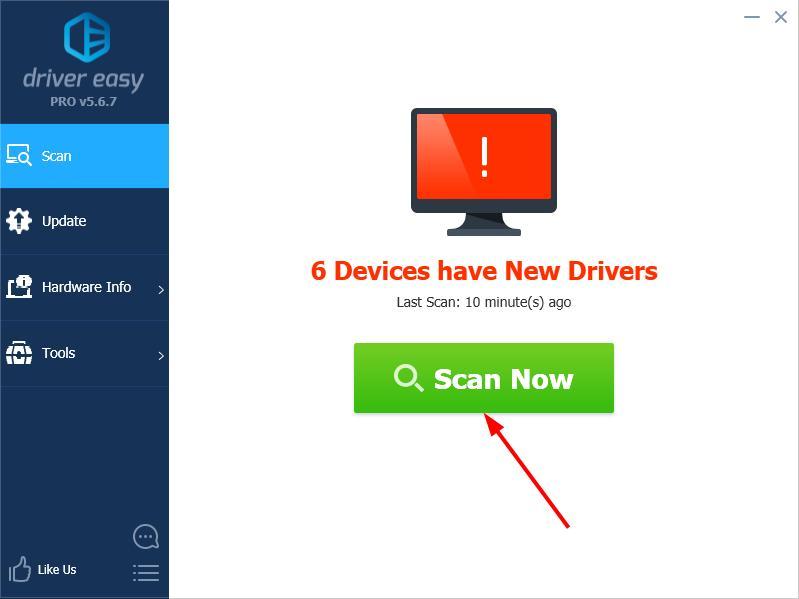
- Click Update next to any flagged devices to automatically download the correct version of their drivers, then you can install them manually. Or click Update All to automatically download and install them all automatically. (This requires the Pro version – you’ll be prompted to upgrade when you click Update All. You get full support and a 30-day money back guarantee.)

- Restart your computer and check if your program is now resolved. If not, contact Driver Easy’s support team at support@drivereasy.com for further assistance. They’d be happy to help you. Or you can move on to Solution 3, below.
Solution 3: Reinstall Visual C++ Redistributables
You can also try reinstalling the Visual C++ Redistributables packages on your computer:
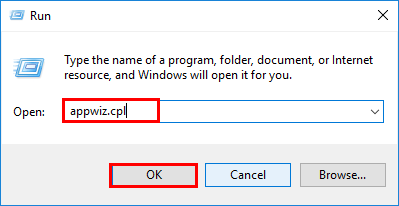
- Press the Windows logo key+
R key
to open the Run box. - Type appwiz.cpl and click OK.
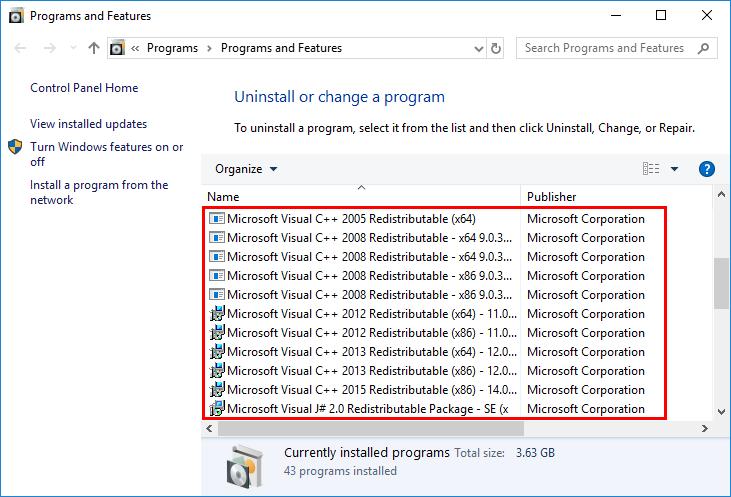
- You can see a list of Microsoft Visual C++ Redistributable packages installed on your computer. Right click on the one you want to uninstall, and click Uninstall, then follow the on-screen instructions to uninstall it.
- When the uninstallation is finished, you can go to the Windows download page to download the corresponding Visual C++ Redistributable packages.
- Double-click on the downloaded file to begin the installation process.
- Restart your computer and check if the application where you encountered the error message now works properly.
Hopefully this can help you out.
You’re, as always, more than welcome to leave a comment below to share your results or any other suggestions.