


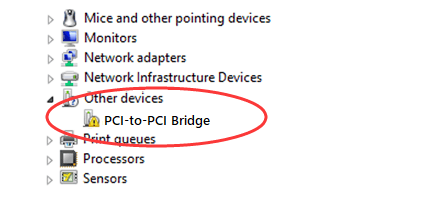
PCI-to-PCI Bridge driver is always shown under Other devices dialog in Device Manager. This issue keep annoying many users. Today we will be showing you how to fix it in easy and quick ways! Go on with this post, you can exactly fix the issue by yourself.
Method 1. Update PCI-to-PCI Bridge driver through Device Manager
(Recommended☞) Method 2. Update PCI-to-PCI Bridge driver via Driver Easy automatically
Method 1. Update PCI-to-PCI Bridge driver through Device Manager
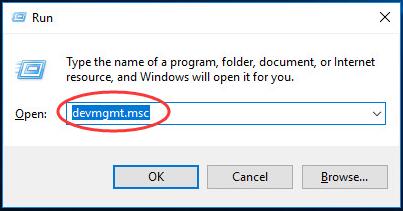
1)
On your keyboard, press Windows key + R key together to open a Run box.
Then type devmgmt.msc in the box and hit Enter to open Device Manager.
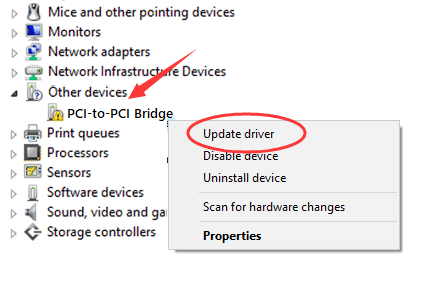
2)
On Device Manager window, find and right-click on PCI-to-PCI Bridge driver.
Click Update driver.
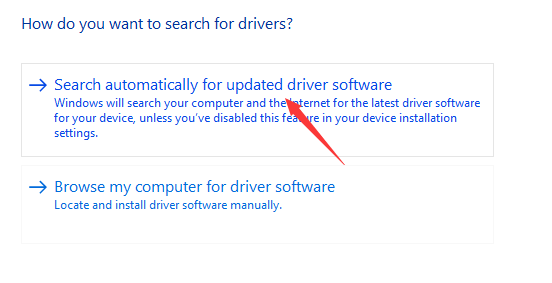
3)
Select Search automatically for updated driver software.
4)
Then your Windows will detect the update for your device automatically.
Notes: For some reasons, Microsoft cannot always find the update for you. Thus if it didn’t find the update for you, make sure to try Method 2 below to let Driver Easy help you.
(Recommended☞) Method 2. Update PCI-to-PCI Bridge driver via Driver Easy automatically
Driver Easy is a truly helpful and safe driver tool compatible with Windows 10/8/7, etc. It can help you scan out all the missing and outdated drivers and find the correct ones in less than 1 min! Without exception, it will find the correct driver for your PCI-to-PCI bridge device.
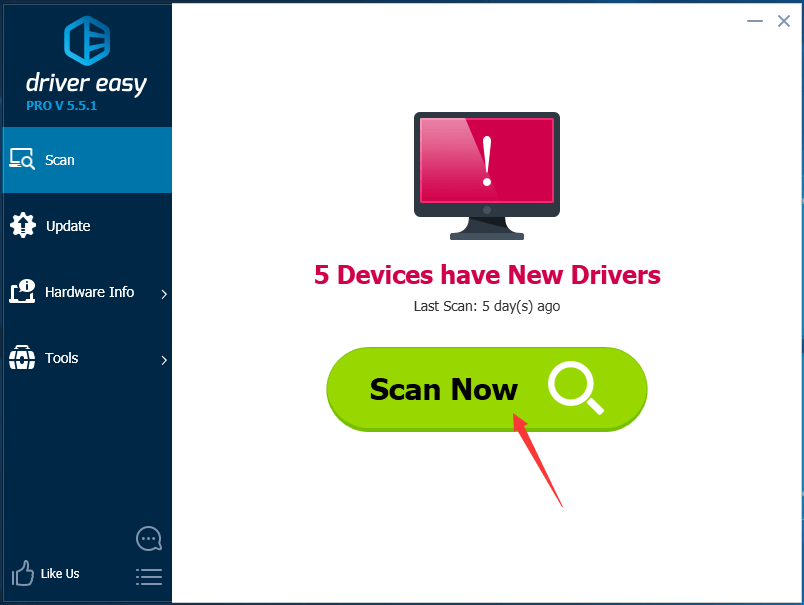
You can try its Free version to install the new driver one by one. Or enjoy the much higher efficiency with its Pro version to update all your drivers in just one-go:
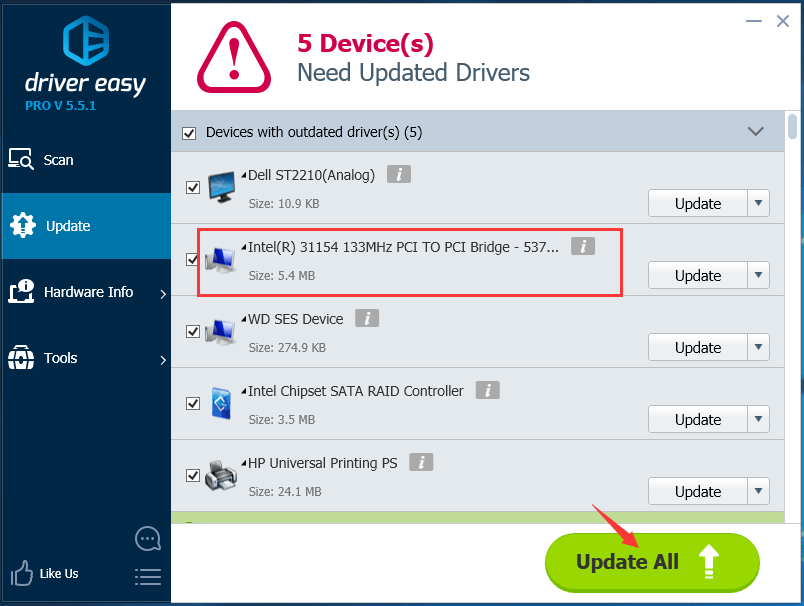
No worry to try its Pro version as we offer you a no-questions-asked 30-day money-back guarantee and professional tech support 24/7.
That’s it.
Any questions please feel free to let we know by leaving your comment below, thanks.