


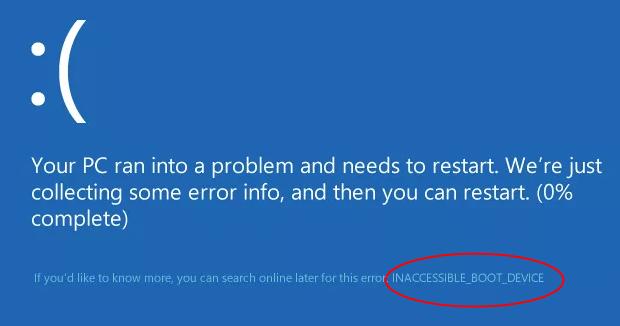
INACCESSIBLE_BOOT_DEVICE error is one of the most common blue screen of death errors. You may see this error during Windows startup. It happens frequently while upgrading to Windows 10. Faulty disk controller drivers and Windows packages are often the causes, and sometimes due to hard disk errors. If you encounter this error with Windows 10, don’t worry. You can fix the error with one of the solutions below.
There are four solutions to fix the problem. You may not have to try them all. Just work your way down at the top of the list until you find the one that works for you.
- Try disconnecting external device
- Go to Safe Mode and restart PC
- Uninstall the installed packages
- Update faulty drivers
- Disable or update any antivirus software
- Refer to user comments
Solution 1: Try disconnecting external devices
The error would occur if one or more devices are not compatible with the system. So if you have any other storage devices plugged in like an external hard drive, unplug them. This mostly works if the error occurs after resetting Windows 10 or while upgrading to Windows 10.
Solution 2: Go to Safe Mode and restart PC
Start Windows in Safe Mode, then restart it in Normal Mode. This is a simple solution, but it may work like a charm for you.
If you are not sure how to boot into Safe Mode, see How to Enter Safe Mode in Windows 10.
Solution 3: Uninstall the installed packages
The problem can be caused by installed Windows packages. Windows packages will be installed without notifying you if Windows Update is set to be installed automatically. So to fix the Inaccessible Boot Device error, you can out the lately installed packages and uninstall them.
Since you can’t boot Windows 10 normally, you need to go to Repair and use the DISM command to uninstall the packages.
Follow steps below:
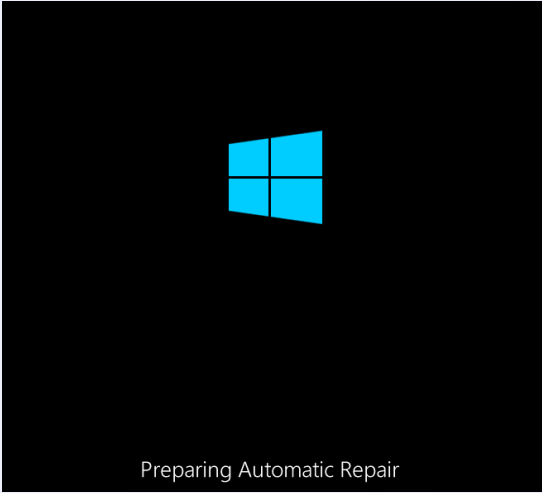
1) Ensure your PC is off.
2) Press the power button to turn on your PC, then hold the power button down until PC shuts down automatically (about 5 seconds) . Repeat this more than 2 times until you see the Preparing Automatic Repair (see below screenshot).
Note: This step is aim to bring up Preparing Automatic Repair screen. When Windows doesn’t boot properly, this screen pops up and Windows attempts to fix the problem by itself. If you’ve seen this screen at the first time when you power up the computer, skip this step.
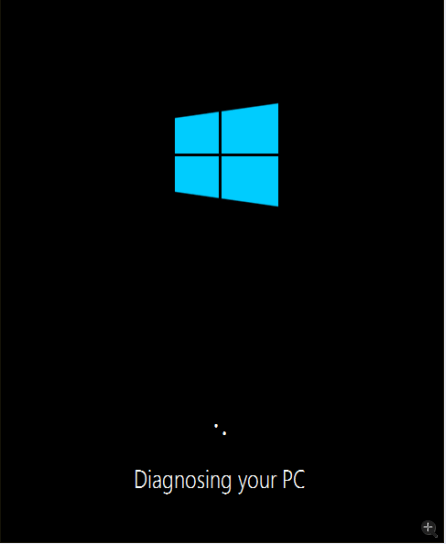
Then wait for Windows to diagnose your PC.
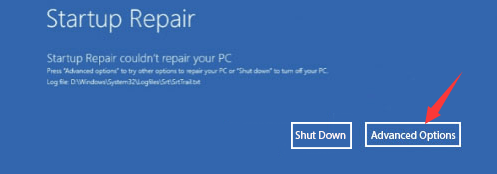
2) Click Advanced options, then the system will bring up the Windows RE (Recovery environment.) screen.
3) On the Windows RE (Recovery environment) screen, click Troubleshoot.
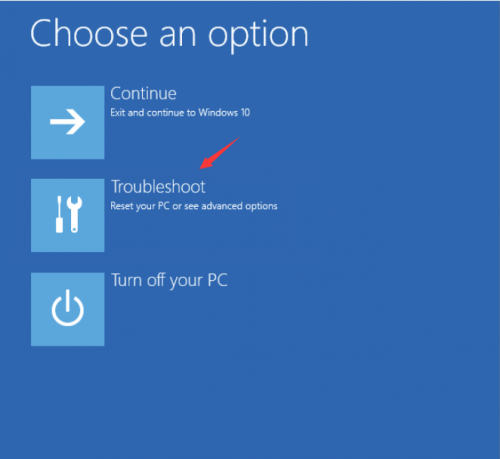
4) On the Troubleshoot screen, click Advanced options.
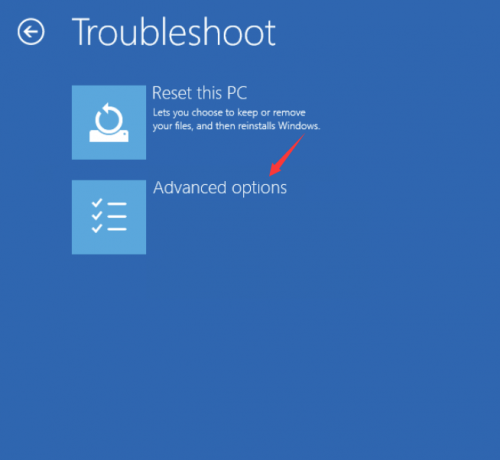
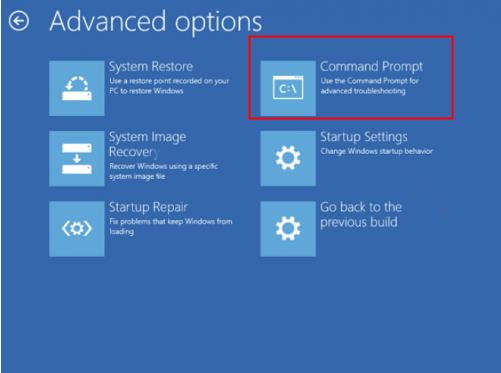
5) Click Command Prompt.
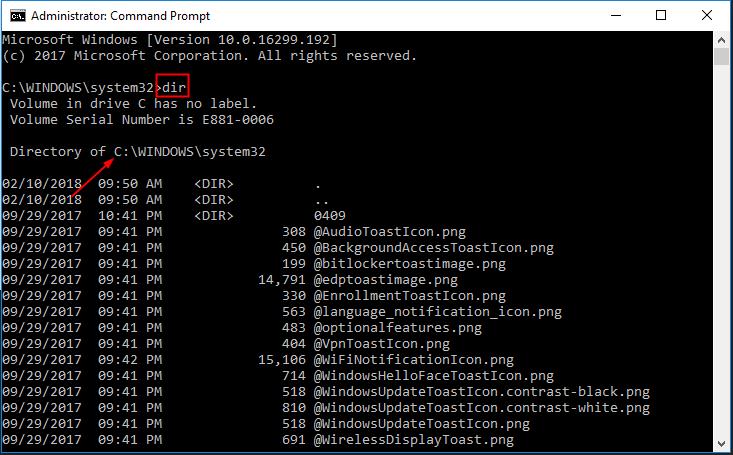
6) Run dir command to check what drive the system is installed on. If you’ve known this information, skip this step.
If below image, you can see the system is installed on the C: drive.
7) Run command Dism /Image:X:\ /Get-Packages get the packages your installed (X means the drive your system has installed).

Then you’ll get a list of packages installed on your computer. Find out the package that may cause the error. You can identify by the installing date. If you’re not sure which one is the cause, you can uninstall several recent installed packages.
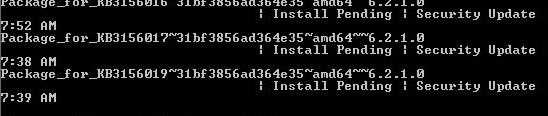
8) Run the following command to remove the package.
dism.exe /image:d:\ /remove-package /packagename:Package_for_KB4014329~31bf3856ad364e35~amd64~~10.0.1.0
“Package_for_KB4014329~31bf3856ad364e35~amd64~~10.0.1.0” is an example here (Tip: According to many other Window 10 users, this package caused them the same error like you. You can check if this package had installed on your computer.). Please replace it with the specific problem package on your computer.

The uninstall process may take a few minutes. Please wait until it completes.
9) After uninstalling the packages, reboot your computer and check to see if the problem is resolved.
Solution 4: Update faulty drivers
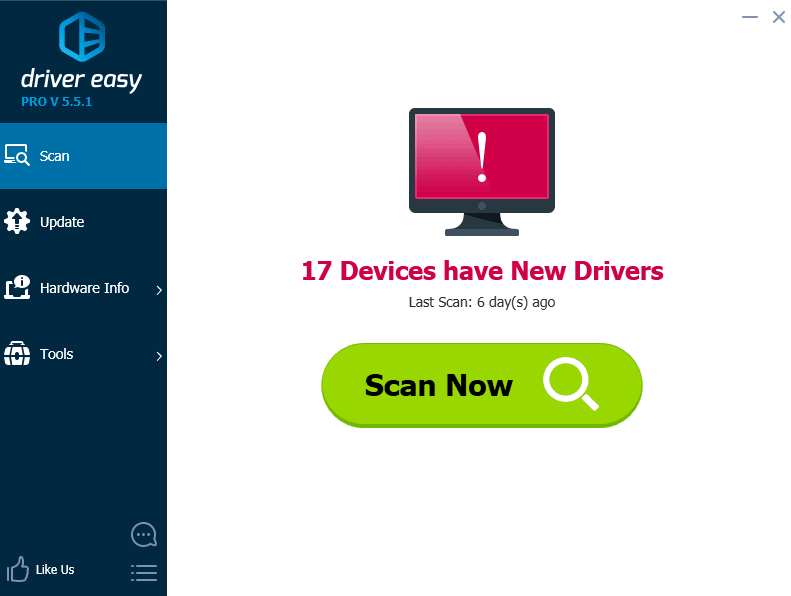
The problem probably being caused by driver issues especially graphics card driver issues. The steps above may resolve it, but if they don’t, or you’re not confident playing around with drivers manually, you can do it automatically with Driver Easy.
Driver Easy will automatically recognize your system and find the correct drivers for it. You don’t need to know exactly what system your computer is running, you don’t need to risk downloading and installing the wrong driver, and you don’t need to worry about making a mistake when installing.
You can update your drivers automatically with either the FREE or the Pro version of Driver Easy. But with the Pro version it takes just 2 clicks (and you get full support and a 30-day money back guarantee):
1) Download and install Driver Easy.
2) Run Driver Easy and click Scan Now. Driver Easy will then scan your computer and detect any problem drivers.
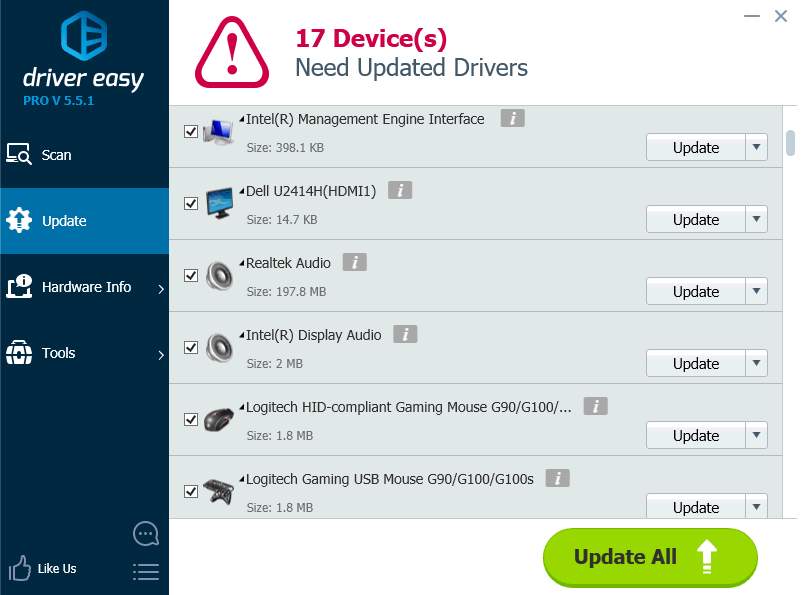
3) Click the Update button next to all devices to automatically download and install the correct version of their drivers (you can do this with the FREE version).
Or click Update All to automatically download and install the correct version of all the drivers that are missing or out of date on your system (this requires the Pro version – you’ll be prompted to upgrade when you click Update All).
Solution 5: Disable or update any antivirus software
The antivirus software could be the cause because they may prevent Windows reading data from the system. If you have some antivirus software running, disable them. If you are uncomfortable with disabling, try updating the software.
Hope one of the solutions above help you fix the blue screen error. If you have any questions, please freel free to leave your comments.
