


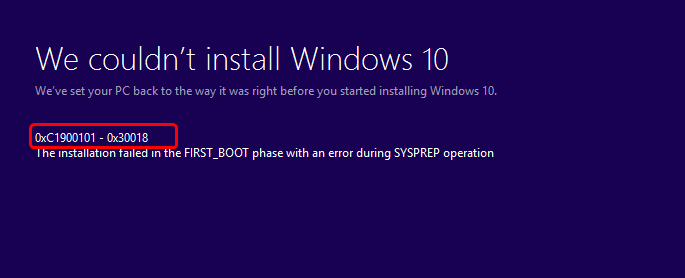
How do I fix the 0xC1900101 error?
Here are 6 of the most effective solutions for you to try. You may not have to try them all; just work your way down until you find the one works for you. Method 1: Update device drivers, esp. the display card driver Method 2: Uninstall third-party antivirus programs Method 3: Remove unused SAT devices Method 4: Do a clean boot Method 5: Run SFC/ DISM tools Method 6: Update BIOSThis post helps to fix the following error codes as well:
In many case, the error codes could be different in different combinations of computers, but all of them have some general solutions. Here are some of the most commonly seen codes: 0xC1900101 – 0x20004 0xC1900101 – 0x2000c 0xC1900101 – 0x20017 0xC1900101 – 0x30018 0xC1900101 – 0x3000D 0xC1900101 – 0x4000D 0xC1900101 – 0x40017 If you’re bugged by one of the codes above, feel free to try the methods below, one at a time.Method 1: Update device drivers, esp. the display card driver
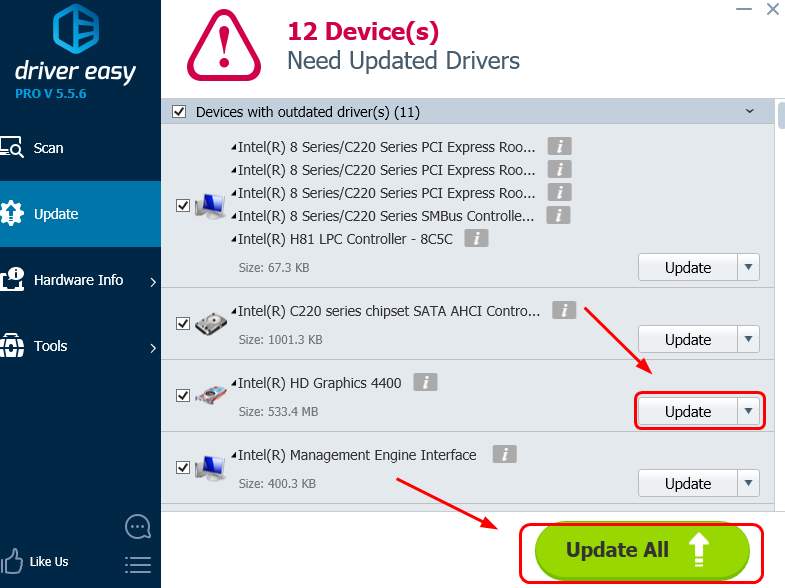
As the rest of the error message shows, the 0xC1900101 error is very likely to be caused by outdated device drivers, outdated display card driver, for specific. So one of the first things you do when you see the error code is to update all the available device drivers. Manual drivers update – You can update needed drivers via the Device Manager one by one, or go to your computer’s manufacturer support website and search for the device drivers by yourself. Note that you should always go to the manufacturer website for your graphics card driver if you’re a laptop user. Because display driver from chipset or hardware manufacturer won’t have the customized features for your laptop. Automatic drivers update – If you don’t have the time, patience or computer skills to update your drivers manually, you can do it automatically with Driver Easy. Driver Easy will automatically recognize your system and find the correct drivers for it: 1) Download and install Driver Easy. 2) Run Driver Easy and click the Scan Now button. Driver Easy will then scan your computer and detect any problem drivers.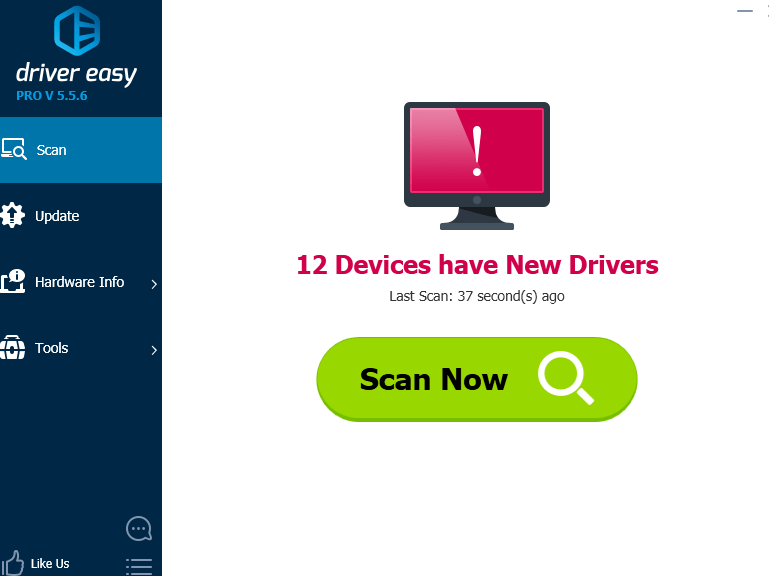
Method 2: Uninstall third-party antivirus programs
This error is sometimes caused by interference from antivirus software. To see if that’s the problem for you, temporarily disable your antivirus and check if the problem persists. (Consult your antivirus documentation for instructions on disabling it.) If this resolves the problem, contact the vendor of your antivirus software and ask them for advice, or remove it from your computer. In fact, if you’re already on Windows 10, we recommend that you don’t install any third-party antivirus program, because the built-in Windows Defender is powerful enough for you already.Method 3: Remove unused SAT devices
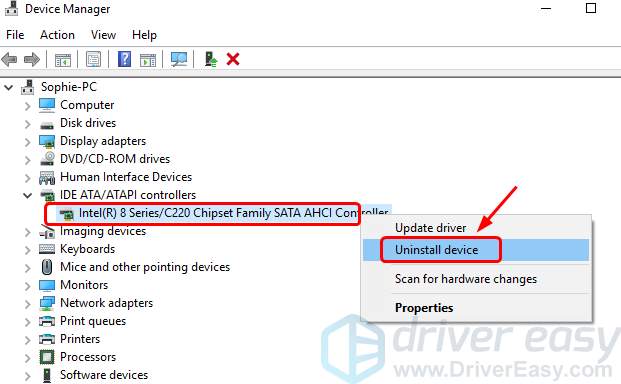
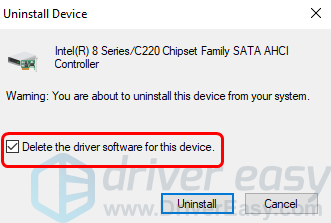
IMPORTANT: Please make sure that you don’t actually need the about-to-be-removed device. If you can’t decide whether to keep it or not, you should move on to the next method instead. 1) On your keyboard, press the Windows logo key and R at the same time. Type devmgmt.msc in and press Enter.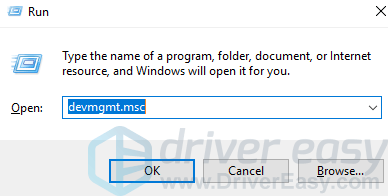
Method 4: Do a clean boot
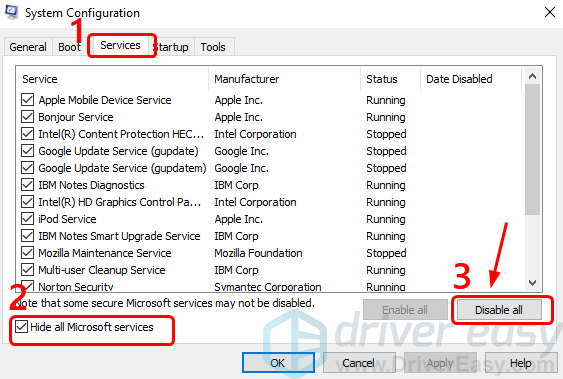
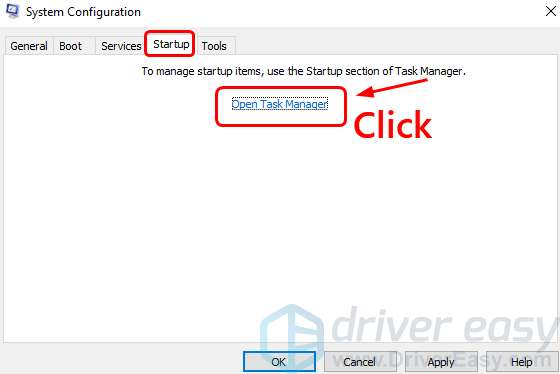
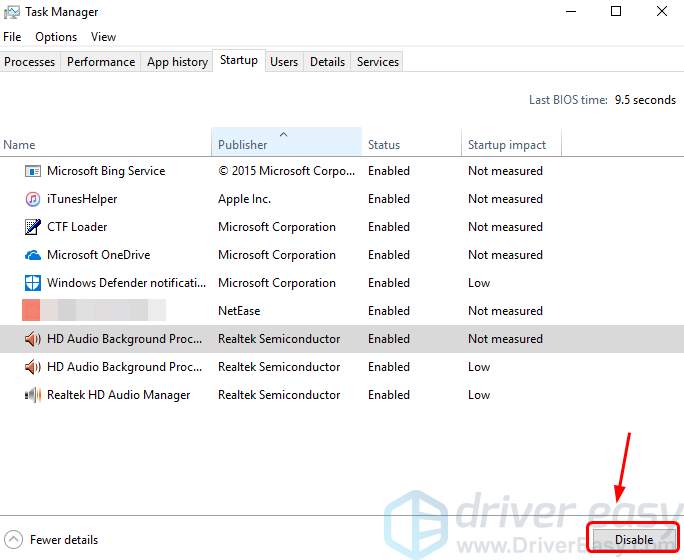
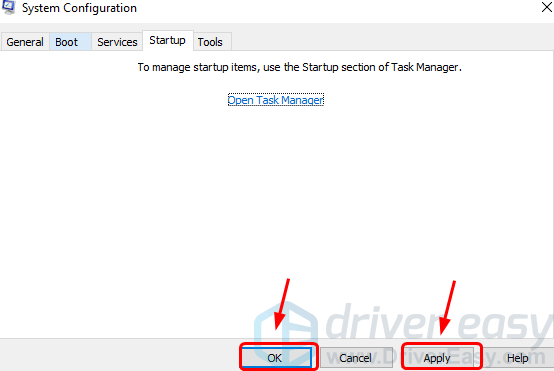
Clean boot requires only the very basic and built-in drivers and programs to run your computer. Therefore, it usually tells if the installed software is conflicting with others when you update, install or run it. If you’re having the 0xC1900101 error code, we recommend that you do a clean boot and see if you’re able to upgrade to or update your Windows 10 from there. IMPORTANT: You must log in as administrator to do the clean boot. 1) On your keyboard, press the Windows logo key and R at the same time. Type msconfig in and press Enter.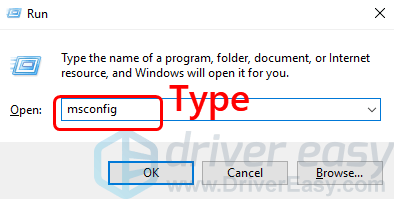
Method 5: Run SFC/ DISM tools
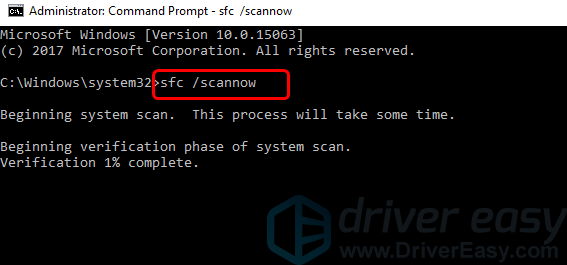
In some cases, the 0xC1900101 error could mean that your system files are somehow corrupted or broken, and the code is there to remind you that you may need to revert your PC to a more stable stage before you do the system upgrade or update. To fix it: 1) On your keyboard, press the Windows logo key. Type cmd in the search box. Right-click Command Prompt and click Run as administrator.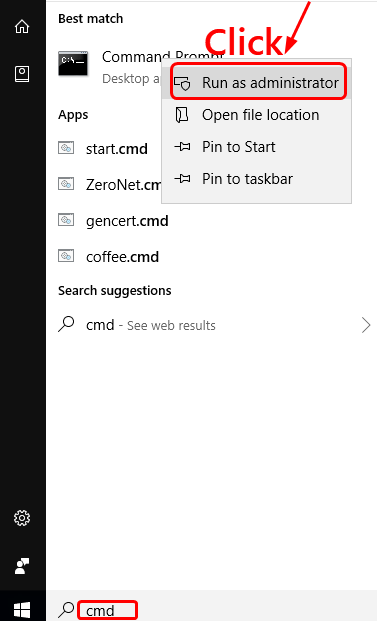
 2) In the Command Prompt window, copy and paste in the following command:
sfc /scannowPress the Enter key on your keyboard.
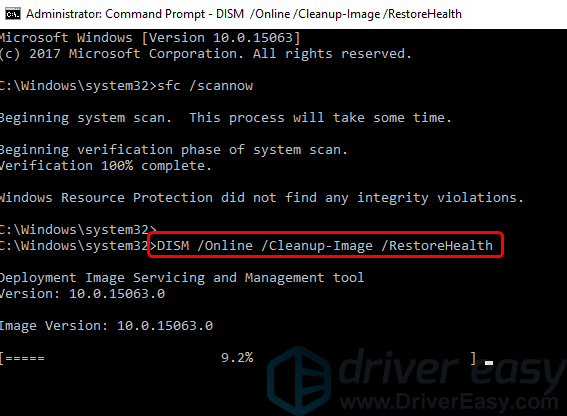
DISM /Online /Cleanup-Image /RestoreHealth
Method 6: Update BIOS
If you have tried all the methods above but the problem remains unsolved, it’s time for you to consider updating your BIOS. If you’re not sure how to do that, go to the manufacturer website of your computer and search for the specific instructions. To avoid any unwanted issues to your computer, you should always go to the manufacturer website for your PC to get your BIOS updated. Please DO NOT download BIOS from any third-party websites or products. 16
16 people found this helpful
Available in other languages
Wenn Sie bei einem Upgrade auf Windows 10 den Fehlercode 0xC1900101 erhalten, haben Sie 6 dazu Lösungen, die Sie selbst ausführen können.

Si vous rencontrez l'erreur 0xc1900101 en mettant à jour ou mettant à niveau votre système Windows, je vous montre ici quelques correctifs.

0 Comments
Most Voted