


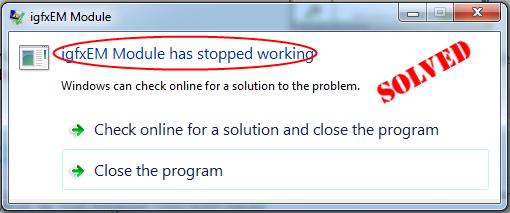
The igfxEM Module has stopped working error is often caused by the corrupt or incompatible Intel graphics driver on your computer. So you should update your Intel graphics driver to resolved the problem.
To solve the igfxEM Module has stopped working issue
- Update your Intel graphics card driver automatically (Recommended)
- Update your Intel graphics card driver manually
Method 1: Update your Intel graphics card driver automatically (Recommended)
If you’re not confident playing around with drivers manually, you can do it automatically with Driver Easy.
Driver Easy will automatically recognize your system and find the correct drivers for it. You don’t need to know exactly what system your computer is running, you don’t need to risk downloading and installing the wrong driver, and you don’t need to worry about making a mistake when installing. Driver Easy handles it all.
You can update your drivers automatically with either the FREE or the Pro version of Driver Easy. But with the Pro version it takes just 2 clicks (and you get full support and a 30-day money back guarantee):
1) Download and install Driver Easy.
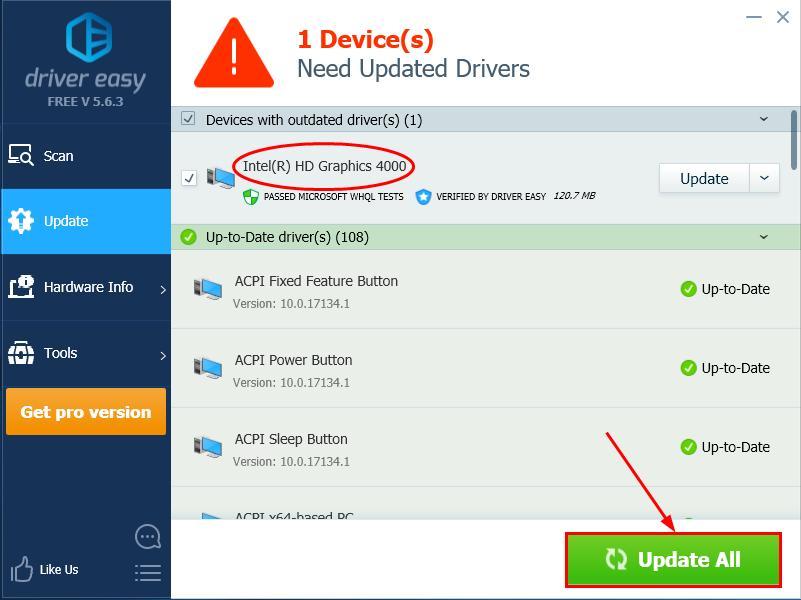
2) Run Driver Easy and click Scan Now. Driver Easy will then scan your computer and detect any problem drivers.

3) Click Update All to automatically download and install the correct version of ALL the drivers that are missing or out of date on your system (this requires the Pro version – you’ll be prompted to upgrade when you click Update All).
4) Restart your computer and check if the igfxEM Module has stopped working error is resolved.
Method 2: Update your Intel graphics card driver manually
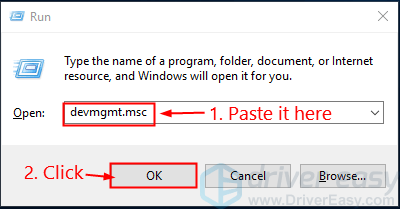
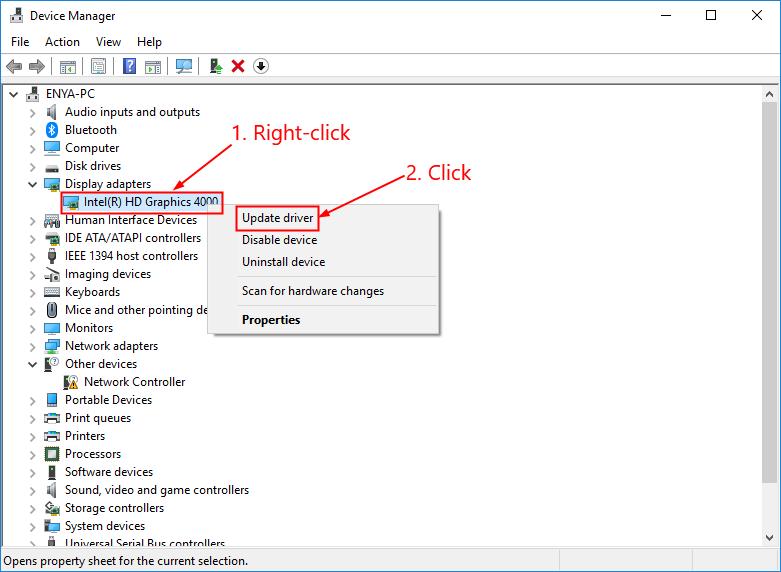
- On your keyboard, press the Windows logo key and R at the same time, then copy & paste devmgmt.msc into the box and click OK.
- Locate and double-click on Display adapters (aka. Graphics card, Video card).
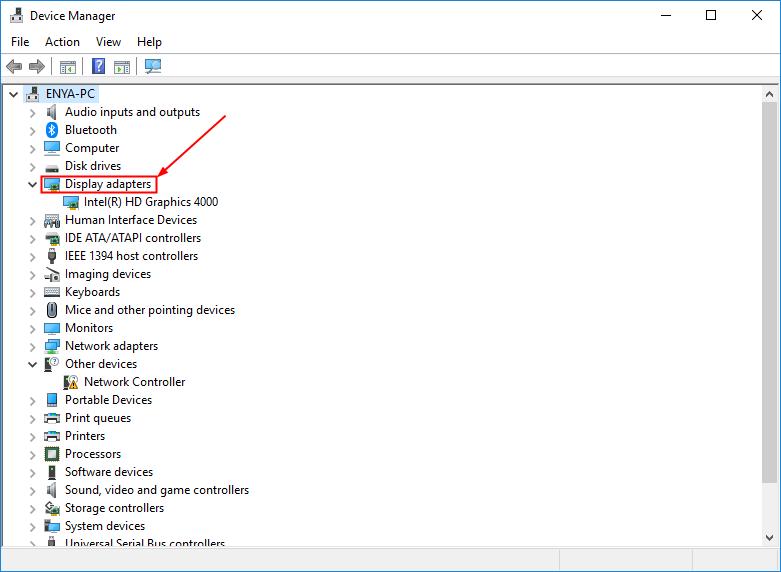
- Right-click on your flavor of Intel graphics card driver (Intel(R) HD Graphics 4000, in my case) and click Update driver.
- Click Search automatically for updated driver software.
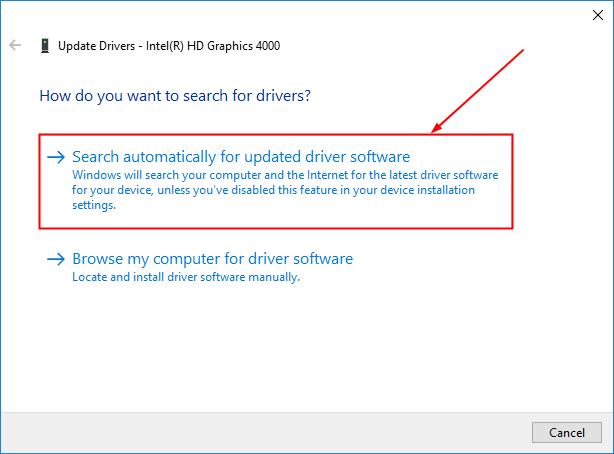
- Depending on whether Windows provides you a driver update:
- If yes, then follow the on-screen instructions to update the driver and skip the rest of the steps. Then restart your computer for the changes to take effect.
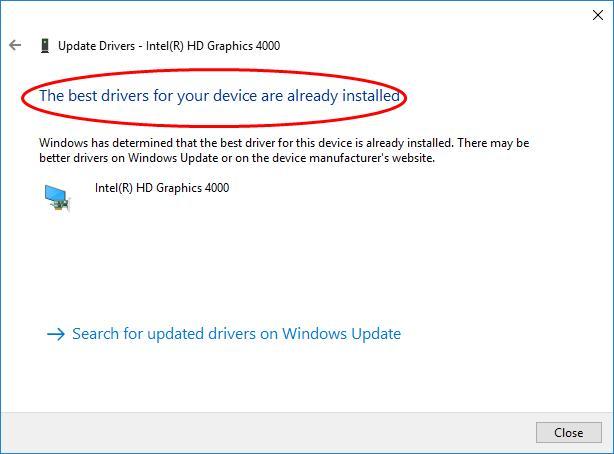
- If no, and instead you got the message The best drivers for your device already installed, then you might have to continue with the following steps. CLEARLY the message isn’t true and Windows can fail its job in keeping up with the manufacturer’s latest graphics drivers (hence the error igfxEM Module has stopped working).
- Go to Intel’s official website, check out the Support section for driver downloads.
- Enter the model of your Intel graphics card and search for results.
- Click the first result to make sure you download the latest version. Be sure to choose ONLY drivers that are compatible with your variant of Windows system versions.
- Download the file and install the driver.
- Restart your computer and hopefully the annoying message has gone by now. 🙂
That’s it – 2 methods to update your Intel graphics card driver to solve the igfxEM Module has stopped working error. Hope it helps and feel free to comment below if you have any further questions.