


Bugging by crackling, popping sound coming out from your laptop, even when you’re using headphones? No more worries. Annoying as the problem may seem, it is not hard to solve at all.
Sound crackling and popping problems can be caused by faulty audio device settings, outdated sound drivers, or interference from certain hardware. That is to say, there is not a definite fix, but some general ones.
Read on and follow the easy-doing steps with images to find the right fix for you.
1. Change Sound Format
The sound format on your PC could be the cause. To change it:
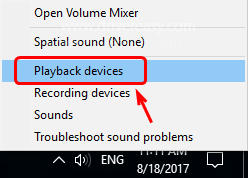
1) Right-click the sound icon at the bottom right corner of your desktop and select Playback devices.
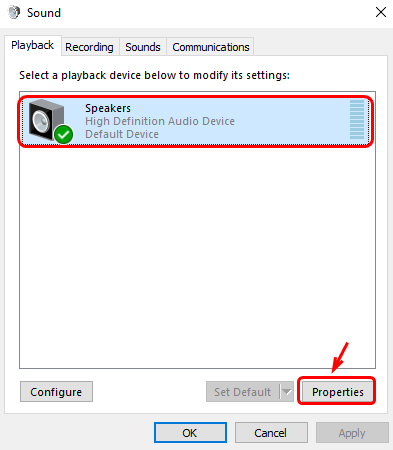
2) Highlight your default audio device, which should have a green tick on its icon, then click Properties.
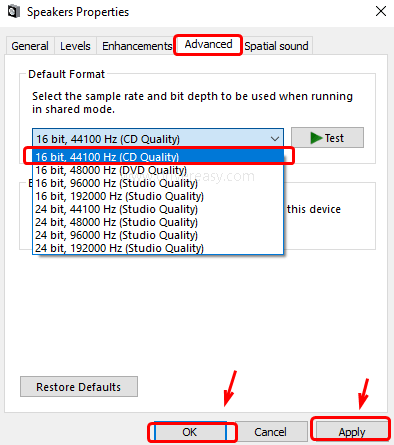
3) Go to the Advanced tab. Select from the drop-down box 16 bit, 44100 Hz (CD Quality). Then click Apply and OK to save the change.
If CD Quality option fails to help you solve the popping sound issue, try to choose another audio format and see what happens.
2. Update Audio Driver
If the above methods don’t work to restore your laptop speakers, your sound problem is probably being caused by driver issues. There are two ways you can get the right drivers for your audio card: manually or automatically.
Manual driver update – You can update your audio driver by going to the manufacturer’s website, and searching for the most recent correct driver for it. Be sure to choose only the driver that is compatible with your variant of Windows 10.
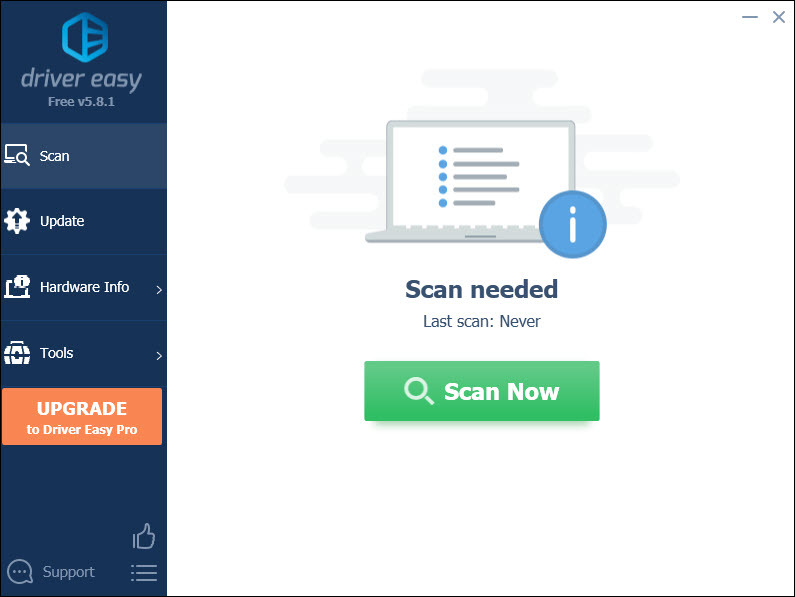
Automatic driver update – If you don’t have the time, patience, or computer skills to update your audio driver manually, you can, instead, do it automatically with Driver Easy. Driver Easy will automatically recognize your system and find the correct drivers for it, and your variant of Windows 10, and it will download and install it correctly:
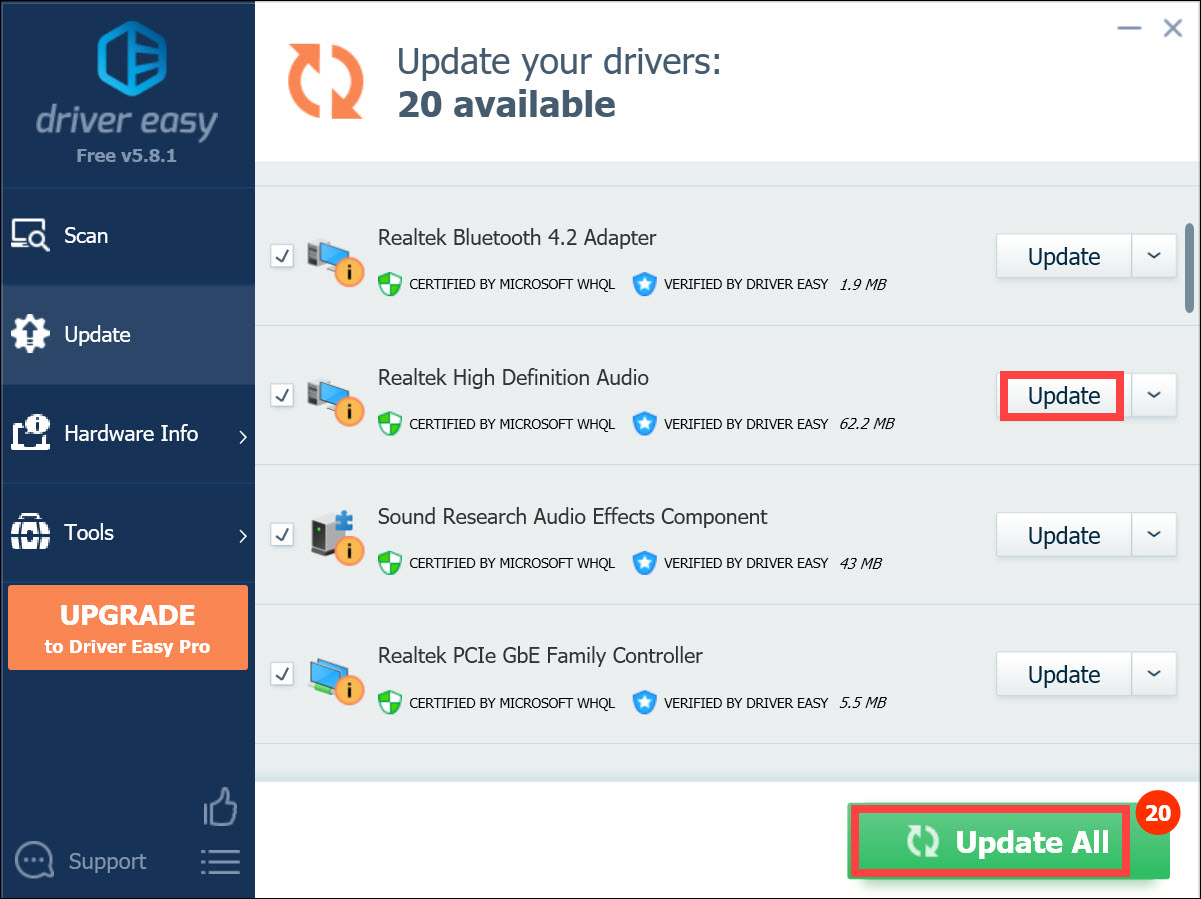
1) Download and install Driver Easy.
2) Run Driver Easy and click the Scan Now button. Driver Easy will then scan your computer and detect any problem drivers.
3) Click the Update button next to a flagged audio driver to automatically download and install the correct version of this driver (you can do this with the FREE version).
Or click Update All to automatically download and install the correct version of all the drivers that are missing or out of date on your system (this requires the Pro version – you’ll be prompted to upgrade when you click Update All).
3. Disable Sound Enhancement
Some sound drivers use enhancements to improve sound quality on your PC. But if enhancements aren’t working well, a crackling sound issue could occur. To disable it:
1) Right-click the sound icon at the bottom right corner of your desktop and select Playback devices.
2) Highlight your default audio device, which should have a green tick on its icon, then click Properties.
3) Go to Enhancements tab. Check the box for Disable all enhancements. Then click Apply and OK to save the change.
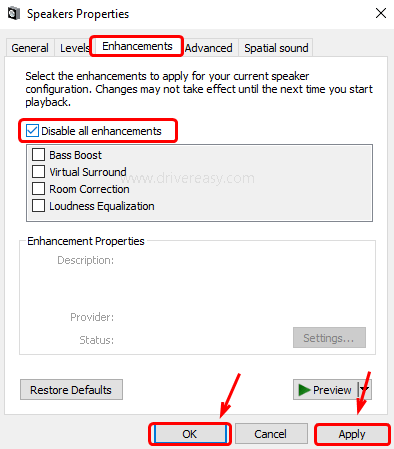
Note that this option is not a universal one, since not all software drivers include such a function. You may also see a similar tab named Sound Blaster and similar effects. Or you may not see the option the disable enhancements at all.
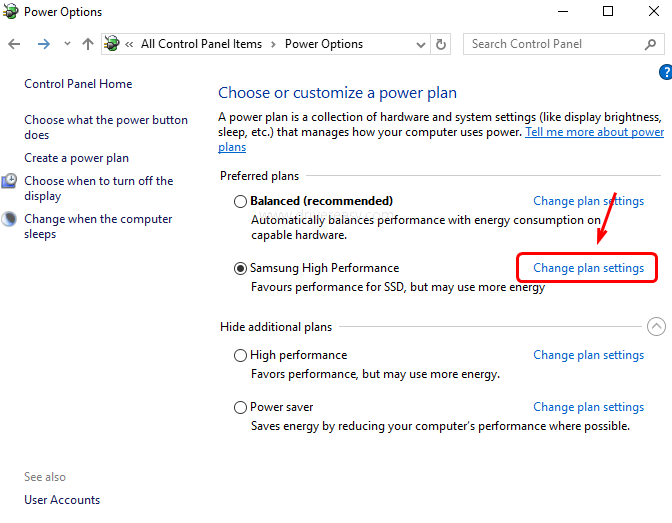
4. Change Power Settings
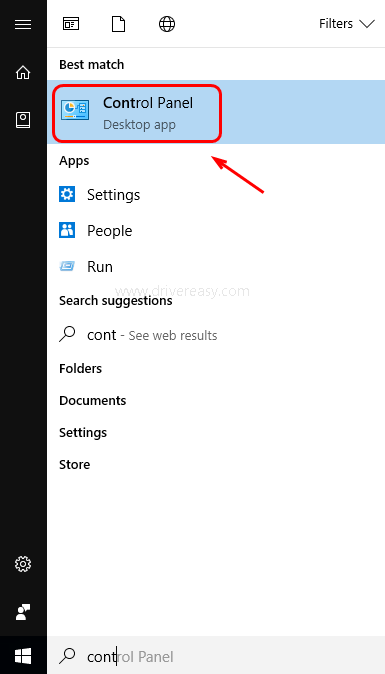
1) On your keyboard, press the Windows logo key and then type control in the search box. Select Control Panel from the list.
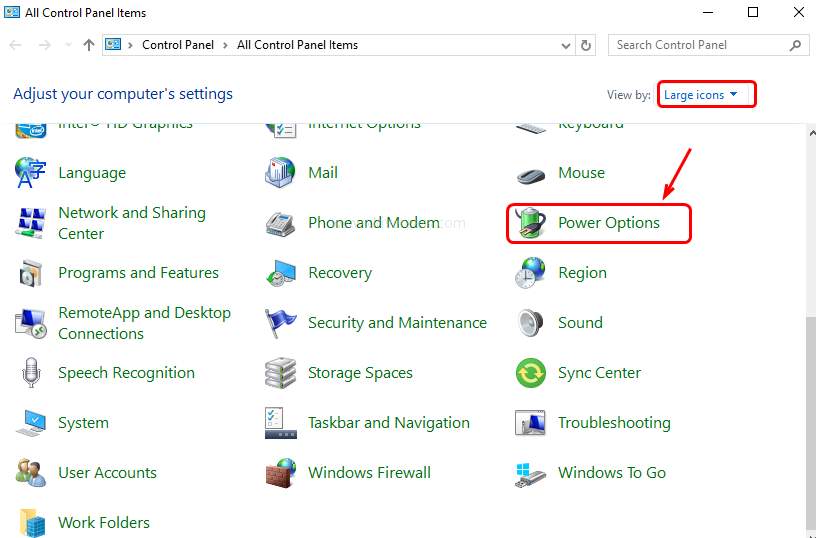
2) View by Large icons and then select Power Options.
3) Select Change plan settings of whichever plan that you’re using now.
4) Now click Change advanced power settings.
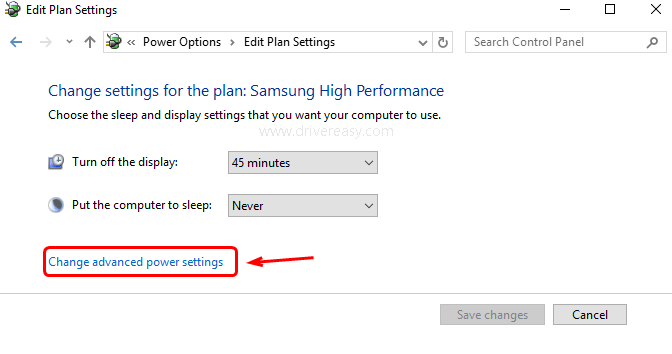
5) Locate and click the + button to expand Processor power management. Then expand Minimum processor state as well. Change the Setting (%) to 100. Then click Apply and OK to save the change.
