


Lost Ark players have been experiencing heavy traffic or constantly getting disconnected from the game since its launch. If you also encounter the “cannot connect to the server” error while playing Lost Ark, this post is for you. Here are some quick fixes you can try while we’re all waiting for an official fix.
Try these fixes:
You may not need to try them all, simply work your way down the list until you find the one that does the trick!
- Test your internet connection
- Restart the game/Steam
- Repair game files
- Update the graphics driver
- Configure your firewall settings
- Check your DNS settings
Fix 1: Test your internet connection
When your network connection is unstable, it can fail to connect you to the game server. A quick test and refresh could help:
- Power cycle your router and modem. Unplug the power cables from your router and your modem, leave them disconnected for at least 30 seconds, then plug the cables back. When your Internet is working again, launch Lost Ark to see if it can connect to the server now.
- If you’re playing on Wi-Fi when you encounter connection issues, the last thing you want is overcrowding. You can try turning off Wi-Fi on the devices you don’t use at the moment, or disconnect them from the Wi-Fi temporarily.
- If possible, play on an ethernet connection. It’ll provide a more stable and reliable connection.
- It’s not recommended to use a VPN unless you have to.
If this doesn’t help, try the next fix.
Fix 2: Restart the game/Steam
Many players have been able to solve the “cannot connect to the server” error by simply restarting the game or Steam client. Although it seems like a temporary workaround and you may have to try multiple times, it’s the quickest fix you can try.
Fix 3: Repair game files
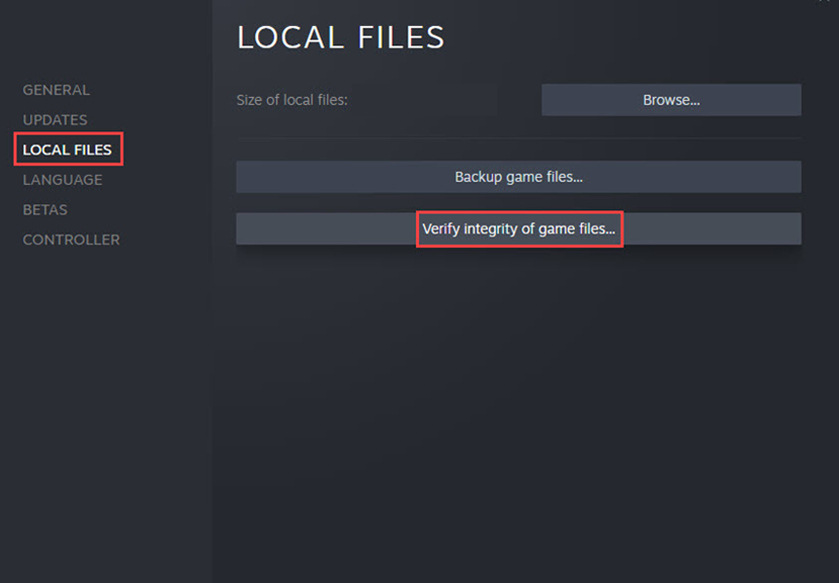
Missing or corrupted game files could also solve the connection issue to the game server. You can verify the integrity of the game files on Steam:
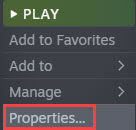
- Open your Steam library and find Lost Ark. Right-click the game then click Properties.
- Click LOCAL FILES, then click Verify integrity of game files.
If this doesn’t solve your problem, move on to the next fix.
Fix 4: Update the graphics driver
The latest GPU drivers are essential for video games. If your graphics driver is outdated or faulty, game performance could be impacted and you might even get errors and crashes. Although this is not directly related to the connection error, we suggest that you keep your graphics card driver up-to-date for the best gaming experience.
There are two ways to keep your graphics card driver up-to-date. One is to manually update it via Device manager. Note that Windows doesn’t always detect the latest available update, so you may need to search on the manufacturer’s websites. Be sure to choose only the driver that is compatible with your Windows version.
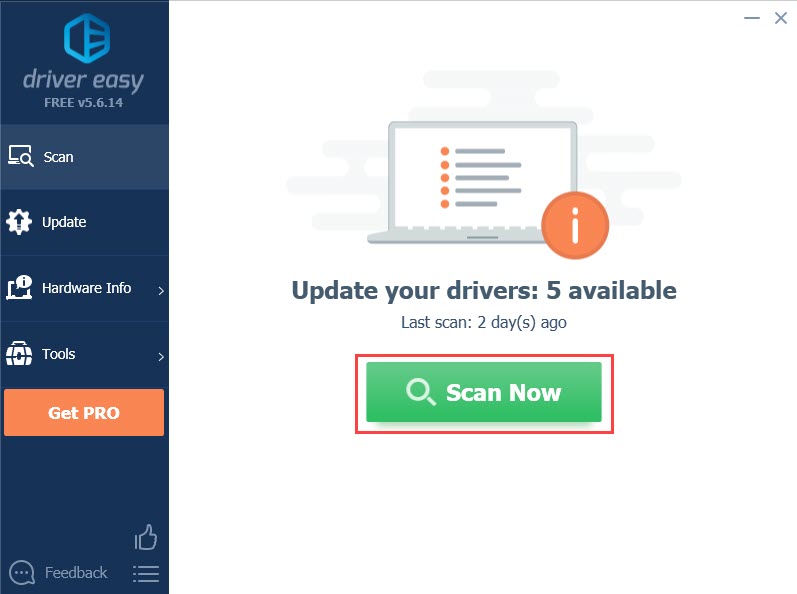
Automatic driver update – If you don’t have the time, patience, or computer skills to update your driver manually, you can, instead, do it automatically with Driver Easy. Driver Easy will automatically recognize your system and find the correct driver for your exact graphics card and your Windows version, then it will download and install the driver correctly:
- Download and install Driver Easy.
- Run Driver Easy and click the Scan Now button. Driver Easy will then scan your computer and detect any problem drivers.
- Click the Update button next to the flagged graphics card driver to automatically download the correct version of the driver, then you can manually install it (you can do this with the FREE version).
Or click Update All to automatically download and install the correct version of all the drivers that are missing or out of date on your system. (This requires the Pro version which comes with full support and a 30-day money-back guarantee. You’ll be prompted to upgrade when you click Update All.)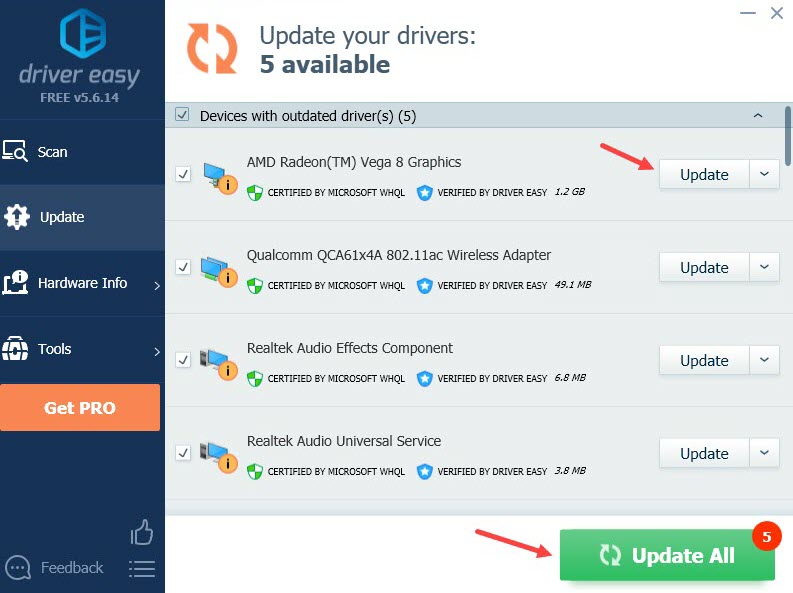
If you need assistance, please contact Driver Easy’s support team at support@drivereasy.com.
Reboot your PC and launch Lost Ark to see if you can connect to the server now. If this doesn’t help, try the next fix.
Fix 5: Configure your firewall settings
One possible cause of the “cannot connect to the server error” is that your firewall is blocking your connection to the Lost Ark server. Here’s how to check if Lost Ark is allowed through the firewall, and configture the settings if needed:
Check if your firewall has blocked Lost Ark
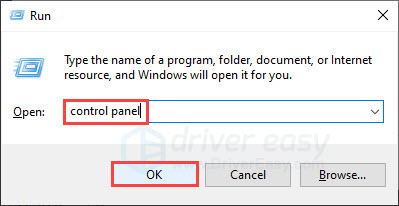
- Press the Windows logo key and R to invoke the Run box.
- Type control panel, then click OK.
- Select View by: small icons, then click Windows Defender Firewall.

- Click Allow an app or feature through Windows Defender Firewall.
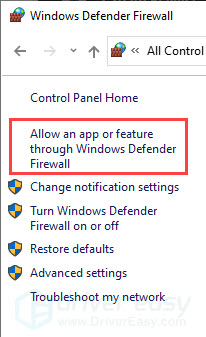
- Scroll down to see if Lost Ark is on the exception list. If so, that means the game is allowed through your firewall, and you can jump to the next fix. If you can’t find Lost Ark in the exception list, follow the steps below to unblock the game.
Add the game to the exception list
- Click Change settings, then click Allow another app.
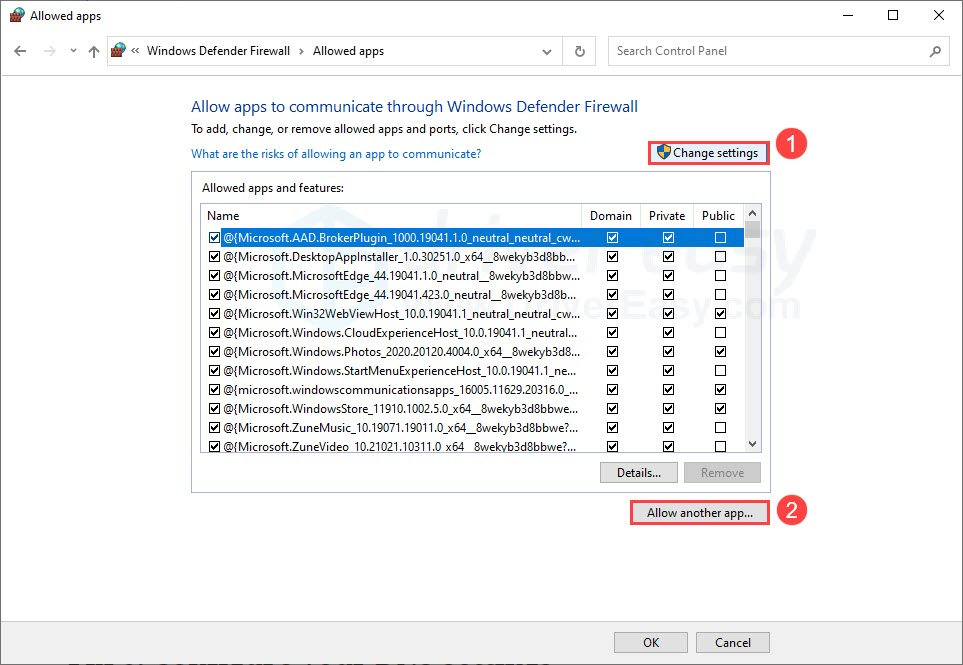
- Click Browse.

- Navigate to Lost Ark game folders and add the game executable to the list. The default location is C:\Program Files (x86)\Steam\steamapps\common.
- Find Lost Ark on the list, tick the checkbox of Private network, and click OK.
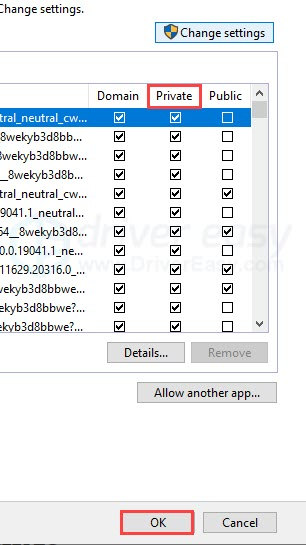
This will ensure your firewall won’t block the game connection when you’re using a private network, for example, your home Wi-Fi. For safety reasons, we recommend you only select the private network, but you’re welcome to allow the game through all types of networks if needed.
Fix 6: Check your DNS settings
Corrupted DNS caches may cause random connection issues. If the fixes above didn’t give you luck, you may want to give this fix a try and configure your DNS settings. There are two things you can do:
2: Switch to a public DNS server
1: Flush your DNS
Flushing DNS will clear the DNS cache from your PC. When the DNS cache is deleted, your PC need to obtain the data from the DNS server every time it accesses a new website. This may solve the “cannot connect to the server” error if it’s triggered by invalid DNS cache data.
Here are the steps:
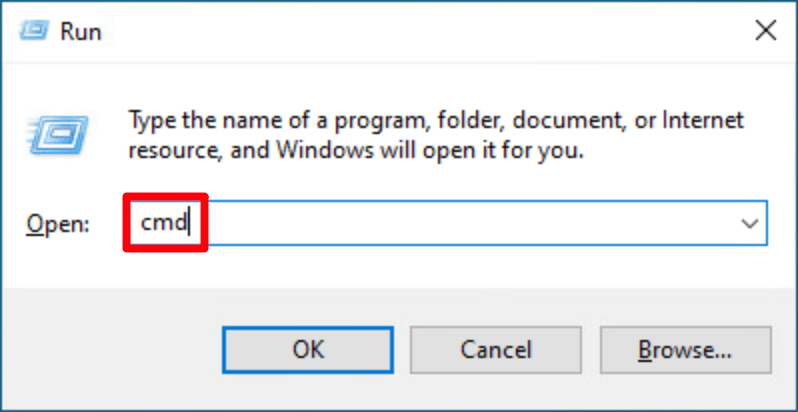
- Press the Windows logo key and R on your keyboard to invoke the Run box.
- Type cmd, then press Shift and Enter at the same time. If prompted for permission, click Yes.
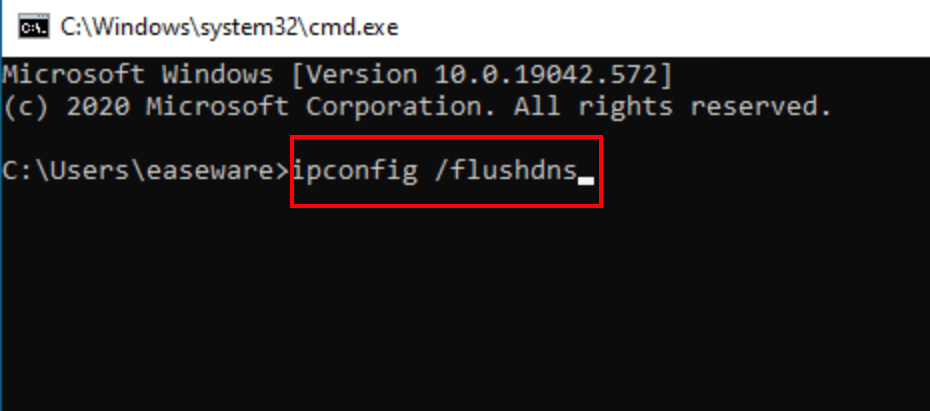
- Copy ipconfig /flushdns, and paste it in the pop-up window. Then press Enter.
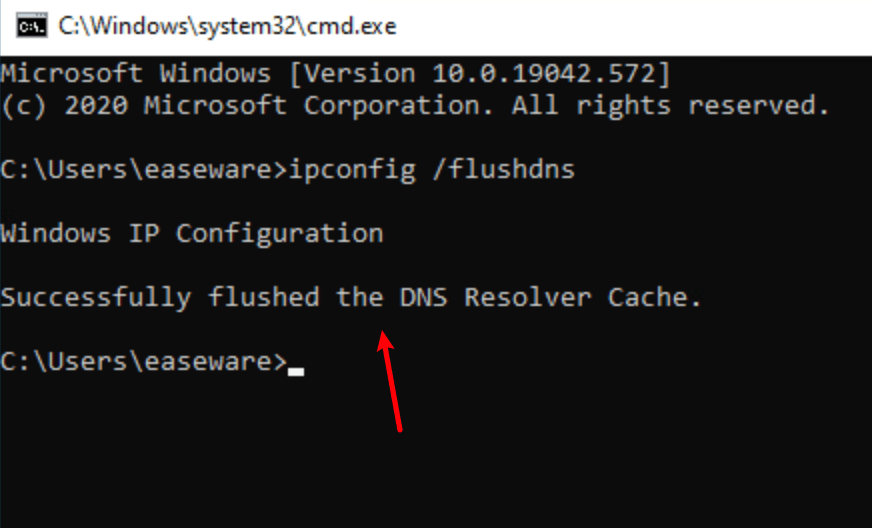
- Your DNS cache is successfully cleared.
2: Switch to a public DNS server
We also recommend using a public DNS server to test the issue. Here we’ll use the Google DNS server as an example. Below are the steps:
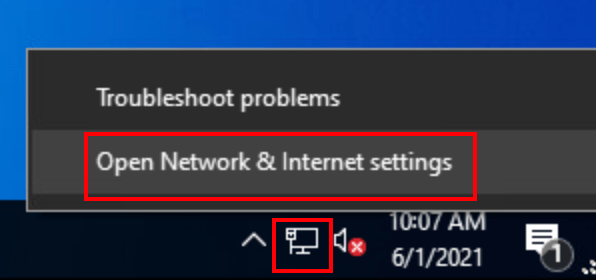
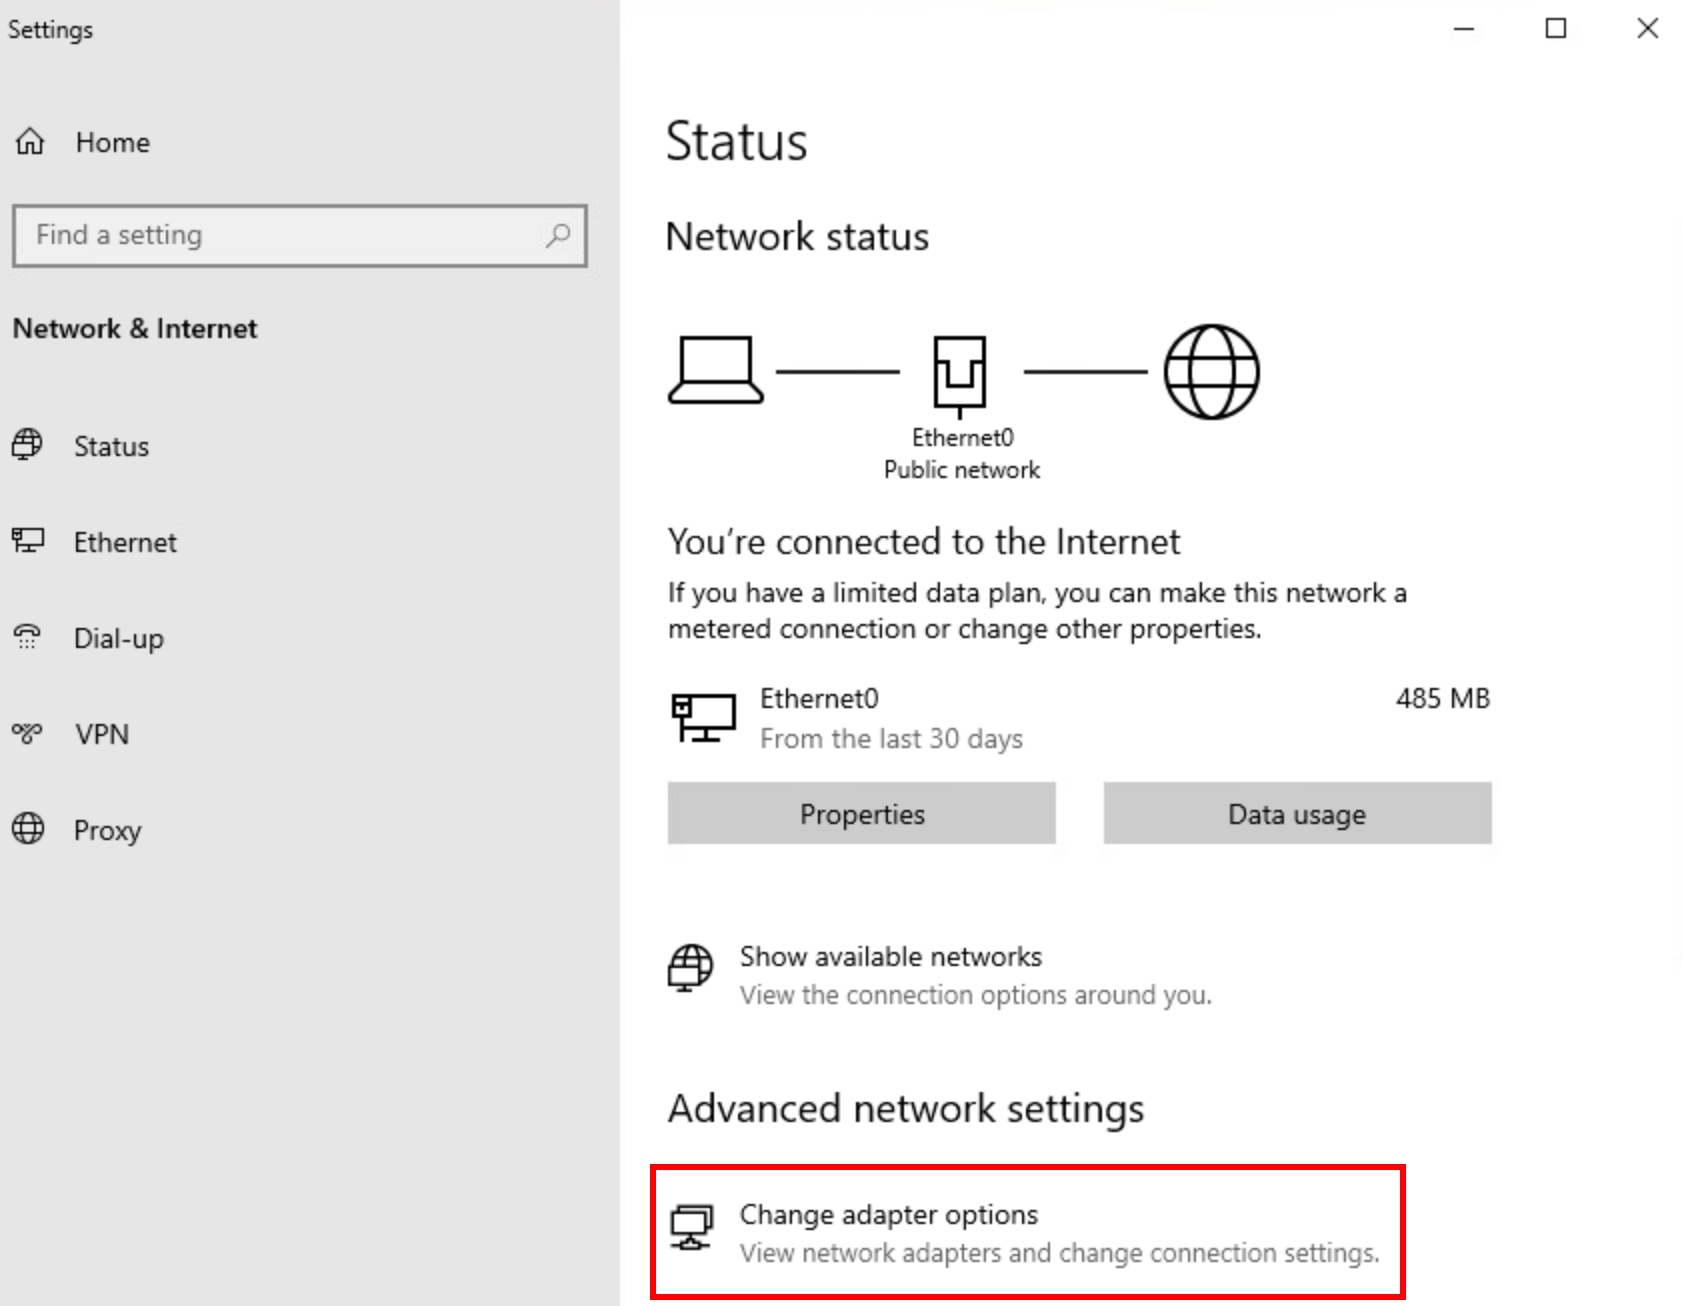
- On your taskbar, right-click the network icon, then click Open Network & Internet settings.
- Click Change adapter options.
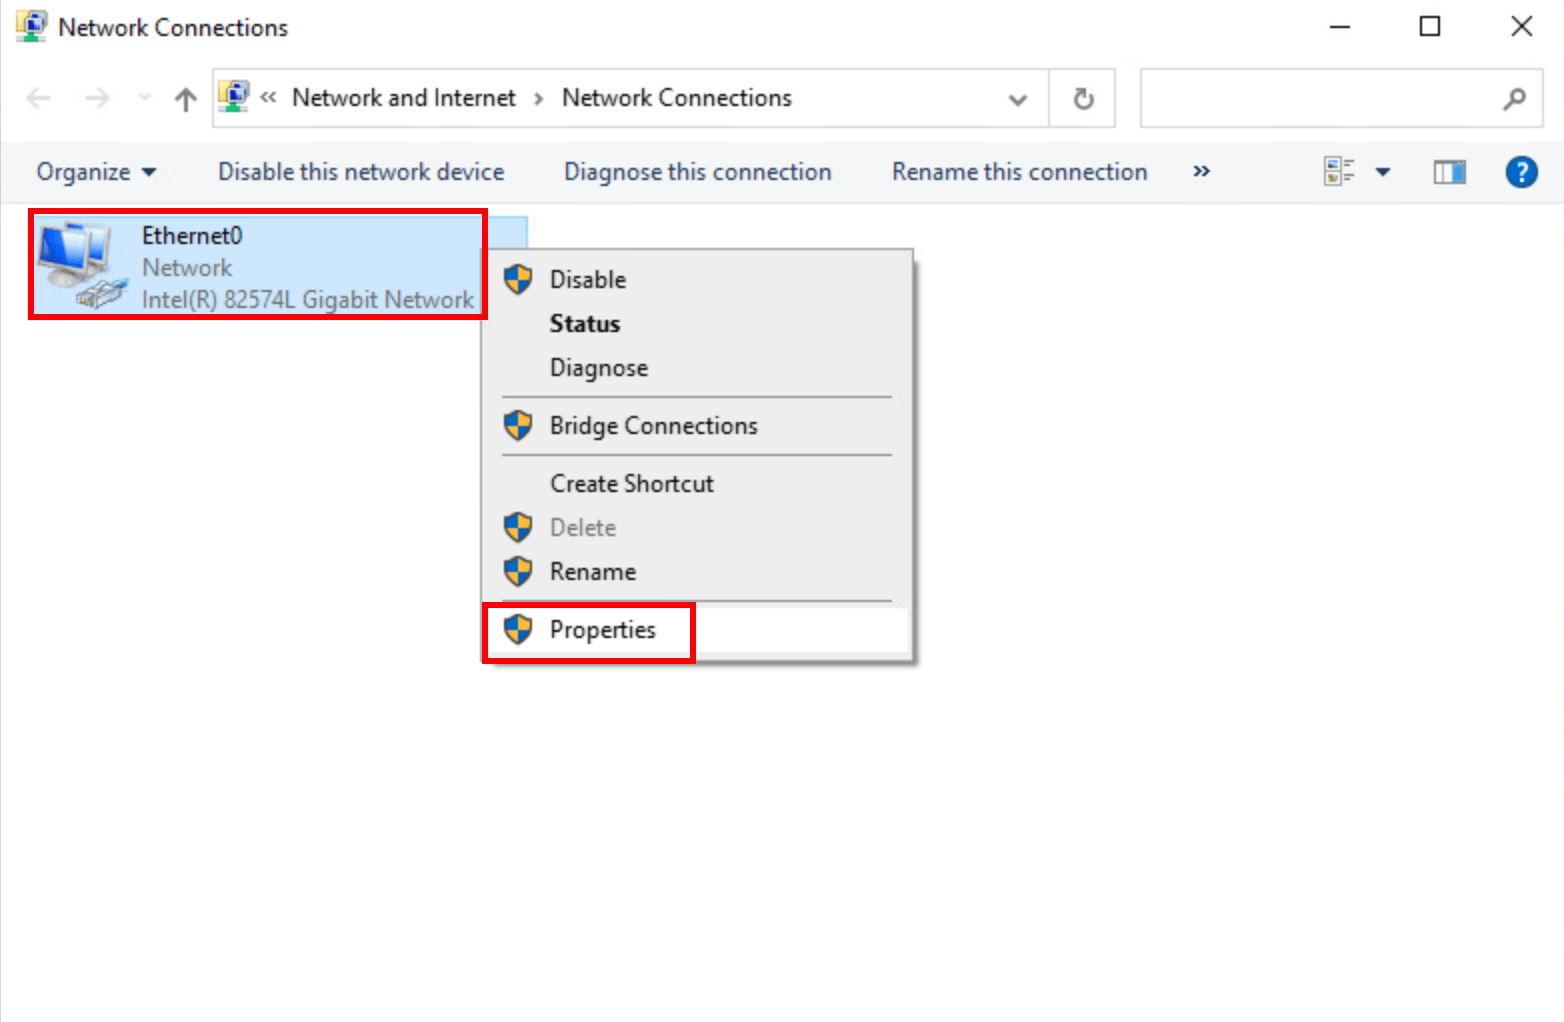
- Right-click the network you’re using, then click Properties.
- Select Internet Protocol Version 4 (TCP/IPv4), then click Properties.

- Select Use the following DNS server addresses, fill in the Google DNS server addresses as below, then click OK.
Preferred DNS server: 8.8.8.8
Alternate DNS server: 8.8.4.4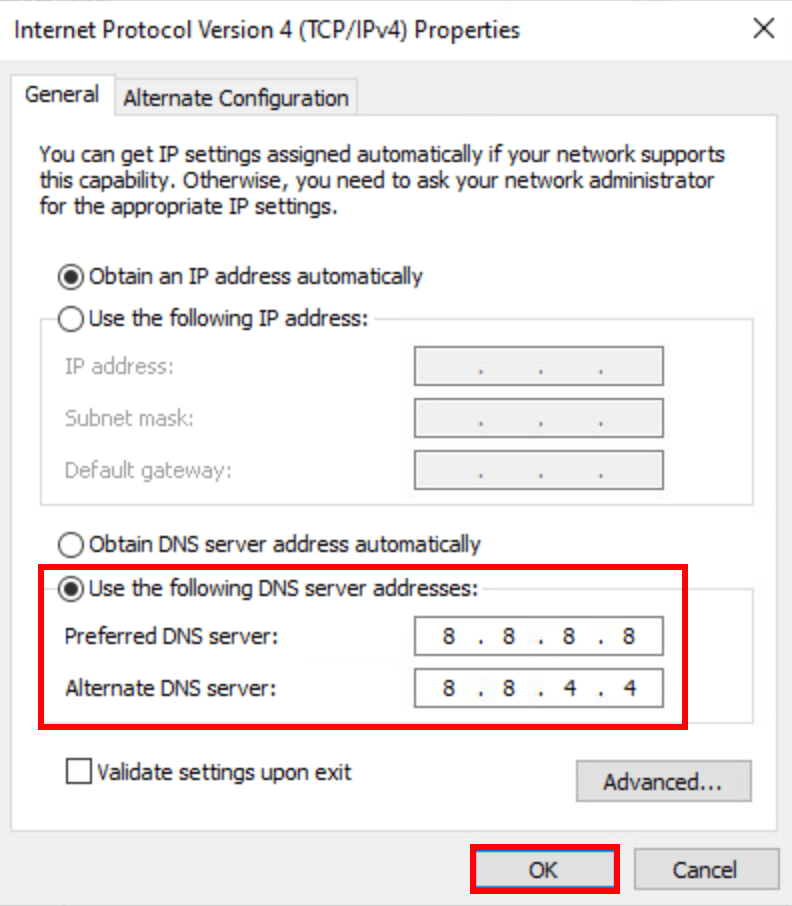
Hopefully this article helps! If you have any questions or suggestions, please feel free to drop us a comment down below.