


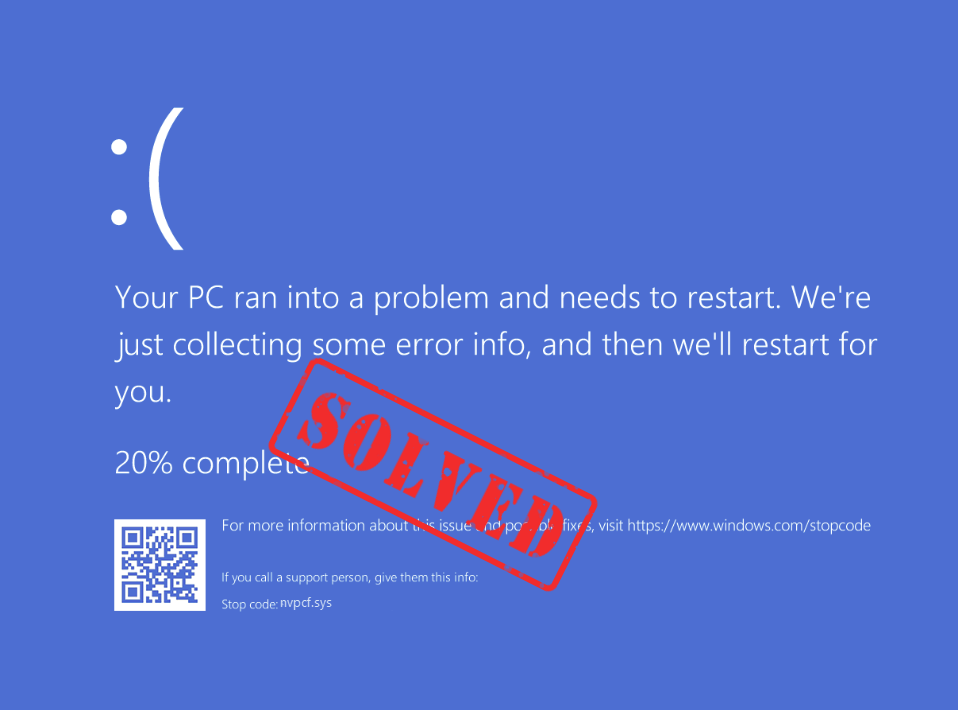
Urgh, the annoying blue screen of death error again! And this time, it’s nvpcf.sys, what does that even mean? If this is happening to you, don’t worry, the nvpcf.sys blue screen error could be simply caused by a driver issue with your Nvidia display card. Read on and see what you can do to get this problem fixed once and for all.
Try these fixes for the nvpcf.sys blue screen error on your computer
You don’t have to try all the following fixes: simply work your way down the list until you find the one that does the trick to fix the nvpcf.sys blue screen of death error for you.
- Check for Windows updates
- Clean reinstall the NVIDIA graphics card driver
- Update chipset drivers
- Run SFC and DISM
- Rename the nvpcf.sys file
- Consider a system reinstallation
1. Check for Windows updates
If your system isn’t updated regularly, there could be compatibility issues that can cause system issues like the nvpcf.sys blue screen of death error. To make sure that you have the latest available updates installed:
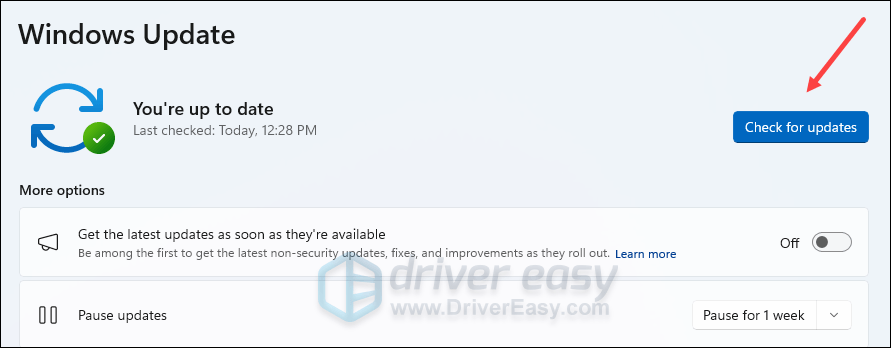
- On your keyboard, hit the Windows key, then type check for updates, then click Check for updates.

- Click Check for updates, and Windows will scan for any available updates.
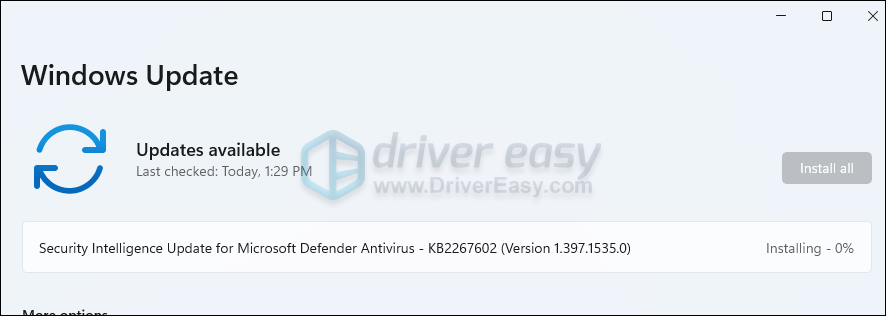
- If there are available updates, Windows will automatically download them for you. Restart your computer for the update to take effect if needed.
- If there are no available updates, you’ll see You’re up to date like this.
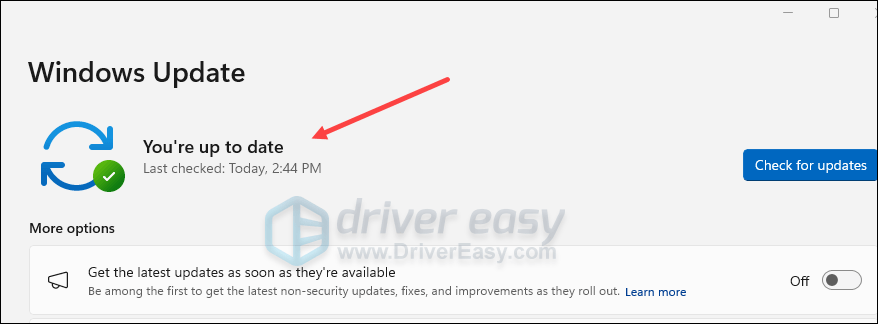
Then restart your computer, and see if the nvpcf.sys blue screen of death error still remains. If the problem persists, please move on to the next fix.
2. Clean reinstall the NVIDIA graphics card driver
As mentioned, the nvpcf.sys blue screen of death error is related to your Nvidia graphics card driver, which could be at fault for mysterious reasons.
In this case, it’s recommended that you do a clean reinstallation of the NVIDIA display card driver. To do so, DDU (Display Driver Uninstaller) is usually recommended, as it can do a pretty good job removing all the older or faulty display driver files on your computer.
To do a clean reinstallation of the display card driver with DDU:
- Download and search for the execution file of the display card driver from the website of your GPU manufacturer (if you’re not sure how to do it, please jump here to see how you can get the graphics card driver updated automatically):
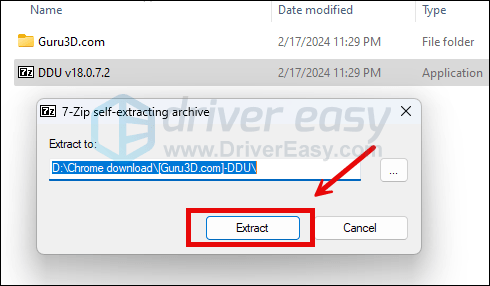
- Download DDU from the official download page. Then unzip the folder, and double-click the DDU file to further extract the execution file.
- Boot your computer into Safe Mode as instructed here: Start Safe Mode using the System Configuration tool
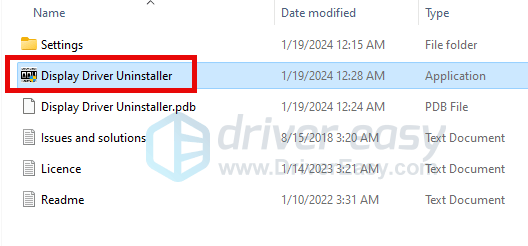
- When in Safe Mode, go to the folder where you unzip the DDU execution file. Double-click to run Display Driver Uninstaller.
- Select GPU and your GPU manufacturer on the right side. Then click Clean and restart.
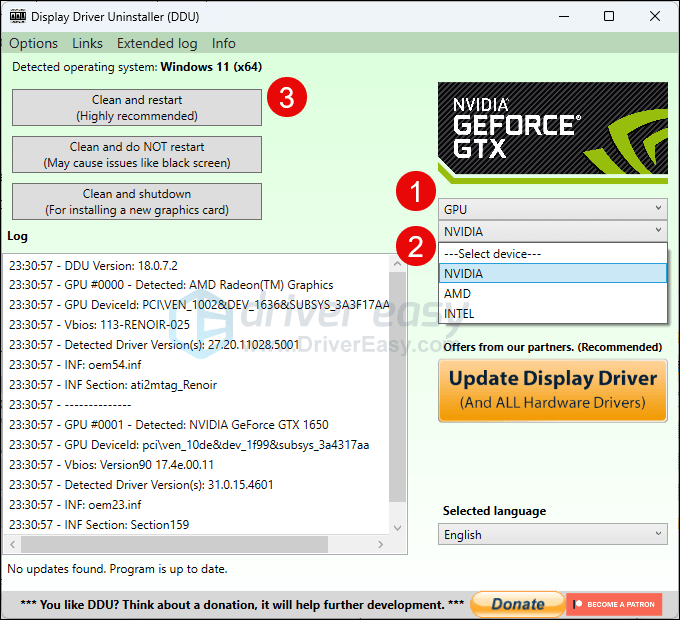
- Your computer should restart when the old driver files for your graphics card are cleaned.
- Double-click the setup file for the display card driver you’ve downloaded from step 1 to run the driver installation.
- Restart your computer afterward.
If you don’t have the time, patience or skills to update the driver manually, you can do it automatically with Driver Easy. Driver Easy will automatically recognize your system and find the correct drivers for it. You don’t need to know exactly what system your computer is running, you don’t need to be troubled by the wrong driver you would be downloading, and you don’t need to worry about making a mistake when installing. Driver Easy handles it all.
You can update your drivers automatically with either the 7 days free trial or the Pro version of Driver Easy. It takes just 2 clicks, and you get full support and a 30-day money-back guarantee with the Pro version:
- Download and install Driver Easy.
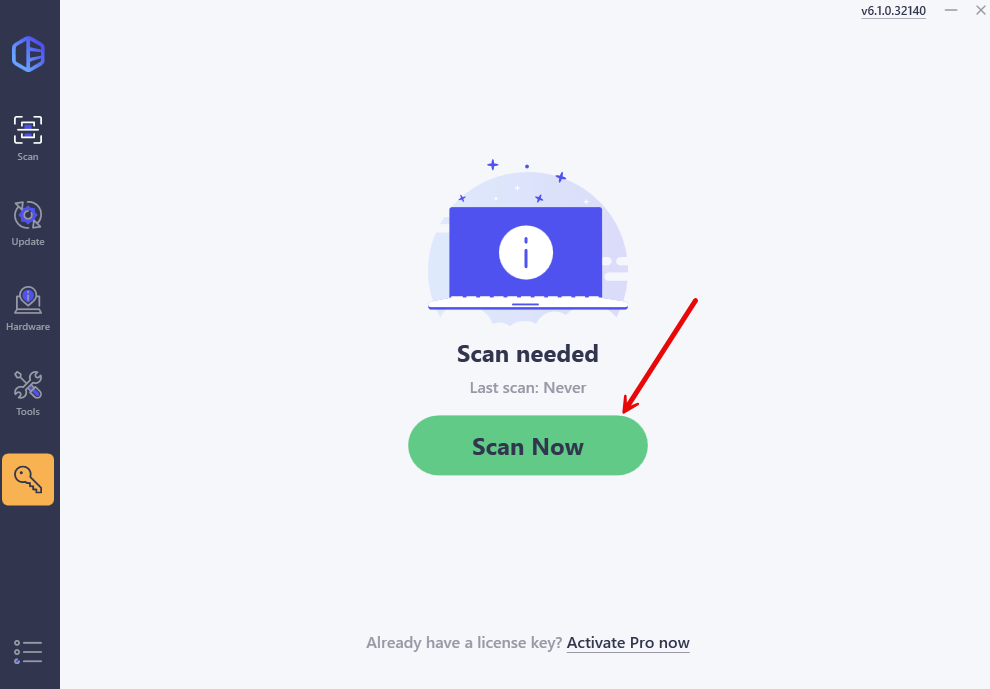
- Run Driver Easy and click the Scan Now button. Driver Easy will then scan your computer and detect any problem drivers.
- Click the Activate & Update button next to the flagged device to automatically download and install the correct version of this driver.
Or click Update All to automatically download and install the correct version of all the drivers that are missing or out of date on your system (You’ll need the Pro version for this – when you select Update All, you’ll get a prompt to upgrade. If you’re not prepared to purchase the Pro version yet, Driver Easy provides a 7-day trial at no cost, granting access to all Pro features like fast downloads and easy installation. No charges will occur until after your 7-day trial period ends.)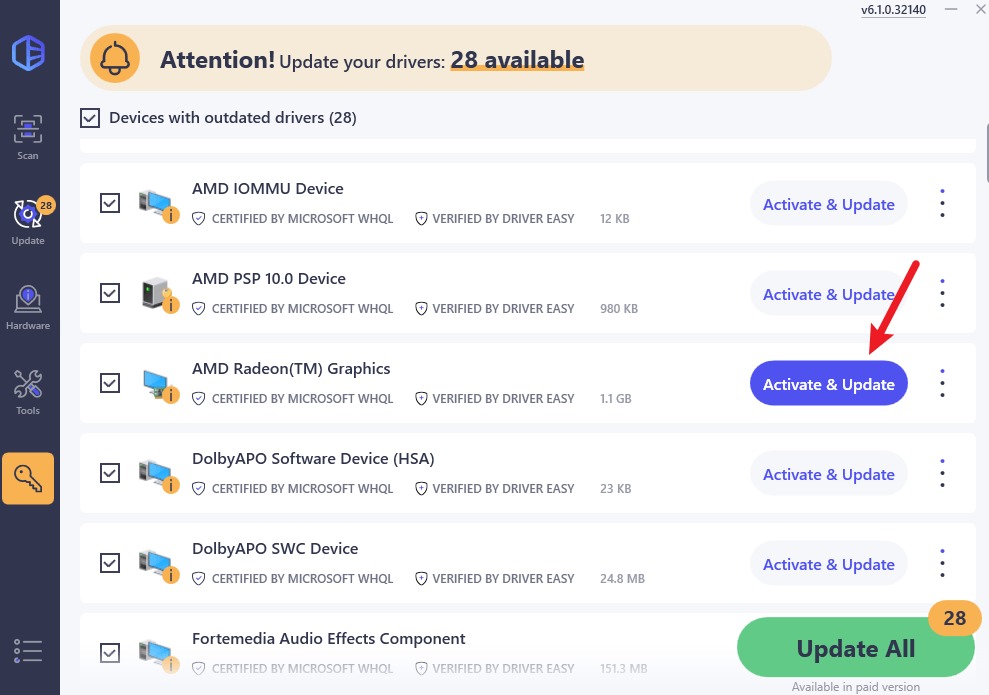
- Restart your computer for the change to take effect.
See if the nvpcf.sys blue screen of death error remains. If this fix doesn’t work for you, try the next fix, below.
3. Update chipset drivers
Another common reason why you have the nvpcf.sys blue screen of death error could be faulty or outdated chipset drivers. To fix it, you can try to update the chipset drivers with the correct driver file downloaded from the official website of your motherboard manufacturer.
To get this done, you’ll first know the exact motherboard model for your device, then go to the official website to search and download the correct driver files for your operating system.
If you’re not sure how to do all that, see here how you can update the chipset drivers automatically.
4. Run SFC and DISM
Corrupted system files may cause blue screen of death errors like nvpcf.sys. Luckily, there are two built-in tools that can help to identify and repair such bad system files. The whole process could take some time, and we suggest you don’t run any other programs when doing the test. If you find the command lines too intimidating and you’re afraid that things could go wrong somehow, please see here how you can do the system file repair automatically.
To run these tools:
4.1 Scan corrupt files with System File Checker
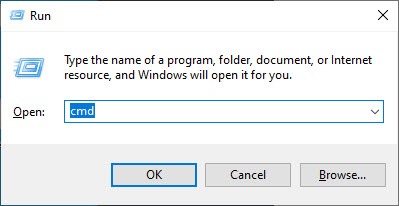
1) On your keyboard, press the Windows logo key and R at the same time. Type cmd and press Ctrl+Shift+Enter at the same time to run Command Prompt as administrator.
Click Yes when prompted for permission to make changes to your device.
2) In the Command Prompt window, copy and paste the following command and hit Enter.
sfc /scannow
3) System File Checker will then scan all system files and repair any corrupted or missing ones it detected. This may take 3-5 minutes.
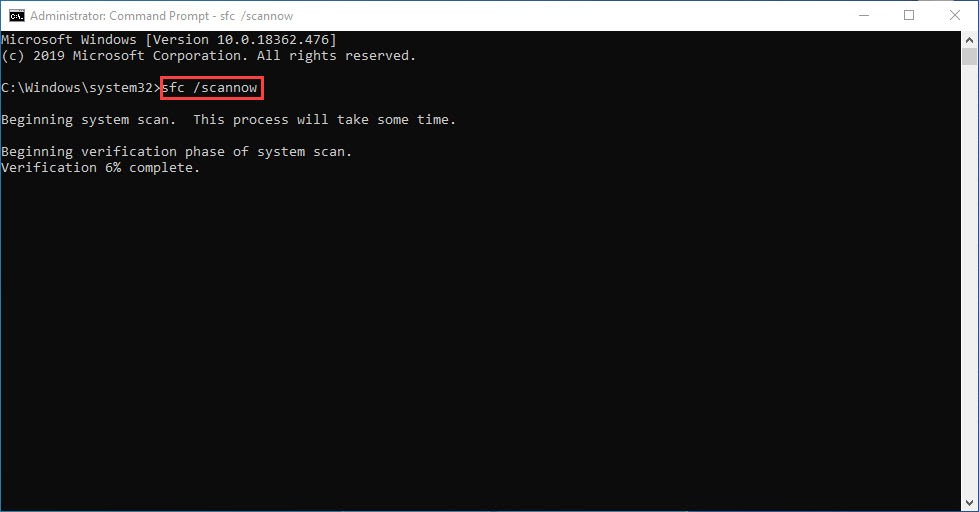
4) After the scan, restart your computer, and see if the nvpcf.sys blue screen of death error still persists . If so, move on to the next test:
4.2 Run dism.exe
1) On your keyboard, press the Windows logo key and R at the same time. Type cmd and press Ctrl+Shift+Enter to run Command Prompt as administrator.
Click Yes when prompted for permission to make changes to your device.
2) In the Command Prompt window, copy and paste the following commands and hit Enter after each line:
dism.exe /online /cleanup-image /scanhealth
dism.exe /online /cleanup-image /restorehealth
2) When the process finishes:
- If the DISM tool gives you errors, you can always try this command line. This will take up to 2 hours.
dism /online /cleanup-image /startcomponentcleanup
- If you get Error: 0x800F081F, reboot your computer, then open Command Prompt as administrator again (step 1) and run this command line instead:
Dism.exe /Online /Cleanup-Image /AnalyzeComponentStore
When these tests are done, restart your computer and see if nvpcf.sys blue screen of death error is still seen. If the problem still persists, please move on to the next fix.
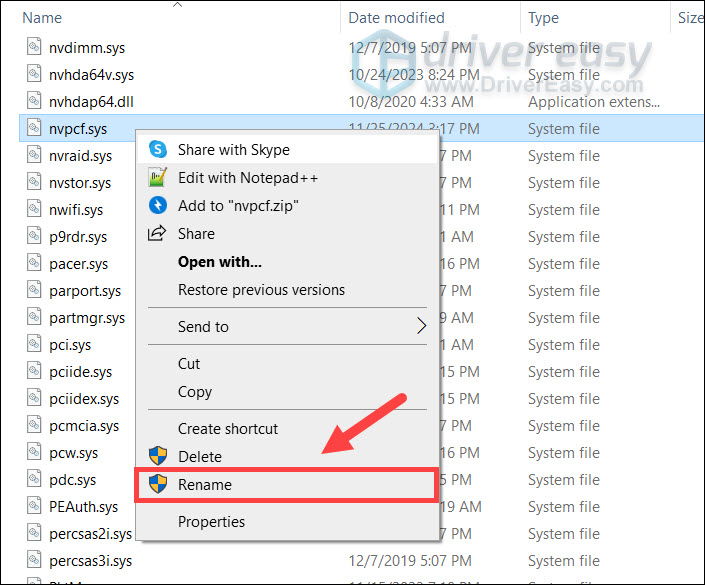
5. Rename the nvpcf.sys file
A number of users reported that changing the name of the nvpcf.sys file fixed their issues. So you can try the same method and see if it’s a potential fix for you.
- On your keyboard, press Win+R to invoke the Run box. In the input box, enter or paste C:\Windows\System32\Drivers\ then click OK.
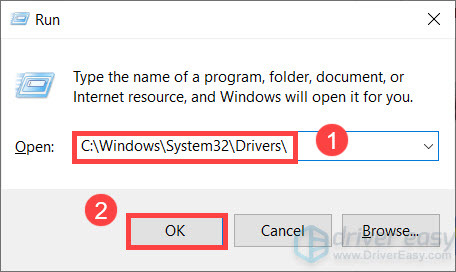
- Find and right click the nvpcf.sys file, then select Rename. Change the name to nvpcf.sys.old and restart your PC.
If this fix didn’t give you luck, take a look at the next approach.
6. Consider a system reinstallation
If the nvpcf.sys blue screen of death error is still seen at this stage, you can consider a system reinstallation.
If you need further instructions on how to do it, here’s a post for your reference: Reinstall/Reset Windows 10 [Step By Step] the screenshots are from Windows 10, but the instructions work on Windows 11 as well.
If the nvpcf.sys blue screen of death error is still there after the computer reset or reinstallation, the problem is likely due to the faulty hardware. In that case, you should contact your computer vendor to see if they can help to repair your computer. If your computer is out of warranty, you’ll need to seek help from a hardware technician to get your Nvidia graphics card checked, or simply get a new graphics card.
Hope one of the above methods helps to fix the the nvpcf.sys blue screen of death error for you. If you have other constructive suggestions, please feel free to leave a comment below. We’re all ears.