


OBS is one of the most popular video-recording and live-streaming apps, especially among players. However, there have been a lot of reports about OBS crashing. If OBS constantly crashes on your Windows 10/11 or causes the games to crash while streaming, don’t worry. We’ll show you some simple but effective methods to get it back to work.
Try these fixes:
Here are 4 fixes that helped other users with the OBS crashing issue. You don’t have to try them all. Just work your way down the list until you find the one that does the trick.
- Update your graphics driver
- Adjust the compatibility settings
- Allow OBS through Windows Firewall
- Install DirectX
Fix 1 – Update your graphics driver
Before getting into the more complicated solutions for OBS crashes, you should always ensure that your graphics driver is up to date. This is important to the function of OBS. You can download the correct and latest driver directly from the GPU manufacturer’s website: AMD, Intel or NVIDIA. Then you’ll need to install the driver manually.
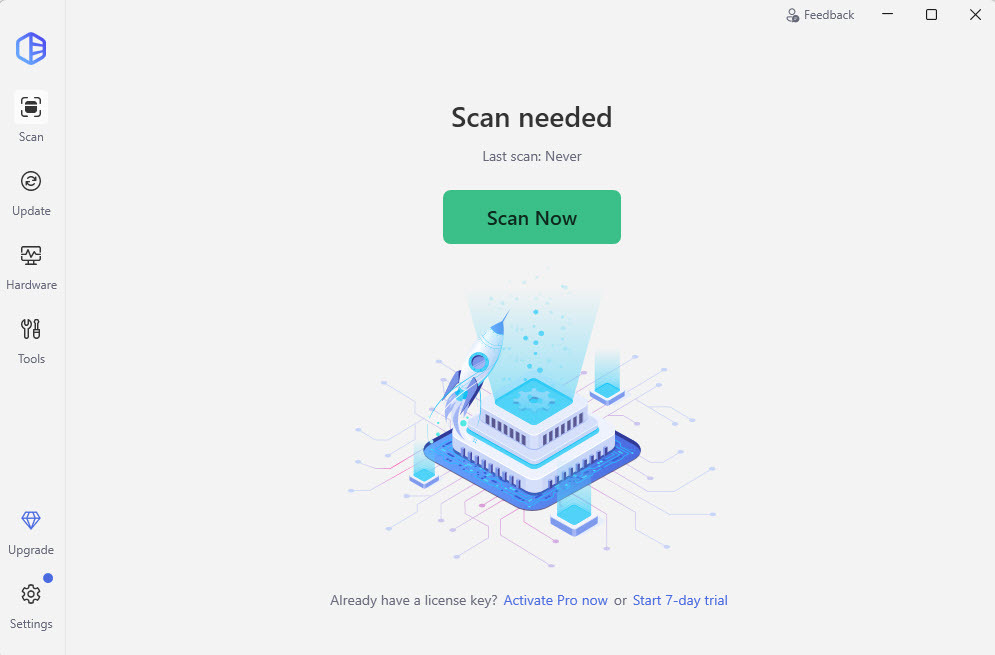
If you don’t have the time, patience or computer skills to update your graphics drivers manually, you can, instead, do it automatically with Driver Easy. Driver Easy will automatically recognize your system and find the correct drivers for your exact GPU, and your Windows version, and it will download and install them correctly:
- Download and install Driver Easy.
- Run Driver Easy and click the Scan Now button. Driver Easy will then scan your computer and detect any problem drivers.
- Click the Activate & Update button next to the flagged graphics driver to automatically download and install the correct version of that driver. Or click Update All to automatically download and install the correct version of all the drivers that are missing or out of date on your system.
(Note: This will prompt an upgrade to the Pro version. Driver Easy offers a 7-day free trial, providing access to premium features such as high-speed downloads and one-click installs without any charges until the trial period ends.)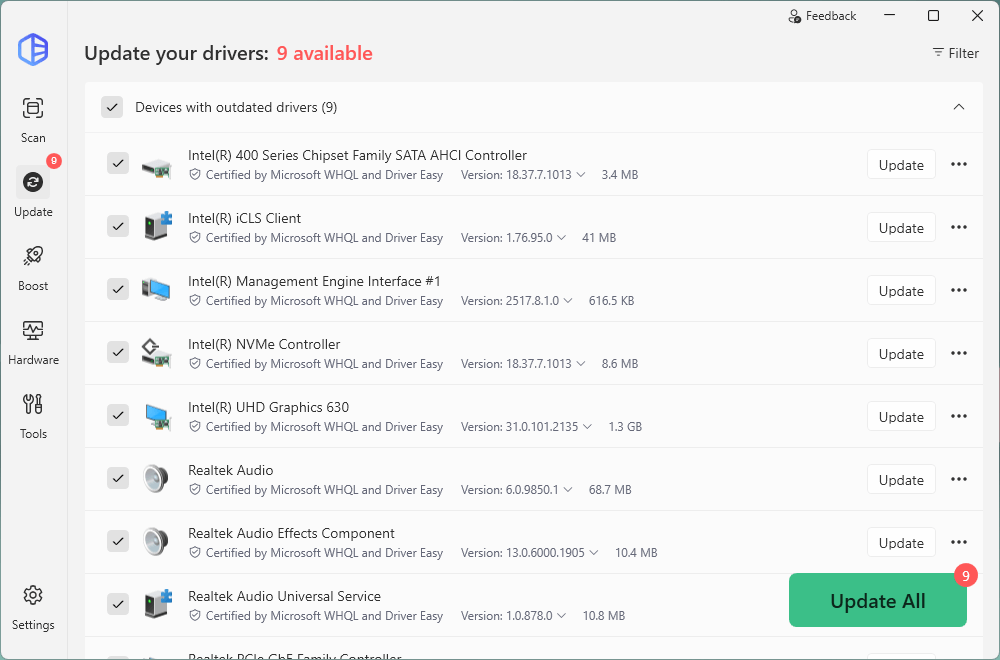
After it completes, restart your computer to employ the changes.
In addition, it’s advisable you update your Windows. It’s crucial for maintaining system stability and security. Regular updates provide security patches that protect against vulnerabilities, enhance performance, and ensure compatibility new software and hardware.
To check if there are updates available, then download and install them, follow the steps below.
on Windows 11
- Press the Windows logo key + I on your keyboard to open the Windows Settings app.
- Select Windows Update from the left pane. Then click Check for updates.
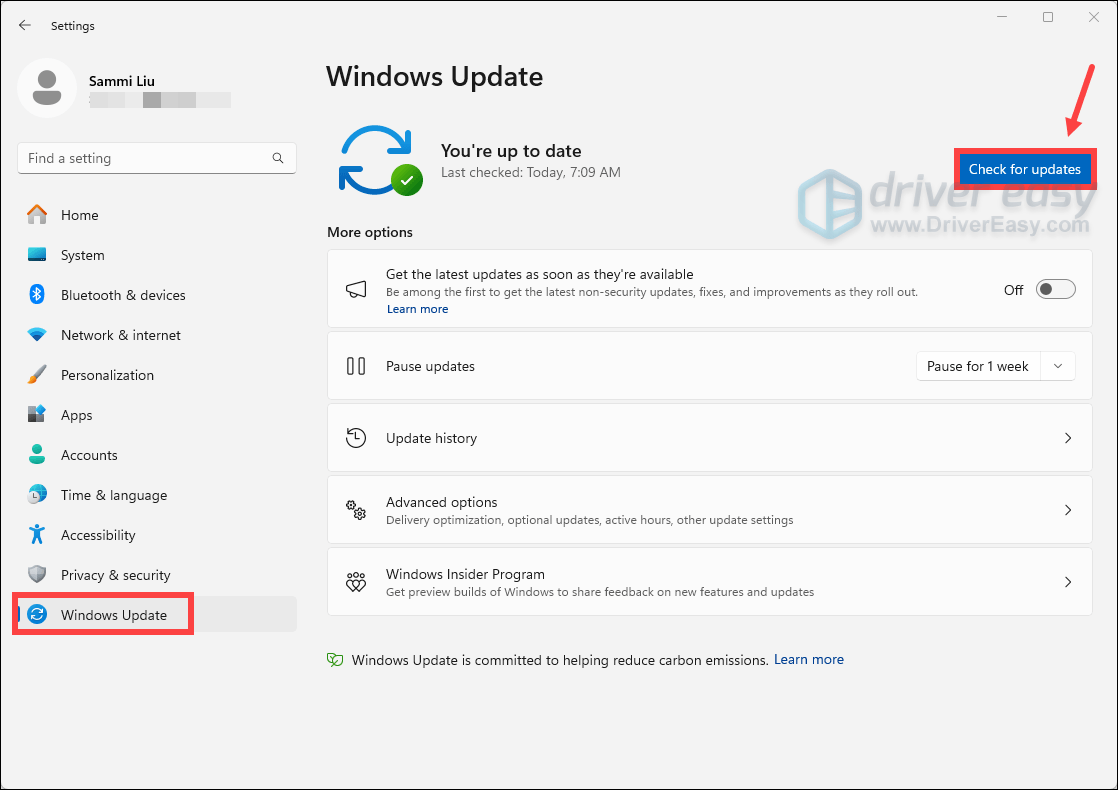
Windows will scan for any available updates. If updates are found, they’ll be downloaded and installed automatically. This process may take some time, depending on the size of the updates.
Repeat these steps until you see the message You’re up to date, ensuring that all updates have been installed. Once done, restart your computer to apply the changes.
on Windows 10
- Press the Windows logo key + I on your keyboard to open the Windows Settings app.
- Select Update & Security.

- Click Check for updates.
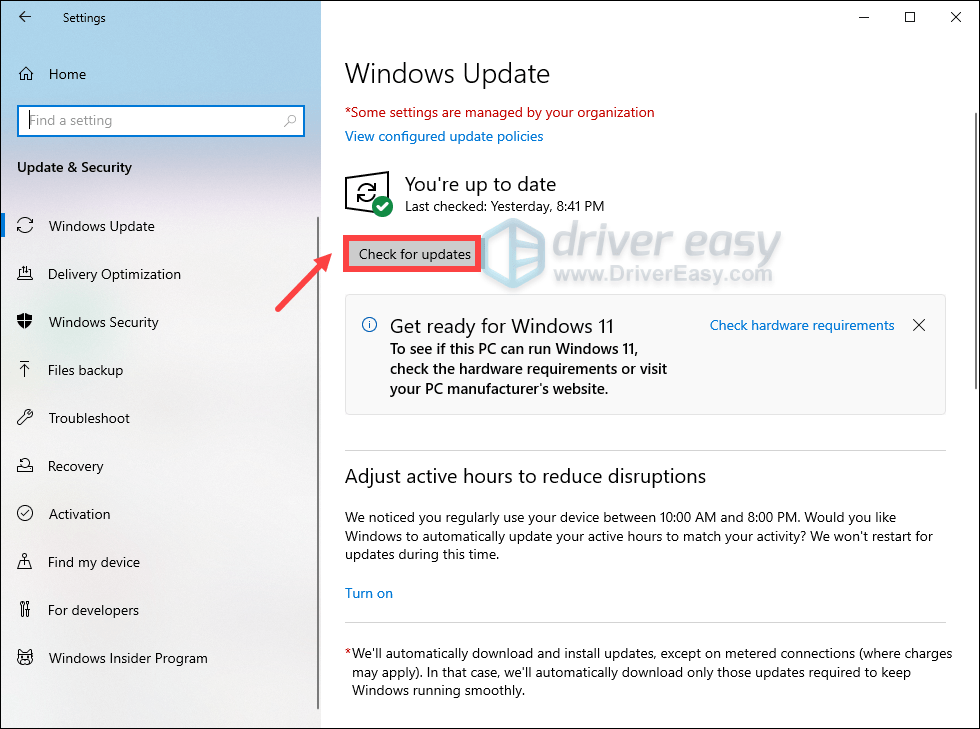
Windows will scan for any available updates. If updates are found, they’ll be downloaded and installed automatically. This process may take some time, depending on the size of the updates.
Repeat these steps until you see the message You’re up to date, ensuring that all updates have been installed. Once finished, restart your computer.
Fix 2 – Adjust the compatibility settings
If the OBS isn’t compatible with your Windows version, or it fails to access necessary permissions, it will crash. In this case, you should change the program’s compatibility settings properly.
- Right-click the OBS Studio.exe file and select Properties.

- Navigate to the Compatibility tab. Then tick Run this program in compatibility mode for and select Windows 7 or 8.
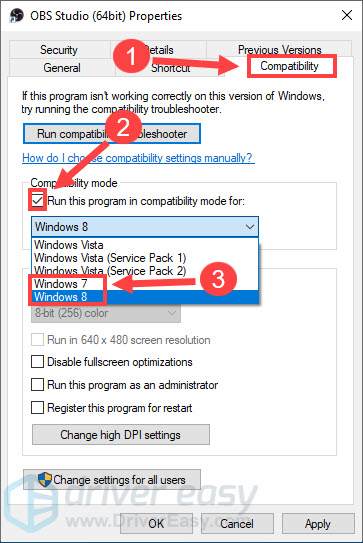
- Tick Run this program as an administrator. Then click OK to save the changes.
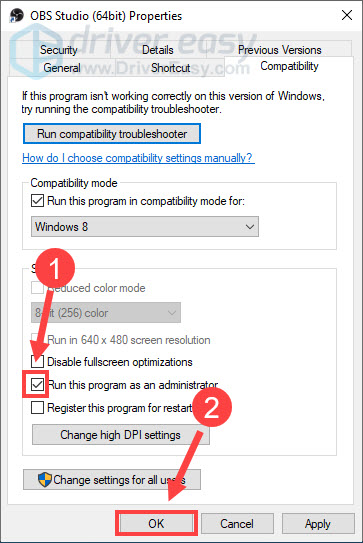
When the new settings are applied, test your OBS again. If it still crashes, check out the next fix.
Fix 3 – Allow OBS through Windows Firewall
To allow OBS to work as expected, make sure the Windows Defender Firewall isn’t blocking the app. You can check with the following steps:
- Type windows defender firewall in the Windows search box and select Windows Defender Firewall.
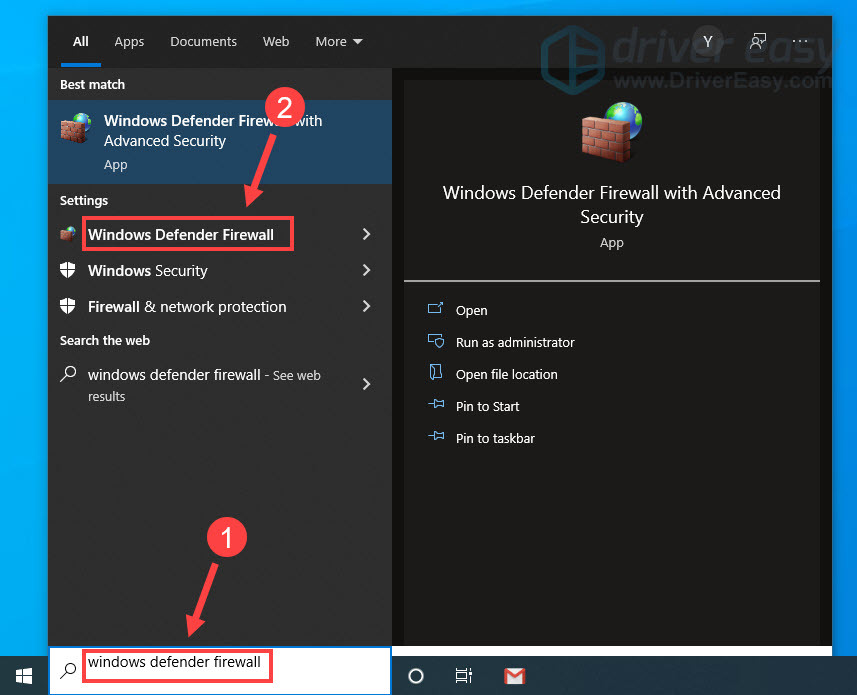
- From the left panel, click Allow an app or feature through Windows Defender Firewall.
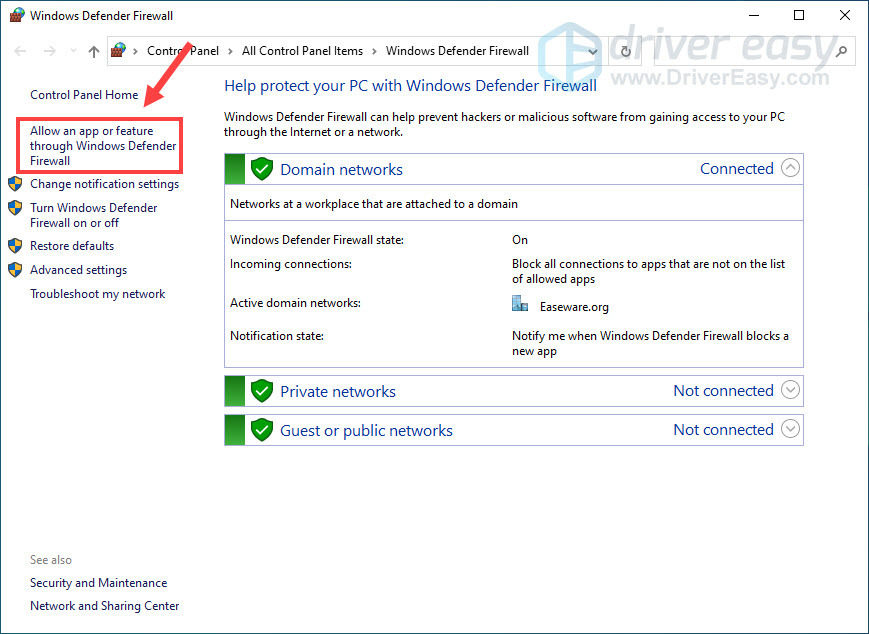
- Click Change settings.
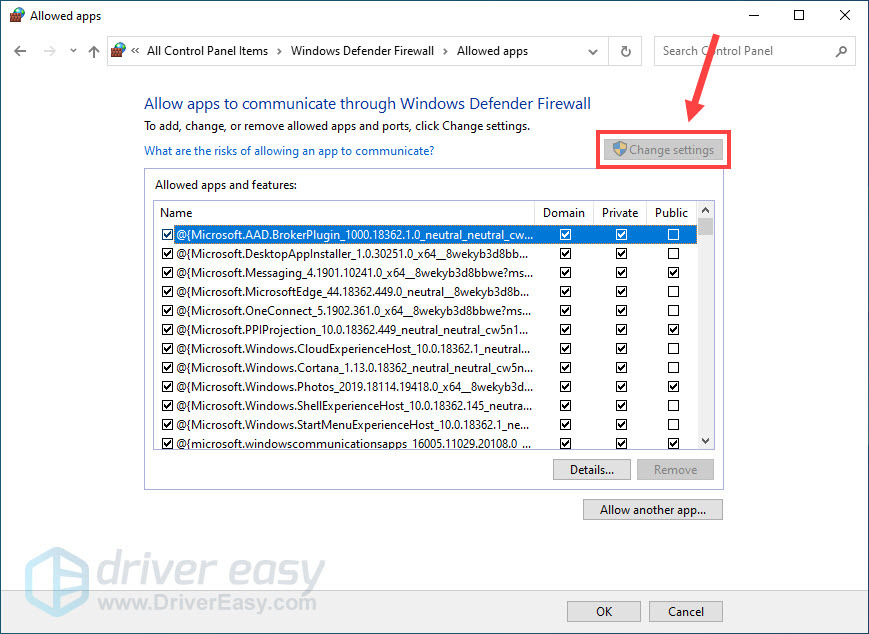
- Scroll the list to locate the OBS Studio app. Then make sure to check the box under the Private and Public tab.
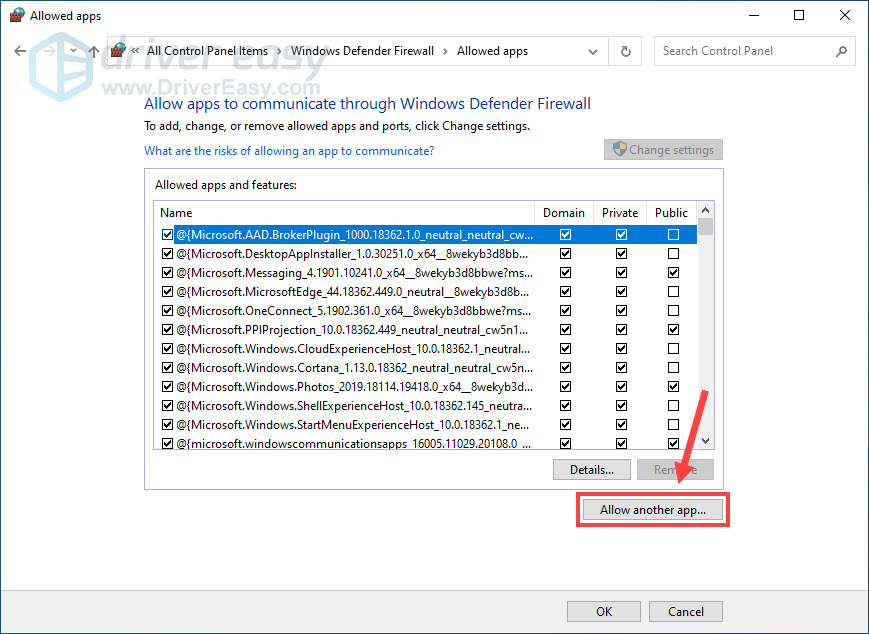
- If you don’t find the app in the list, click Allow another app.
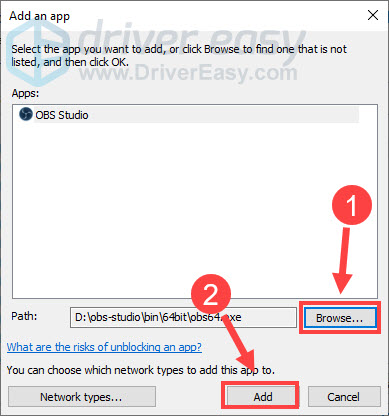
- Click Browse, navigate to the OBS installation folder and locate the OBS Studio.exe file. Then click Add.
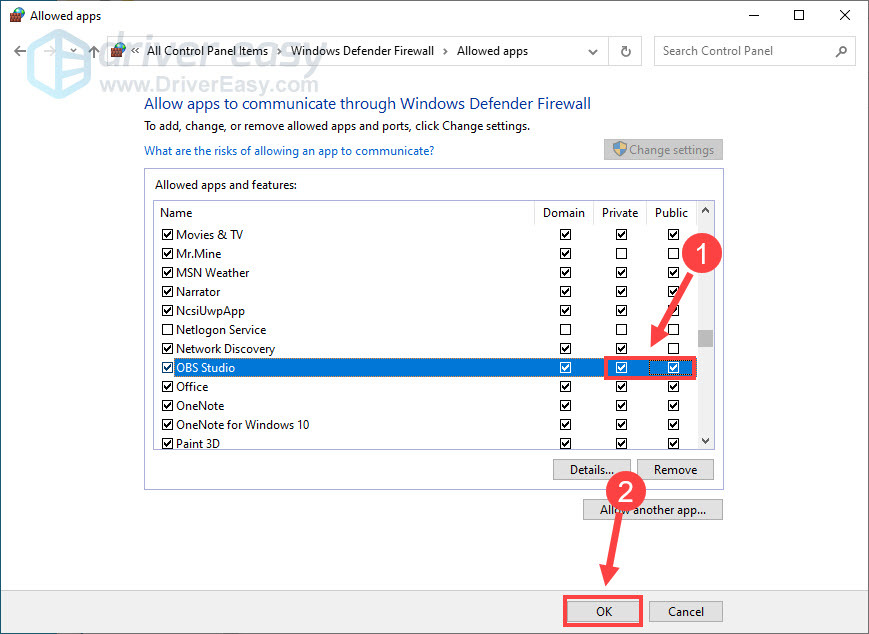
- Tick the box under the Private and Public tab next to OBS Studio, and click OK to confirm.
If you’ve installed any antivirus on the computer, add OBS to their whitelists so they won’t prevent OBS from running. Now see if you’re able to stream with OBS without problems. If not, move on to Fix 4 below.
Fix 4 – Install DirectX
DirectX is a set of components that allows software, primarily and especially games, to work directly with your video and audio hardware. If your OBS crashes with certain DirectX-related errors cropping up, such as your system is missing DirectX components that OBS requires, or the program can’t start because d3dx10_43.dll is missing from your computer, installing DirectX may solve the issue. Here’s how:
- Visit the official DirectX download page.
- Select your preferred language and click Download.
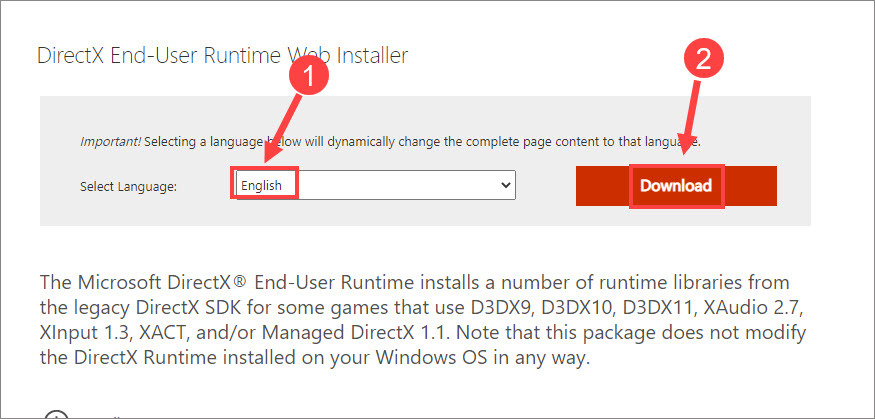
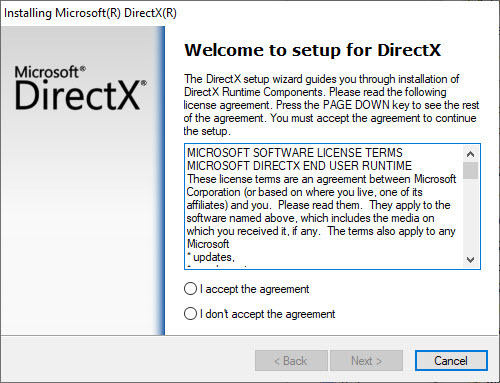
- It will directly download the DirectX installer to your computer. Once done, open the downloaded file (dxwebsetup.exe file) and follow the setup wizard to install it.
Hopefully one of the fixes above resolves your OBS crashing issue. If you have any questions or suggestions, please feel free to leave your comment below.