


War Thunder keeps crashing on startup, or it constantly closes to desktop while you’re in the middle of the game?
This is extremely frustrating, and you’re certainly not alone. Many players are reporting it, but the good news is that you can fix it. Here are 8 fixes to try.
How to fix War Thunder crashing on PC
You may not have to try them all; just work your way down the list until you find the one that works for you.
- Meet the minimum system requirements
- Restart your computer
- Run your game as an administrator
- Install the latest game patch
- Verify the integrity of game files
- Update your graphics driver
- Change your PC’s Power Settings
- Reinstall your game
Fix 1: Meet the minimum system requirements
To run War Thunder on your PC, make sure that your computer meets the minimum system requirements; otherwise, you’ll need to play the game on another computer.
OS: Windows 7/Vista/8/10
Processor: 2.2 GHz
Memory: 4 GB RAM
Graphics: Intel HD Graphics 4000 / AMD Radeon 46XX / NVIDIA GeForce GT 520
DirectX: Version 10
Storage: 9 GB available space
Here is how to view your hardware information:
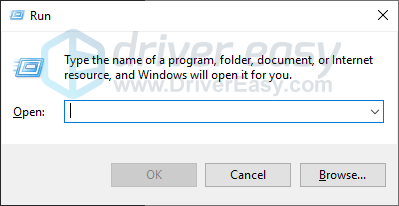
1) On your keyboard, press the Windows logo key and R at the same time to invoke the Run dialog.
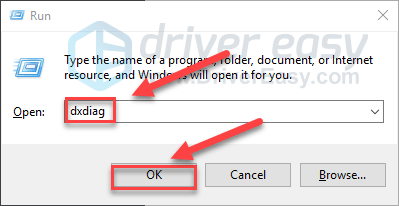
2) Type dxdiag and click OK.
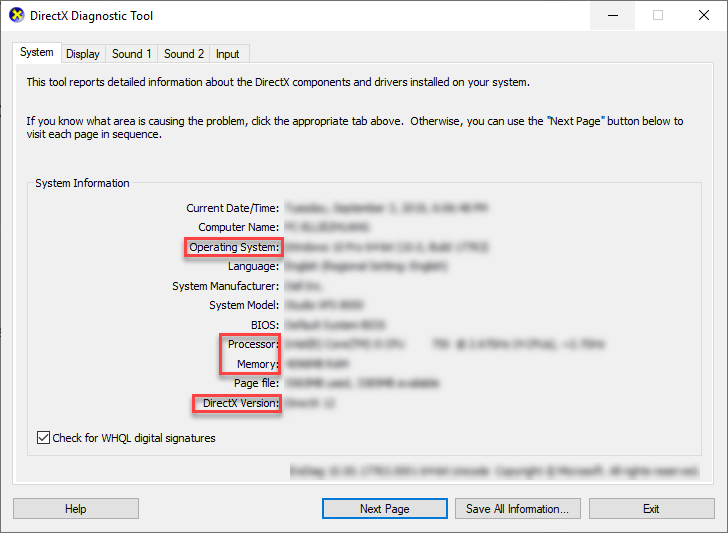
3) Check your Operating System, Processor, Memory and DirectX Version.
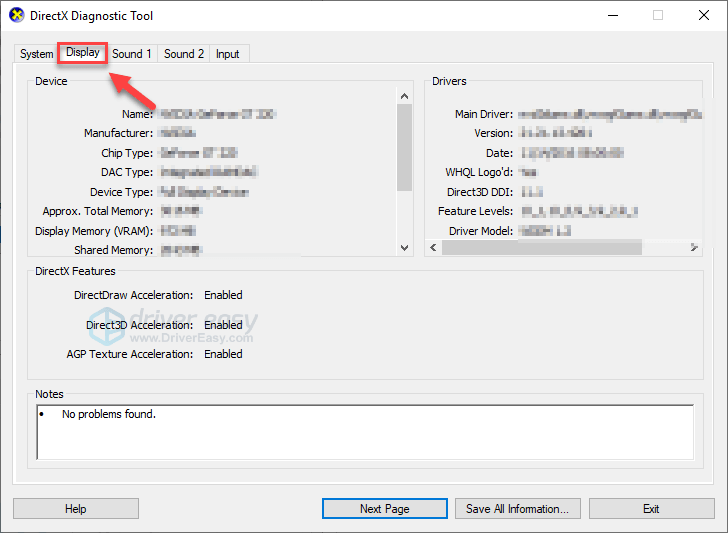
4) Click the Display tab, and then check your graphics card’s information.
If your computer meets the minimum requirements, read on and check the fix, below.
Fix 2: Restart your computer
Some programs running on your PC may conflict with War Thunder, causing it to crash constantly. To see if that’s the problem for you, try restarting your computer to end unwanted programs completely, then relaunch your game to test your issue.
If War Thunder still crashes your computer, then go ahead with the next fix.
Fix 3: Run your game as an Administrator
War Thunder or Steam sometimes can’t access certain game files on your computer under normal user mode, which could result in the crashing issue. To see if that’s the problem for you, try running Steam as an administrator, then launch your game from Steam. Follow the instructions below:
1) Exit Steam.
2) Right-click the Steam icon on your desktop and select Properties.
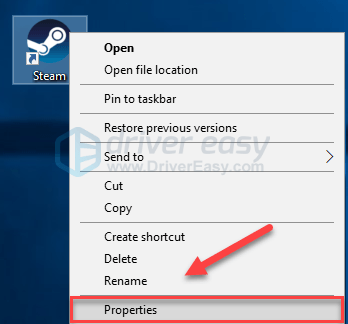
3) Click the Compatibility tab and check the box next to Run this program as an administrator. Then, click OK.
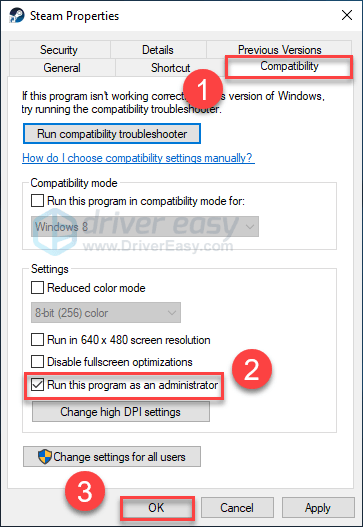
4) Relaunch Steam and War Thunder to test your issue.
You can hopefully run the game without crashing now. If the problem still exists, then go ahead with the fix below.
Fix 4: Install the latest game patch
The developers of War Thunder release regular game patches to fix bugs. It’s possible that a recent patch has stopped your game from running correctly, and that a new patch is required to fix it.
To check if there is any update, go to the War Thunder website and search for the latest patch. If a patch is available, install it, then run your game again to check whether the crashing problem has been resolved. If it hasn’t, or there was no new game patch available, move on to the next fix.
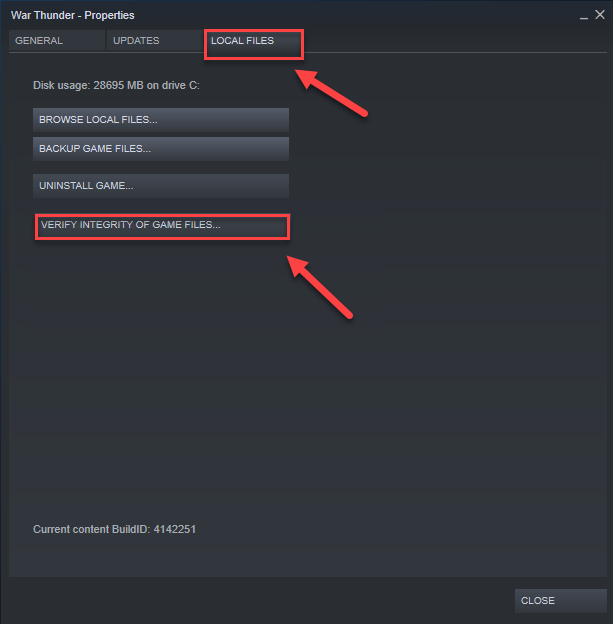
Fix 5: Verify the integrity of game files
War Thunder may crash when a certain game file is damaged or missing. To fix it, try verifying the integrity of your game files on the Steam client. Here is how:
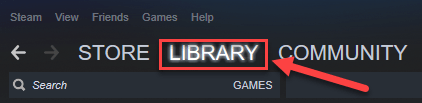
1) Run Steam.
2) Click LIBRARY.
3) Right-click War Thunder and select Properties.
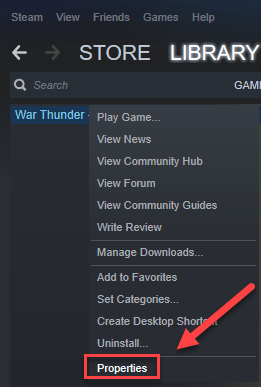
4) Click the LOCAL FILES tab, then click VERIFY INTEGRITY OF GAME FILES.
Wait for the scans to be complete, then relaunch your game to see if your problem has been resolved. If not, try the next fix.
Fix 6: Update your graphics driver
War Thunder crashing issues might occur if you’re using a faulty graphics driver, or it’s outdated. It’s essential that you have the latest graphics driver at all times.
There are two ways you can get the latest correct graphics driver:
Option 1 – Manually– You’ll need some computer skills and patience to update your drivers this way, because you need to find exactly the right the driver online, download it and install it step by step.
OR
Option 2 – Automatically (Recommended)– This is the quickest and easiest option. It’s all done with just a couple of mouse clicks – easy even if you’re a computer newbie.
Option 1 – Download and install the driver manually
The manufacturer of your graphics card keeps updating drivers. To get the latest graphics driver, you need to go to the manufacturer’s website, find the drivers corresponding with your specific flavor of Windows version (for example, Windows 32 bit) and download the driver manually.
Once you’ve downloaded the correct drivers for your system, double-click on the downloaded file and follow the on-screen instructions to install the driver.
Option 2 – Automatically update your graphics driver
If you don’t have the time, patience or computer skills to update the graphics driver manually, you can do it automatically with Driver Easy.
Driver Easy will automatically recognize your system and find the correct drivers for it. You don’t need to know exactly what system your computer is running, you don’t need to risk downloading and installing the wrong driver, and you don’t need to worry about making a mistake when installing.
You can update your drivers automatically with either the 7-day free trial or the Pro version of Driver Easy. But with the Pro version it takes just 2 clicks:
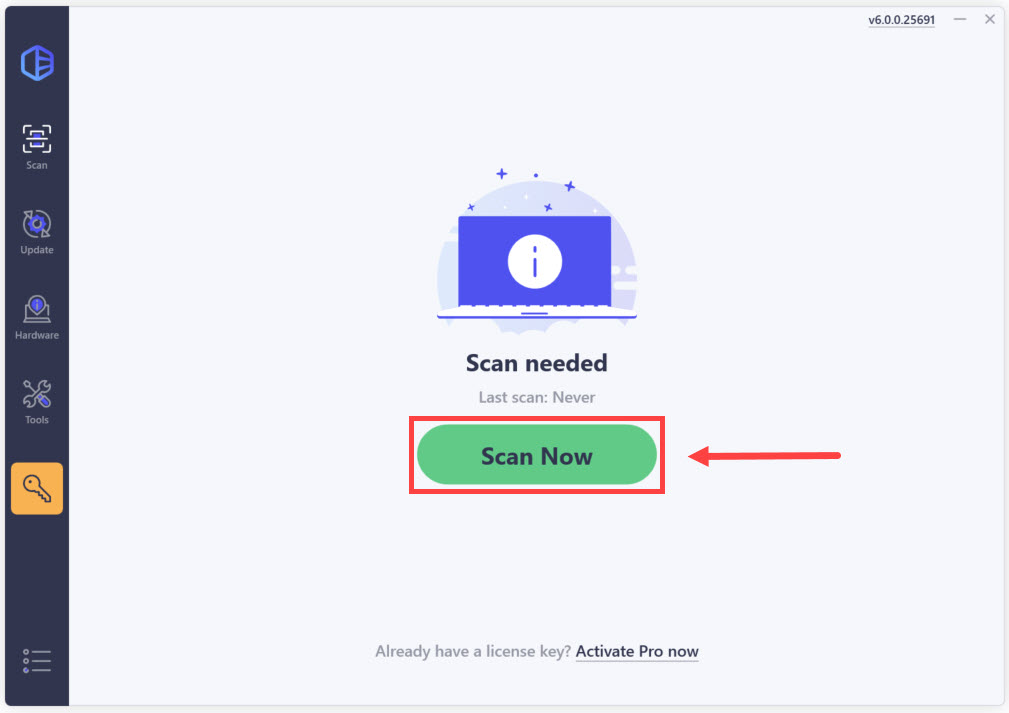
1) Download and install Driver Easy.
2) Run Driver Easy and click the Scan Now button. Driver Easy will then scan your computer and detect any problem drivers.
3) Click the Activate & Update button next to the flagged device to automatically download and install the correct version of this driver.
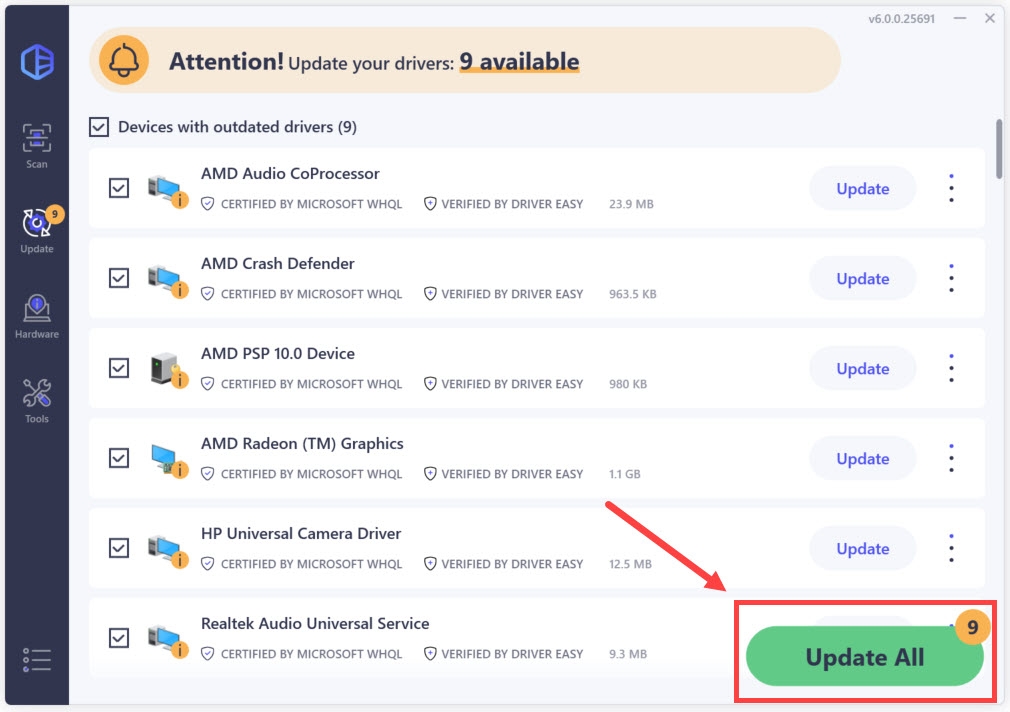
Or click Update All to automatically download and install the correct version of all the drivers that are missing or out of date on your system (You’ll need the Pro version for this – when you select Update All, you’ll get a prompt to upgrade. If you’re not prepared to purchase the Pro version yet, Driver Easy provides a 7-day trial at no cost, granting access to all Pro features like fast downloads and easy installation. No charges will occur until after your 7-day trial period ends.)
4) Restart your PC and game after the update is complete.
If your issue persists, then try the next fix below.
Fix 7: Change your PC’s Power Settings
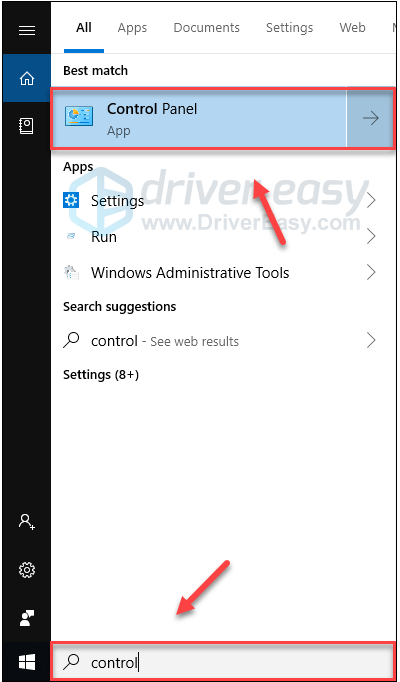
The power plan on all computers is set to Balanced by default to save more energy, so your computer sometimes will slow down to save energy, which could cause War Thunder to crash. Follow the instructions below to see how to fix it:
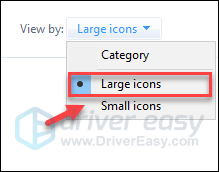
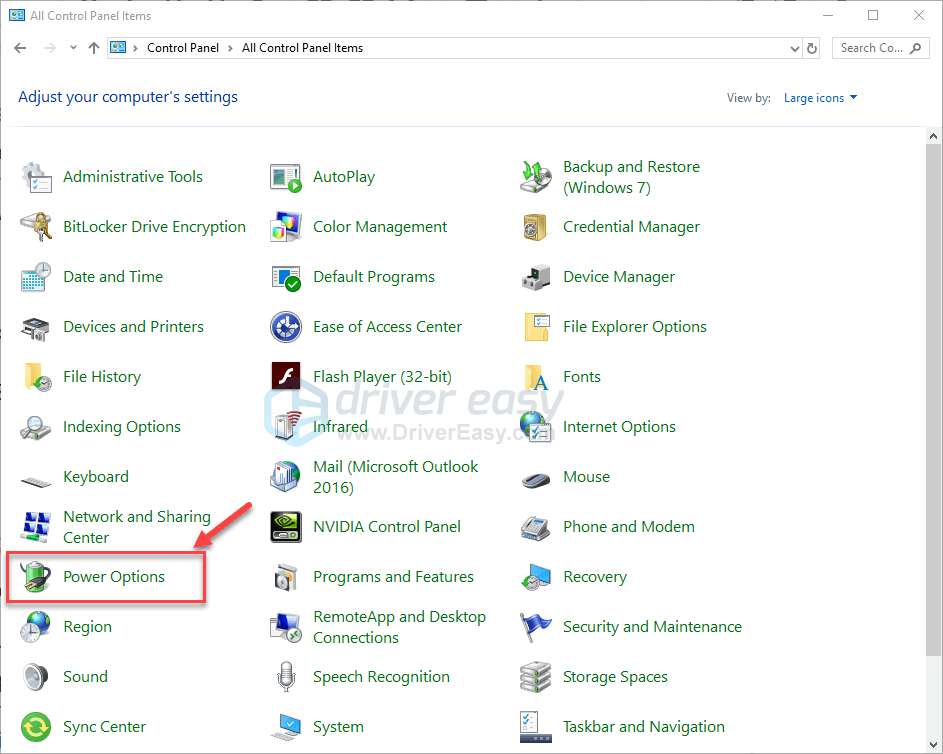
1) On your keyboard, press the Windows logo key and type control. Then, click Control panel.
2) Under View by, click Large icons.
3) Select Power Options.
4) Select High Performance.
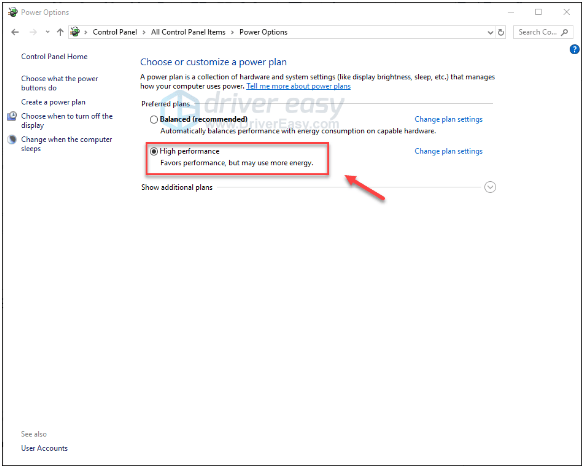
Restart your computer and your game to see if this worked for you. If your problem persists, try the fix below.
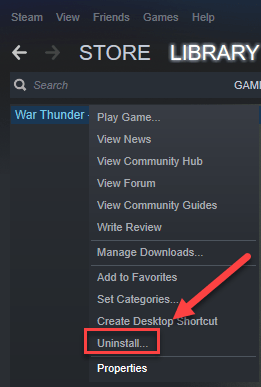
Fix 8: Reinstall your game
If none of the fixes above worked for you, reinstalling your game is very likely the solution to your problem. Here is how to do it:
1) Run Steam.
2) Click LIBRARY.
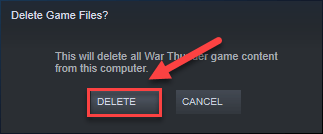
3) Right-click War Thunder and select Uninstall.
4) Click DELETE.
5) Right-click the Steam icon on the taskbar, and select Exit to exit Steam.

6) On your keyboard, press the Windows logo key and E at the same time to open File Explorer.

7) Paste C:\Program Files (x86)\Steam\steamapps\common on the address bar.
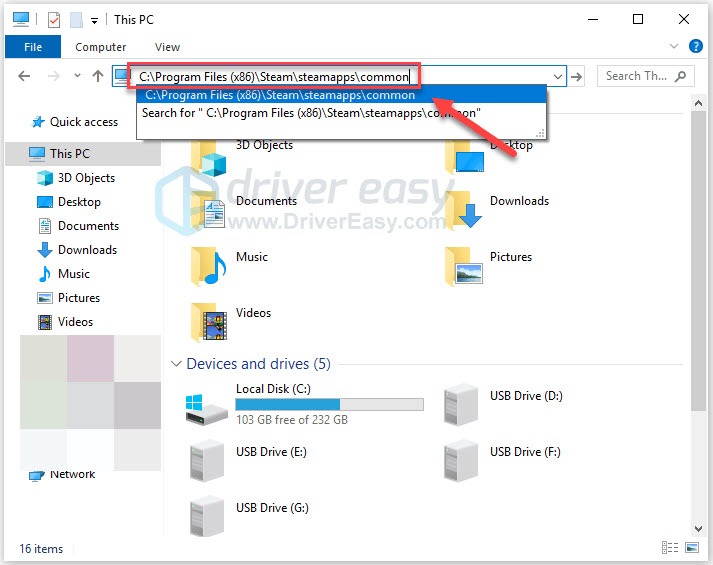
8) Highlight the War Thunder folder, and then press the Del key on your keyboard to delete the folder.
9) Run Steam to download and reinstall War Thunder.
10) Relaunch the game to see if it runs correctly now.
Hopefully, this article helped in resolving your issue! If you have any questions or suggestions, please feel free to leave us a comment below.