


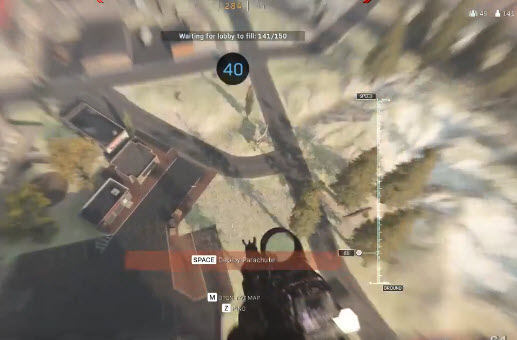
If you want to solve the flickering in Warzone, you’ve come to the right place. This post has gathered all working fixes for you.
Before trying any complicated fixes, you might want to give Alt+ Tab a try. This simple shortcut has helped some players fix the flickering issue.
How: Press Alt + Tab and wait for the screen to load windows. Then go back to the game.
If it’s not working, try the fixes below. You don’t have to try them all; just work your way down the list until you find the one that works for you.
Try these fixes
Fix 1: Update your drivers
Make sure all of your drivers are updated. You might think you’ve updated your graphic driver, but that’s not enough. Many drivers are used while gaming and most of them won’t be updated regularly with your Windows Update. The outdated or corrupted driver could be the culprit for crashing, lagging, or flickering issues.
You can update drivers one by one through the manufacturer’s official website manually, or update all drivers by Driver Easy with 2 clicks.
Driver Easy will automatically recognize your system and find the correct driver for it. You don’t need to know exactly what system your computer is running, you don’t need to risk downloading and installing the wrong driver, and you don’t need to worry about making a mistake when installing.
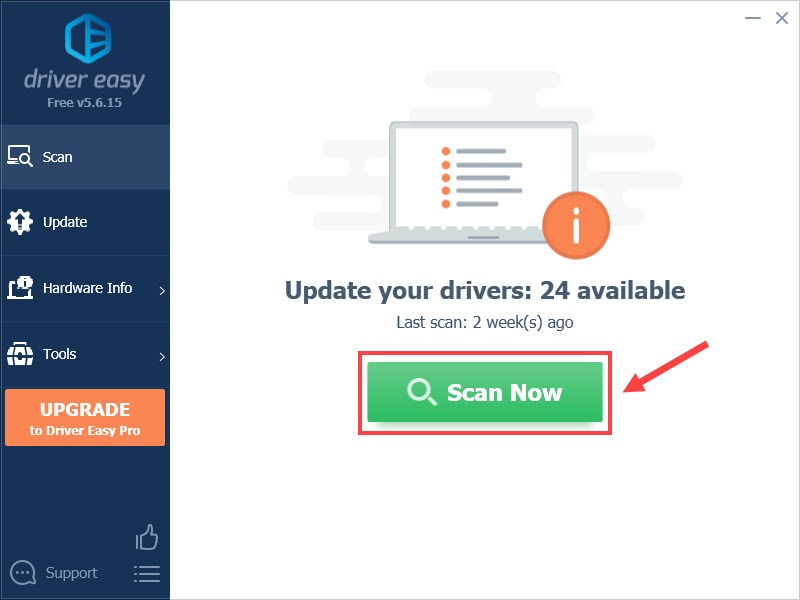
- Download and install Driver Easy.
- Run Driver Easy and click the Scan Now button. Driver Easy will then scan your computer and detect any problem drivers.
- Click the Update button next to the driver to automatically download the correct version of that driver, then you can manually install it (you can do this with the FREE version).
Or click Update All to automatically download and install the correct version of all the drivers that are missing or out of date on your system. (This requires the Pro version which comes with full support and a 30-day money back guarantee. You’ll be prompted to upgrade when you click Update All.)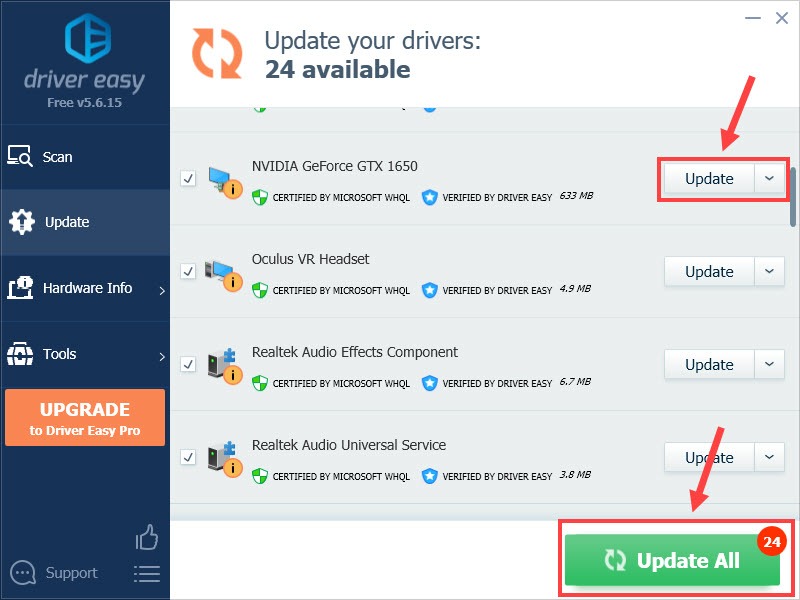
If you need assistance, please contact Driver Easy’s support team at support@drivereasy.com.
Restart your computer for the changes to take effect.
Fix 2: Change mini map shape
If the minimap was flickering and showing multiple times in every game after the restart, choosing a square mini map might fix the issue.
- Click Options on the bottom of your screen.
- Go to the General tab.
- Scroll down to HUD. Change Mini Map Shape into Square.
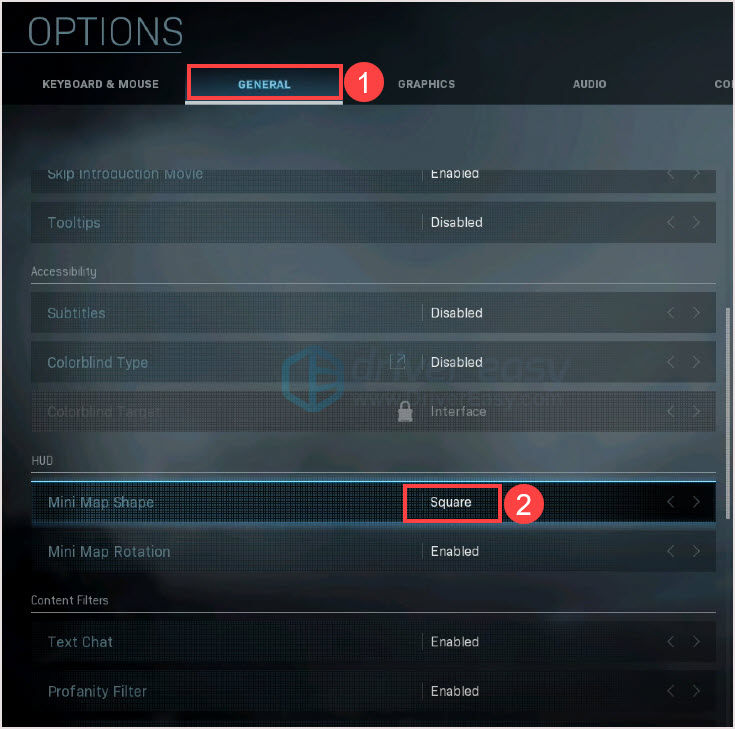
- Back to the game and check.
If it’s not working, move to the next fix.
Fix 3: Reinstall shaders & clear cache
Many players has proved reinstall shaders and clear caches could fix the texture flickering problem. Follow the steps to fix the issue.
- Click Options on the bottom of your screen.
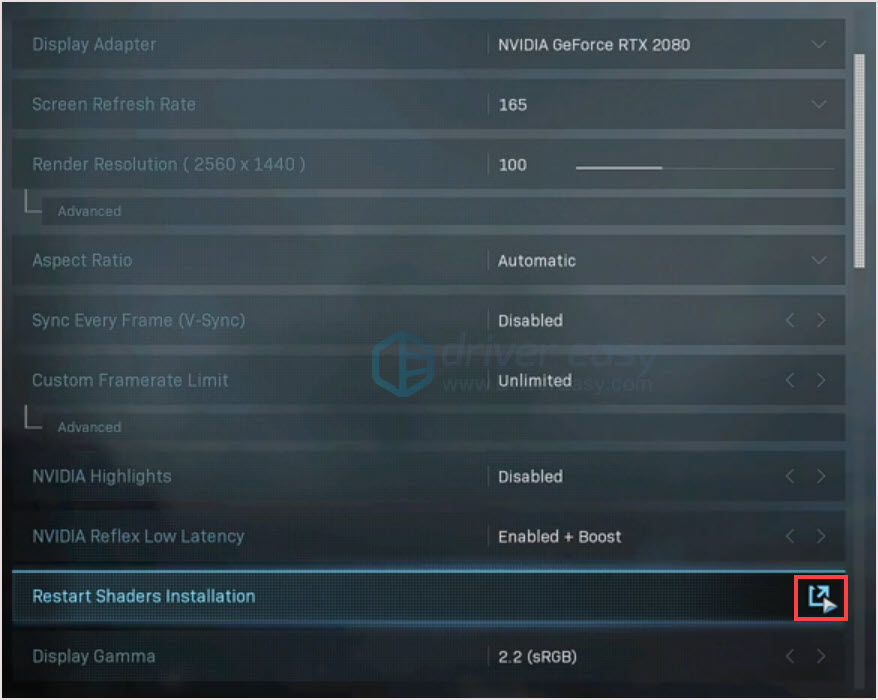
- In the Graphics tab, scroll down and click Restart Shaders Installation.
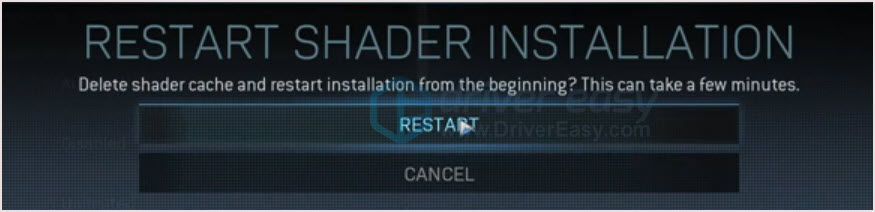
- Click RESTART.
- After the process is finished, restart the game to check. If it’s still flickering, move on to the next step.
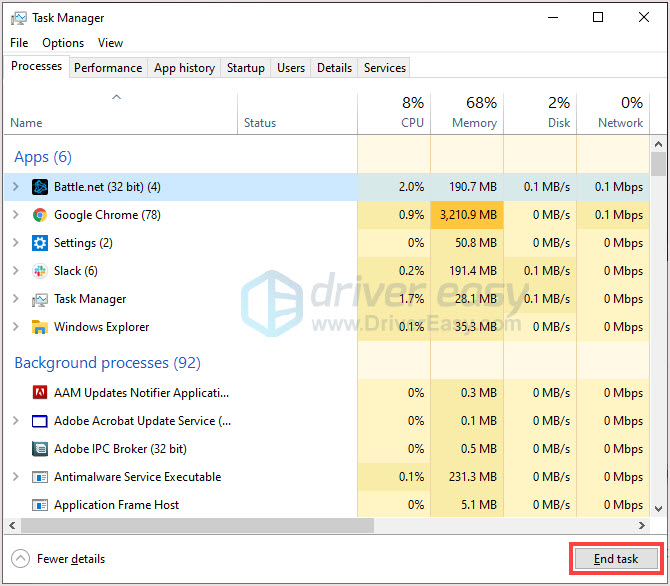
- Close all your Blizzard programs completely.
- Press Ctrl + Shift+ Esc together to open the Task Manager.
- Click the Processes tab. Select Battle.net and click End task.
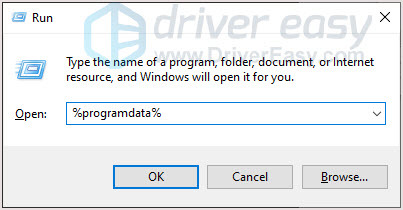
- Press Windows key + R to open the Run box.
- Type %programdata% and press Enter.
- Delete the Blizzard Entertainment folder completely.
- Restart Battle.net and relaunch the game.
No luck with this fix? Try the next one.
Fix 4: Change NVIDIA settings
NVIDIA control panel lets you fine-tune your in-game graphics. When there are visual issues, you can change the NVIDIA control panel settings to fix the problem.
- Right-click the Windows desktop and select NVIDIA Control Panel on the pop-up menu.
- Click Manage 3D Settings in the left panel.
- Find Antialiasing – Mode on the right panel, change the setting to Off.
- Click Adjust desktop color settings on the left panel. Make sure all settings are set to default.
- Restart your PC and relaunch the game.
If it’s not working, you’d better follow fix 5 to install the old NVIDIA driver.
Fix 5: Install the old driver
If your PC has the NVIDIA graphics card, this fix may work for you. Many users indicated this is the only working fix for them.
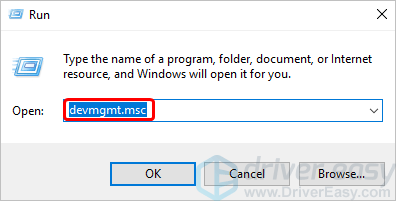
- On your keyboard, press Win+R (Windows logo key and R key) at the same time to invoke the Run box.
- Type devmgmt.msc and press Enter to open the Device Manager window.
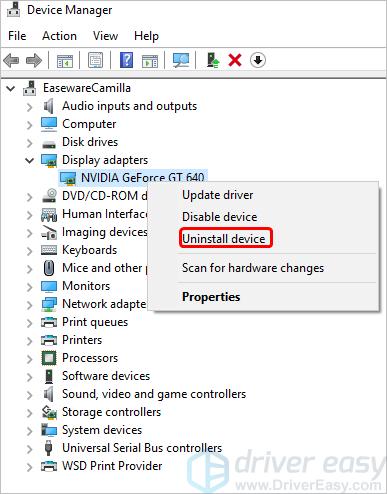
- Double click on Display adapters to expand the category. Right-click the NVIDIA graphics card installed on your computer, then select Uninstall device (in some cases, this could be Uninstall).
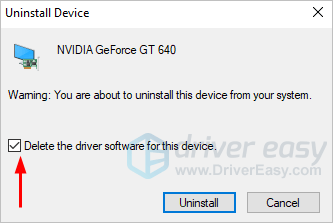
- On the Uninstall confirm dialog box, select the Delete the driver software for this device check box, then click Uninstall.
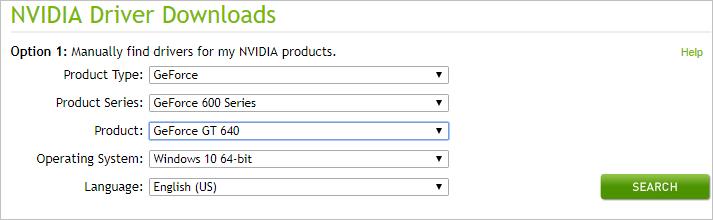
- Go to NVIDIA’s driver download page.
- Enter the information in the field according to your system version and your graphics card model. In my case, my computer is running Windows 10 64-bit, and my graphic card is NVIDIA GeForce GT 640, so I enter the information in the field as follows:
- Don’t choose the latest driver, select the older one.
- Follow the on-screen instructions to download the driver.
- Double-click on the downloaded file and follow the on-screen instructions to install the driver.
- Restart your PC and relaunch the game.
Hope you get it all fixed! If you have questions or suggestions, you’re welcome to leave a comment below. If you have other working fixes, please share them with us! We appreciate your help!