


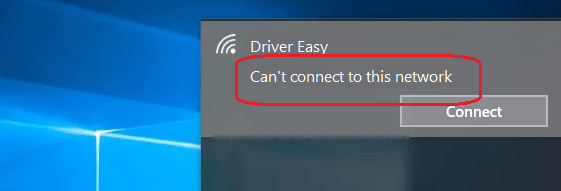
Lose your network connection? Don’t worry. If you’re on Windows 10, and you’re seeing this error saying Can’t connect to this network, you’re not alone. Many Windows users are reporting it. The good news is you can fix it. Read on to find how…
Fixes for ‘Can’t connect to this network’:
- Uninstall your network adapter driver
- Update your network adapter driver
- Disable 802.1 1n mode of your network adapter
- Reset your router
Solution 1: Uninstall your network adapter driver
When “Can’t connect to this network” error occurs on your Windows 10, it’s probably there’s something wrong with your network adapter. So as the top 1 solution, we advise you uninstall your network adapter and then let your Windows 10 reinstall the driver automatically.
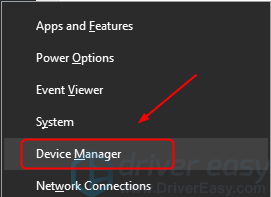
1) On your keyboard, press the Windows logo key and X key together to open quick-access menu.
2) Click Device Manager.
3) Click Network adapters, then right-click on your network adapter and select Uninstall device.
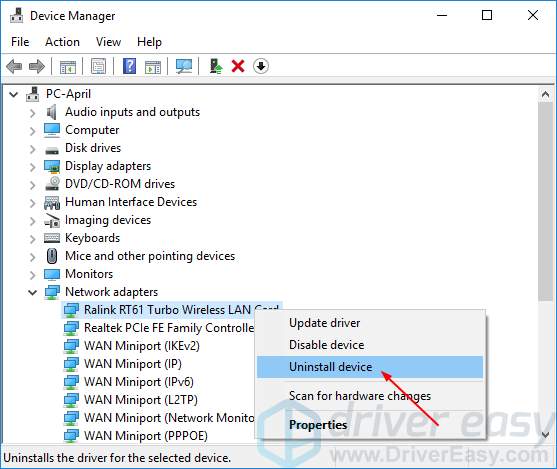
4) Tick on Delete the driver software for this device. Then click Uninstall.

5) Reboot your Window 10 and try to establish your network connection to see if it works.
Solution 2: Update your network adapter driver
This problem could be also caused by the old or incorrect network driver. If you’re not confident playing around with drivers manually, you can do it automatically with Driver Easy.
Driver Easy will automatically recognize your system and find the correct drivers for it. You don’t need to know exactly what system your computer is running, you don’t need to risk downloading and installing the wrong driver, and you don’t need to worry about making a mistake when installing.
You can update your drivers automatically with either the FREE or the Pro version of Driver Easy. But with the Pro version it takes just 2 clicks (and you get full support and a 30-day money back guarantee):
1) Download and install Driver Easy.
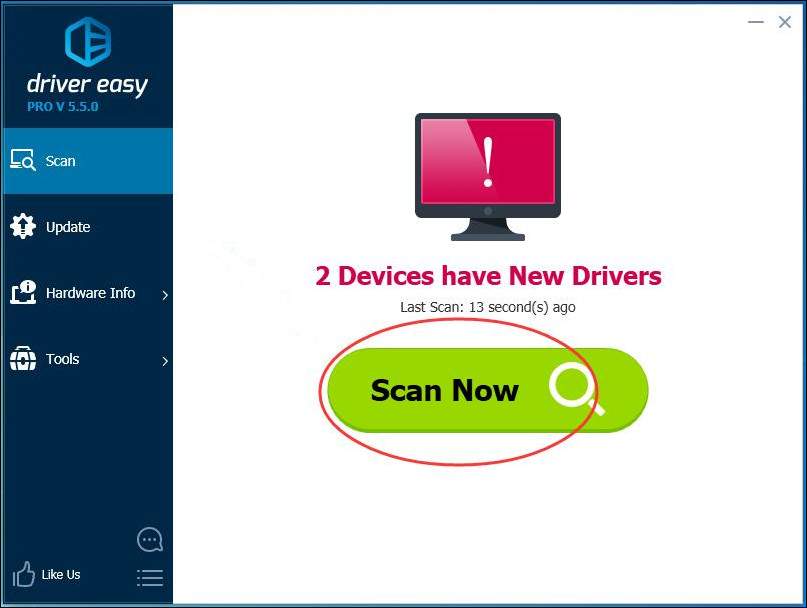
2) Run Driver Easy and click Scan Now button. Driver Easy will then scan your computer and detect any problem drivers.
3) Click the Update button next to a flagged network adapter driver to automatically download and install the correct version of this driver (you can do this with the FREE version).
Or click Update All to automatically download and install the correct version of all the drivers that are missing or out of date on your system (this requires the Pro version – you’ll be prompted to upgrade when you click Update All).
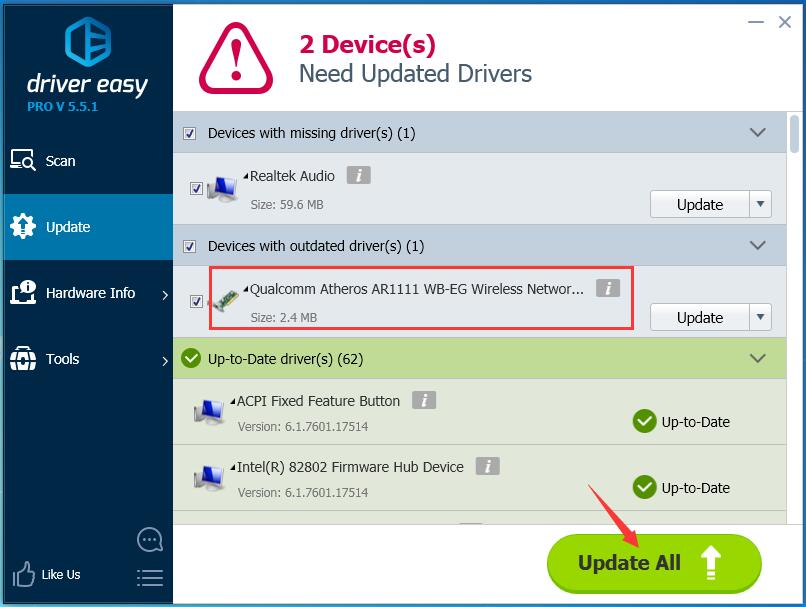
NOTICE: It needs network connection for Driver Easy help you update all the driver with one-click. But without Internet, you still can use its Offline Scan feature to update your network adapter drivers.
4) Reboot your Window 10 and try to establish your network connection to see if it works.
Solution 3: Disable 802.1 1n mode of your network adapter
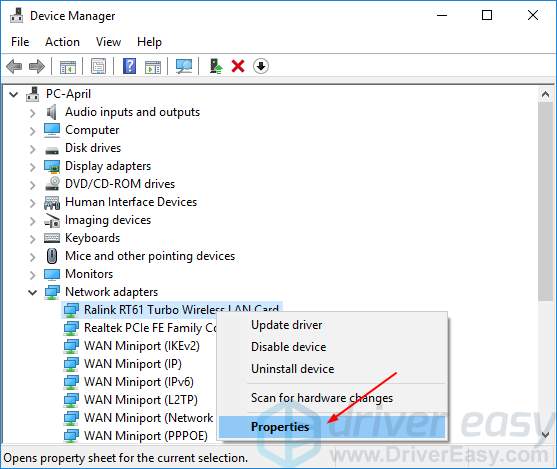
1) On your keyboard, press the Windows logo key and X key together to open quick-access menu.
2) Click Device Manager.
3) Click Network adapters, then right-click on your network adapter and select Properties.
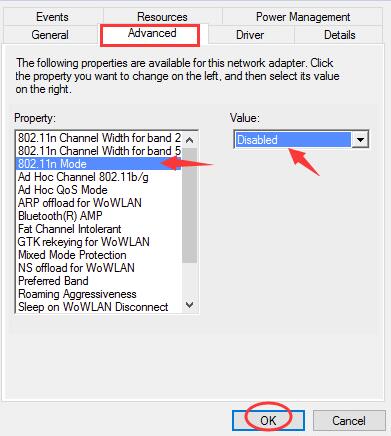
2) Click the Advanced section, then click 802.1 1n Mode and set the Value to Disabled.
Click OK.
3) Try to establish your network connection to see if it works.
Solution 4: Reset your router
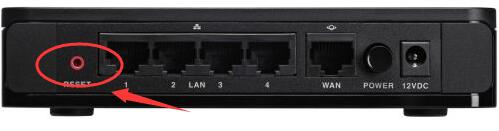
According to many users reported, reset their routers help them fix the error. Thus make sure to reset your router to try to fix the error.
You can use the reset button on your router or unplug and reconnect your router to reset it.
When it’s done, try to establish your network connection to see if it works.
