


If you’re looking to update the WiFi driver for Windows 7, you’ve come to the right place.
No proper Internet access on that computer right now? Don’t worry – we got you covered – check out the 2 methods below to get your network up and running again!
To update WiFi driver for Windows 7
You don’t have to try both methods to get your wireless driver updated; just browse through the list and take your pick:
Option 1: Update your Wi-Fi driver automatically (Recommended)
If you don’t have the time, patience or computer skills to update the driver for your wireless adapter manually, you can do it automatically with Driver Easy.
Driver Easy will automatically recognize your system and find the correct drivers for it. You don’t need to know exactly what brand and model of network adapter your computer is using, you don’t need to risk downloading and installing the wrong driver, and you don’t need to worry about making a mistake when installing.
You can update your drivers automatically with the Pro version of Driver Easy and it takes just 2 clicks:
- Download and install Driver Easy.
- Run Driver Easy and click Scan Now. Driver Easy will then scan your computer and detect any problem drivers.

- Click Update All to automatically download and install the correct version of ALL the drivers that are missing or out of date on your system (this requires the Pro version – you’ll be prompted to upgrade when you click Update All).

Option 2: Update your Wi-Fi driver manually
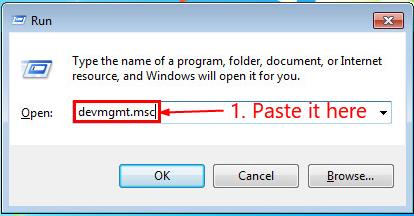
- On the keyboard of the target computer, press the Windows logo key and R at the same time, then copy & paste devmgmt.msc into the box and click OK.
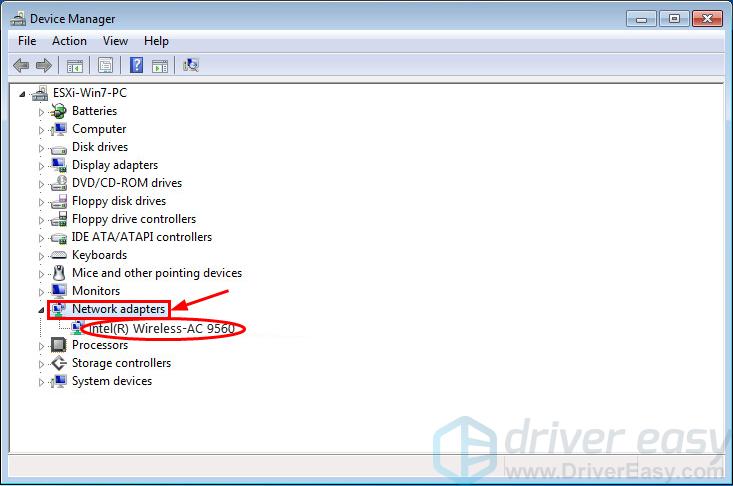
- Locate and double-click on Network adapters to retrieve the brand and model of your Wi-Fi adapter. (Intel(R) Wireless-AC 9560 in my case)
- On the computer with Internet, go to the brand manufacturer’s official website and check out the Support section for driver downloads.
- Search the model of your wireless adapter, click the right download link for your Windows 7 OS. Usually a few download options will be listed but you might want to click the first result for the latest driver version.
- Move the downloaded file to the computer without the Internet.
- On the computer without the Internet, run the downloaded file (mostly either an exe. file or .inf file) and follow the on-screen instructions to finish the install.
- Restart your computer for the changes to take effect.
Now congrats – you have the latest wireless driver updated on your Windows 7 PC. Hope this helps and feel free to comment below if you have any further questions.