


If Windows tells you that your wireless network connection adapter is disabled, don’t worry! Although it’s incredibly frustrating, you’re not the only person to experience this problem. Many Windows users have recently reported the very same issue. More importantly, you should be able to fix it pretty easily…
Fixes to try
Here’s a list of fixes that have fixed this issue for other Windows users. You don’t have to try them all. Just work your way through the list until you find the one that does the trick for you.
- Enable your wireless network adapter in Device Manager
- Enable your wireless network adapter in Network and Sharing center
- Enable your wireless network adapter in Command Prompt
- Bonus tip: Update the driver for your wireless network adapter
Fix 1: Enable your wireless network adapter in Device Manager
This might be the easiest fix to try. Here is how to do it:
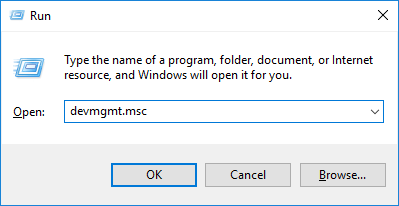
- On your keyboard, press the Windows logo key and R at the same time to invoke the Run dialog. Type devmgmt.msc and press Enter. You’ll be prompted for permission. Click Yes to open Device Manager.
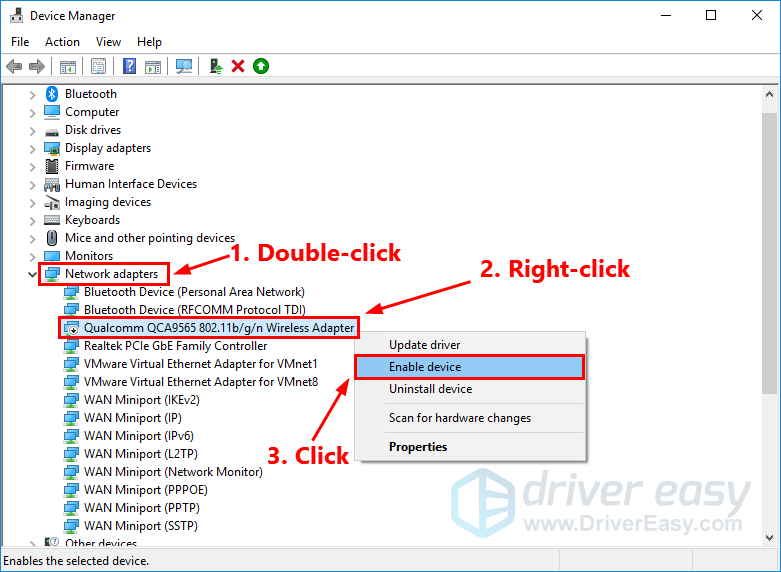
- Double-click Network adapters to expand the list. Then right-click the network adapter whose name contains “wireless” and click Enable device.
Fix 2: Enable your wireless network adapter in Network and Sharing center
You can also enable your wireless network adapter in Network and Sharing center. Follow the instructions below to enable your wireless network adapter:
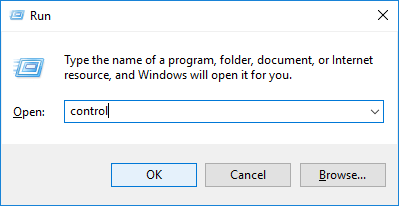
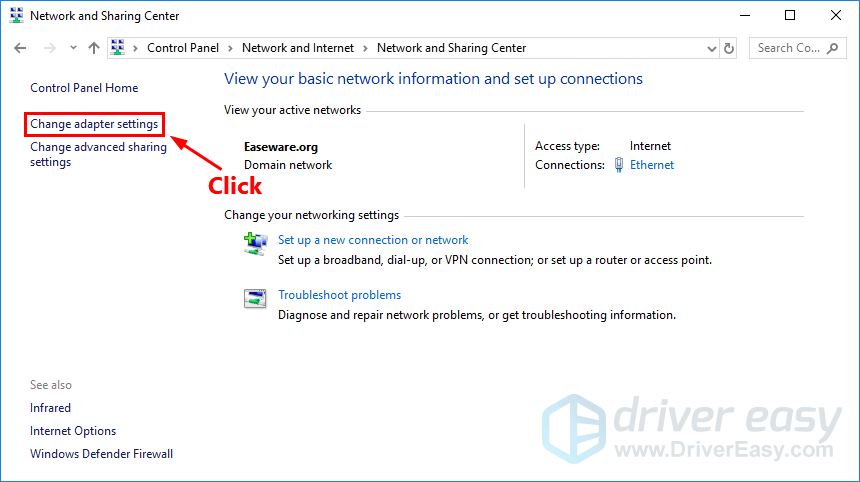
- On your keyboard, press the Windows log key and R at the same time to open the Run dialog. Type control and press Enter to open Control Panel.
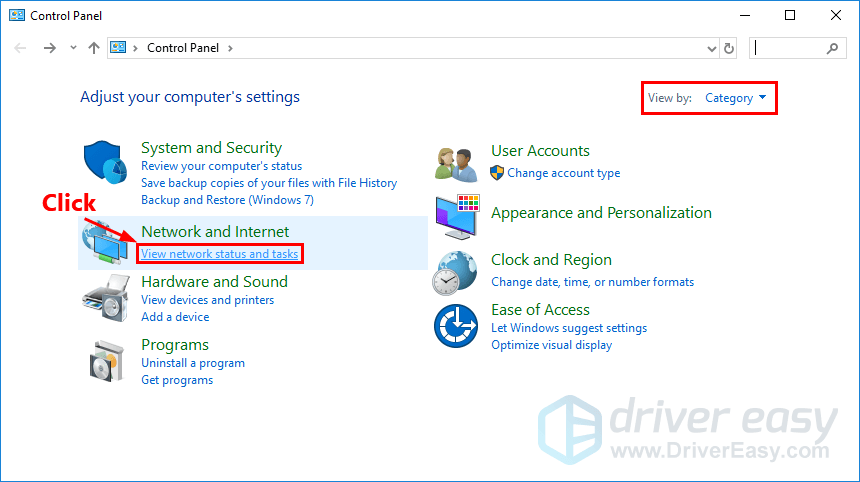
- View Control Penal by Category. Click View network status and tasks.
- On the left panel, click Change adapters settings.
- Right-click your wireless network adapter (usually the gray one with the signal icon), then click Enable. You’ll be prompted for permission. Click Yes to confirm.
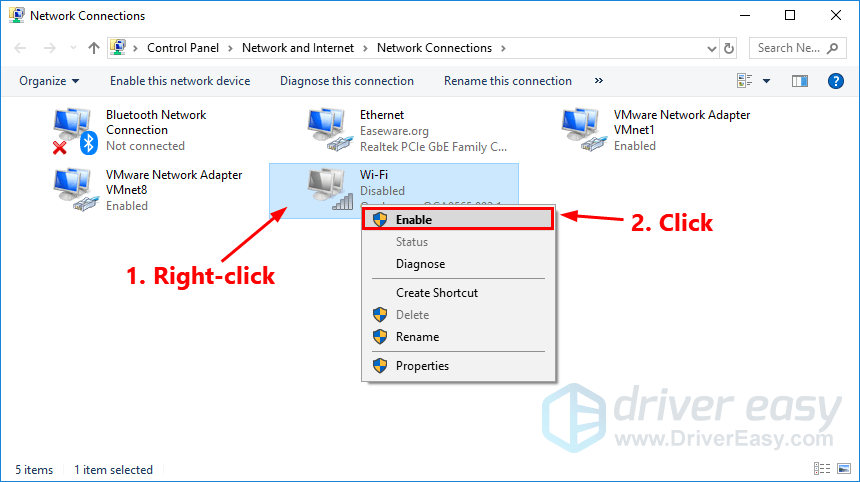
After you enabled your wireless network adapter, the color of its icon will back to normal.
Fix 3: Enable your wireless network adapter in Command Prompt
You can also enable your wireless network adapter with a simple command line in Command Prompt. Here is how to do it:
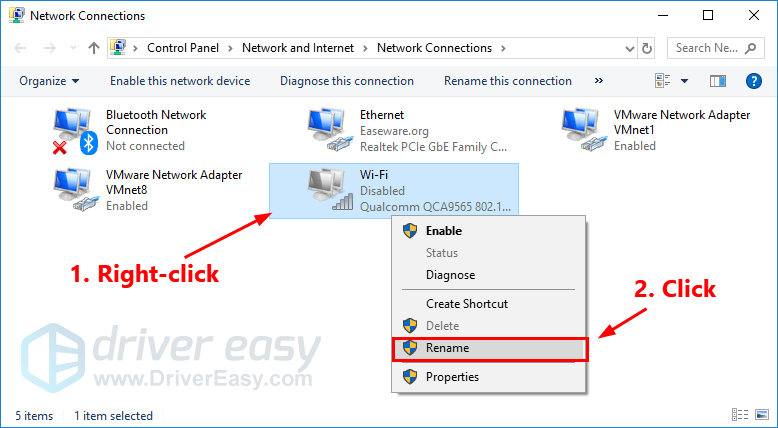
- Rename your wireless network adapter to Wi-Fi. If you don’t know how to do it, follow the steps below:
- Open Control Penal and view it by Category. Click View network status and tasks.
- On the left panel, click Change adapters settings.
- Right-click your wireless network adapter (usually the gray one with the signal icon), then click Rename to rename it to Wi-Fi.
- Open Control Penal and view it by Category. Click View network status and tasks.
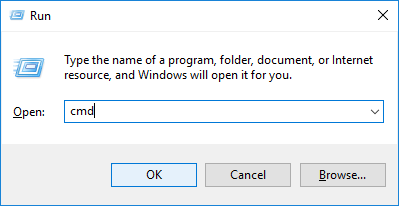
- On your keyboard, press the Windows logo key and R at the same time to open the Run dialog. Type cmd and press Ctrl, Shift and Enter at the same time to run Command Prompt as administrator. You’ll be prompted for permission. Click Yes to run Command Prompt.
- In Command Prompt, type the command line netsh interface set interface Wi-Fi enabled and press Enter to enable your wireless network adapter.

Just wait several seconds, your wireless network adapter will be enabled.
Bonus tip: Update the driver for your wireless network adapter
By updating the driver for your wireless network adapter, you can not only keep it in good condition but also avoid many unexpected network issues.
If you don’t have the time, patience, or computer skills to update your network driver manually, you can, instead, do it automatically with Driver Easy.
You don’t need to know exactly what system your computer is running, you don’t need to risk downloading and installing the wrong driver, and you don’t need to worry about making a mistake when installing. Driver Easy handles it all.
- Download and install Driver Easy.
- Run Driver Easy and click the Scan Now button. Driver Easy will then scan your computer and detect any problem drivers.

- Click Update next to your wireless network adapter to automatically download the correct version of its driver, then you can install it manually. Or click Update All to automatically download and install the correct version of all the drivers that are missing or out of date on your system (This requires the Pro version – you’ll be prompted to upgrade when you click Update All. You get full support and a 30-day money back guarantee).
