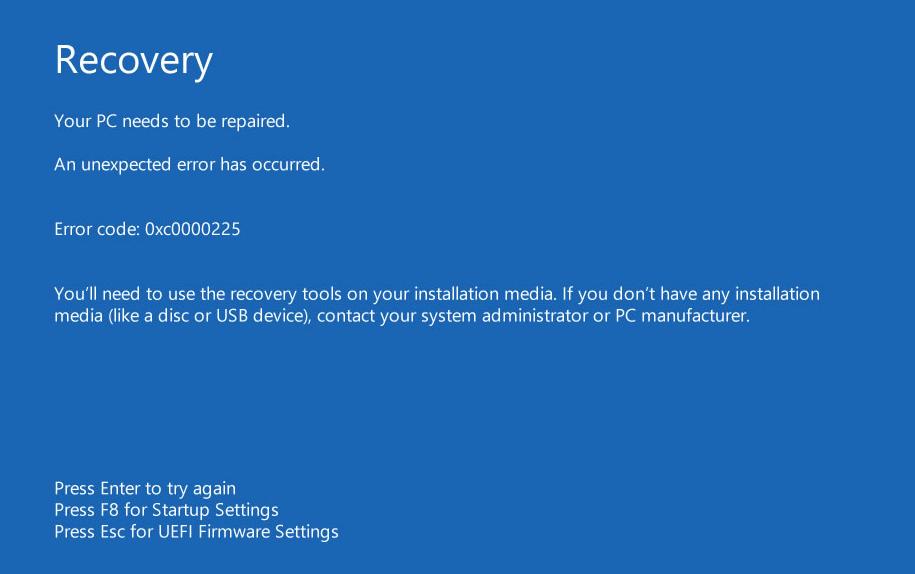
If you’re on Windows 10, and you see the Error code: 0xc0000225 when you’re about to start your PC, you’re not alone. Many Windows 10 users are reporting this problem as well. But no worries, this is not at all a hard problem to fix.
Why would I see the error code: 0xc0000225 on my computer?
First off, error code: 0xc0000225 means Windows cannot find the System Files used for booting, aka, BCD (Boot Configuration Data). In other words, if your system files are corrupted, the disk file system has a bad configuration, or if you have faulty hardware, the 0xc0000225 error would occur.
How do I fix the error code 0xc0000225 problem?
With all the possible causes laid out, the solutions should be easy to locate. Here we recommend you try the following methods. You may not have to try them all; just work your way down until you find the one that works for you.
Method 1: Run automatic repair
Method 2: Run a disk check and system file check
Method 3: Rebuild BCD
Method 4: Mark partition as active
Method 5: Check hardware failure
Bonus tip: Keep your computer stable
IMPORTANT: You need to use installation media, such as a USB flash drive, or a disc, to proceed with some of the following methods. If you don’t have one, here is how you can make one by yourself easily.
Method 1: Run automatic repair
One of the first things, and the handiest thing, you can do is to run the automatic repair whenever you see problems like this when booting up.
1) Power off your computer, and insert your installation media, be it a USB flash drive, or a DVD. Then restart your computer.
2) If you’re using a USB flash drive, press the appropriate function key to boot from it. If you’re using a CD or DVD disc, you should be able to see “Press any key to boot from CD or DVD”. Follow the instruction and boot.

If you need, here are more tips to boot from installation media.
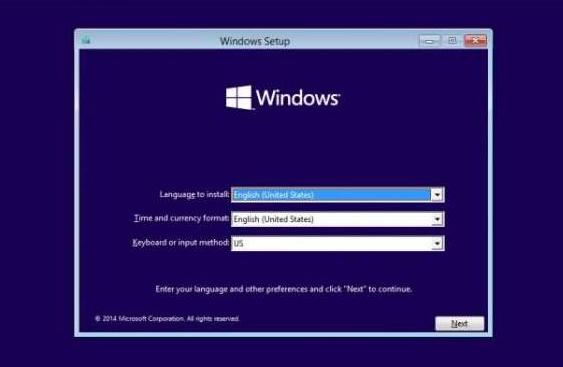
3) Choose your language preference, and move on.
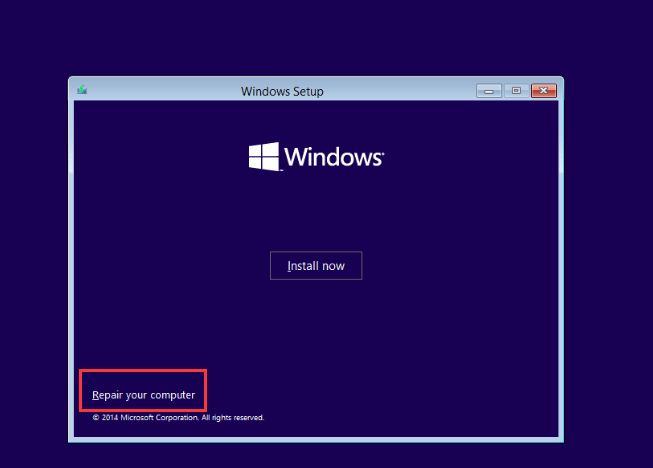
4) Click Repair your computer.
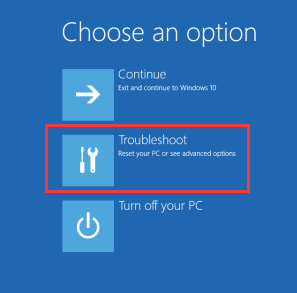
5) Click Troubleshoot.
6) Click Advanced options.
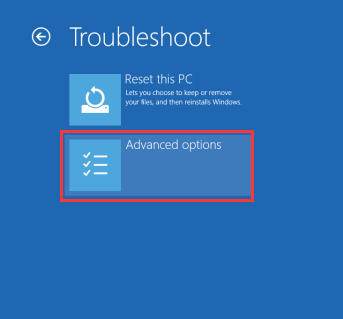
7) Click Automatic Repair.
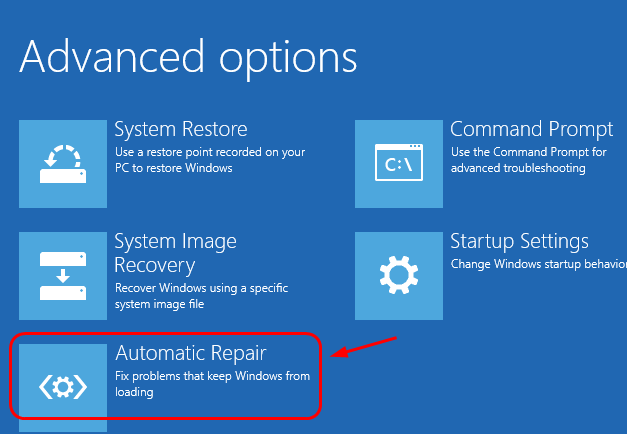
8) Wait for the process to kick in.
9) Restart your computer when the repair process finishes. See if the error code 0xc0000225 is gone.
Method 2: Run a disk check and system file check
As mentioned, one of the reasons for the error code: 0xc0000225 is corrupted system files and/or disk files. Luckily, this is not at all hard to solve. Here is what you can do:
1) Repeat the above steps in Method 1 to boot into the Advanced option page (step 1 to step 6). Click Command Prompt.
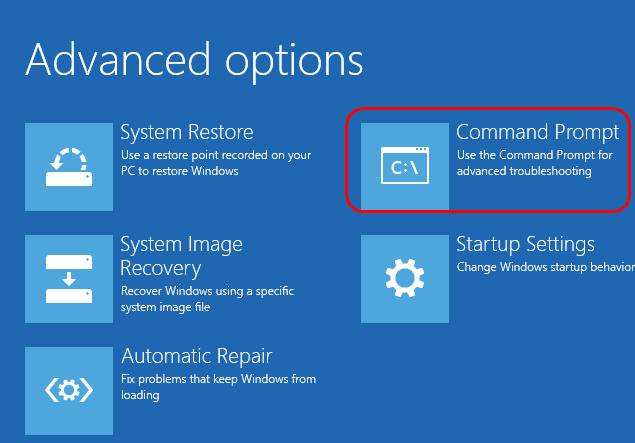
2) In the command window, type in the following commands and press the Enter key on your keyboard after each command:
sfc /scannow
chkdsk c: /f /r
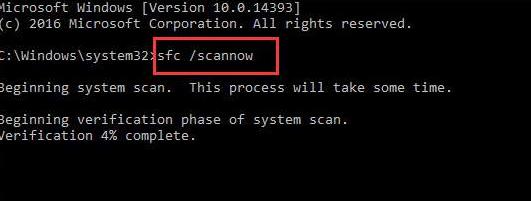
The letter C here stands for the drive where you place your Windows installation files. Most of you might place it in C drive, some might place it in D, E, or some other drives. Change the letter accordingly.
Method 3: Rebuild BCD
It’s also mentioned that faulty BCD, i.e. Boot Configuration Data, could also be the cause. Luckily, you can easily get it fixed by rebuilding a new one. Here is how:
1) Repeat step 1 to step 6 as instructed in Method 1. Click Command Prompt.

2) In the command prompt window, type in the following commands. Press the Enter key on your keyboard after each command:
bootrec/ scanos
bootrec /fixmbr
bootrec /fixboot
bootrec /rebuildbcd
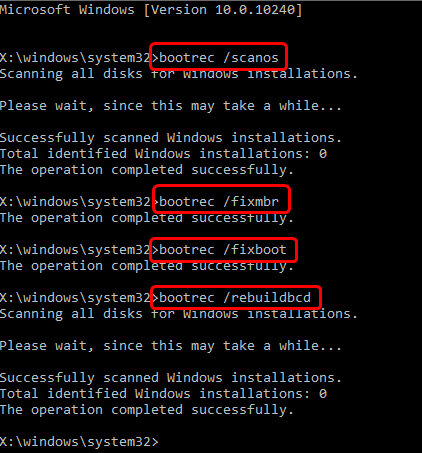
3) When the commands finish running, restart your computer and see if the error code: 0xc0000225 happens again.
Method 4: Mark partition as active
1) Repeat step 1 to step 6 in Method 1. Click Command Prompt.

2) In the command prompt window, type in the following command. Press the Enter key on your keyboard after each command.
disk part
list disk
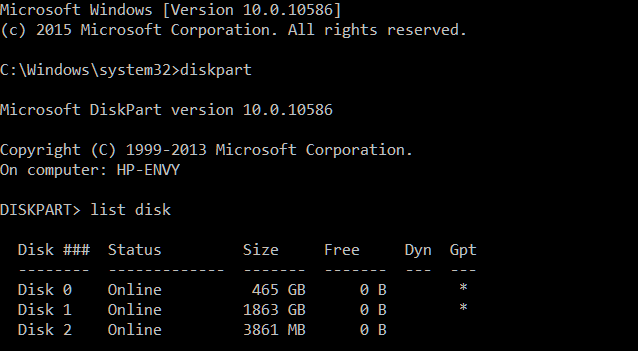
3) Identify the disk you want to reformat, usually the C drive. Select it and then reformat it by typing the commands below:
select disk (your disk number)
list partition
4) Then type in the following commands:
select partition (your disk number)
activate
Press Enter after each of the command. These commands will help you activate the partition on the disk.
5) Check if the error code: 0xc0000225 is gone now.
Method 5: Check hardware failure
As mentioned, hardware failure is one of the causes of this problem. But we do not suggest you do the checking by yourself. You should contact your PC or laptop manufacturer about the error, and have them get the hardware devices in your PC checked.
Bonus tip: Keep your computer stable
It is very important to keep your device drivers up-to-date. Windows 10 doesn’t always give you the latest version. But with outdated or wrong drivers, you may encounter various issues including crashing and BSOD.
There are two ways you can update your driver: manually and automatically.
Option 1 – Manually– You’ll need some computer skills and patience to update your drivers this way, because you need to find exactly the right the driver online, download it and install it step by step.
OR
Option 2 – Automatically (Recommended)– This is the quickest and easiest option. It’s all done with just a couple of mouse clicks – easy even if you’re a computer newbie.
Option 1 – Download and install the driver manually
You can download graphics drivers from the manufacturer official website. Search for the model you have and find the correct driver that suits your specific operating system. Then download the driver manually.
Option 2 – Automatically update drivers
If you don’t have time or patience to manually update your graphics drivers, you can do it automatically with Driver Easy.
Driver Easy will automatically recognize your system and find the correct drivers for it. You don’t need to know exactly what system your computer is running, you don’t need to be troubled by the wrong driver you would be downloading, and you don’t need to worry about making a mistake when installing. Driver Easy handles it all.
You can update your drivers automatically with either the 7 days free trial or the Pro version of Driver Easy. It takes just 2 clicks, and you get full support and a 30-day money-back guarantee with the Pro version:
- Download and install Driver Easy.
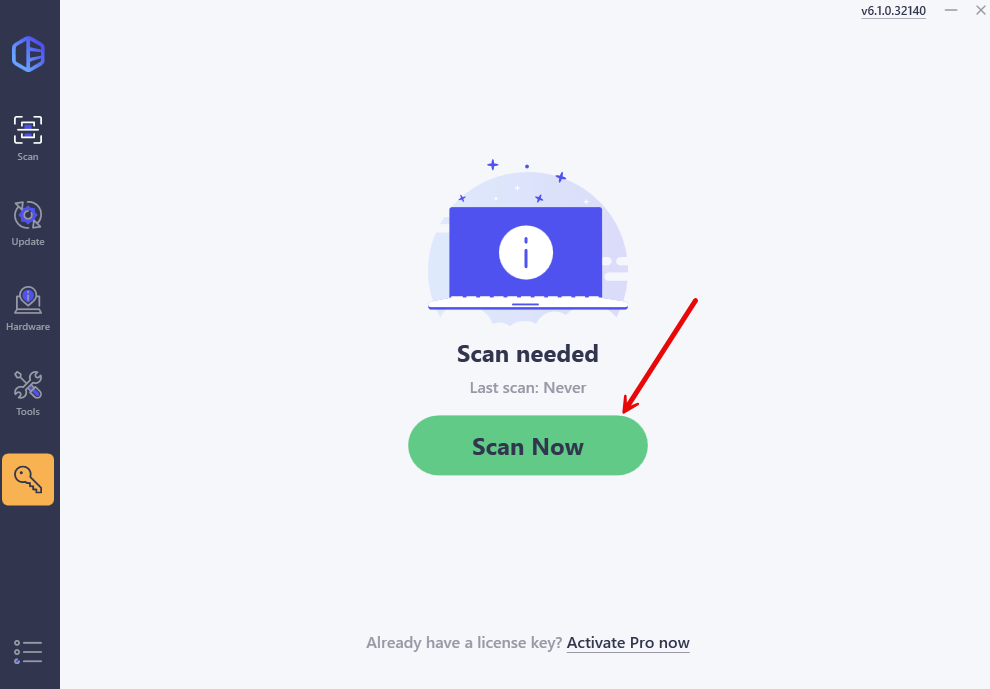
- Run Driver Easy and click the Scan Now button. Driver Easy will then scan your computer and detect any problem drivers.
- Click the Activate & Update button next to the flagged device to automatically download and install the correct version of this driver.
Or click Update All to automatically download and install the correct version of all the drivers that are missing or out of date on your system (You’ll need the Pro version for this – when you select Update All, you’ll get a prompt to upgrade. If you’re not prepared to purchase the Pro version yet, Driver Easy provides a 7-day trial at no cost, granting access to all Pro features like fast downloads and easy installation. No charges will occur until after your 7-day trial period ends.)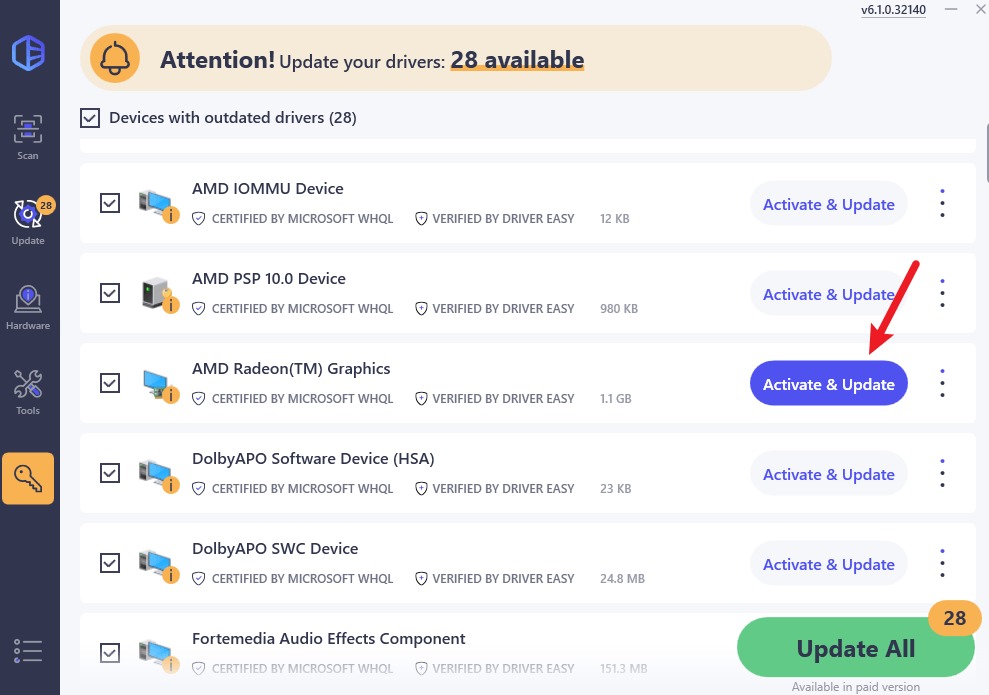
- Restart your computer for the change to take effect.


