


It must be frightening when your monitor goes black after you install the graphics card driver: the power light is still on, but nothing is seen on the screen but infinite blackness. You could still see the white mouse pointer, but there’s nothing to click on the big dark screen.
If this is also you, don’t worry, it could be simply caused by a step going wrong with the driver installation process, it doesn’t necessarily mean that your graphics card itself is broken. We have gathered here some fixes that have helped many other users with their black screen after the graphics card driver update issue, and you may also try them to get the same problem fixed for you.
Try these fixes for the black screen after installing graphics card driver issue
You don’t have to try all the following fixes: simply select the ones that fit your situation and move along from there to get the black screen after installing the graphics card driver problem sorted.
1. If you can boot into your computer…
If you can still boot into your computer, and the black screen problem is only seen on one of your monitors, you can try the following fixes. In other words, you can still use your computer, but just with one screen blackout.
If you can’t even start your computer straight, or if you can’t see anything on your monitor, please go to the If you can’t boot into your computer… section.
1.1 Use the original graphics card driver
If your screen goes black after you install a graphics card driver, the display card driver itself might be at fault. To see if this is your case, you can try the following to see if the same problem remains with the original graphics card driver from Microsoft. To do the test:
- On your keyboard, press the Windows key and the R key at the same time, then type devmgmt.msc and hit Enter.

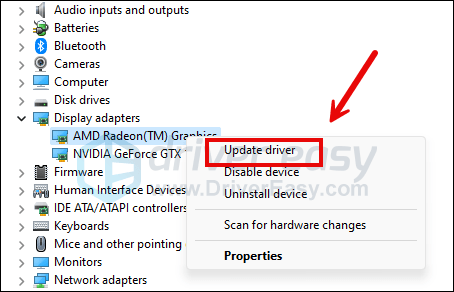
- Double-click to expand the Display adapters category, then right-click your display card and select Update driver.
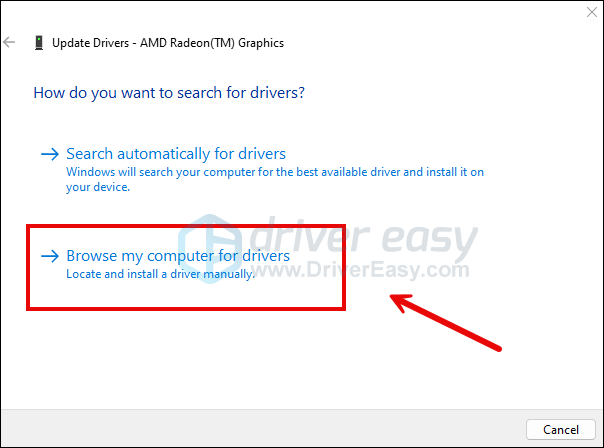
- Select Browse my computer for drivers.
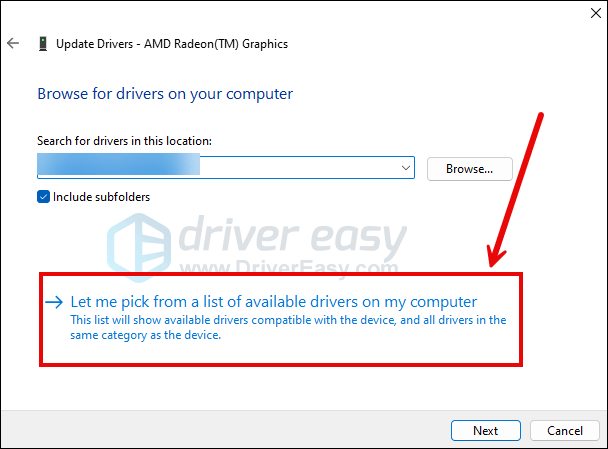
- Select Let me pick from a list of available drivers on my computer.
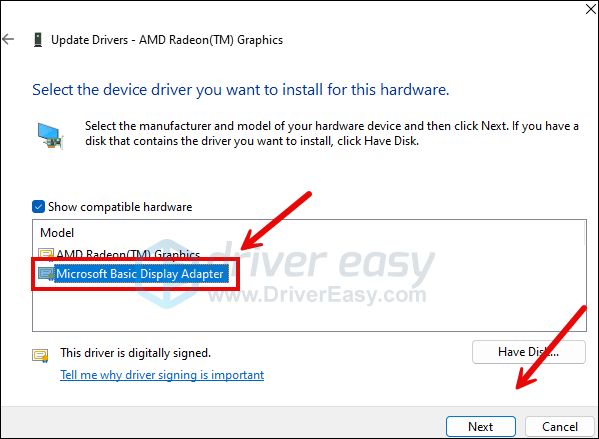
- Select Microsoft Basic Display Adapter from the list and click Next for the driver to be installed.
- Your screen might flash a couple of times during the older driver installation, but no need to worry much about it, as it’s normal.
- Repeat the same to install the generic display card driver for your other display card should you have one.
Restart your computer to see if your computer screen remains black. If the problem remains, please move on.
1.2 Clean install the graphics card driver
As mentioned, the screen goes black after installing a graphics card driver problem could be caused by a step going wrong during the display card driver installation process, like faulty driver files or incorrect permission granted. To see if this is your case, you can do the following to clean install the display card driver:
- On your keyboard, press the Windows key and the R key at the same time, then type devmgmt.msc and hit Enter.
- Double-click to expand the Display adapters category, then right-click your display card and select Uninstall device.
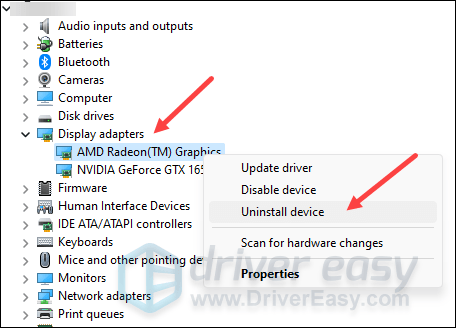
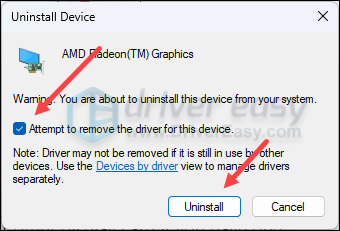
- Tick the box for Attempt to remove the driver for this device and click Uninstall.
- Repeat the same to remove the driver for your other display card if you have one.
Then download and update the display card driver.
There are mainly 2 ways you can update your graphics driver: manually or automatically.
Option 1: Update your graphics driver manually
If you’re a tech-savvy gamer, you can spend some time updating your GPU driver manually.
To do so, first visit the website of your GPU manufacturer:
Then search for your GPU model. Note that you should only download the latest driver installer that’s compatible with your operating system. Once downloaded, open the installer and follow the on-screen instructions to update.
Option 2: Update your graphics driver automatically (Recommended)
If you don’t have the time, patience or skills to update the driver manually, you can do it automatically with Driver Easy. Driver Easy will automatically recognize your system and find the correct drivers for it. You don’t need to know exactly what system your computer is running, you don’t need to be troubled by the wrong driver you would be downloading, and you don’t need to worry about making a mistake when installing. Driver Easy handles it all.
You can update your drivers automatically with either the FREE or the Pro version of Driver Easy. But with the Pro version it takes just 2 steps (and you get full support and a 30-day money back guarantee):
- Download and install Driver Easy.
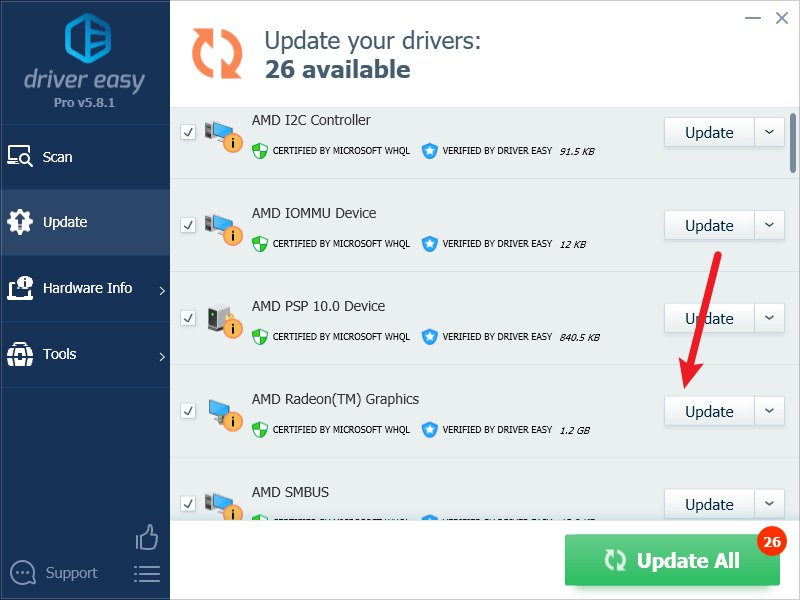
- Run Driver Easy and click the Scan Now button. Driver Easy will then scan your computer and detect any problem drivers.

- Click Update All to automatically download and install the correct version of all the drivers that are missing or out of date on your system. (This requires the Pro version – you’ll be prompted to upgrade when you click Update All.)
Note: You can do it for free if you like, but it’s partly manual. - Restart your PC for the changes to take effect.
If your screen remains black after the clean installation of a graphics card driver, please move on to the next fix.
1.3 Run the hardware troubleshooter to see if it’s a hardware problem
If you’ve already tried the above but your screen remains black, you may need to check if the problem is with your hardware devices: faulty power supply, motherboard, display cable (HDMI, DP, or VGA), and/or the graphics card itself could also cause a black screen problem.
To see if this is your case, you can run the built-in hardware troubleshooter in this way:
- Open the Run dialog by pressing Windows + R on your keyboard.
- Type
msdt.exe -id DeviceDiagnosticinto the box and hit Enter.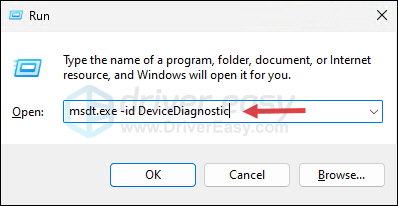
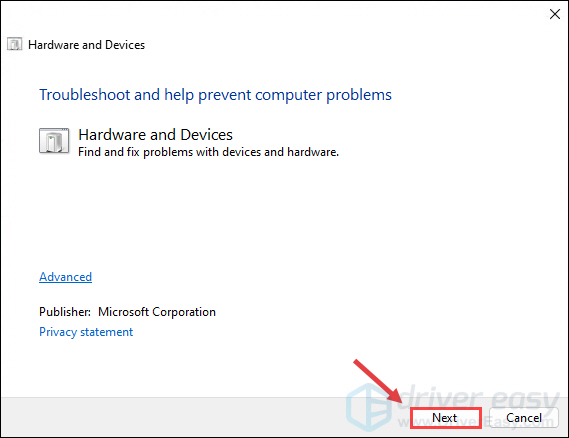
- When the troubleshooter window opens, click Next.
- If any issues are found, follow the on-screen instructions to fix them.
- If none are found, close the window and try the next fix below.
1.4 Restore BIOS settings
Your monitor will remain black if there are some incorrect settings in BIOS, which stop certain firmware and/or software from starting properly. To see if this is your case, you can try to restore your BIOS settings to default.
You can reset your BIOS settings back to it’s original to see if that’s the issue for you. Here is how to do it:
- Press and hold the power button until your computer turns off.
- Disconnect the AC power cord from the power supply, and then open your computer case.
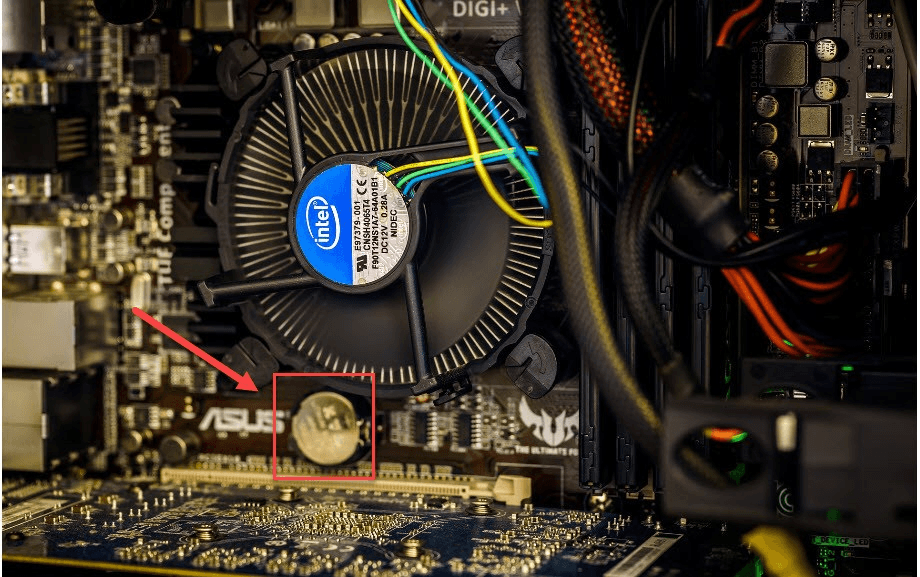
- On your motherboard, remove your CMOS battery with your fingernail or a non-conductive screwdriver. The CMOS battery looks like this:
- Wait for 5 minutes, and then reinstall your CMOS battery.
- Connect the AC power cord to the power supply, and then turn on your computer to see if your problem persists.
2. If you can’t boot into your computer…
If your computer won’t boot normally after you restart it when you see the black screen problem, you can try the following to see if they help.
Firstly, let’s try to boot into your computer by doing the following:
- Press and hold the power button on your computer until it powers off.
- Press the power button on your computer to turn it on.
- Repeat steps 1) and 2) until you see Please wait during the boot. It usually takes three repeats (more than three repeats if this is not the first time that you did this) for it to come up. You need to try until you can see the Please wait coming out.

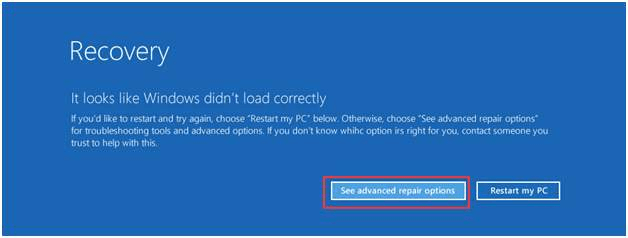
- When the following page shows, click See advanced repair options.
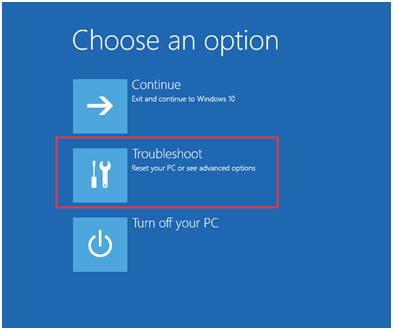
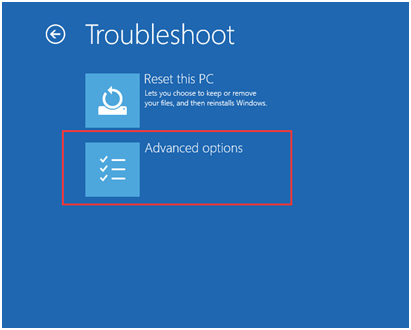
- Click Troubleshoot.
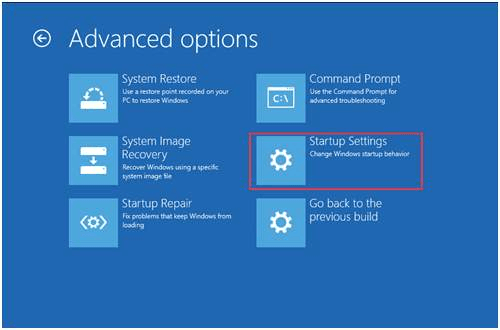
- Click Advanced options.
- Click Startup Settings.
- Click Restart.
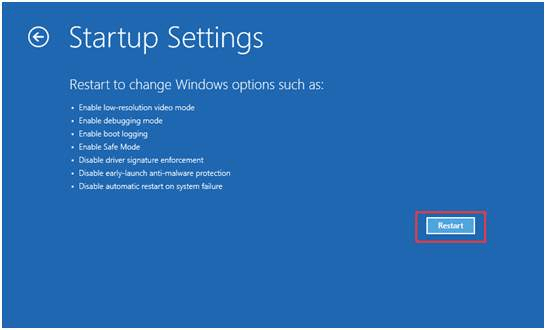
- Press F5, or 5 to enter the Safe Mode with networking mode.
2.1 Uninstall the graphics card driver in Safe Mode
When you boot into the Safe Mode with networking
- On your keyboard, press the Windows key and the R key at the same time, then type devmgmt.msc and hit Enter.
- Double-click to expand the Display adapters category, then right-click your display card and select Uninstall device.
- Tick the box for Attempt to remove the driver for this device and click Uninstall.
- Repeat the same to remove the driver for your other display card if you have one.
- Restart your computer into Safe Mode again to see if it helps. If not, please move on.
2.2 Try different hardware devices
At this point, if none of the above helps, you may need to consider different hardware devices, as it could be a problem with the graphics card, the hardware device itself, when it blacks out after a driver installation. As mentioned, faulty power supply, display cables, or motherboard could also be the culprit.
If you’re not sure about this, you can always seek help from a hardware technician to see if they can run some tests on your hardware components to make sure that they’re still working fine.
Hope one of the above helps to fix the black screen after installing graphics card driver problem for you, or at least point to the right direction for you. If you have other working fixes, please feel free to leave a comment below.