


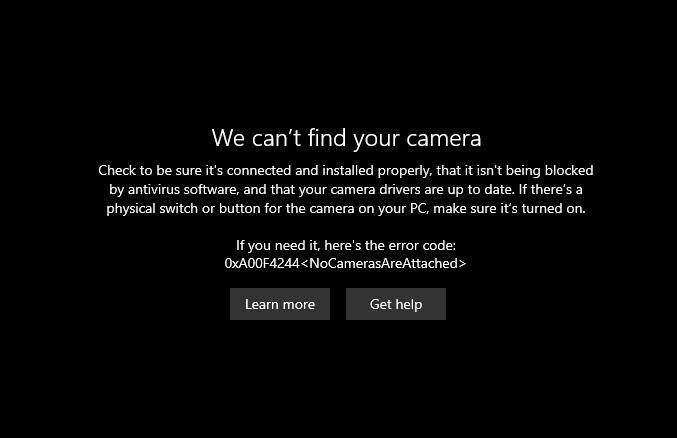
Camera not working on your Windows 10 or 11 PC? You’re not alone. Many users are plagued by the same problem. In this post, we’ve put together all possible fixes to get your webcam working again.
Try these fixes
You don’t have to try them all. Simply work your way down the list until you find the one that does the trick.
- Restart your PC
- Check if there’s a physical switch
- Try a different USB port
- Update your camera driver
- Reinstall your camera driver
- Check your privacy settings
- Temporarily disable your antivirus software
- Reset the camera
- Check for Windows updates
- Run camera troubleshooter
- Consider a computer reset
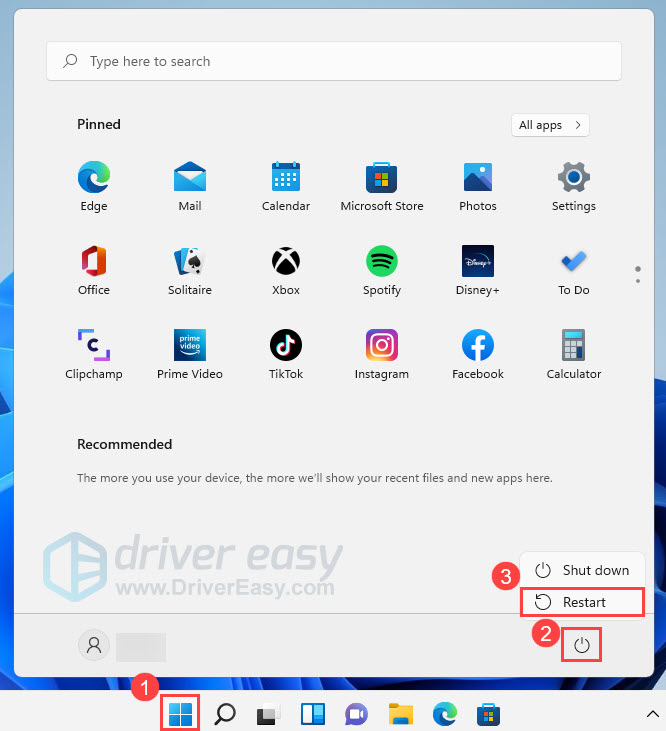
Fix 1: Restart your PC
When your camera isn’t working in Windows 11, the easiest way you can try is to restart your computer. It might sound simple, but sometimes that’s all it takes to fix your camera issue. If you haven’t tried this yet, definitely give it a shot.
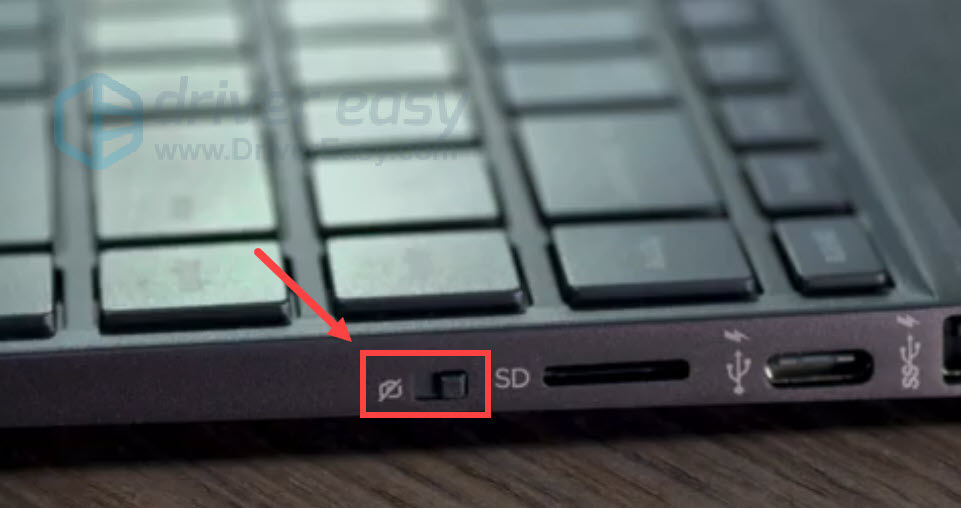
Fix 2: Check if there’s a physical switch
Some laptops and external cameras have a physical switch that turns the camera on or off. When the switch is turned off, you won’t be able to use the camera. So do check if there’s a physical switch or button for the camera on your PC. If there is, make sure it’s turned on.
Fix 3: Try a different USB port
If you’re using an external camera, check if it’s properly connected. You can unplug your camera and then plug it back in. Sometimes the culprit could be your USB port, so you can try connecting your camera to another port.
If this still doesn’t work, take a look at the next method.
Fix 4: Update your camera driver
Your camera may not function well if you’re using an outdated camera driver. So you should update your camera driver to see if it fixes your problem.
You can update your camera driver manually, by visiting the manufacturer’s website, finding the latest correct installer and installing it step-by-step. But if you don’t have the time or patience to install it manually, you can do that automatically with Driver Easy.
Driver Easy will automatically recognize your system and find the correct driver for your camera. You don’t need to know exactly what system your computer is running or risk downloading and installing the wrong driver. Driver Easy will take care of all the busy work for you.
- Download and install Driver Easy.
- Run Driver Easy and click the Scan Now button. Driver Easy will then scan your computer and detect any problem drivers.

- Click Update All to automatically download and install the correct version of all the drivers that are missing or out of date on your system.
(This requires the Pro version which comes with full support and a 30-day money-back guarantee. You’ll be prompted to upgrade when you click Update All. If you’re not ready to buy the Pro version, Driver Easy offers a 7-day free trial which includes access to all the Pro features such as high-speed download and one-click install. You won’t be charged anything until your 7-day trial has ended.)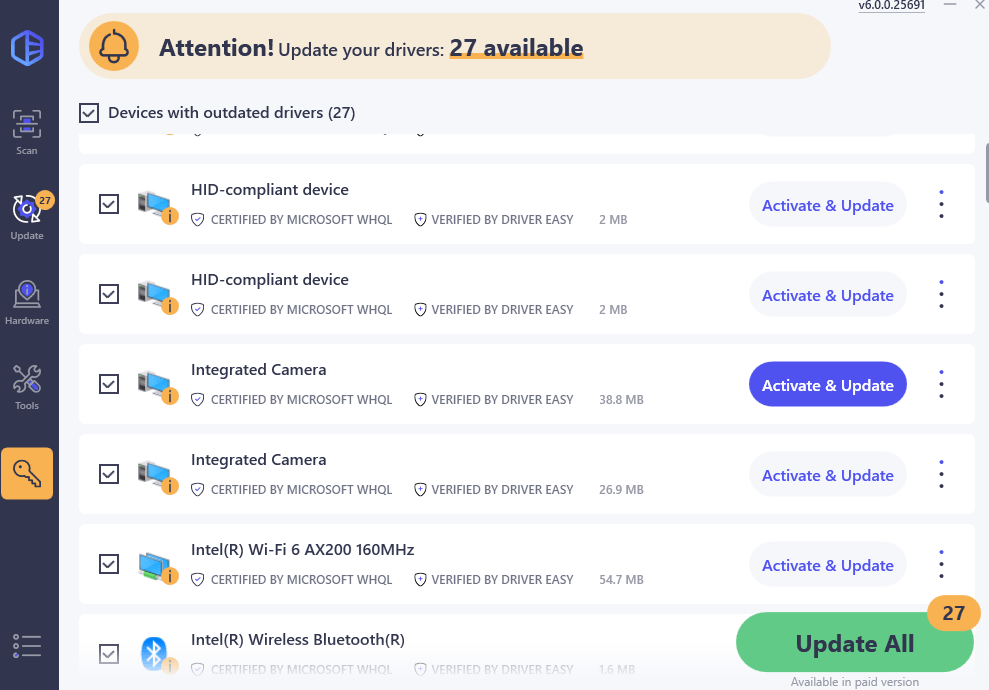
- Restart your computer for the changes to take effect.
After updating drivers, restart your PC and do a camera test to check if your problem is resolved. If not, here are some other fixes to try.
Fix 5: Reinstall your camera driver
The faulty camera driver or driver conflicts can lead to your camera not working in Windows 11. To fix the problem, you can try reinstalling your camera driver. Here’s how:
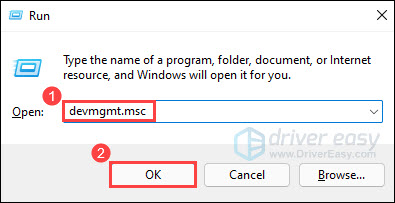
- On your keyboard, press the Windows logo key and R at the same time to invoke the Run command.
- Type devmgmt.msc in the field and click OK.
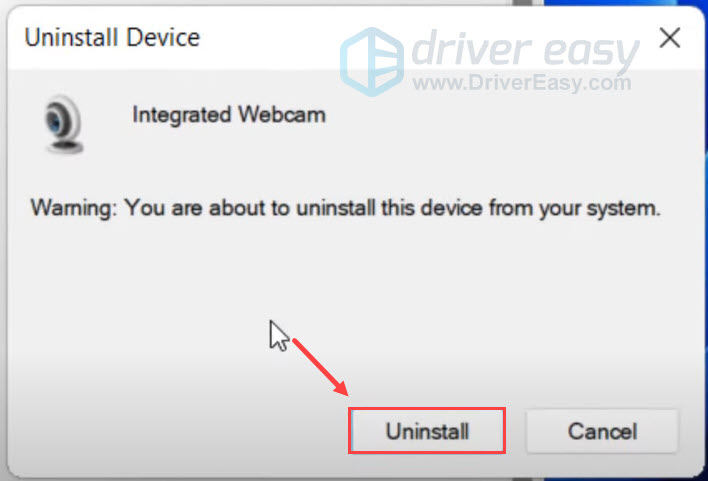
- Double-click Imaging devices or Cameras to expand the category.
- Right-click your camera and select Uninstall device.

- Click Uninstall to confirm.
Once the process is complete, restart your computer. Upon startup, the system will automatically reinstall the missing camera driver for you.
Now test your camera with the Camera app. If your camera still doesn’t work, move on to the next fix.
Fix 6: Check your privacy settings
If you recently updated Windows 11, you might need to give apps permission to use the camera. Some apps don’t have default access to the camera.
To let your apps access the camera:
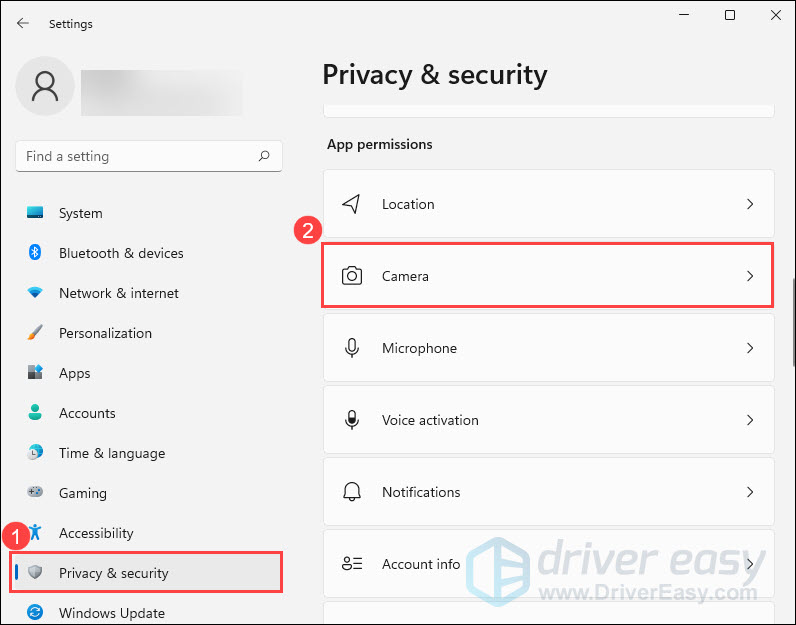
- On your keyboard, press the Windows logo key and I at the same time to open Settings.
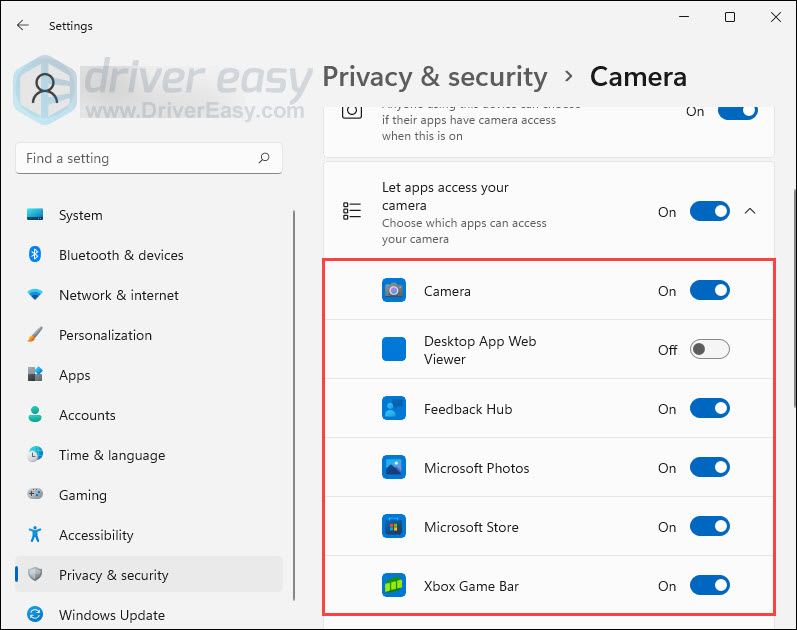
- Select Privacy & security, then click Camera.
- Make sure Camera access and Let apps access your camera are set to On.
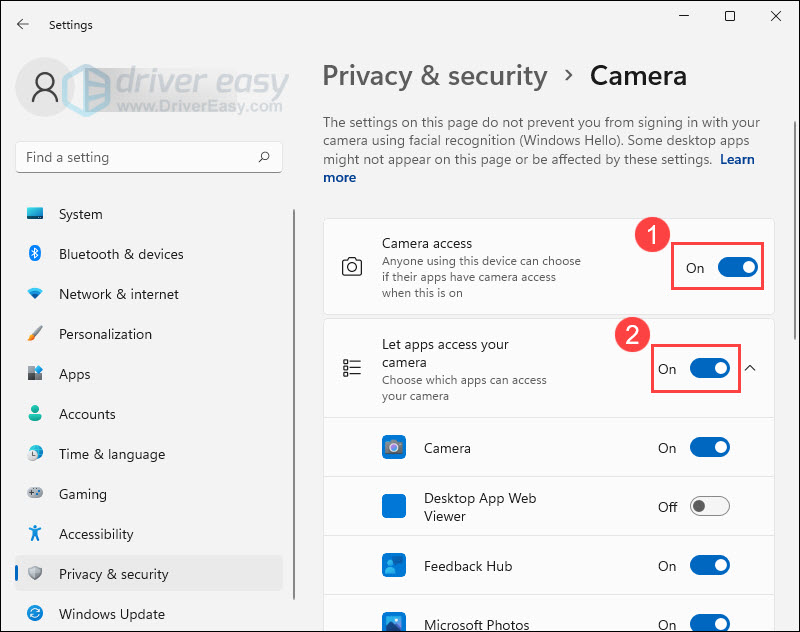
- Enables the apps that you want to access your camera by turning on the switch next to them.
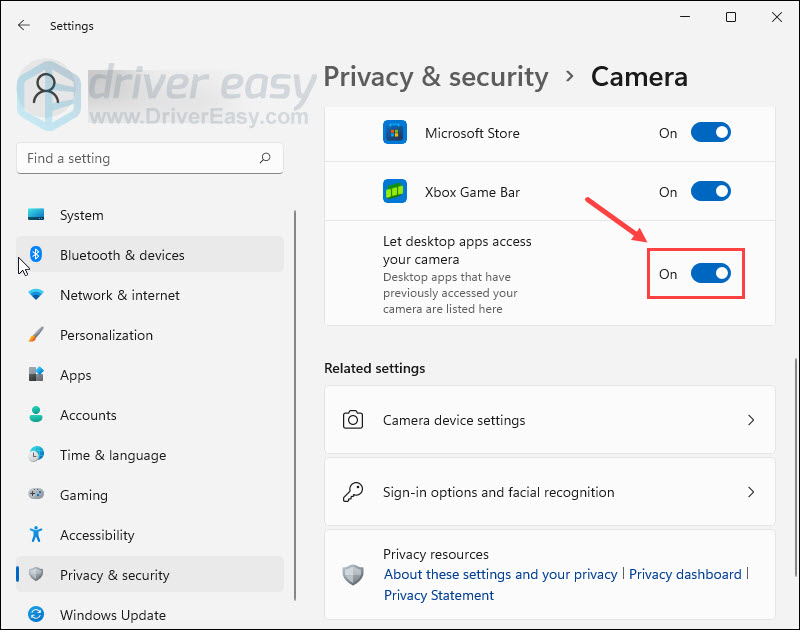
- Scroll down the page and make sure that Let desktop apps access your camera is also turned on.
After you’ve made these changes, check if your camera starts to work. If you’re still having problems with your camera, continue to the next fix.
Fix 7: Temporarily disable your antivirus software
Sometimes your antivirus software could block the normal operation of the camera and cause it to stop working. To see if that’s the case, you can temporarily disable your antivirus software.
If your camera starts to work after disabling the antivirus software, look for help on your antivirus manufacturer’s website.
Fix 8: Reset the camera
If your camera doesn’t work properly, you can try resetting it on your Windows 11 PC. Here’s how:
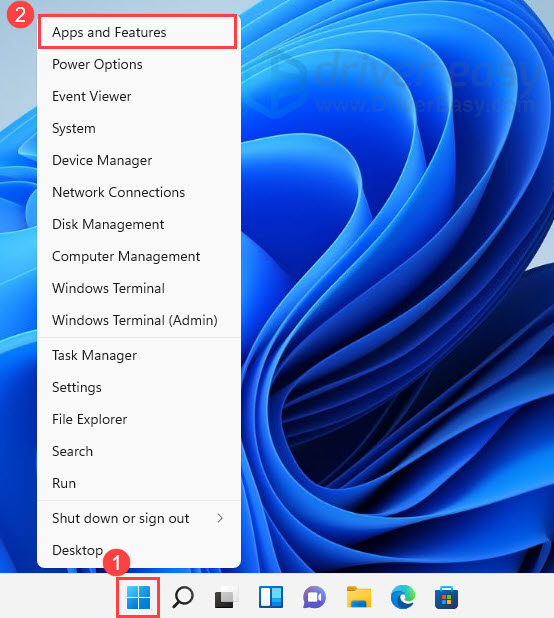
- Right-click Start and select Apps and Features.
- In Apps & features, locate the Camera app and click the three dots icon next to it. Then select Advanced options.
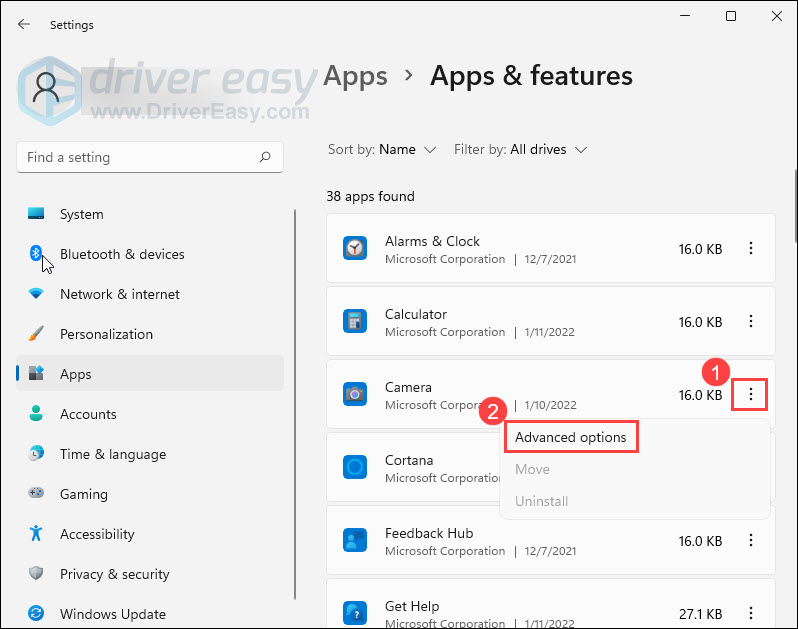
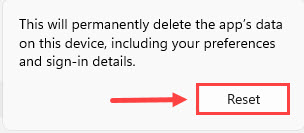
- Click Reset.
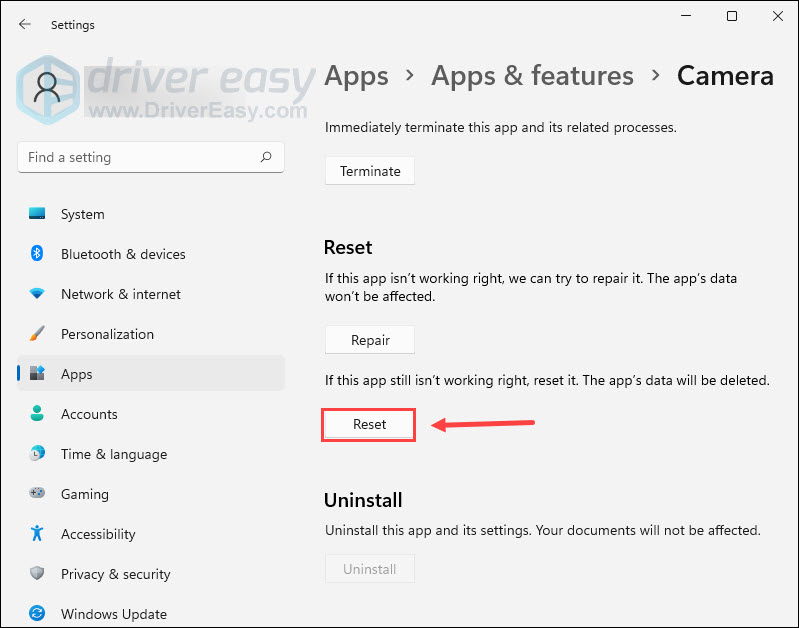
- In the pop-up window, click Reset again.
Once the process is complete, check if your camera is working right.
If resetting the camera app gives you no luck, check out the next fix.
Fix 9: Check for Windows updates
Windows updates often contain feature improvements and bug fixes. If the camera problem was caused due to a bug, then it might be fixed in the latest Windows updates. To check for Windows updates:
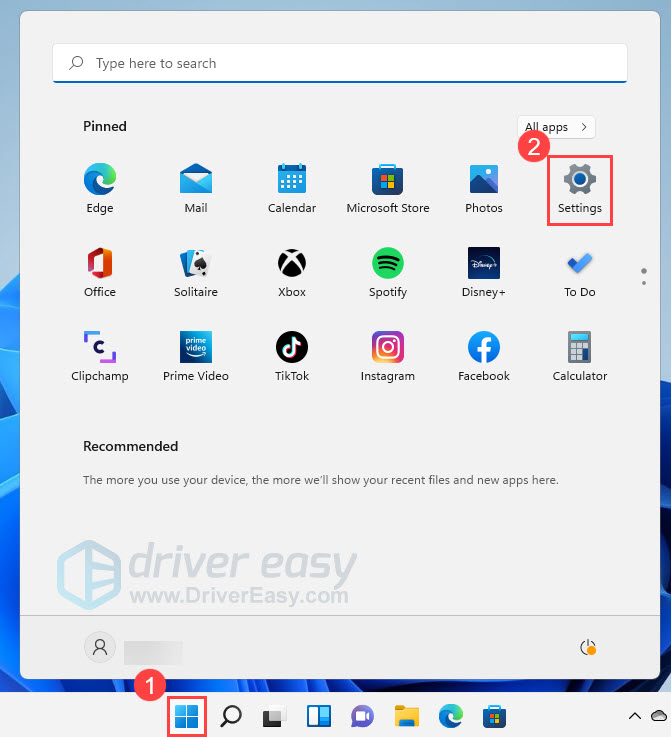
- On your taskbar, click Start and then select Settings.
- In the left panel, select Windows Update. Then click Check for updates.
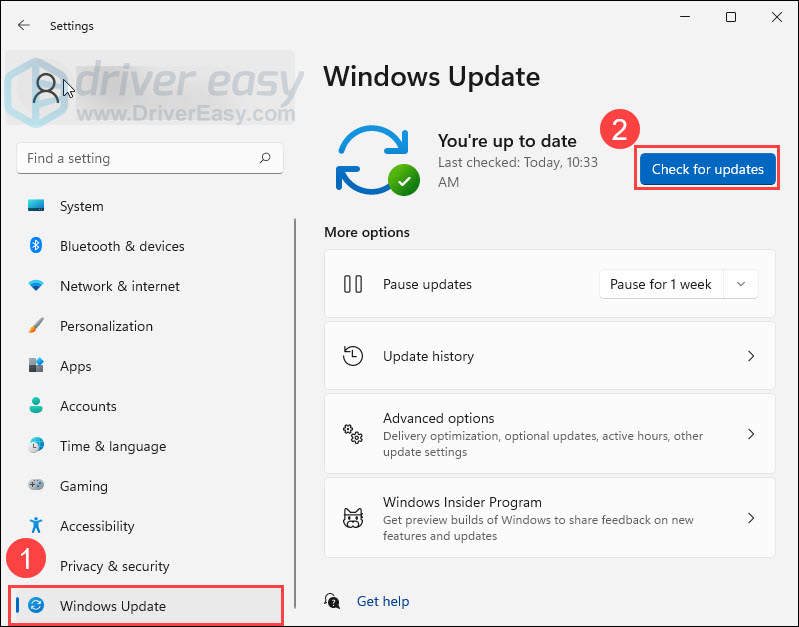
- Windows will automatically download and install the available updates.
Once you’ve installed all the updates, restart your computer and check if you’re able to use your camera now. If not, try the last fix below.
Fix 10: Run camera troubleshooter
Like Windows 10, Windows 11 has a built-in troubleshooter. You can run the camera troubleshooter to diagnose and fix your camera issue. Here’s how:
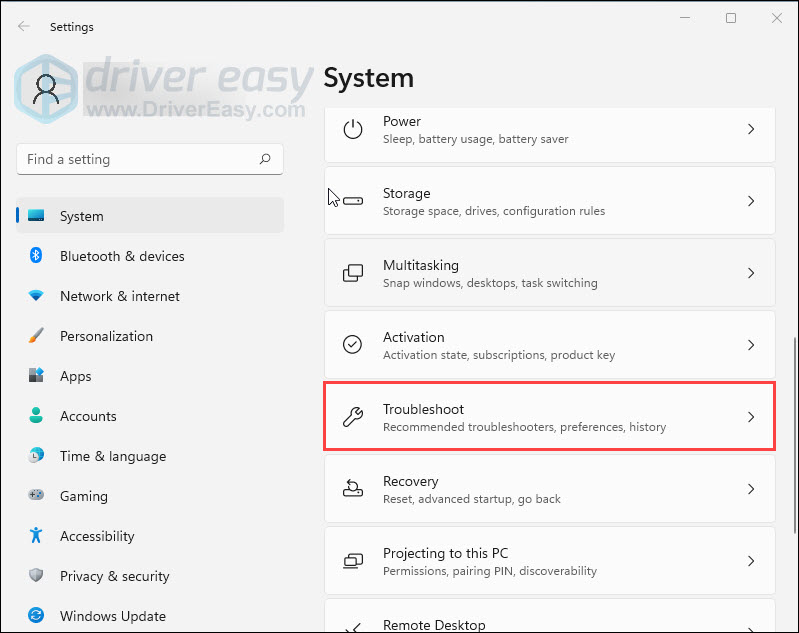
- On your keyboard, press the Windows logo key and I to open Windows Settings.
- Under System, select Troubleshoot.
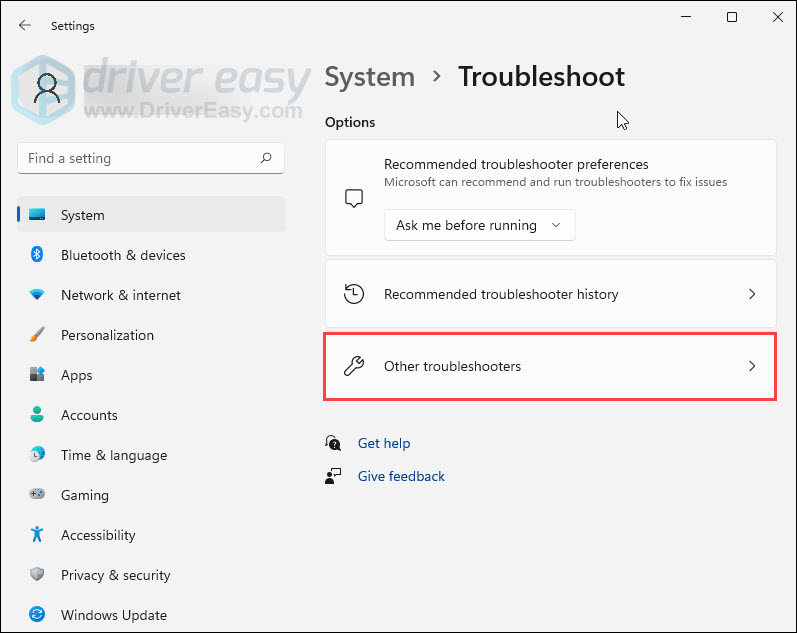
- Click Other troubleshooters.
- Locate the Camera app and click Run next to it.
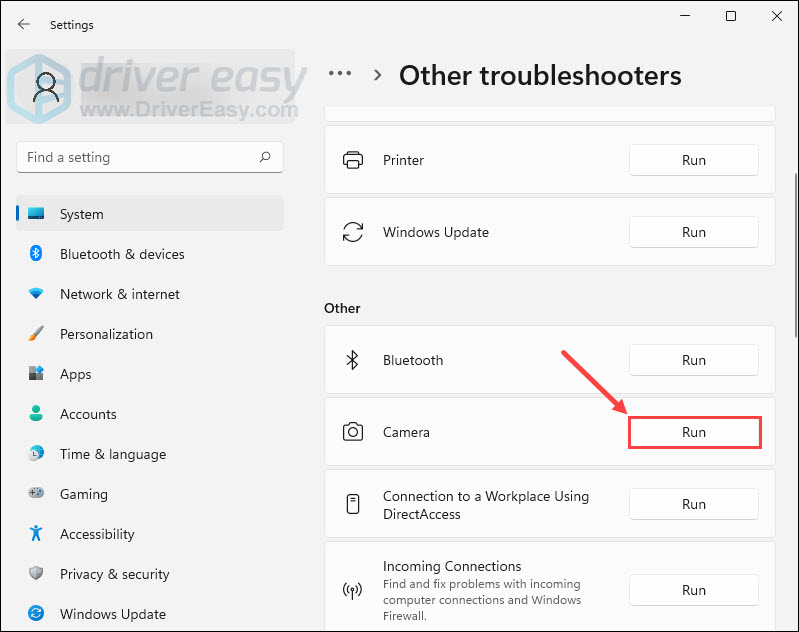
- Follow the troubleshooting steps to fix the problem.
Fix 11: Consider a computer reset
If none of the above helps to restore your camera, then as a last resort, you may need to consider a Windows reset: it wipes out all software incompatibilities and problems, it’s also the rule of thumb in telling a software problem from a hardware one: if your camera remains failing even after a system reset, then it’s definitely a hardware problem.
Microsoft has actually made the system reset process much easier: you can choose to keep all your files and install them back after the system reinstall, without having to lose them over to the reinstallation.
To reinstall or reset your computer, here’s a post for your reference: Reinstall/Reset Windows 10 [Step By Step]
So these are the fixes for the Windows 11 camera not working issues. Hopefully, this post helped. If you have any other questions, feel free to leave us a comment below.