


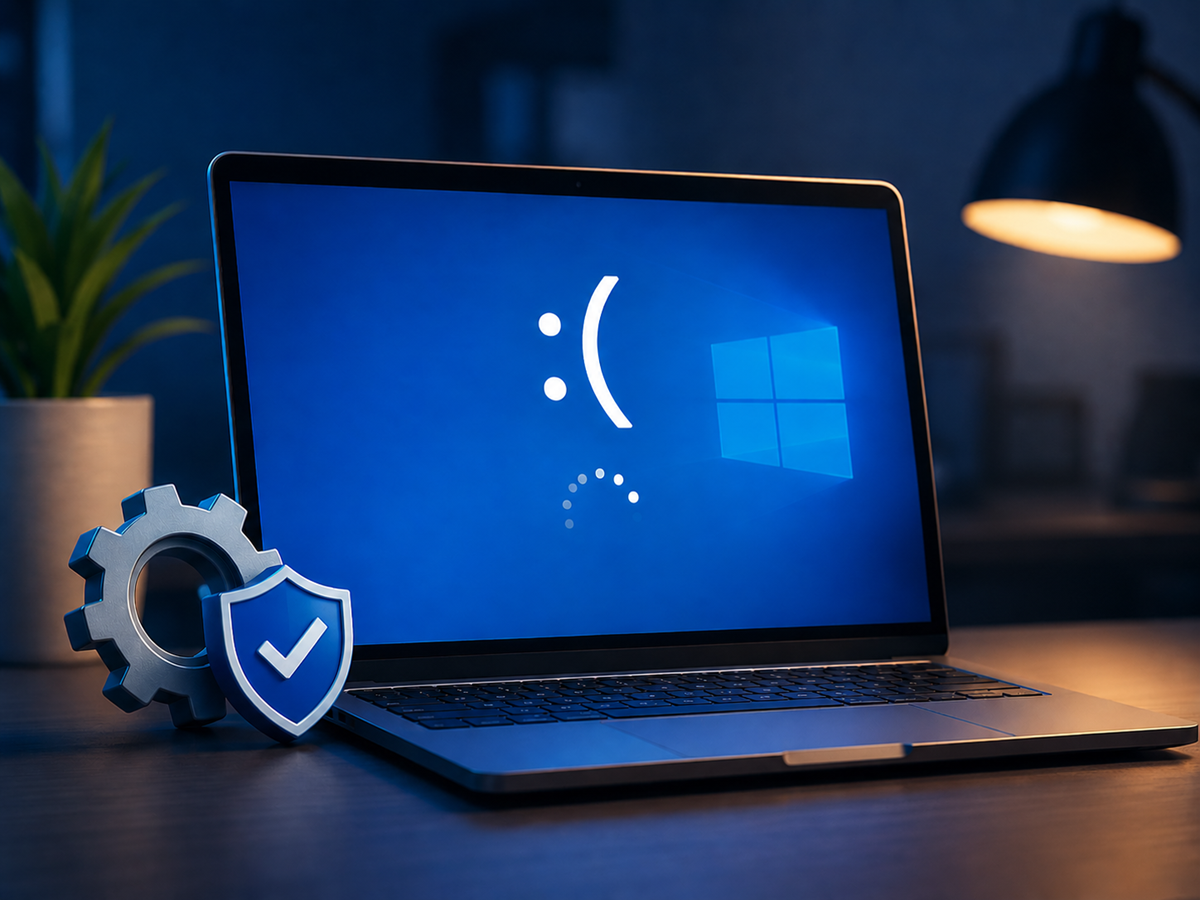
Your PC was running fine. Then you installed Windows Update KB5094126 (builds 26200.8655 / 26100.8655), and now it’s stuck at an endless boot loop, triggers a BSOD with error code 0xc0430001, or freezes at the login screen. Maybe the Start button just stopped working.
You’re not alone. This update has affected many users, especially on HP laptops. Based on user reports and troubleshooting investigations, one of the most commonly reported causes is a Secure Boot certificate update failing due to insufficient free space in the EFI System Partition (ESP). In this guide, we’ll walk you through the most effective fixes for various issues caused by the KB5094126 update.
Fix 1 – Uninstall the KB5094126 update
You can simply uninstall the KB5094126 update to restore your system. If you can boot into Windows, follow the steps below. If your computer can’t boot, you’ll need to remove the update from WinRE.
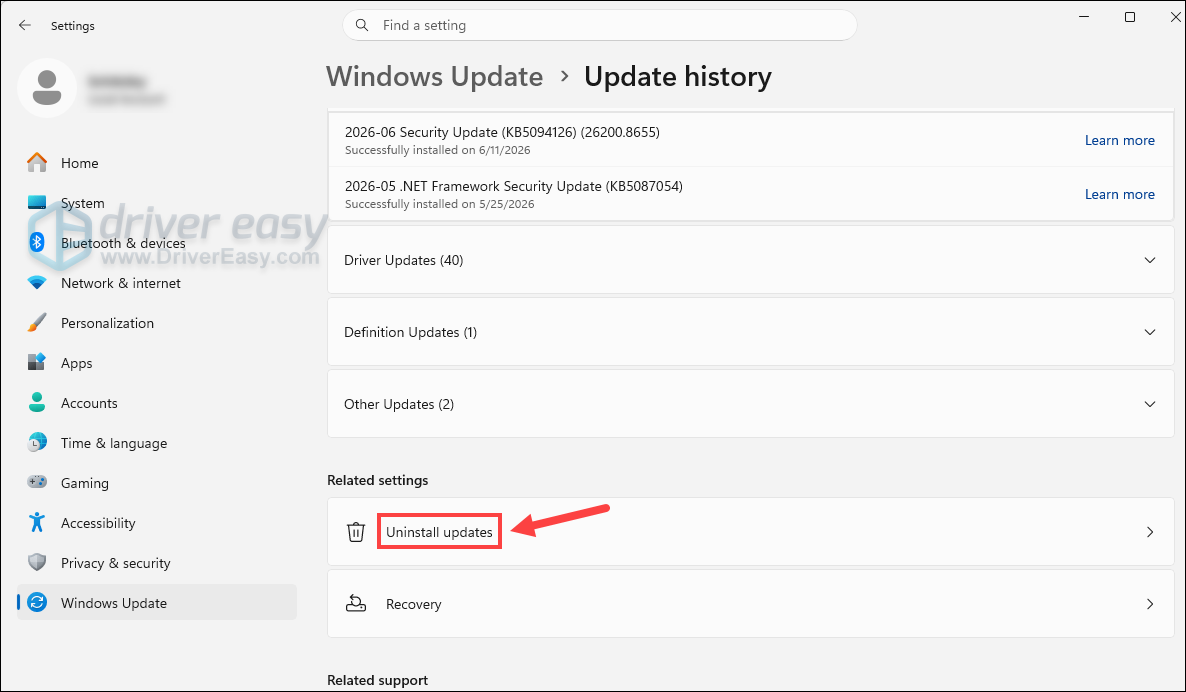
- On your keyboard, press the Windows logo key + I to open Settings.
- Go to Windows Update > Update History.

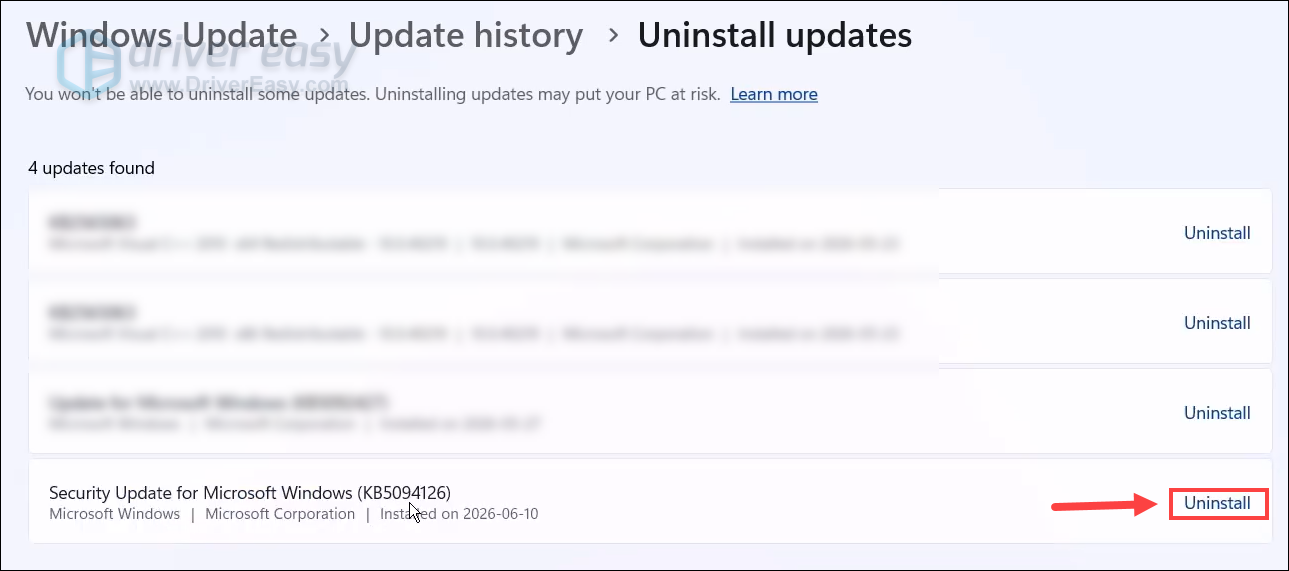
- Scroll down and click Uninstall Updates.
- Locate KB5094126. Click Uninstall.
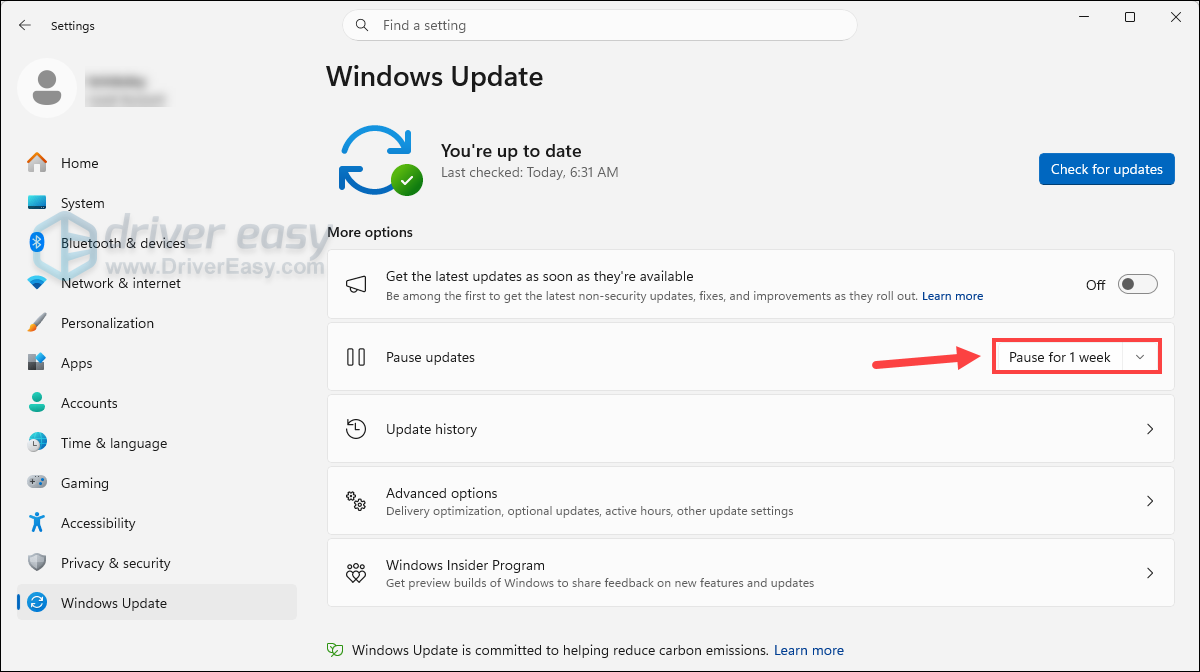
- Go back to Windows Update and click Pause for 1 week. This enables you to temporarily pause Windows Updates to prevent KB5094126 from being reinstalled immediately.
Restart the PC and check if your computer works now.
Uninstall the update in the Windows Recovery Environment
If Windows won’t boot, you can enter the Windows Recovery Environment to remove the update. Here’s how:
- Create a Windows installation USB on another working PC: Download the Windows 11 Media Creation Tool, run it and choose Create installation media (USB flash drive).
- Plug the USB into your affected PC. Turn on the PC and keep pressing the hotkey (often F12, F11, or Esc, depending on your motherboard) to boot from the USB.
- Use the ↑ or ↓ key to choose the USB flash drive as your boot device.
- Select a language and click Next.
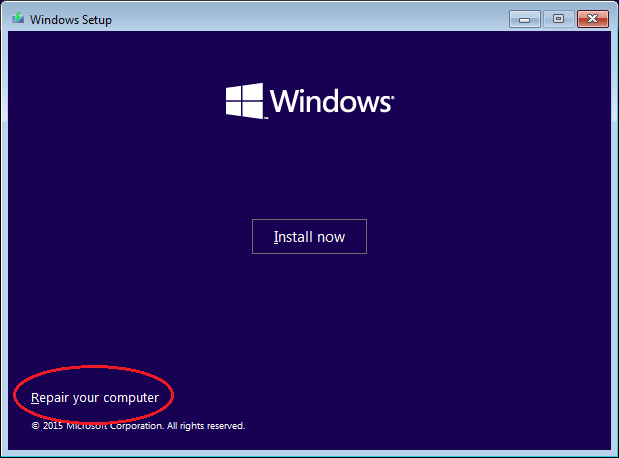
- On the Windows Setup screen, click Repair your computer.
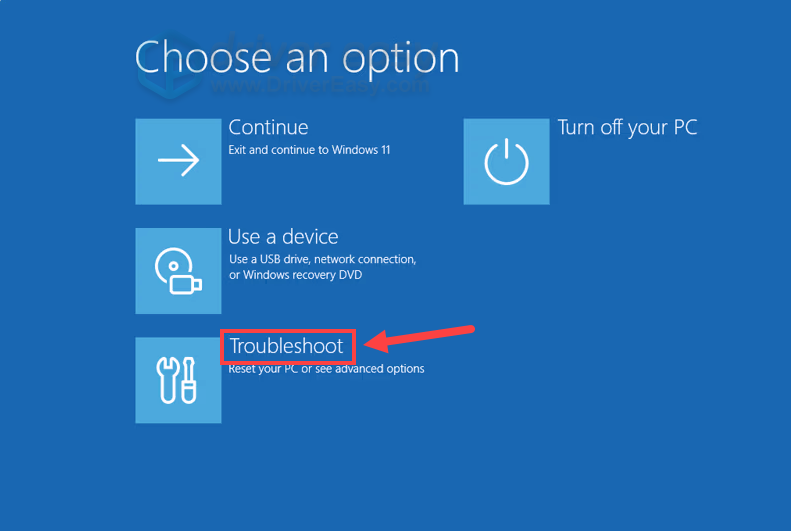
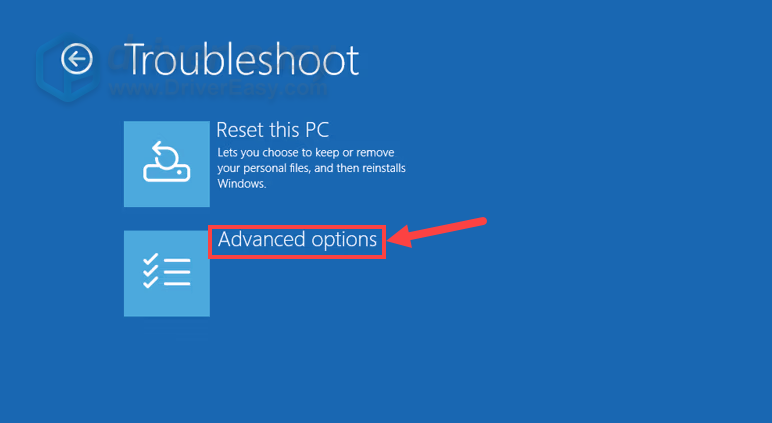
- Select Troubleshoot > Advanced Options > Uninstall Updates.
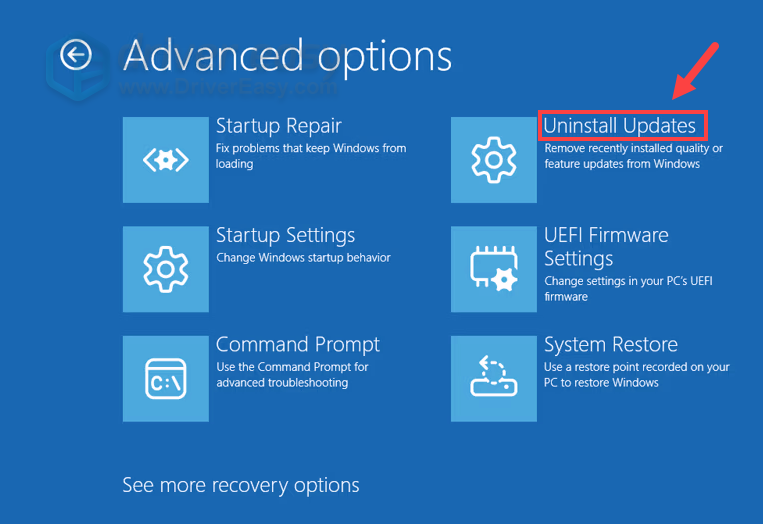
Locate the KB5094126 update and uninstall it. Once done, restart your computer and test your system.
Fix 2 – Disable Secure Boot
If you encounter an error message “The operating system loader failed Secure Boot verification” or your PC repeatedly boots into the BitLocker Recovery, the cause might be related to the secure boot settings. Disabling Secure Boot stops the motherboard from attempting to read the corrupted or incomplete update data stored in the EFI partition, and often allows you to restore access to Windows.
Note: If your system partition is encrypted with BitLocker, Windows will demand your 48-digit recovery key on the next boot. Ensure you have access to this key via your Microsoft Account Recovery Portal before proceeding.
- Restart your PC. When the manufacturer logo appears, repeatedly press the hotkey to enter BIOS/UEFI. It may vary by brands:
– Asus: F2
– Dell: F2
– HP: Esc or F10
– Lenovo: F1 - Navigate to the Security or Boot tab.
- Look for the Secure Boot option and set it to Disabled.
- Save the settings and exit (usually by pressing the F10 key)
Fix 3 – Remove HP DEVFW Firmware backup files (for HP systems)
Based on community reports and our review of affected systems, HP devices with DEVFW firmware backup files appear to be among the most frequently affected configurations. These files can consume valuable EFI space and may interfere with Secure Boot certificate updates.
To delete the HP firmware files:
- Enter cmd into the Windows search box and click Run as administrator.
- Enter mountvol X: /S and press Enter.
(If X: is taken, use Z: or any other free drive letter.) - Enter dir X:\EFI\HP in the command prompt and hit Enter.
- If a DEVFW folder is found, you can continue to delete it. If no file is found, jump to the next fix.
- Type in rd /s /q X:\EFI\HP\DEVFW and press Enter.
- Enter mountvol X: /d and press Enter.
Restart the computer and check whether Windows boots normally or the BSOD error disappears.
Fix 4 – Increase EFI partition size
Many affected systems use a 100MB EFI partition. Modern Secure Boot updates may require additional free space, which can lead to installation failures or error 0x800f0922. If you’re on a Dell, custom build, or any system with a 100MB EFI partition, increasing its size to 500MB may help prevent future Secure Boot update failures.
Before proceeding, you can temporarily suspend BitLocker:
To increase your EFI partition size without data loss, you can use a dedicated, third-party partition manager like MiniTool Partition Wizard. You can follow this step-by-step guide to resize the EFI partition safely.
Fix 5 – Fix for Start button not working and System Tray missing
Some users report that after KB5094126, the Start button isn’t working and the system tray icons vanish. In many cases, this is caused by third-party UI customization tools or Windows shell components failing to load correctly after the update.
If you use Windhawk, try disabling any mods that modify the Start menu, taskbar, system tray, or Windows Explorer. Still not working? You can disable or uninstall Windhawk.
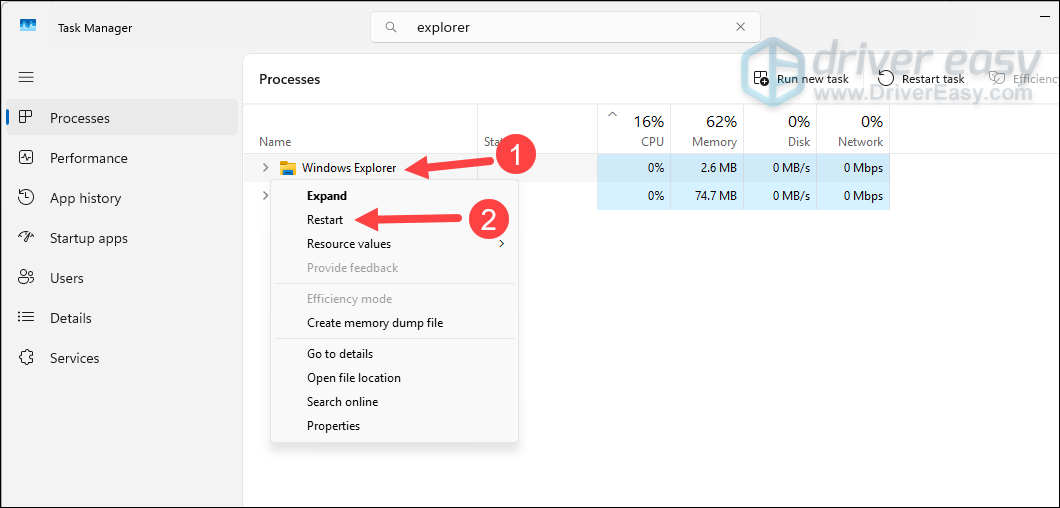
- On your keyboard, press Ctrl + Shift + Esc to open the Task Manager.
- Right-click on Windows Explorer and click Restart.
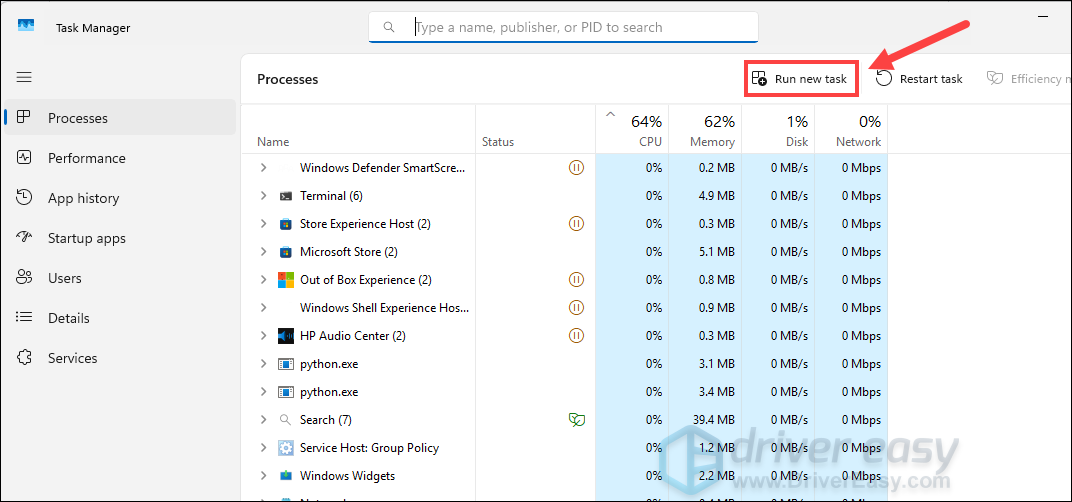
If the problem persists, you may need to completely uninstall Windhawk.
- Click Run new task.
- Type appwiz.cpl and press Enter.
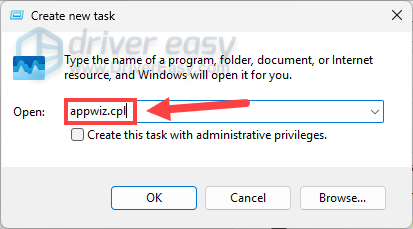
- Find Windhawk (or your customizer), right-click it, and select Uninstall.
- Restart your PC.
The KB5094126 update has caused boot issues, BSOD errors, and installation failures for a number of Windows users, but the fixes are straightforward once you know where to look. In most cases, you can bring your system back to normal by uninstalling the KB5094126 update or solving the Secure Boot update problems.