


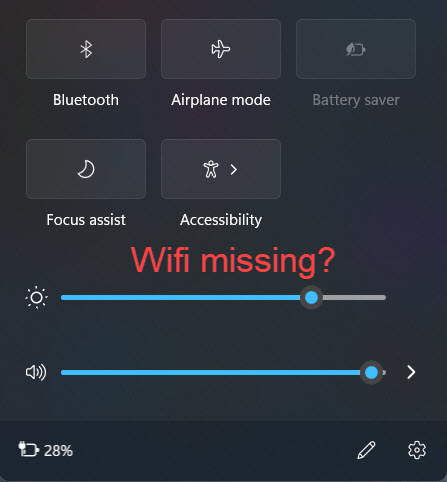
If your WiFi is not showing up on Windows 11, you’re not alone. Some users find that the WiFi icon disappears completely, while others can see the WiFi icon but no WiFi network shows up when trying to connect.
In most cases, the problem is caused by a disabled wireless adapter, a corrupted WiFi driver, Windows network services, or a recent Windows update. In this guide, we’ll walk you through the most effective fixes for WiFi missing on Windows 11.
This guide applies to Windows 11 (all editions) and most laptops from Dell, HP, Lenovo, ASUS, Acer, MSI, and Surface devices.
How to fix WiFi not showing up on Windows 11
Start with the simplest solutions first. After completing each method, click the WiFi icon in the taskbar to check whether your available wireless networks appear again.
- Power cycle your computer
- Enable the Wi-Fi adapter
- Update your Wi-Fi adapter driver
- Run the Network Adapter troubleshooter
- Turn on WLAN AutoConfig service
- Reset Windows network components
- Reset all network settings
Fix1: Power cycle your computer
Sometimes Windows simply fails to initialize the wireless adapter after waking from sleep or installing updates. To fix the problem, try to shut down your system completely, disconnect the power cable (or charger), wait about 2-3 minutes, and then boot the computer again. This sounds simple, but it does work for many users.
If you haven’t tried this method before, give it a go.
Fix 2: Enable the Wi-Fi adapter
If your Wi-Fi adapter is disabled, the Wi-Fi option may not show up, even if your router is working normally. To see if that’s the case, you can check your network settings. Here’s how:
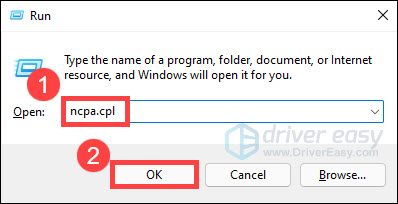
- On your keyboard, press the Windows logo key and R at the same time to invoke the Run dialog. Then type ncpa.cpl and click OK.
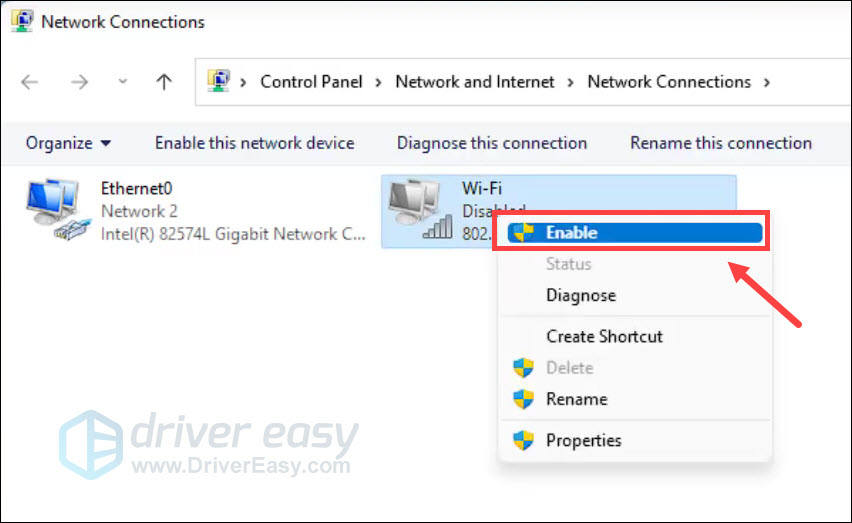
- Check your Wi-Fi adapter. If it’s disabled or greyed out, right-click it and select Enable. If it’s already enabled, leave it as is.
Once done, restart your computer and check if your Wi-Fi network shows up again.
If your Wi-Fi adapter is enabled and the issue remains, go ahead with the next fix.
Fix 3: Update your Wi-Fi adapter driver
One of the main causes of the Wi-Fi option not showing up is that you’re using a corrupted or outdated wireless adapter driver. To ensure your Wi-Fi network works properly, you need to update your Wi-Fi adapter driver to the latest version.
Option 1 – Update automatically (recommended)
To update your device drivers easily and quickly, you can use a trusted driver updater like Driver Easy.
Driver Easy will automatically recognize your system and find the correct drivers for it. You don’t need to know exactly what system your computer is running, you don’t need to risk downloading and installing the wrong driver, and you don’t need to worry about making a mistake when installing. Driver Easy handles it all.
Temporarily connect via Ethernet if your PC has an Ethernet port.
Or use USB tethering from an Android phone or iPhone to give your PC temporary internet access.
Or use another computer with internet access to download Driver Easy, then copy the installer to a USB flash drive and run it on the affected PC. You’ll need an offline scan and update. Here’s the step-by-step guide.
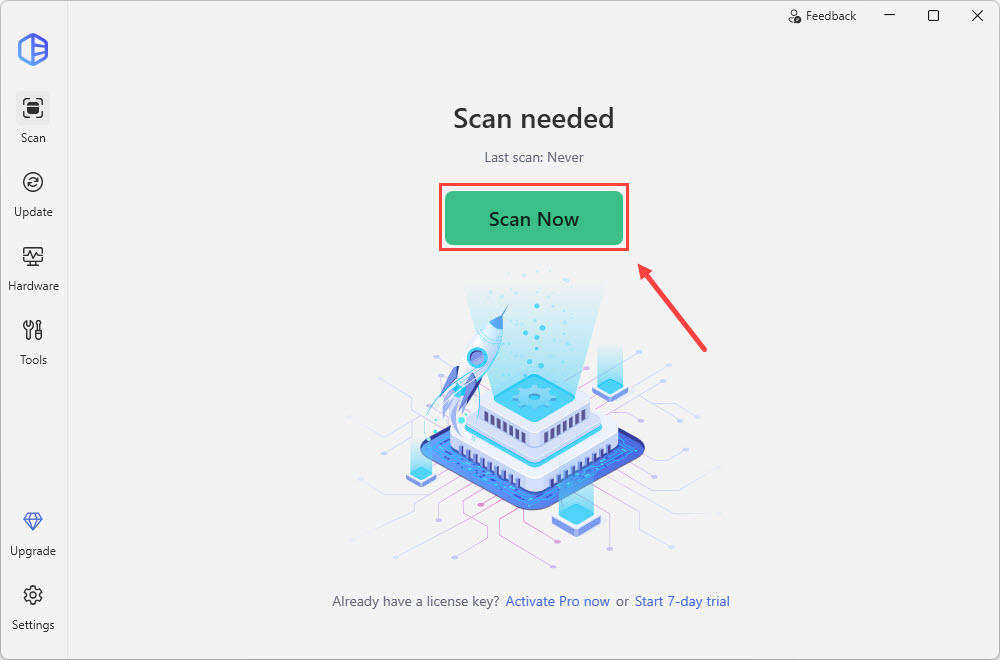
- Download and install Driver Easy.
- Run Driver Easy and click the Scan Now button. Driver Easy will then scan your computer and detect any problem drivers.
- Click the Activate & Update button next to your Wi-Fi adapter to automatically download and install the correct version of this driver. Or click Update All to automatically download and install the correct version of all the drivers that are missing or out of date on your system. (This requires the Pro version — you’ll be prompted to upgrade when you click Update All.)
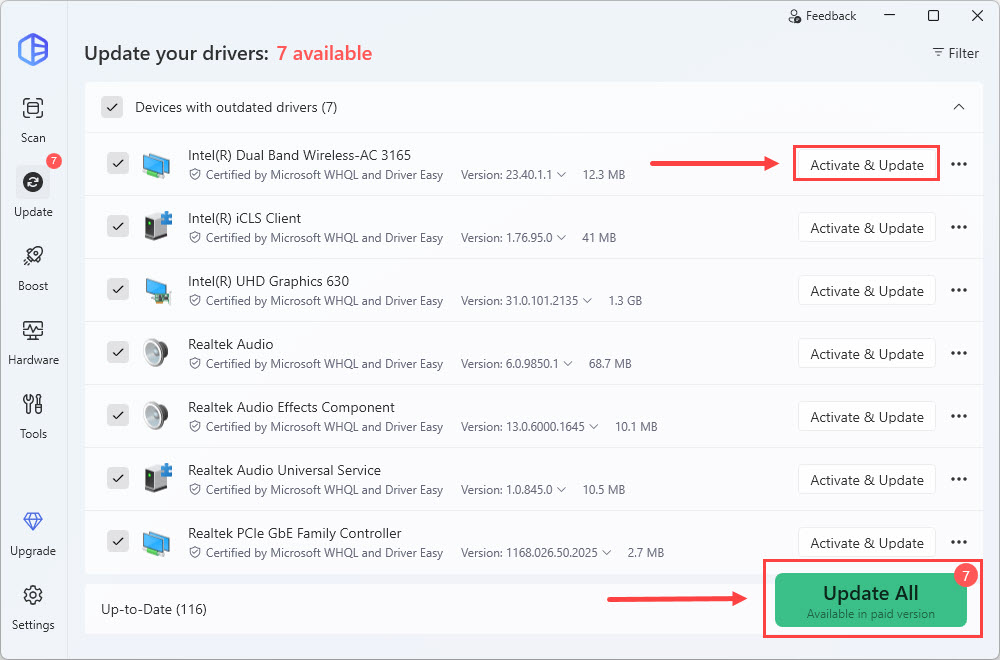
Once you’ve updated your Wi-Fi adapter driver, restart your computer.
Option 2 – Update the driver manually
You can also download the latest wireless driver from the WiFi adapter manufacturer, such as Intel, Realtek, MediaTek, Qualcomm, or from the PC manufacturer’s support website, such as Dell, HP, Lenovo, ASUS, Acer, or MSI.
On another computer that can access the Internet, download the driver, then copy it to the offline PC and install the driver manually.
Now check to see if your problem has been resolved. If not, move on to the next fix.
Fix 4: Run the Network Adapter troubleshooter
If updating the Wi-Fi adapter driver doesn’t help, try running the Network Adapter troubleshooter. This troubleshooter can automatically diagnose and repair common wireless configuration problems. To run the troubleshooter:
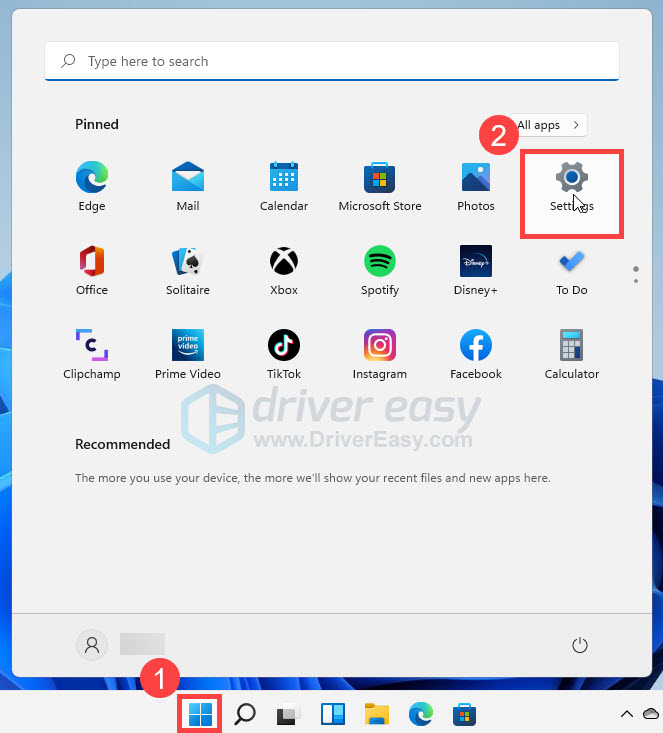
- On your taskbar, select the Start button and click Settings.
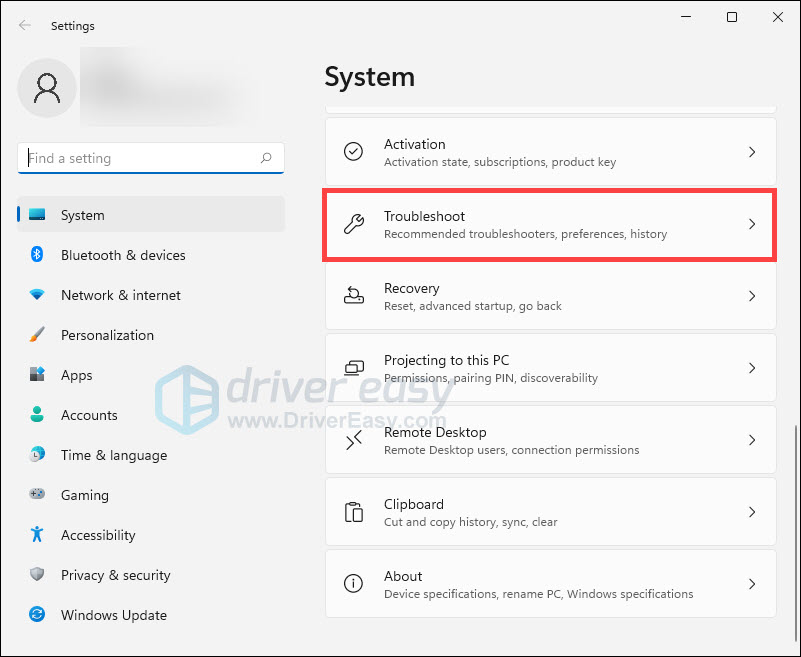
- Under System, select Troubleshoot.
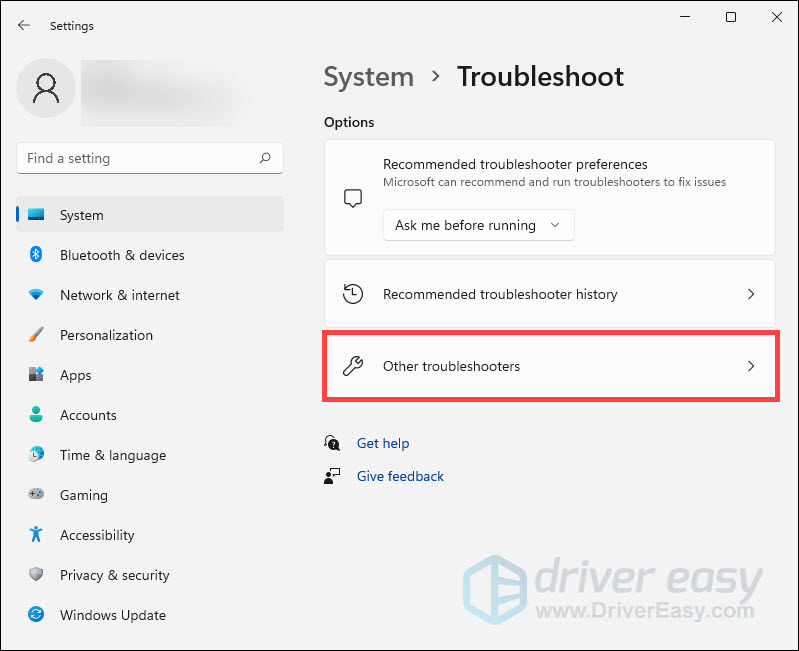
- Click Other troubleshooters.
- Scroll down the page, locate Network Adapter and click Run.
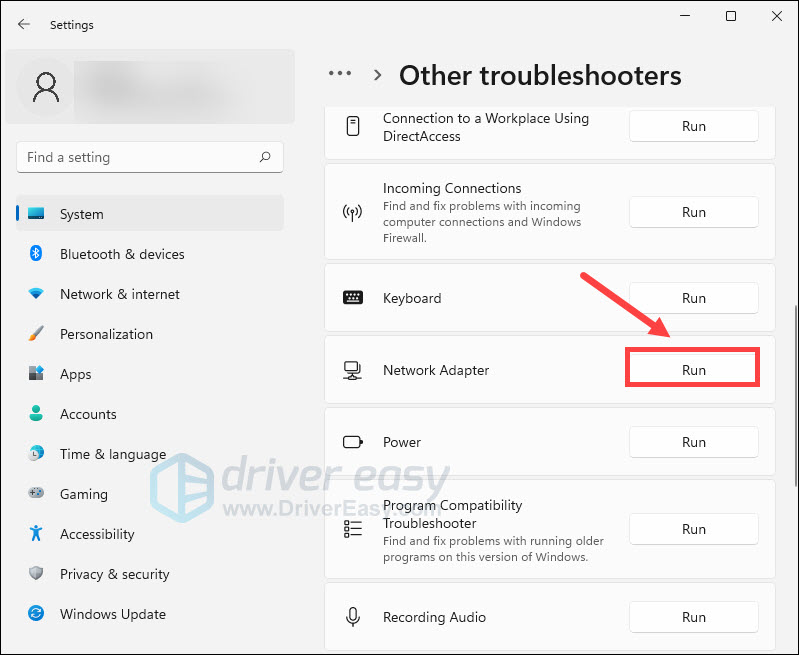
- Follow the steps in the troubleshooter and see if that fixes the problem.
If your issue persists, check out the next fix.
Fix 5: Turn on WLAN AutoConfig service
WLAN AutoConfig is a Windows service that helps your computer to configure, discover, connect to, and disconnect from a wireless network. If this service is disabled, your WiFi list may appear completely empty. So you should make sure the WLAN AutoConfig service is running automatically. Here’s how to do it:
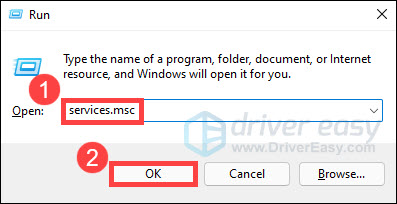
- On your keyboard, press the Windows logo key and R together to invoke the Run dialog. Then type services.msc and click OK.
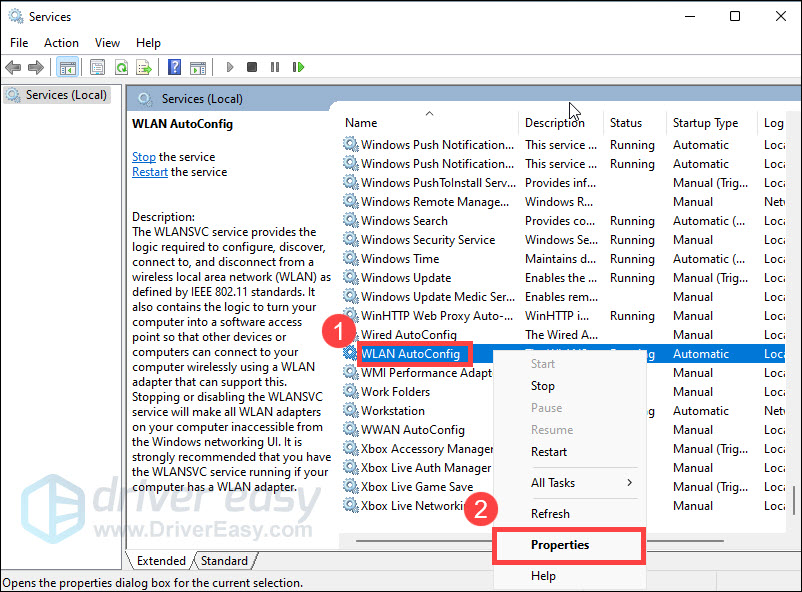
- Find WLAN AutoConfig in the list of services, right-click on it and select Properties.
- Make sure Startup type is set to Automatic and Service status is Running. Then click OK to save changes.
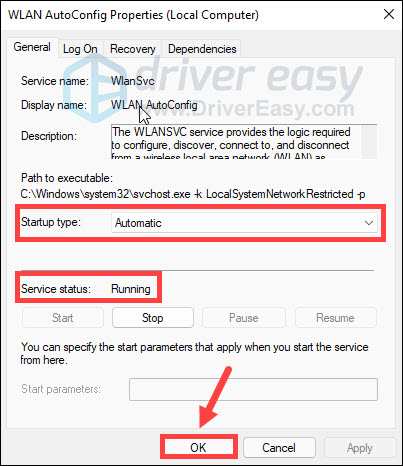
Restart your PC and see if your Wi-Fi shows up.
If you still face the same issue, try the next fix.
Fix 6: Reset Windows network components
When you’re having trouble with your wireless network, you can try running some network commands to manually reset the TCP/IP stack, release and renew the IP address, and flush and reset the DNS client resolver cache. Here is how to do it:
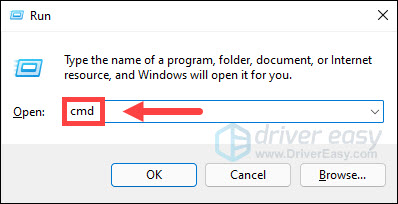
- On your keyboard, press the Windows logo key and R at the same time to open the Run dialog. Then type cmd and press Ctrl, Shift, and Enter simultaneously to run Command Prompt as administrator.
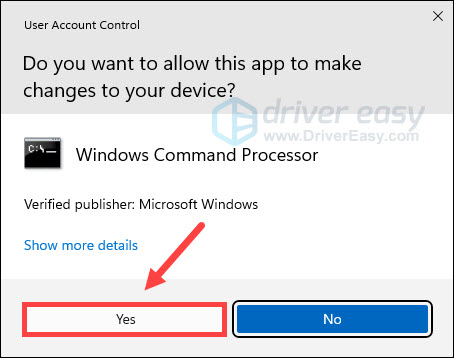
- If you are prompted for permission by User Account Control, click Yes.
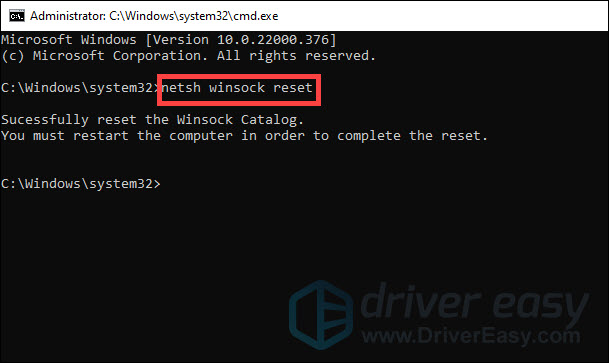
- At the command prompt, type netsh winsock reset and press Enter.
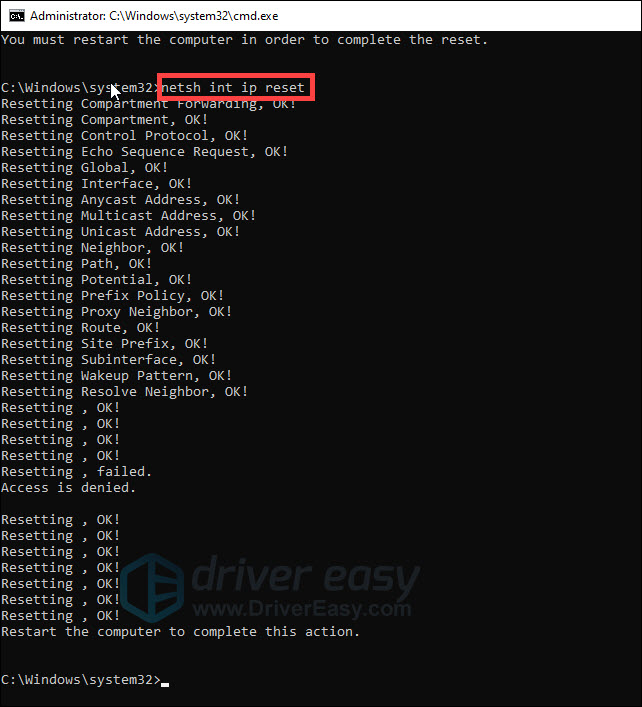
- Type netsh int ip reset and press Enter.
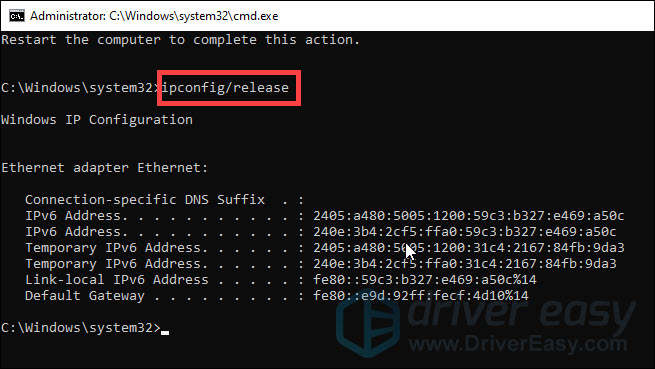
- Type ipconfig /release and press Enter.
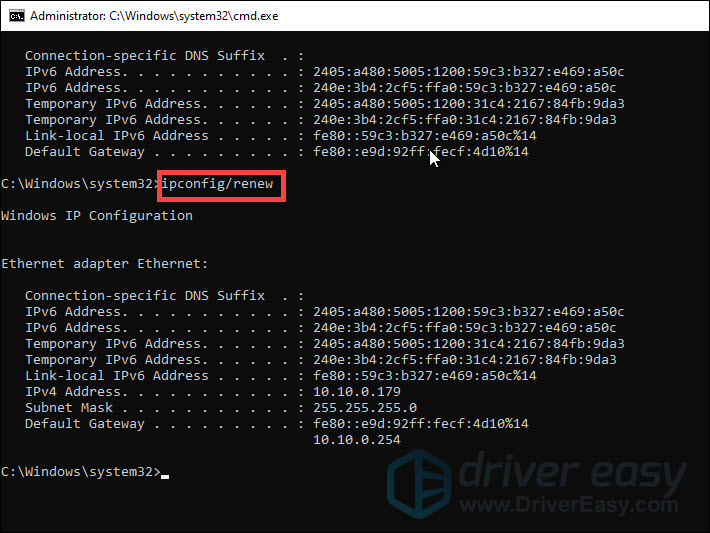
- Then type ipconfig /renew and press Enter.
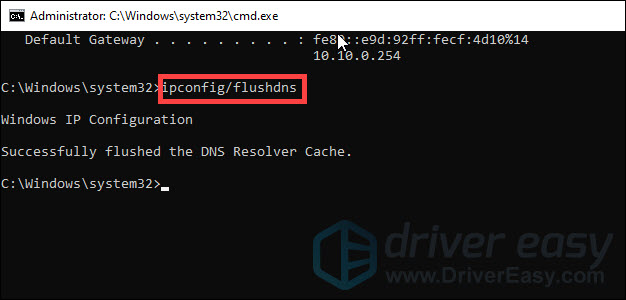
- Type ipconfig /flushdns and press Enter.
Once you’ve run all those commands, restart your computer and try to connect to the Wi-Fi network.
If this method doesn’t help, try the last fix below.
Fix 7: Reset all network settings
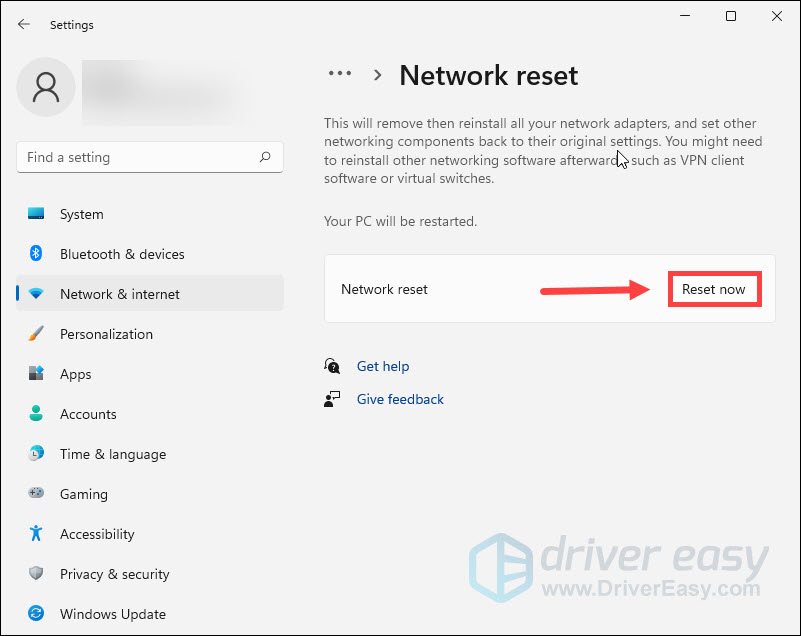
If you’ve tried all of the above steps and you still can’t get your Wi-Fi to work, the last thing you can try is to reset your network. This will remove and then reinstall all your network adapters, and the settings for them will be set to the defaults.
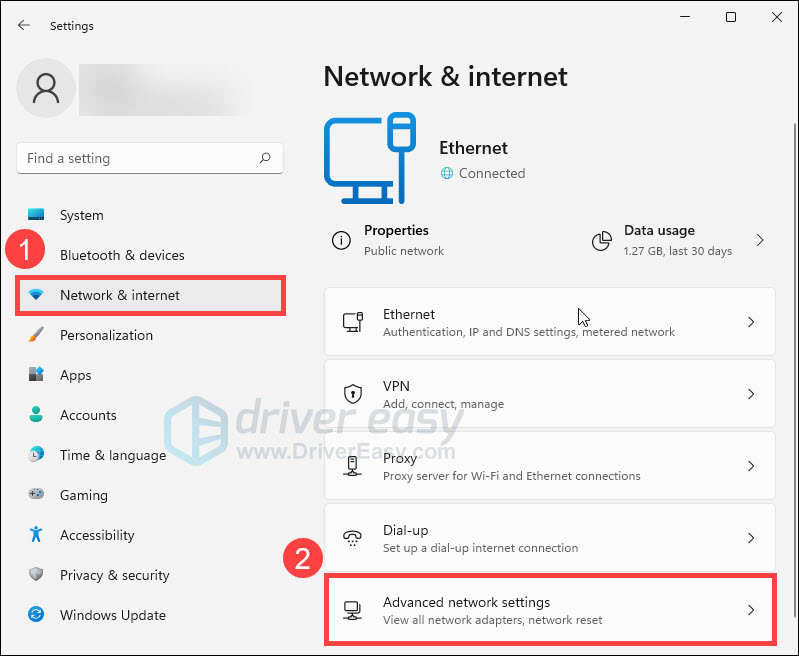
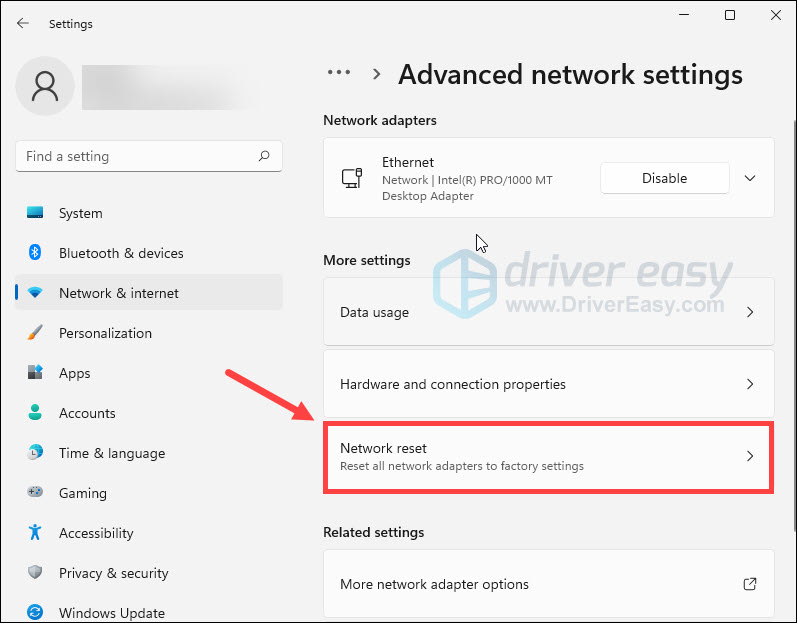
- On your taskbar, select the Start button and click Settings.
- Select Network & internet, then click Advanced network settings.
- Under More settings, click Network reset.
- Click Reset now.
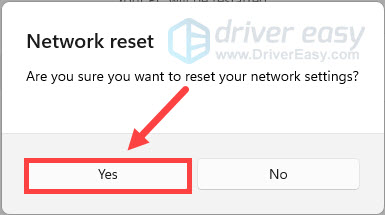
- Click Yes to confirm again.
Wait for your computer to restart, and see if that fixes the problem.
Still can’t see any WiFi networks?
If you’ve tried every fix above and your WiFi network is still not showing up, the problem may be hardware-related. Check the following:
- Your laptop’s physical WiFi switch (if available).
- Your router is broadcasting normally.
- Other devices can detect the same WiFi network.
- The wireless adapter appears in Device Manager > Network adapters.
If the WiFi adapter is completely missing from Device Manager, it’s possible the driver failed to load, or the wireless card has developed a hardware fault.
That’s all about it. Working through the fixes above, from restarting your PC to updating your WiFi driver and resetting Windows networking, will usually resolve the WiFi is not showing up or WiFi network missing problem.
If you have any questions or suggestions, feel free to leave us a comment below.
