


Error codes in Device Manager appear when your computer is experiencing device driver issues, system resource conflicts or other hardware problems.
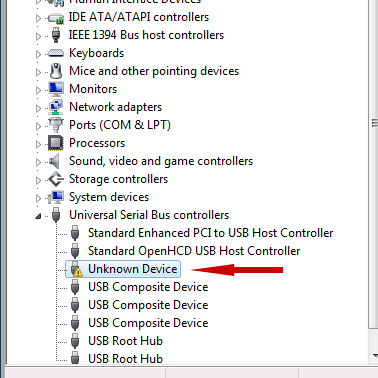
When you see a device in your Device Manager panel are marked with a yellow exclamation mark like the following screen shot:
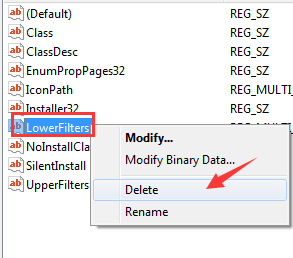
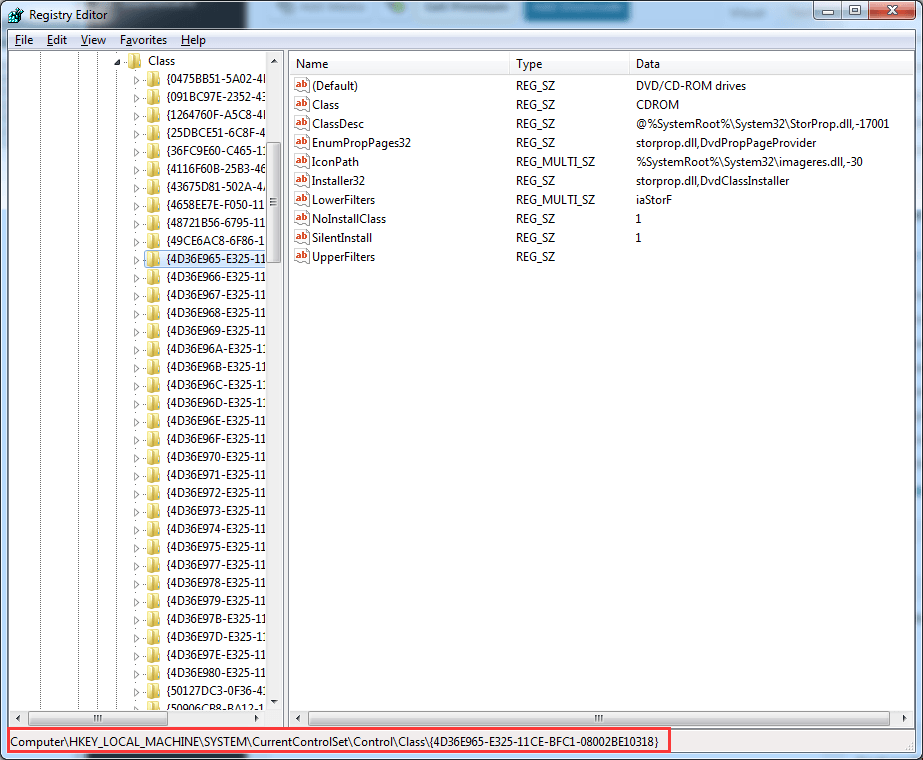 3) Find UpperFilters and LowerFilters, right click them respectively and choose Delete.
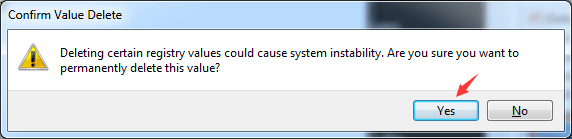
 4) When you are prompted to confirm the delete, click Yes.
 5) Quit Registry Editor, and then restart your computer.
Note: If you cannot see the UpperFilters and LowerFilters with the Type name REG_MULTI_SZ, please seek the alternatives.
5) Quit Registry Editor, and then restart your computer.
Note: If you cannot see the UpperFilters and LowerFilters with the Type name REG_MULTI_SZ, please seek the alternatives.
 Method Two: Replace the Existing Driver
1) Go to Device Manager.
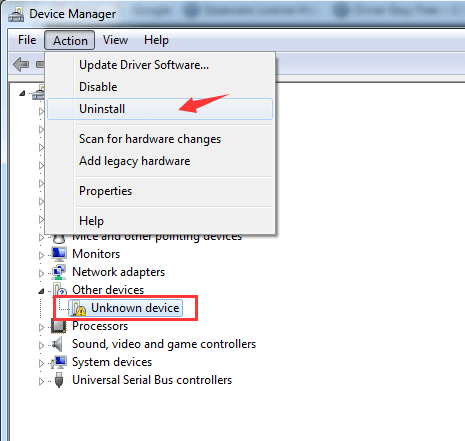
2) Select the device with the yellow exclamation mark, then press Action button and choose Uninstall.
Method Two: Replace the Existing Driver
1) Go to Device Manager.
2) Select the device with the yellow exclamation mark, then press Action button and choose Uninstall.
 3) Repeat step 2 until you have uninstall all the devices with the yellow exclamation marks.
4) After you have finished the uninstall, please go to the Action button on the menu bar and then choose Scan for hardware changes.
3) Repeat step 2 until you have uninstall all the devices with the yellow exclamation marks.
4) After you have finished the uninstall, please go to the Action button on the menu bar and then choose Scan for hardware changes.
 5) Close all the windows and restart your computer.
After you reboot your computer, the drivers for these devices will be installed automatically.
Note: This method is not always helpful since the drivers that provided by Windows Update are not always the latest or able to help you with the Code 41 error. So you might need to find another way to help you with this problem.
Method Three: Update the Driver Manually
Note: Before you proceed with this method, it is required that you have located, downloaded and extracted drivers for the hardware. You could always do so by searching in the manufacturers websites first.
1) Go to Device Manager.
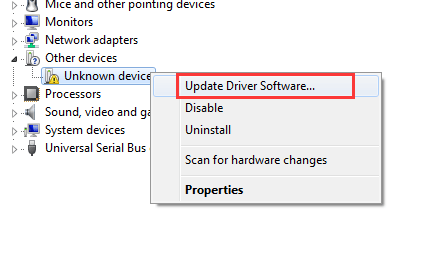
2) Right click the device with the yellow exclamation mark and choose Update Driver Software…
5) Close all the windows and restart your computer.
After you reboot your computer, the drivers for these devices will be installed automatically.
Note: This method is not always helpful since the drivers that provided by Windows Update are not always the latest or able to help you with the Code 41 error. So you might need to find another way to help you with this problem.
Method Three: Update the Driver Manually
Note: Before you proceed with this method, it is required that you have located, downloaded and extracted drivers for the hardware. You could always do so by searching in the manufacturers websites first.
1) Go to Device Manager.
2) Right click the device with the yellow exclamation mark and choose Update Driver Software…
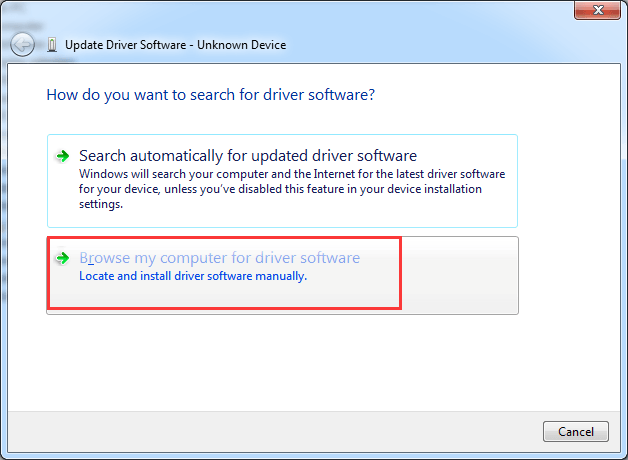
 3) Choose Browse my computer for driver software.
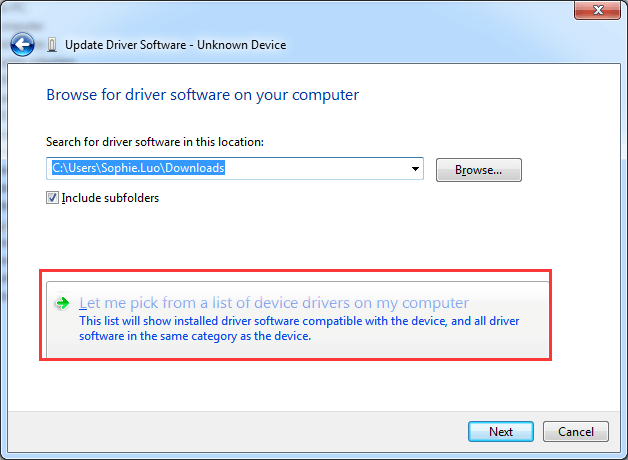
 4) Then go to Let me pick from a list of device drivers on my computer.
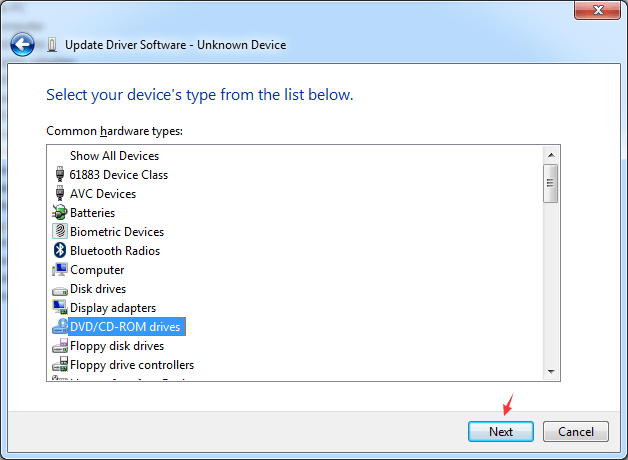
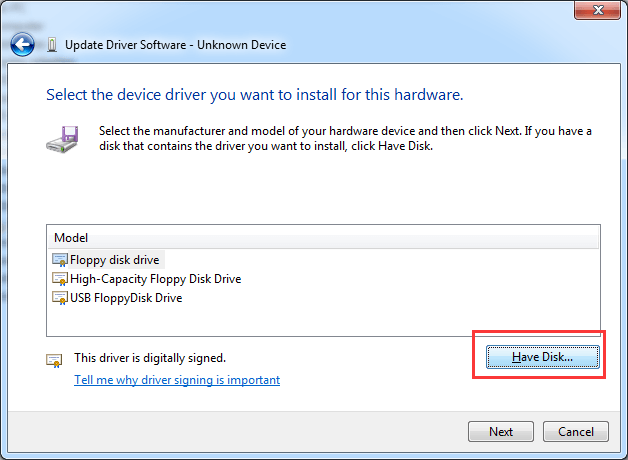
 5) Select the type your device and then choose Next. The following screen shot is just for reference.
 6) Then choose Have Disk… option on the right corner.
 7) Click the Browse button to navigate to the folder that you have extracted the downloaded drivers for your device.
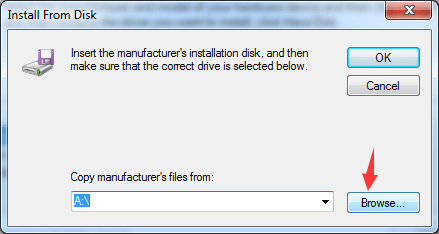 8) The file that you are looking for should be an .inf file. If you can’t see the file, please download the drivers again, since this folder could contain corrupted files.
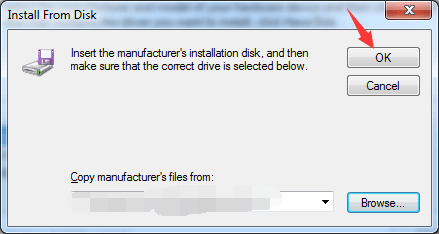
9) Press OK back on the Install From Disk window.
8) The file that you are looking for should be an .inf file. If you can’t see the file, please download the drivers again, since this folder could contain corrupted files.
9) Press OK back on the Install From Disk window.
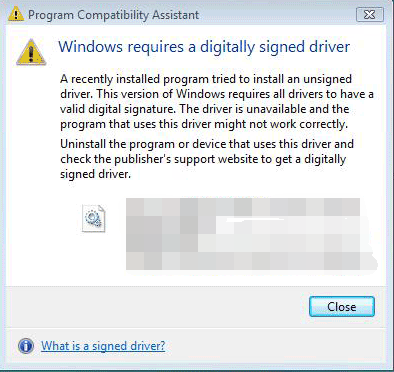
 10) Click Yes to the following notifications that might come up.
“Windows can’t verify the publisher of this driver software”
10) Click Yes to the following notifications that might come up.
“Windows can’t verify the publisher of this driver software”
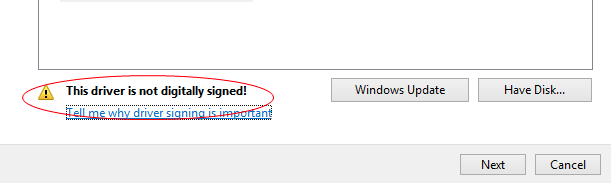
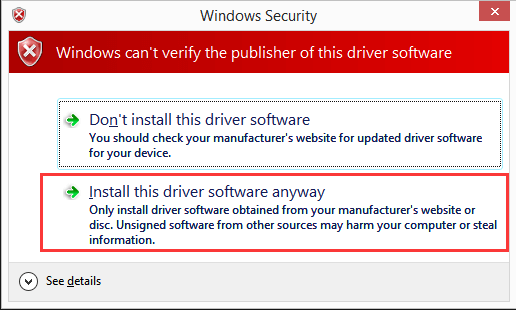 “This driver hasn’t been signed”
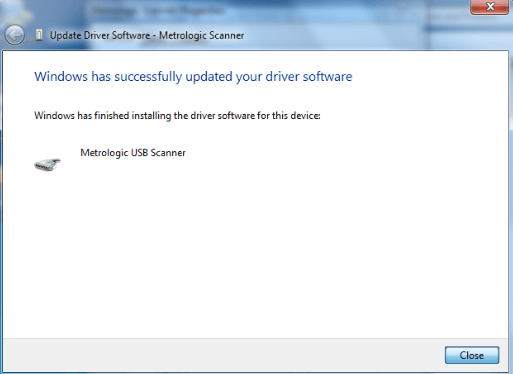
 11) After the install, you will see a window saying that Windows has successfully updated your driver software.
 Method Four: Driver Easy
If you don’t have the time, patience or computer skills to update your drivers manually, you can do it automatically with Driver Easy.
Driver Easy will automatically recognize your system and find the correct drivers for it. You don’t need to know exactly what system your computer is running, you don’t need to risk downloading and installing the wrong driver, and you don’t need to worry about making a mistake when installing.
You can update your drivers automatically with either the FREE or the Pro version of Driver Easy. But with the Pro version it takes just 2 clicks (and you get full support and a 30-day money back guarantee):
1) Download and install Driver Easy.
2) Run Driver Easy and click Scan Now button. Driver Easy will then scan your computer and detect any problem drivers.
Method Four: Driver Easy
If you don’t have the time, patience or computer skills to update your drivers manually, you can do it automatically with Driver Easy.
Driver Easy will automatically recognize your system and find the correct drivers for it. You don’t need to know exactly what system your computer is running, you don’t need to risk downloading and installing the wrong driver, and you don’t need to worry about making a mistake when installing.
You can update your drivers automatically with either the FREE or the Pro version of Driver Easy. But with the Pro version it takes just 2 clicks (and you get full support and a 30-day money back guarantee):
1) Download and install Driver Easy.
2) Run Driver Easy and click Scan Now button. Driver Easy will then scan your computer and detect any problem drivers.
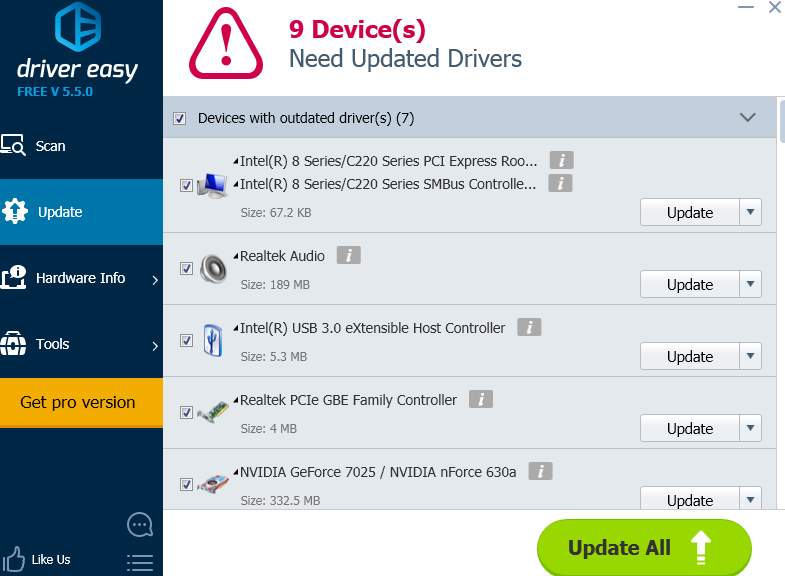
 3) Click the Update button next to a flagged USB driver to automatically download and install the correct version of this driver (you can do this with the FREE version).
Or click Update All to automatically download and install the correct version of all the drivers that are missing or out of date on your system (this requires the Pro version – you’ll be prompted to upgrade when you click Update All).
3) Click the Update button next to a flagged USB driver to automatically download and install the correct version of this driver (you can do this with the FREE version).
Or click Update All to automatically download and install the correct version of all the drivers that are missing or out of date on your system (this requires the Pro version – you’ll be prompted to upgrade when you click Update All).
3) Find UpperFilters and LowerFilters, right click them respectively and choose Delete.
4) When you are prompted to confirm the delete, click Yes.
5) Quit Registry Editor, and then restart your computer.
Note: If you cannot see the UpperFilters and LowerFilters with the Type name REG_MULTI_SZ, please seek the alternatives.
3) Repeat step 2 until you have uninstall all the devices with the yellow exclamation marks.
4) After you have finished the uninstall, please go to the Action button on the menu bar and then choose Scan for hardware changes.
5) Close all the windows and restart your computer.
After you reboot your computer, the drivers for these devices will be installed automatically.
Note: This method is not always helpful since the drivers that provided by Windows Update are not always the latest or able to help you with the Code 41 error. So you might need to find another way to help you with this problem.
Method Three: Update the Driver Manually
Note: Before you proceed with this method, it is required that you have located, downloaded and extracted drivers for the hardware. You could always do so by searching in the manufacturers websites first.
1) Go to Device Manager.
2) Right click the device with the yellow exclamation mark and choose Update Driver Software…
3) Choose Browse my computer for driver software.
4) Then go to Let me pick from a list of device drivers on my computer.
5) Select the type your device and then choose Next. The following screen shot is just for reference.
6) Then choose Have Disk… option on the right corner.
7) Click the Browse button to navigate to the folder that you have extracted the downloaded drivers for your device.
8) The file that you are looking for should be an .inf file. If you can’t see the file, please download the drivers again, since this folder could contain corrupted files.
9) Press OK back on the Install From Disk window.
10) Click Yes to the following notifications that might come up.
“Windows can’t verify the publisher of this driver software”
“This driver hasn’t been signed”
11) After the install, you will see a window saying that Windows has successfully updated your driver software.
Method Four: Driver Easy
If you don’t have the time, patience or computer skills to update your drivers manually, you can do it automatically with Driver Easy.
Driver Easy will automatically recognize your system and find the correct drivers for it. You don’t need to know exactly what system your computer is running, you don’t need to risk downloading and installing the wrong driver, and you don’t need to worry about making a mistake when installing.
You can update your drivers automatically with either the FREE or the Pro version of Driver Easy. But with the Pro version it takes just 2 clicks (and you get full support and a 30-day money back guarantee):
1) Download and install Driver Easy.
2) Run Driver Easy and click Scan Now button. Driver Easy will then scan your computer and detect any problem drivers.
3) Click the Update button next to a flagged USB driver to automatically download and install the correct version of this driver (you can do this with the FREE version).
Or click Update All to automatically download and install the correct version of all the drivers that are missing or out of date on your system (this requires the Pro version – you’ll be prompted to upgrade when you click Update All).
0 Comments
Most Voted