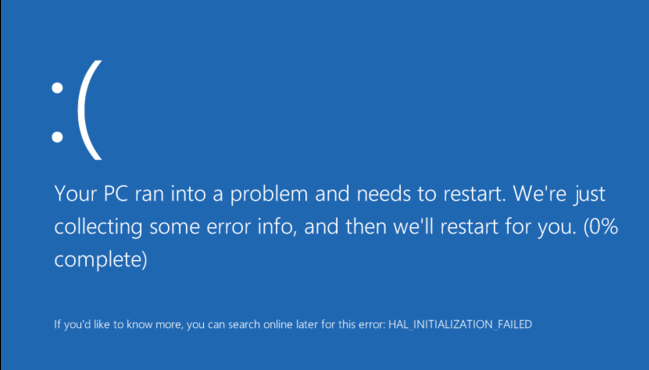
HAL_INITIALIZATION_FAILED is mostly seen when your system wakes up from the sleep stage. It’s likely to be caused by hardware or device driver problems and mainly happens to older PCs.
Usually, your PC will restart after the blue screen of death error as shown in the screenshot above. But if you constantly see this error showing up, it’s time that you fixed it, since it’s your computer’s way of telling you that something is not right with it.
Luckily, this is not a difficult problem to solve. Read on and follow the instructions below with clear screenshots.
How do I fix it?
Here are 4 of the most effective ways for you to try. You may not have to try them all; just work your way down until you find the one that works for you.
Method 1: Set useplatformclock to True
Method 2: Clean Junk Files
Method 3: Check Hard Disk Corruption
Method 4: Update Drivers
Why do I have HAL_INITIALIZATION FAILED error?
Old, corrupted, or incorrectly configured drivers, malware infection, damaged system files or corrupted hard disk could be the major causes of this problem. Sometimes, if you are using a virtual machine, the cause could be it too.
If you are using VMWare, it’s suggested that you upgrade your current version to the latest version that you could find on its official website. Or you could turn to Virtual Machine instead.
1: Set useplatformclock to True
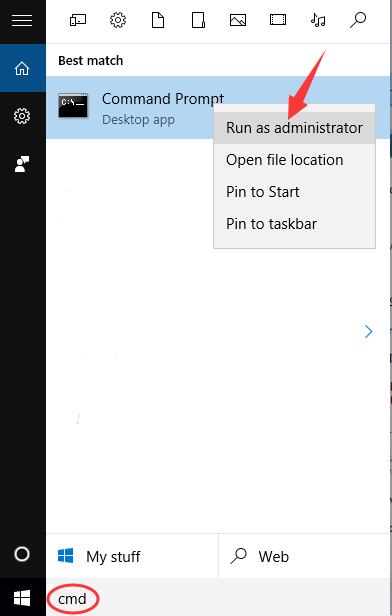
1) Type cmd into the search box and then right-click on the Command Prompt option that comes up and choose Run as administrator.
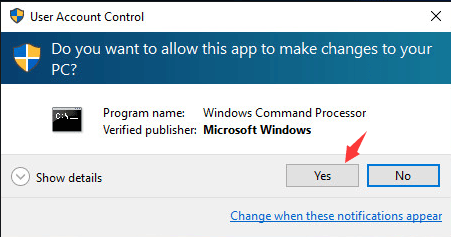
2) Choose Yes at the prompt window.
3) Then type in the command bcdedit /set useplatformclock true. Please note that there is a blank space before the “/”.
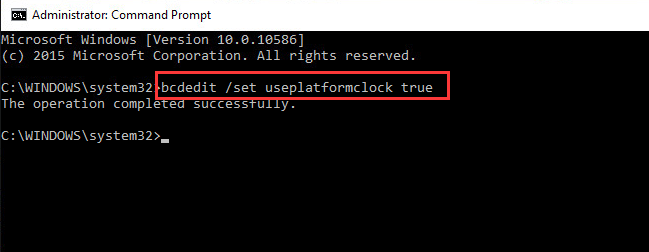
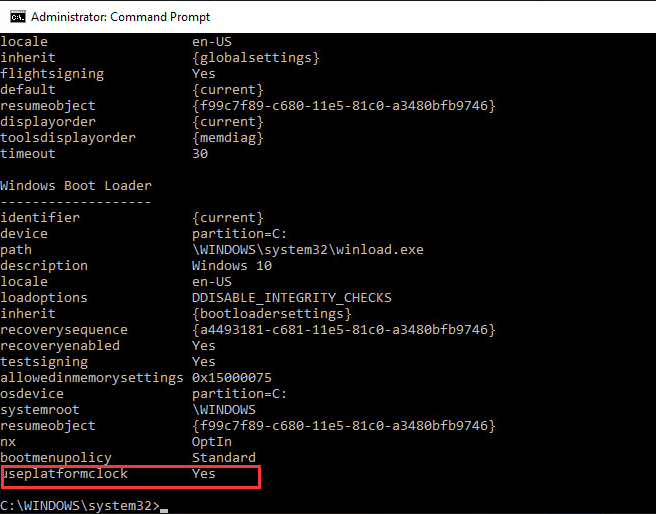
4) To verify the useplatformblock is on/ true, please run the following command bcdedit /enum. There is a space before the”/” also.
If you can see the useplatformclock Yes in command prompt, then you can be sure that this process has been done.
5) Restart your computer after this change to see if the problem is gone.
2: Clean Junk Files
1) Click the Search button on Windows 10 and then type in disk cleanup. Then choose the Disk Cleanup option that comes up.

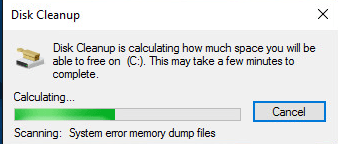
2) Wait for a while.
3) Drag down a little bit to find the Temporary files option. Tick the box in front of it and choose OK.
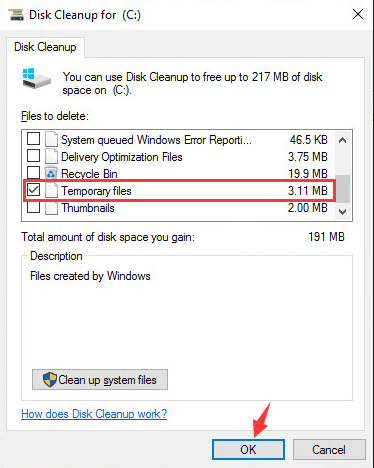
4) If you have more space that you would like to release, tick the box in front to get them clean.
5) Restart your computer after this step.
3: Check Hard Disk Corruption
1) Type cmd into the search box and then right click on the Command Prompt option that comes up and choose Run as administrator.
2) Choose Yes at the prompt window.
3) Type in chkdsk /f and hit Enter.
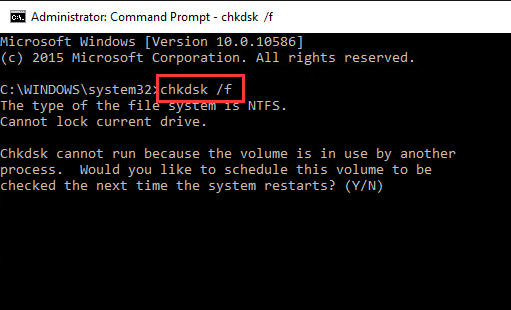
4) It may restart checking your hard disk or it may require a restart. You need to press Y and Enter to move on.
5) Restart your computer now.
4: Update Drivers
It is usually suggested that you update the drivers through Windows Update or go to the manufacturers’ websites to look for the drivers by yourself to ensure the safety of the drivers.
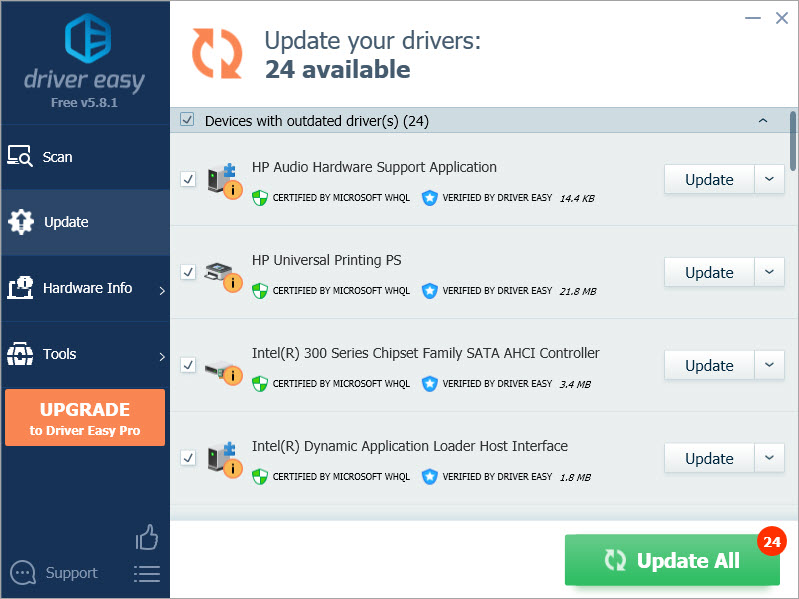
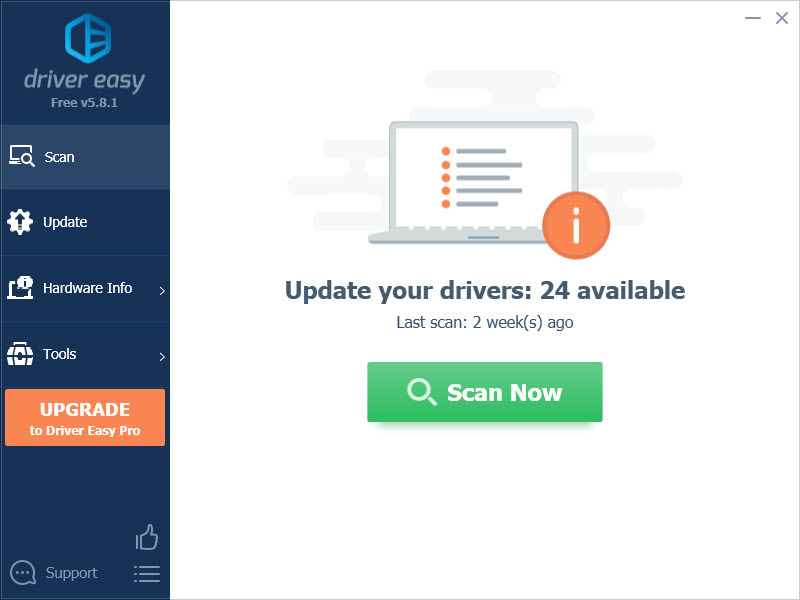
If you don’t have the time, patience, or computer skills to update your drivers manually, you can do it automatically with Driver Easy.
Driver Easy will automatically recognize your system and find the correct drivers for it. You don’t need to know exactly what system your computer is running, you don’t need to risk downloading and installing the wrong driver, and you don’t need to worry about making a mistake when installing.
You can update your drivers automatically with either the FREE or the Pro version of Driver Easy. But with the Pro version, it takes just 2 clicks (and you get full support and a 30-day money-back guarantee):
1) Download and install Driver Easy.
2) Run Driver Easy and click Scan Now button. Driver Easy will then scan your computer and detect any problem drivers.
3) Click the Update button next to a flagged USB driver to automatically download and install the correct version of this driver (you can do this with the FREE version).
Or click Update All to automatically download and install the correct version of all the drivers that are missing or out of date on your system (this requires the Pro version – you’ll be prompted to upgrade when you click Update All).