


If you’d like to install mods for Fallout 4 on PC, you can follow the instructions below. Follow the guide, then you can install any mods you want for Fallout 4.
There are multiple methods to install mods for Fallout 4. Below we’ll introduce the most common method to you. The method is using the Nexus Mod Manager to install the mods for Fallout 4. We assume you’ve installed Fallout 4 on your computer. If not, go to Bethesda.net and purchase the game.
How to install mods for Fallout 4 on PC
Follow these steps to install mods for Fallout 4 on PC.
Step 1: Enable modding in Fallout 4
Step 2: Install Nexus Mod Manager
Step 3: Install any mods you want
Step 4: Download LOOT (The Load Order Optimisation Tool)
Step 5: Play Fallout 4 with the installed mods
Bonus tip: Update drivers to improve game performance
Step 1: Enable modding in Fallout 4
Before installing mods, you need to configure some Fallout4’s game files to enable modding, so the game will accept the mods you install. To do so, follow these instructions:
Open and configure Fallout4Prefs.ini file
1) Navigate to the Fallout 4 directory folder. The location of that folder was determined when you installed the game. The default directory folder is “C:\Users\YOURNAME\Documents\My Games\Fallout4”.
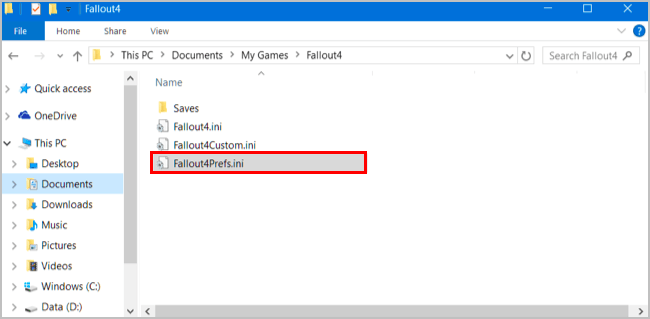
2) Open Fallout4Prefs.ini file with a text editor. If you don’t install a third-party text editor, the file will be opened with the default text editor Windows Notepad. Or you can install Notepad++ to open and edit the file.
3) On your keyboard, press Ctrl+F keys at the same time to invoke a search box. Type [Launcher] in that search box to locate the [Launcher] section in the text editor.
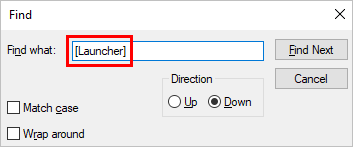
4) Add the following line below the [Launcher] section.
bEnableFileSelection=1

5) Click File -> Save to save the file, then close the text editor.
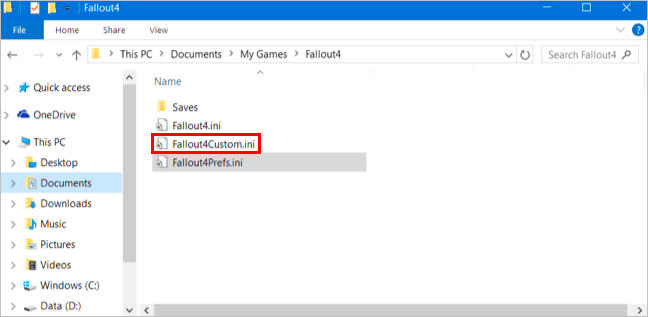
Open and configure Fallout4Custom.ini file
1) Navigate to the Fallout 4 directory folder. The location of that folder was determined when you installed the game. The default directory folder is C:\Users\YOURNAME\Documents\My Games\Fallout4.
2) Open Fallout4Custom.ini file with a text editor.
3) Add the following lines to the end of the file:
 [Archive]
 bInvalidateOlderFiles=1
 sResourceDataDirsFinal=
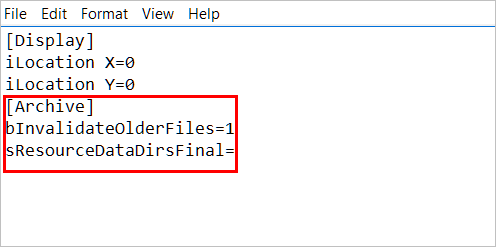
4) Click File -> Save to save the file, then close the text editor.
Step 2: Install Nexus Mod Manager
Nexus Mod Manager is a mod manager developed by Bethesda.net, which allows you to install and uninstall mods easily.
Just click Download Nexus Mod Manager to download the program. After the download completes, double-click on the downloaded file and follow the on-screen instructions to install it on your computer.
Note: To download Nexus Mod Manager, you need to register an account on their website. If you don’t have registered an account yet, just register one for free.
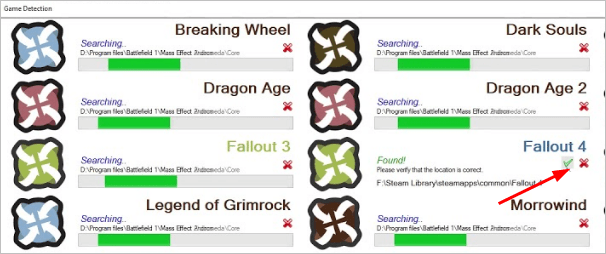
The first time you launch Nexus Mod Manager, the program will scan your computer to find any installed games. Once it finds Fallout 4, you can choose to stop the scanning and click the checkmark to confirm Fallout 4 is installed and then click OK.
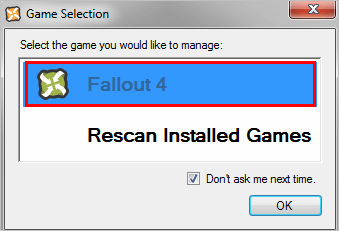
Select Fallout 4 in the list of the installed games and click OK.
You can choose the directory where you want to store your Fallout 4 mods. Or do nothing and just save the mods to the default directory. But if you save the mods to the default directory, you may need to run Nexus Mod Manager as an Administrator, or you’ll run into errors.
Step 3: Install any mods you want
After you’ve installed Nexus Mod Manager, you can install any mods you want with Nexus Mod Manager.
1) Go to Fallout 4 Mods Download Page in nexusmods.com.
2) Click the mod you want to install,then you’ll go to the download page of that mod.

2) Click the MANUAL button and follow the on-screen instructions to download the mod to your computer. The downloaded mod file will be a compressed file in ‘.zip’, ‘.7z’ or ‘.rar’ formats. You don’t need to extract the file.

3) Launch Nexus Mod Manager.
4) Click the green plus icon in the left pane to add the mod you downloaded.
5) Under the Mods tab, double-click on the mod and the mod will be installed automatically.
6) Repeat the steps above to install any mods you want.
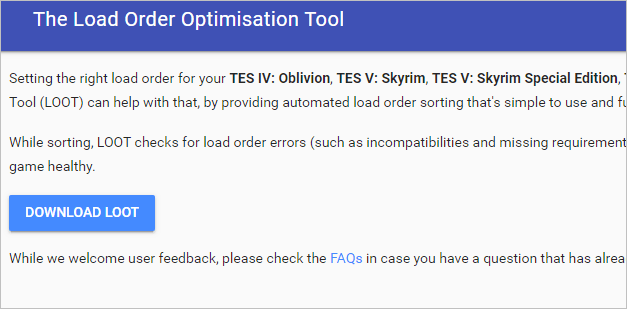
Step 4: Download LOOT (The Load Order Optimisation Tool)
If you’ve installed more than one mods for Fallout 4, the order to load the mods can influence the game stability. Some mods can be overwritten by other mods. So it’s important to set the right load orders for mods. LOOT is a tool that helps set the right load orders for Fallout 4 mods. With LOOT, you don’t need to worry that installed mods have wrong load orders. With LOOT, you can enjoy a stable modded game.
Here’s how to download LOOT:
2) Click DOWNLOAD LOOT.
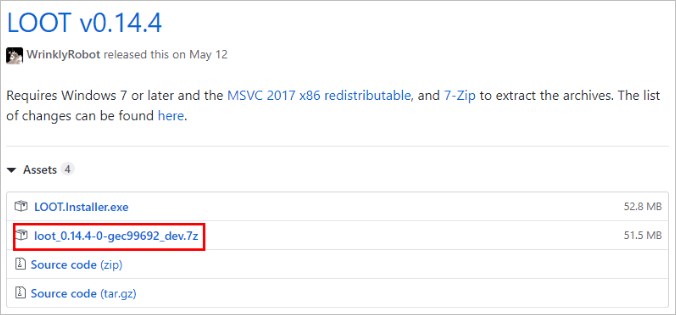
3) Download the .7z file. The file name could be loot_version_*.7z, for example loot_0.14.4-0-gec99692_dev.7z.
3) Use 7-Zip to extract the downloaded file. If you don’t have 7-Zip installed on your computer, go to their official website to download the program and install it on your computer.
4) Copy and paste the extracted folder to the Fallout 4 directory folder (The default Fallout 4 directory folder is “C:\Users\YOURNAME\Documents\My Games\Fallout4”.).
Step 5: Play Fallout 4 with the installed mods
After installing the mods you want, then you can play Fallout 4 with the installed mods. If you have installed multiple mods, before you start playing the game, you need to run LOOT to set the load orders of the mods. To do so, follow these steps:
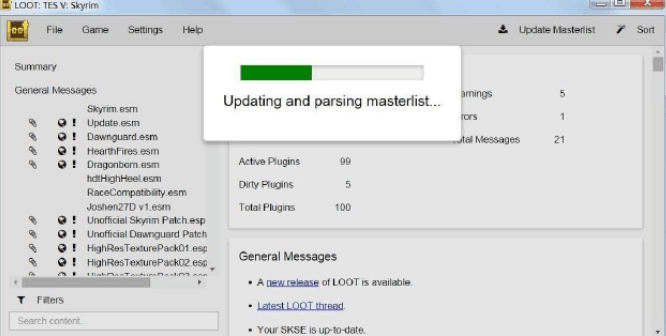
1) Open the Fallout 4 directory folder (The default Fallout 4 directory folder is “C:\Users\YOURNAME\Documents\My Games\Fallout4”.), then open subfolder loot, double click on “loot.exe” to launch LOOT.
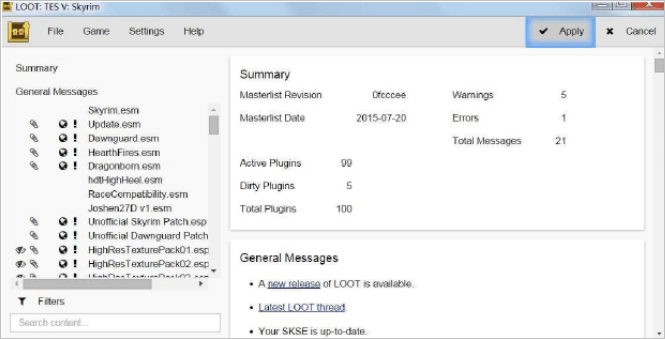
2) Click Sort.
3) Click Apply.
4) Close LOOT.
Following Step 1 to Step 5, you can have fun with playing Fallout 4 with the installed mods.
Bonus tip: Update drivers to improve game performance
If you want your game to have the maximum performance, keep drivers up-to-date, especially the graphics drivers.
If you don’t have the time, patience or computer skills to update the drivers manually, you can do it automatically with Driver Easy.
Driver Easy will automatically recognize your system and find the correct drivers for it. You don’t need to know exactly what system your computer is running, you don’t need to risk downloading and installing the wrong driver, and you don’t need to worry about making a mistake when installing.
You can update your drivers automatically with either the FREE or the Pro version of Driver Easy. But with the Pro version it takes just 2 clicks (and you get full support and a 30-day money back guarantee):
1) Download and install Driver Easy.
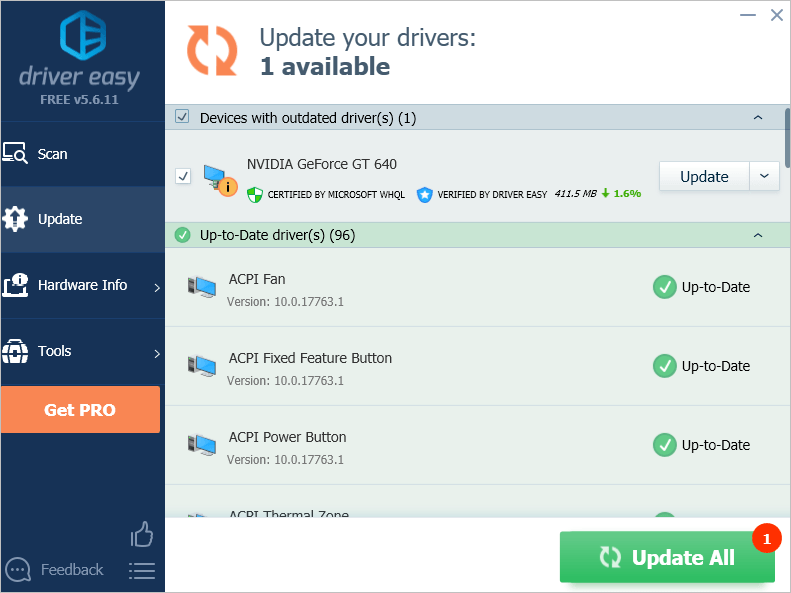
2) Run Driver Easy and click Scan Now. Driver Easy will then scan your computer and detect any problem drivers.

3) Click the Update button next to the devices to automatically download the correct version of their driver, then you can manually install the driver (you can do this with the FREE version).
Or click Update All to automatically download and install the correct version of all the drivers that are missing or out of date on your system (this requires the Pro version – you’ll be prompted to upgrade when you click Update All).
Hopefully you find the above guide to install mods for Fallout 4 helpful. If you have any questions, ideas or suggestions, feel free to leave a common below.