


Your PC feels sluggish. Games stutter. The fan sounds like a jet engine. You open Task Manager and discover the culprit: the CPU is stuck at 100%.
The good news is that a CPU running at 100% isn’t actually a problem. During gaming, video rendering, streaming, and other demanding workloads, modern processors are designed to run at full utilization. The real problem is that the CPU remains maxed out while you’re doing very little or when high CPU usage is accompanied by overheating, lag, crashes, or severe performance drops.
In this article, we’ll show you 10 fixes for CPU 100% usage that actually work. No generic advice. No “just upgrade your hardware” nonsense, but solutions that work.
Why is my CPU at 100%?
The Central Processing Unit (CPU) is the brain of your computer, responsible for handling instructions from Windows, applications, games, and hardware devices. When CPU usage reaches 100%, it simply means your processor is fully occupied with the tasks it has been given.
In many situations, this is completely normal. For example, you may see CPU usage spike while playing CPU-intensive games, rendering videos, streaming or recording gameplay, or running virtual machines. In these scenarios, high CPU usage simply means your processor is working hard.
When is 100% CPU usage a problem?
100% CPU usage by itself does not damage your processor. The real concern is when high CPU usage is accompanied by abnormal behavior, such as:
High CPU usage while doing very little
If your CPU remains pinned at 100% while the system appears idle, or when you’re only browsing the web or performing other lightweight tasks, there may be an underlying problem that needs attention. The culprit may be a background process, software conflict, outdated driver, Windows service, or even malware may be consuming resources without your knowledge.
High CPU temp and performance drops
When a CPU operates under heavy load, it naturally generates more heat. If the cooling system cannot dissipate that heat effectively, the processor may trigger a protective mechanism known as thermal throttling. Thermal throttling automatically reduces the CPU’s clock speed to prevent overheating, but it can cause performance issues like severe lag, system freezes, FPS drops, etc.
To ensure your system is running safely, it’s a good idea to monitor CPU temperatures while troubleshooting.
Generally, temperatures over 90°C should be cautious. Try cleaning dust from your PC, improving airflow, and checking whether the CPU cooler is functioning correctly.
How to fix 100% CPU usage
Here’s a list of fixes that have resolved the 100% CPU usage issue for other users. You don’t have to try them all. Just work your way through the list until you find the one that does the trick for you.
Fix 1 – Find and end high-CPU processes
Before moving on to complicated steps, you need to see exactly what’s hogging your processor’s power. Here is how to do it in Task Manager:
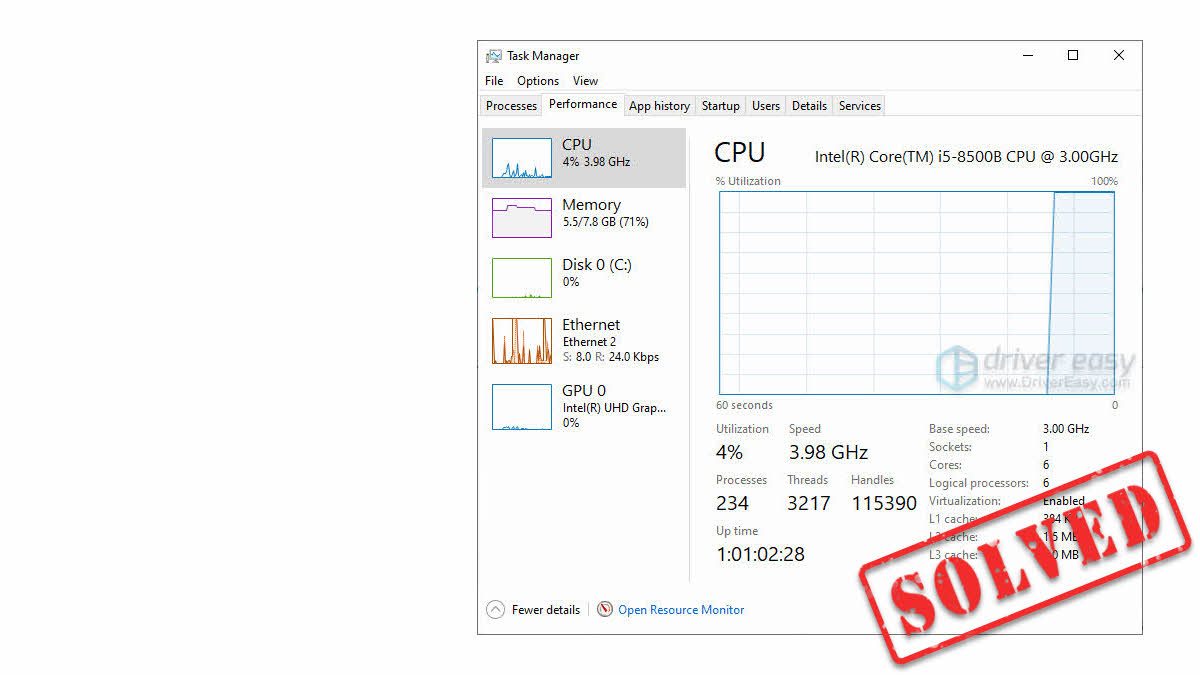
1) On your keyboard, press Ctrl, Shift and Esc to open Task Manager. You’ll be prompted for permission. Click Yes to run Task Manager.
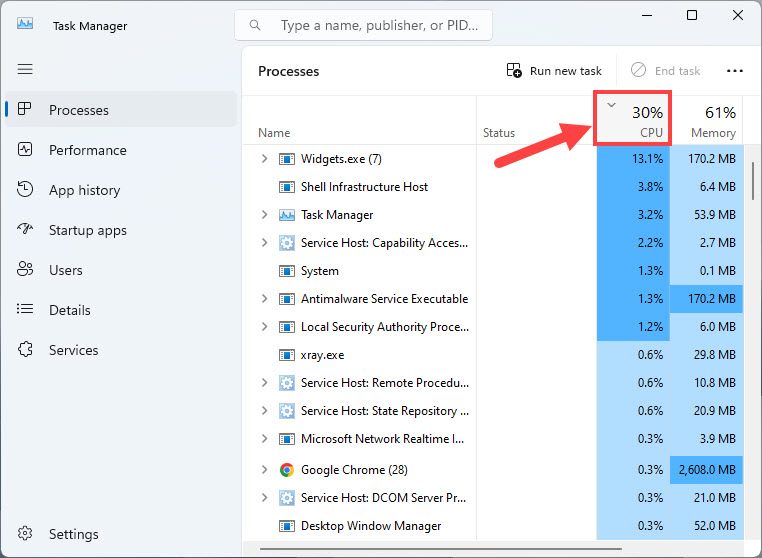
2) Click the CPU column header to sort the processes by CPU usage. Now you can check which processes eat up your CPU.
3) Select the process that consumes lots of your CPU and then click End task to kill this process.
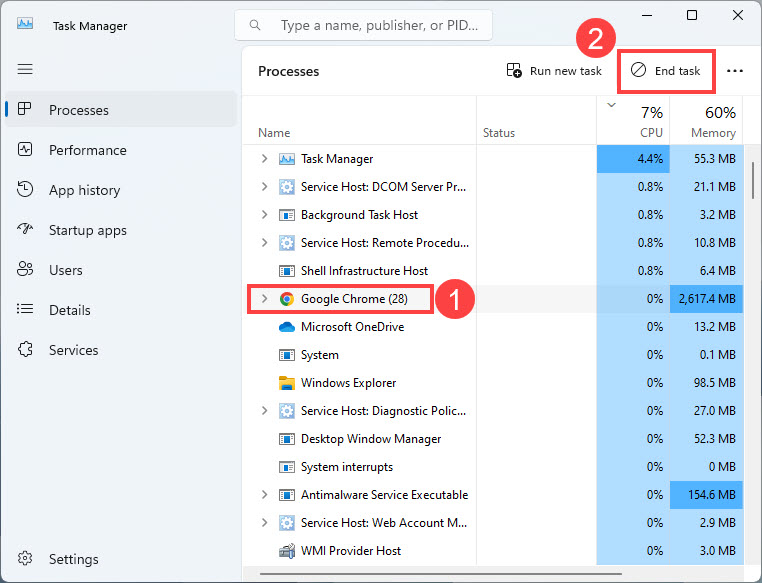
Check out the CPU usage after you end all the processes that eat up the CPU. If the same process repeatedly causes high CPU usage, consider reinstalling, updating, or removing the associated software.
Fix 2 – Scan for malware
Malware and crypto-virus are the most common causes of unexplained CPU 100% usage. It’s also hard to detect because modern malware disguises itself as legitimate Windows services.
You can use a trusted antivirus tool or the built-in Windows Security to run a full system scan.
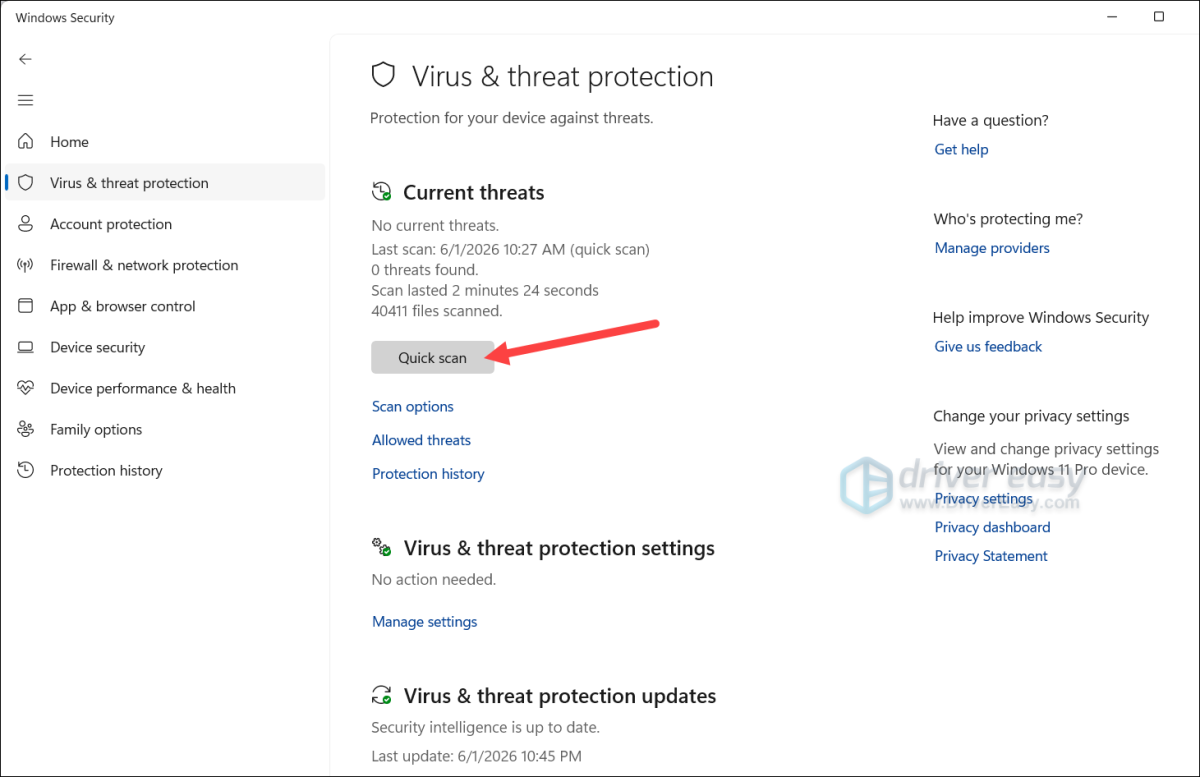
If Windows Security detects any threats, remove them and restart your PC.
Fix 3 – Update your drivers
Outdated, corrupted, or incompatible drivers can sometimes cause unusually high CPU usage. This is especially common with graphics drivers, chipset drivers, network adapters, and audio devices. When a driver isn’t communicating properly with Windows, it can generate excessive background activity and hardware interrupts, resulting in sustained high or even full CPU utilization.
Keeping your drivers up to date can help improve system stability, resolve compatibility issues, and effectively reduce unnecessary CPU load.
There are two ways to update your drivers: manual driver update and automatic driver update (easiest & quickest).
Manual driver update
Simply visit your PC or motherboard manufacturer’s support website (e.g., Dell, HP, ASUS, Lenovo, MSI), and then search for your exact model.
🔔 If you’re not sure about your motherboard model, just enter system information into the Windows search bar, open it, and check the BaseBoard Manufacturer and BaseBoard Product.
Download the correct and latest drivers that are compatible with your Windows system. You should download the drivers for all the components on your motherboard.
Automatic driver update (recommended)
If you don’t have the time, patience or computer skills to update your drivers manually, an easier option is to do it automatically with Driver Easy.
Instead of searching multiple manufacturer websites, Driver Easy automatically scans your system, identifies outdated or problematic drivers, and finds the correct versions for your hardware.
1) Download and install Driver Easy.
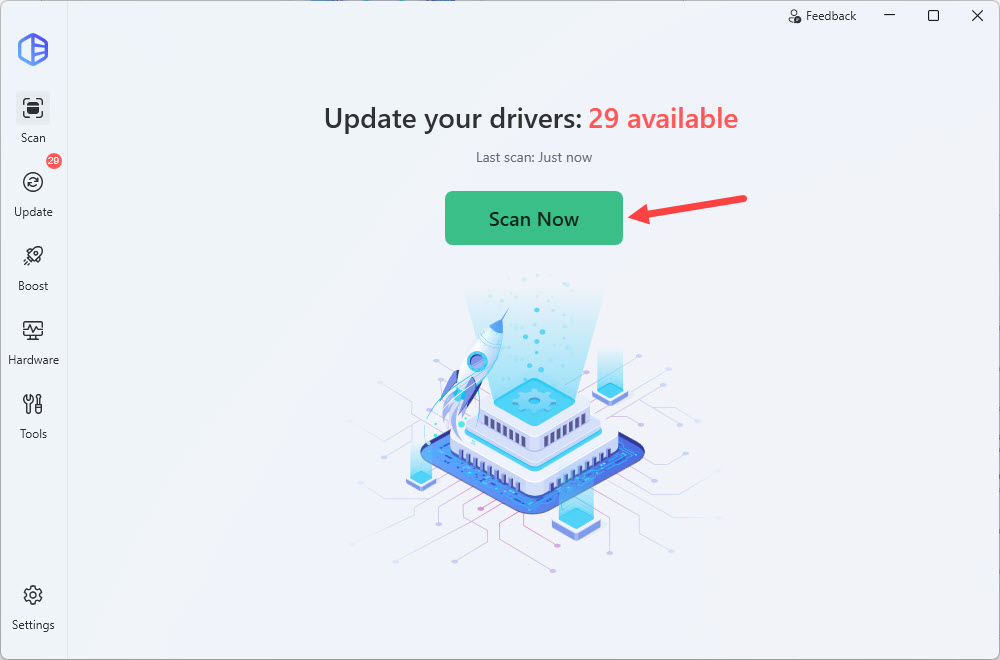
2) Run Driver Easy and click the Scan Now button. Driver Easy will then scan your computer and detect any problem drivers.
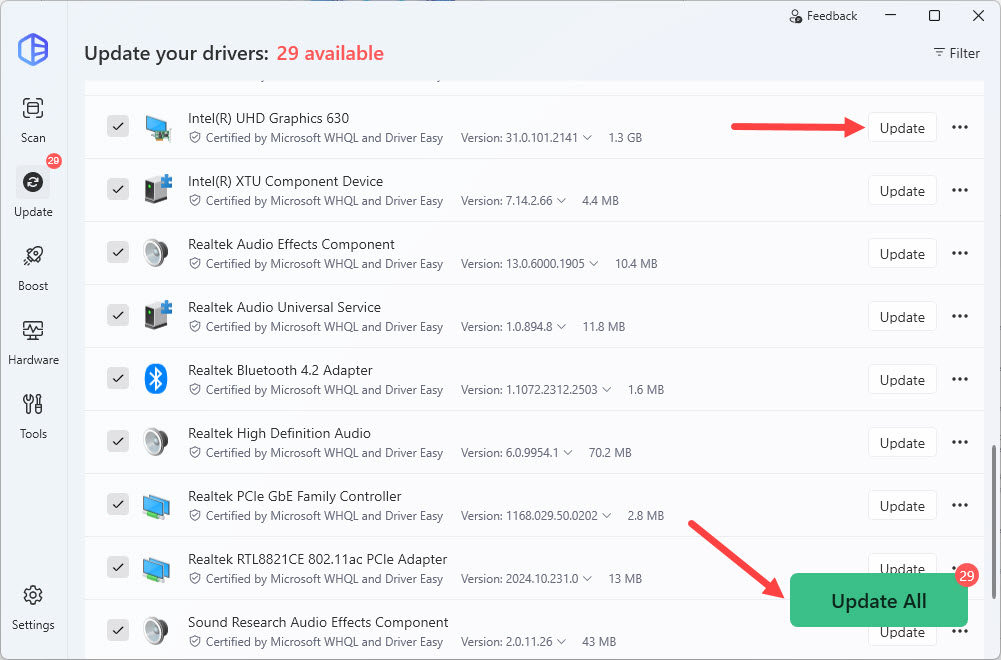
3) Click the Activate & Update button next to the NVIDIA driver to automatically download and install the correct version of this driver. Or click Update All to automatically download and install the correct version of all the drivers that are missing or out of date on your system.
Driver Easy Pro version includes faster downloads, automatic installation, advanced technical tools, and support to boost your PC performance. If you’re not prepared to purchase the Pro version yet, Driver Easy provides a 7-day trial at no cost, granting access to all premium features. No charges will occur until after your trial period ends.
Fix 4 – Disable unnecessary startup programs
Many applications automatically launch when Windows starts and continue consuming CPU resources in the background. You can disable the unnecessary startup programs to reduce the CPU load.
- On your keyboard, press Ctrl, Alt, and Del at the same time to open Task Manager.
- Select the Startup apps tab. Right-click the applications you don’t need to launch automatically, and click Disable.

Fix 5 – Adjust the processor power settings
Setting the Processor Power Management properly is an effective way to prevent CPU high usage and overheating. If the minimum processor state is high, your CPU stays at its highest frequency even when idle, resulting in unnecessary usage. To adjust it:
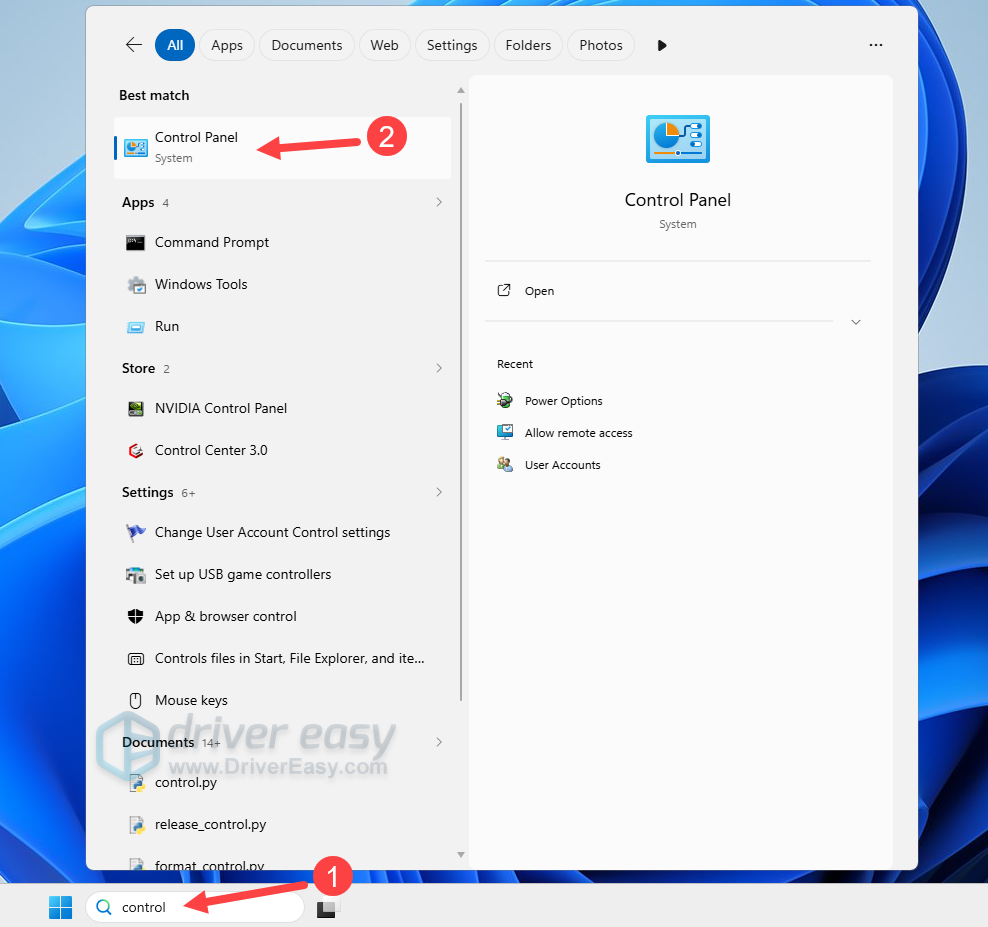
- Enter control in your Windows search bar and click Control Panel.
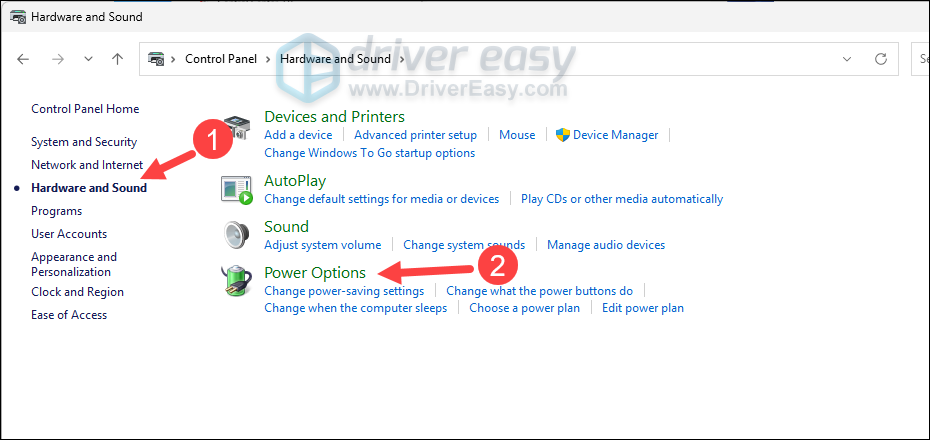
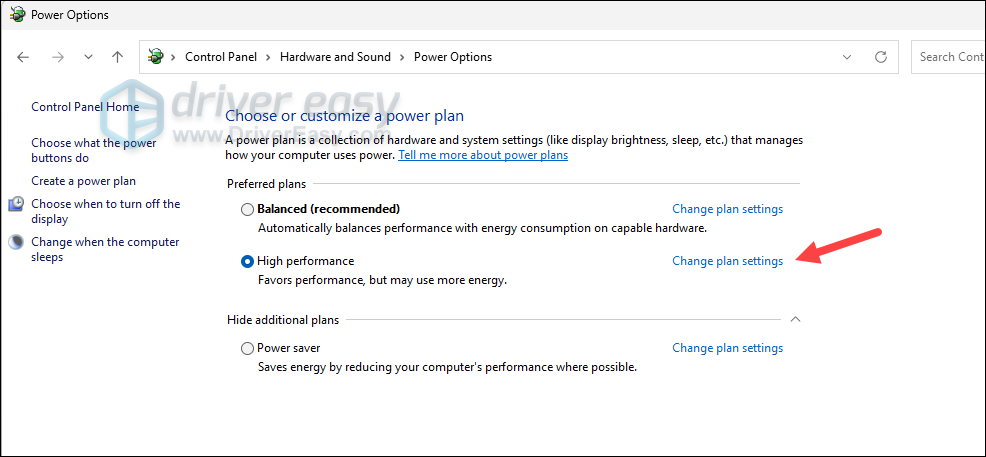
- Select Hardware and Sound > Power Options.
- Click Change plan settings next to your active power plan.
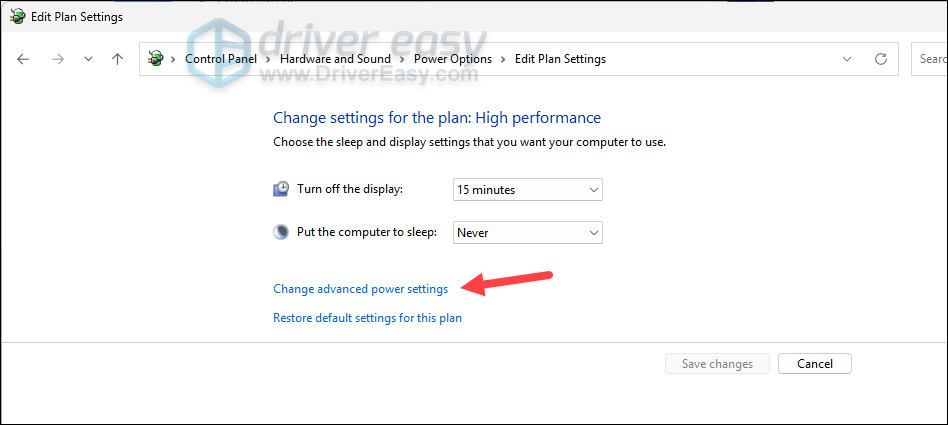
- Click Change advanced power settings.
- Expand Processor power management > Minimum processor state. Set the metric (both on battery and plugged in) to 5% – 10%. Then click OK to apply the changes.
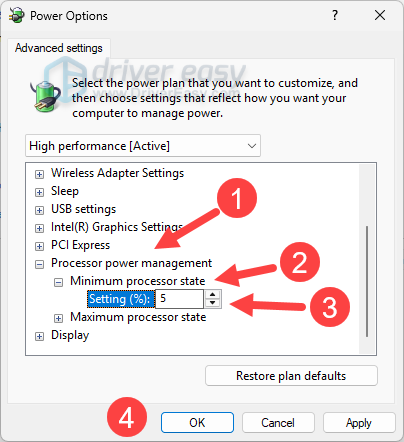
Now test if the CPU high usage is solved. If not, repeat the steps above, and set the Maximum processor state to 99%. While this is set to 100% by default, slightly lowering it can disable aggressive CPU turbo boost to reduce the CPU usage.
If tweaking both the settings doesn’t help, you can turn it back to the original metrics and try the next method.
Fix 6 – Reduce CPU bottlenecks in games
If your CPU is constantly at 100% while gaming, but GPU usage remains unusually low, you’re likely dealing with a CPU bottleneck. That means the CPU cannot keep up with your GPU, leaving the GPU underutilized. To fix:
- Enable DLSS or FSR if supported.
- Cap your frame rate at a stable 60 FPS or your monitor’s refresh rate
- Increase graphics settings like the textures, shadows, and resolution slightly to shift workload toward the GPU.
- Lower CPU-intensive settings, like crowd density.
Fix 7 – Disable Cortana
Many users reported that the built-in voice assistance, Cortana, may also trigger the high CPU usage or even 100% CPU usage issue. If you don’t use Cortana frequently, you can modify its settings in Registry Editor to see if you can fix this issue.
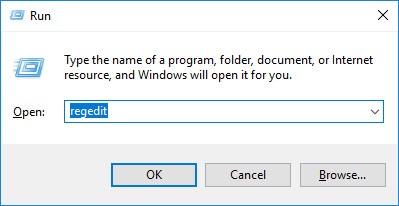
1) On your keyboard, press the Windows logo key and R at the same time to open the Run dialog. Type regedit and then press Enter to open Registry Editor. You’ll be prompted for permission. Click Yes to open it.
2) Follow the path to locate the correct system files:
HKEY_LOCAL_MACHINE\SYSTEM\CurrentControlSet\Services\TimeBroker
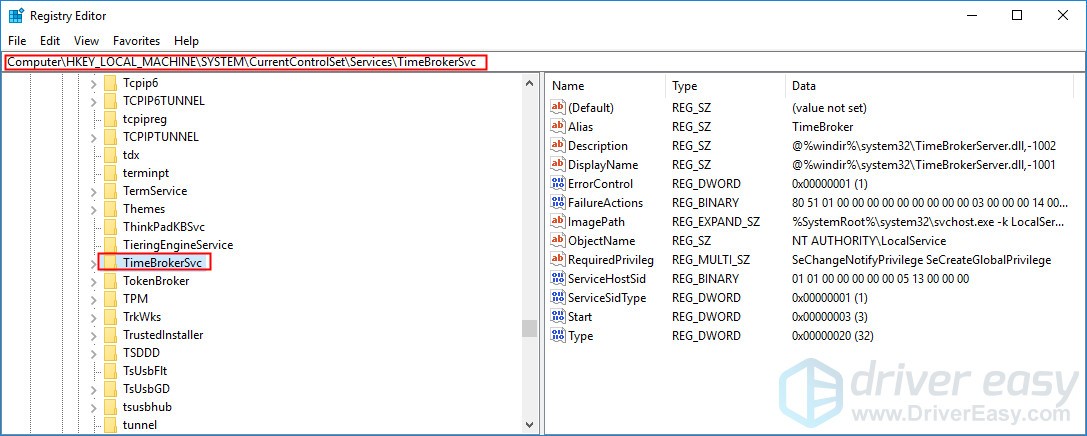
3) On the right side of the pane, right-click Start entry, then select Modify….

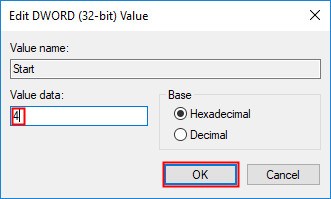
4) Change the Value data to 4, then click OK to save the change.
See if this annoying issue remains. If not, you’ve resolved this issue. If this problem reappears, don’t worry. There are more fixes for you to try.
Fix 8 – Disable P2P Share
The P2P Share feature on your Windows 10 PC may also cause the 100% CPU usage issue. Try disabling this feature to see if this issue can be fixed. Here is how to do it:
1) On your keyboard, press the Windows logo key and I at the same time to open Windows Settings. Then click Update & Security.
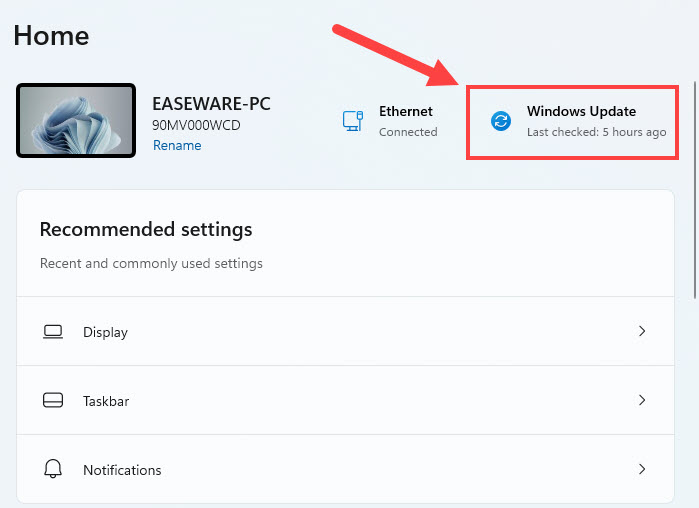
2) Click Advanced options.
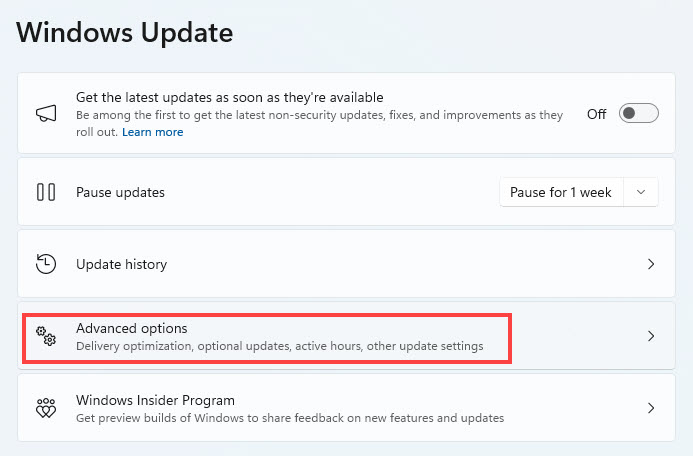
3) Scroll down a little bit and then click Delivery Optimization.
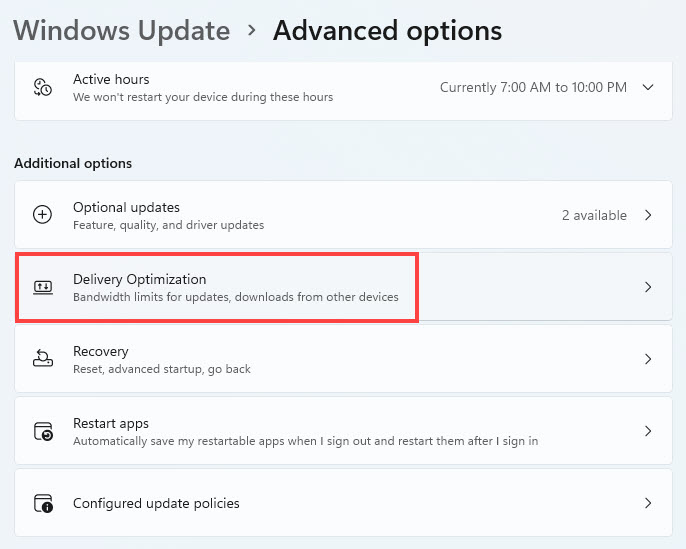
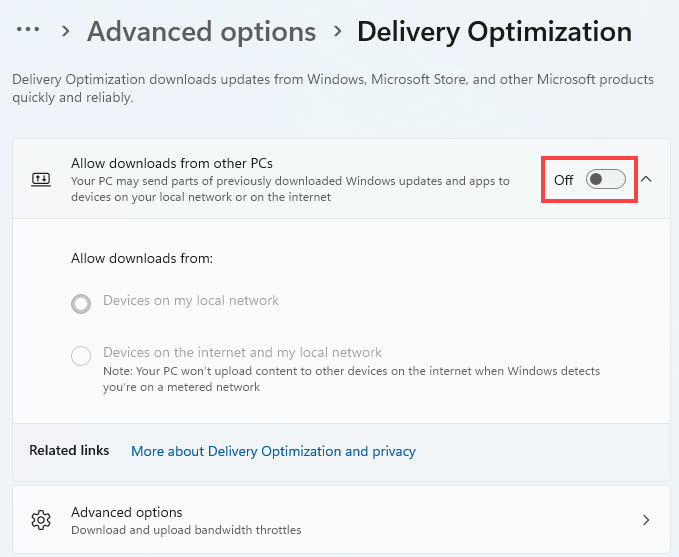
4) Turn off the toggle under Allow downloads from other PCs. You’ll be prompted for permission. Click Yes to turn this feature off.
See if the issue persists after you turn off this feature. If this issue remains, try disabling Windows Notification.
Fix 9 – Turn off Windows notifications
Some Windows 10 users reported that Windows notification settings may cause the high CPU usage issue. Many of them fixed this issue by modifying Windows notification settings. You can also try this fix! Here is how to do it:
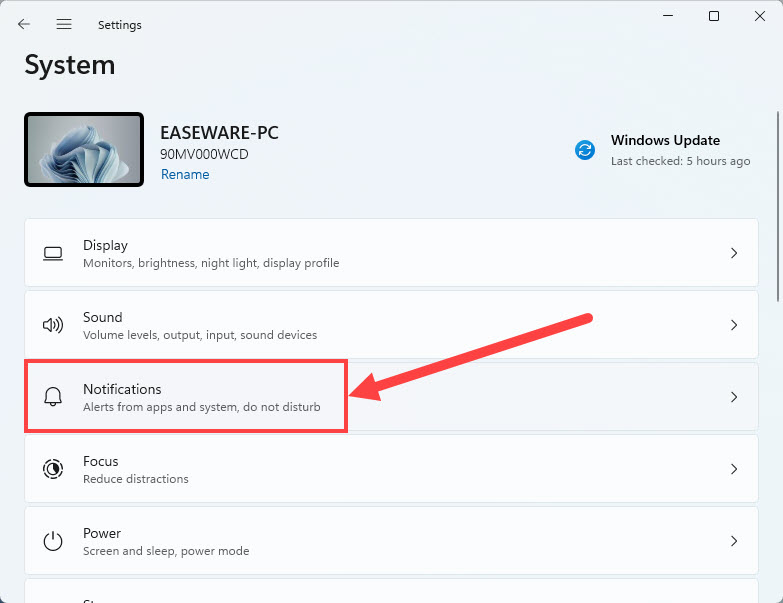
1) On your keyboard, press the Windows logo key and I at the same time to open Windows Settings. Then click System.

2) Select Notifications.
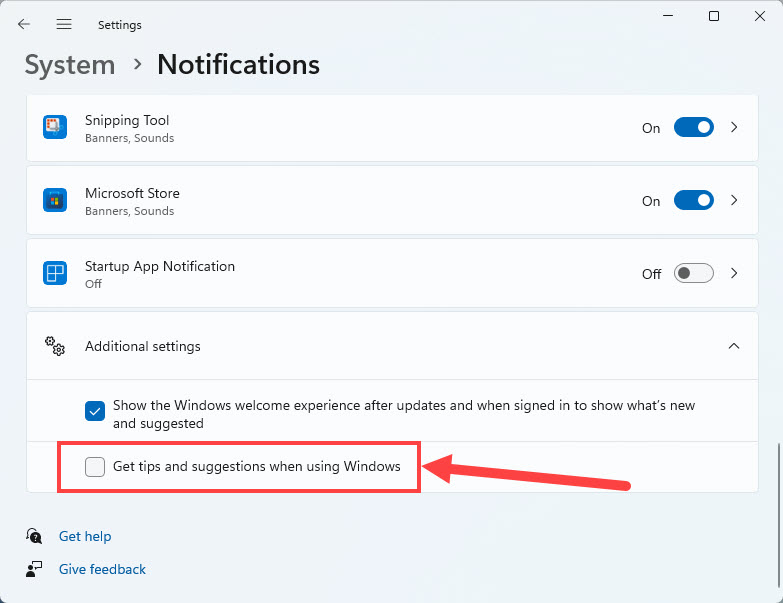
3) Then scroll down a little bit on the right side pane to turn off the feature Get tips and suggestions when using Windows in the Additional settings section.
See if the CPU 100% usage issue reappears after you turn off Windows Notification. If not, you’ve resolved this issue!
Fix 10 – Lower your mouse polling rate
Some gaming mice use extremely high polling rates such as 4000Hz or 8000Hz. While these settings can reduce input latency, they may also increase CPU overhead, especially in poorly optimized games.
Open your mouse software, such as Razer Synapse, Logitech G HUB, or Corsair iCUE, and reduce the polling rate to 1,000 Hz or 2,000 Hz. Now test whether CPU usage and stuttering improve.
100% CPU usage isn’t always a problem. However, if your CPU remains maxed out while idle or performance suddenly drops, try to troubleshoot your background process, malware, driver, or Windows configuration.
Hopefully one of the fixes above can help you resolve this issue. Please leave your comment below if you have any questions.

