


Many NVIDIA graphics adapter users have reported that their NVIDIA Control Panel is missing on their Windows computer. They can’t find the NVIDIA Control Panel on the desktop context menu or in the Windows Control Panel.
You may be very annoyed when you‘re experiencing this issue. But don’t worry. It’s fixable. Here are a few fixes you should try.
Try these fixes
You may not have to try them all; just work your way down the list until you find the one that works for you.
- Ensure that NVIDIA Control Panel is installed
- Unhide your NVIDIA Control Panel
- Update your graphics driver
- Reinstall your graphics driver
Method 1: Ensure that NVIDIA Control Panel is installed
For starters, let’s make sure that you indeed have Nvidia Control Panel installed on your computer. To do so:
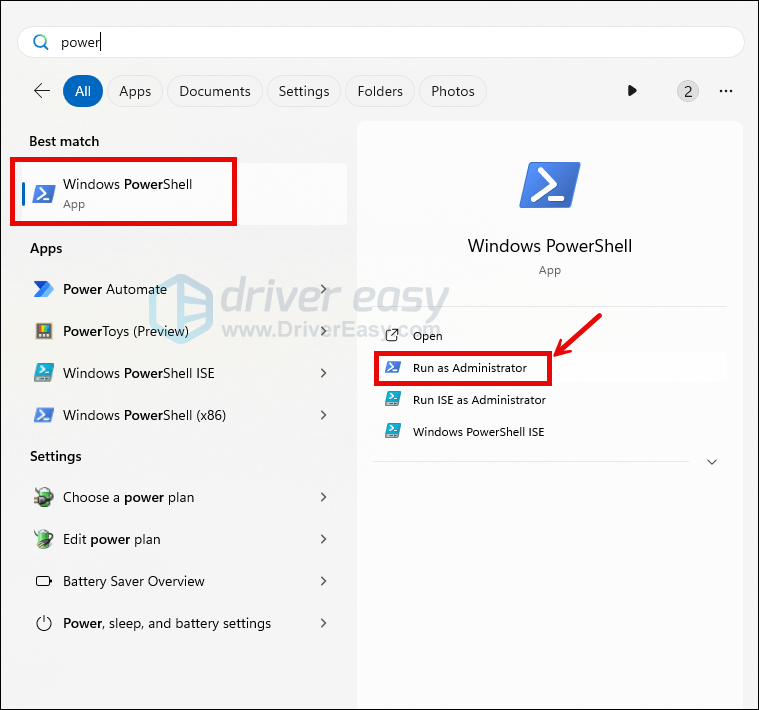
- On your keyboard, hit the Windows key and type power, then highlight Windows PowerShell and select Run as Administrator.
- In the Windows PowerShell window, copy and paste this command
Get-AppxPackage -Name NVIDIACorp.NVIDIAControlPaneland hit Enter. - Then copy and paste this command
Get-AppxPackage -AllUsers -Name NVIDIACorp.NVIDIAControlPaneland hit Enter. You’ll then see the information of the NVIDIA Control Panel installed on your computer like this: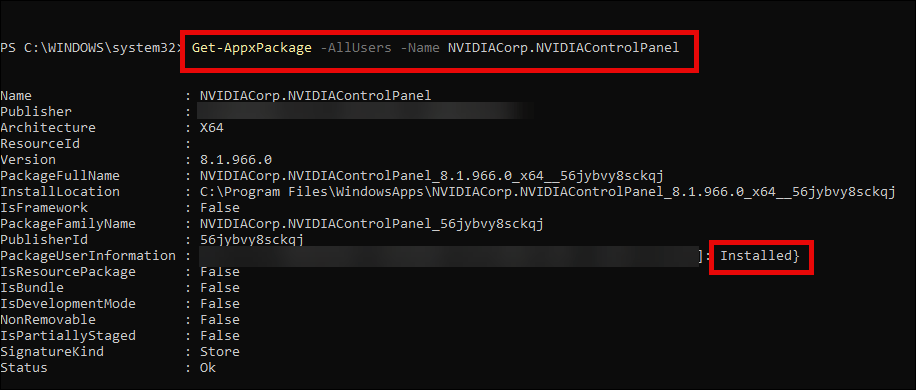
- When you’re sure that Nvidia Control Panel is installed, but it still missing on your desktop context menu, please move on to the fixes below.
Method 2: Unhide your NVIDIA Control Panel
Your NVIDIA Control Panel may be hidden by Windows during the upgrade from a previous version or by software that has accidentally changed the graphics settings. You can open NVIDIA Control Panel in Windows Control Panel and then show it in your desktop context menu. To do so:
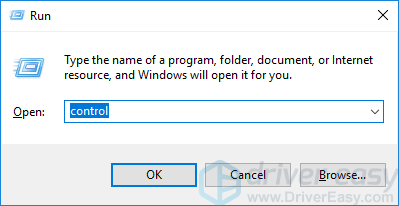
- Press the Windows logo key and R on your keyboard to invoke the Run dialog. Type “control” in the Run dialog and press Enter on your keyboard. This will open Control Panel (of Windows).
- In Control Panel, select View by Large icons.

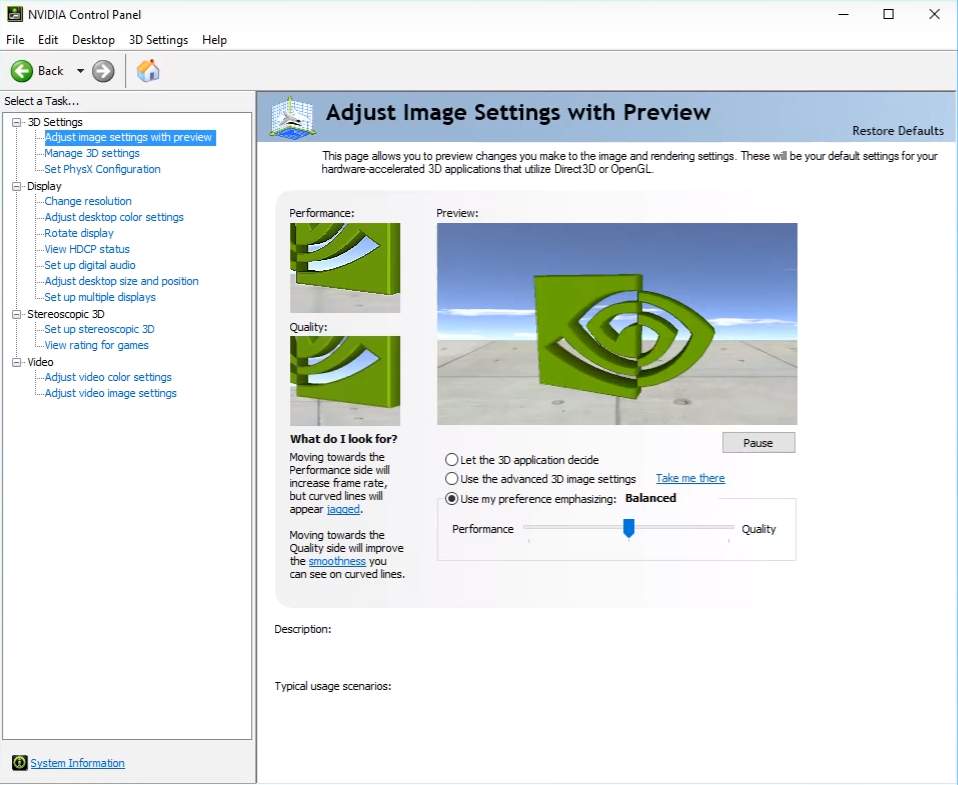
- Select NVIDIA Control Panel.

- In the NVIDIA Control Panel, click View or Desktop, and then check Add Desktop Context Menu.
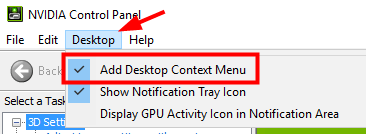
- Right-click your desktop and see if your NVIDIA control panel reappears in the desktop context menu.
Method 3: Update your graphics driver
If the methods above can’t help you, or you can’t see NVIDIA Control Panel even in Windows Control Panel, you need to update your graphics driver. In most cases, NVIDIA Control Panel disappears because you are using the wrong graphics driver or it is out of date. So you should verify that your graphics adapter has the correct driver, and update it if it doesn’t.
There are two ways you can update your graphicsdriver:
Option 1 – Manually – You’ll need some computer skills and patience to update your drivers this way, because you need to find exactly the right the driver online, download it and install it step by step.
OR
Option 2 – Automatically (Recommended) – This is the quickest and easiest option. It’s all done with just a couple of mouse clicks – easy even if you’re a computer newbie.
Option 1 – Download and install the driver manually
NVIDIA keeps updating drivers. To get your NVIDIA graphics driver, you need to go to the NVIDIA website, find the driver corresponding with your specific flavor of Windows version (for example, Windows 32 bit) and download the driver manually.
Once you’ve downloaded the correct drivers for your system, double-click on the downloaded file and follow the on-screen instructions to install the driver.
Option 2 – Automatically update your graphics driver
If you’re not comfortable playing around with drivers manually, you can do it automatically with Driver Easy.
Driver Easy will automatically recognize your system and find the correct drivers for it. You don’t need to know exactly what system your computer is running, you don’t need to risk downloading and installing the wrong driver, and you don’t need to worry about making a mistake when installing.
You can update your drivers automatically with either the 7 days free trial or the Pro version of Driver Easy. It takes just 2 clicks, and you get full support and a 30-day money-back guarantee with the Pro version:
- Download and install Driver Easy.
- Run Driver Easy and click the Scan Now button. Driver Easy will then scan your computer and detect any problem drivers.

- Click the Activate & Update button next to the flagged device to automatically download and install the correct version of this driver.
Or click Update All to automatically download and install the correct version of all the drivers that are missing or out of date on your system (You’ll need the Pro version for this – when you select Update All, you’ll get a prompt to upgrade. If you’re not prepared to purchase the Pro version yet, Driver Easy provides a 7-day trial at no cost, granting access to all Pro features like fast downloads and easy installation. No charges will occur until after your 7-day trial period ends.)
- After updating, restart your computer to take effect.
Method 4: Reinstall your graphics driver
If updating driver can’t help you, you may need to reinstall it completely. There may be corrupted driver files that simple uninstallation can’t get rid of. You need to clear all the files before you install the new driver.
To do a clean reinstallation of the display card driver, you can try DDU (Display Driver Uninstaller):
- Download and search for the execution file of the display card driver from the website of your GPU manufacturer:
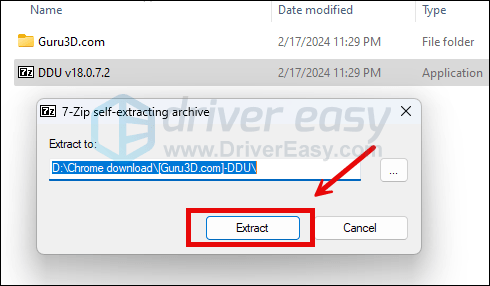
- Download DDU from the official download page. Then unzip the folder, and double-click the DDU file to further extract the execution file.
- Boot your computer into Safe Mode as instructed here: Start Safe Mode using the System Configuration tool
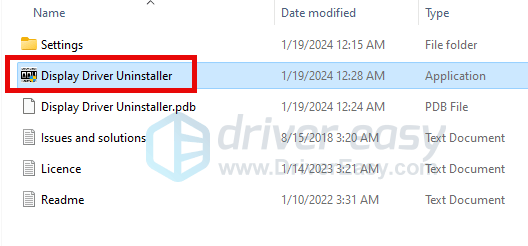
- When in Safe Mode, go to the folder where you unzip the DDU execution file. Double-click to run Display Driver Uninstaller.
- Select GPU and your GPU manufacturer on the right side. Then click Clean and restart.
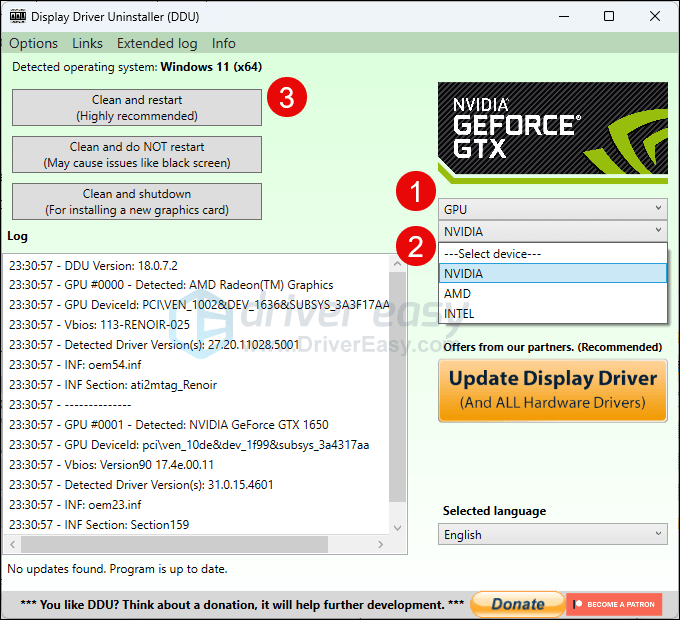
- Your computer should restart when the old driver files for your graphics card are cleaned.
- Double-click the setup file for the display card driver you’ve downloaded from step 1 to run the driver installation. (Or you can use Driver Easy Pro to install the driver automatically.)
- Restart your computer afterward.
That’s it on how to fix the Nvidia Control Panle missing issue. If you have any other suggestions, please feel free to share them with us by leaving a comment below.
