


Can’t see your display card (aka video card, GPU, and graphics card) on your computer? Don’t worry, it doesn’t necessarily mean that your GPU is at fault, the problem could be simply on the settings front. Here in this post, we have some troubleshooting methods to fix the PC not detecting GPU problem for you. Read on and see what you can do to fix the problem.
Try these fixes for the PC not detecting the GPU issue
You don’t have to try all the following methods: just work your way down the list until you find the one that does the trick to fix the GPU not detected issue on your computer for you.
- Add your GPU as a legacy device
- Update the GPU driver
- Restore your BIOS settings to default
- Make sure your GPU is correctly seated
1. Add your GPU as a legacy device
When your computer does not detect your GPU, you can try to add it back as a legacy device to see if it helps. To do so:
- On your keyboard, press the Windows key and the R key at the same time, then type devmgmt.msc and hit Enter.

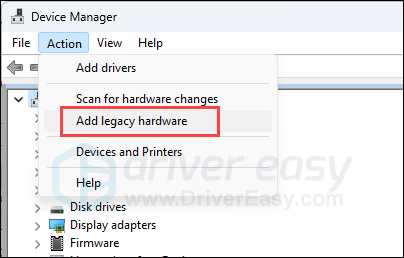
- Click to select your user name (the first line), then click Action on the menu bar and select Add legacy hardware.
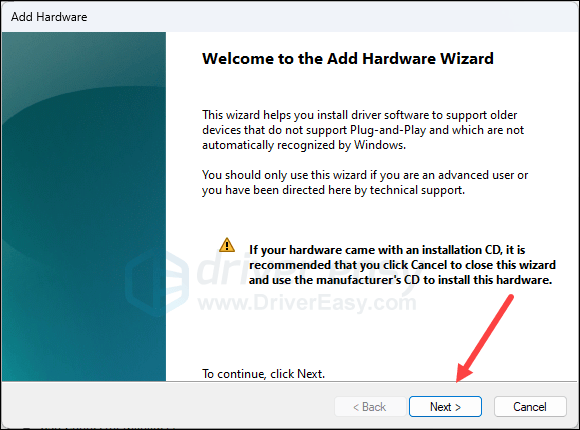
- Click Next to move on.
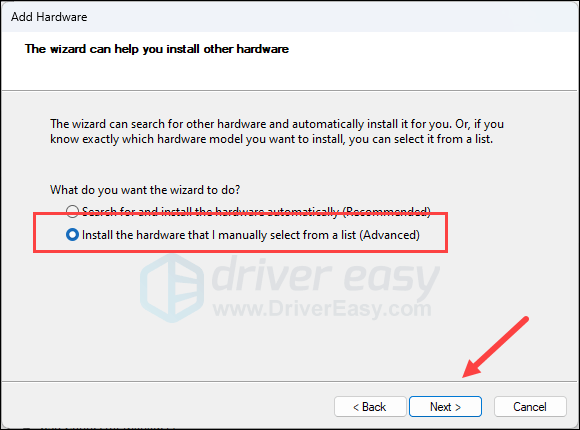
- Select Install the hardware that I manually select from a list (Advanced) and click Next.
- Select Display adpaters and click Next.

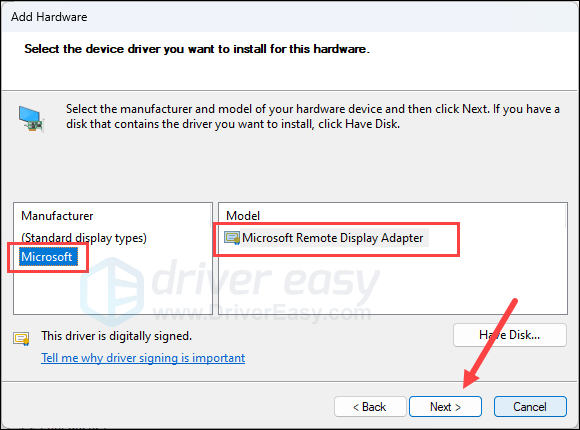
- Select Microsoft, and Microsoft Display Adapter on the right side panel. Then click Next and follow the on-screen instructions for the device to be added.
When the GPU is added back, do the following to update its driver in Device Manager:
- Double-click the expand Display adapters, then right-click the Microsoft Remote Display Adapter that you just added back and select Update device.
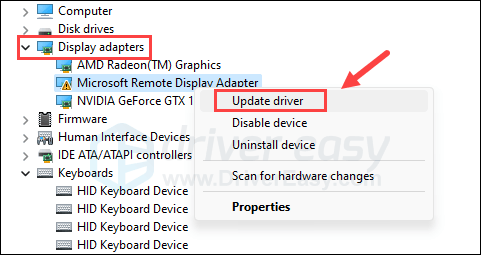
- Click Search automatically for drivers, Windows will then initiate a search online for the latest driver update. Follow any additional instructions provided during the driver update process.

- When the driver update is done, restart your computer for the change to take effect.
If no driver update is found by Windows for you, please move on to the next step to update the GPU driver.
2. Update the GPU driver
There are mainly 2 ways you can update your GPU driver: manually or automatically.
Option 1: Update your graphics driver manually
If you’re a tech-savvy gamer, you can spend some time updating your GPU driver manually.
To do so, first visit the website of your GPU manufacturer:
Then search for your GPU model. Note that you should only download the latest driver installer that’s compatible with your operating system. Once downloaded, open the installer and follow the on-screen instructions to update.
Option 2: Update your graphics driver automatically (Recommended)
If you don’t have the time, patience or skills to update the driver manually, you can do it automatically with Driver Easy. Driver Easy will automatically recognize your system and find the correct drivers for it. You don’t need to know exactly what system your computer is running, you don’t need to be troubled by the wrong driver you would be downloading, and you don’t need to worry about making a mistake when installing. Driver Easy handles it all.
You can update your drivers automatically with either the 7 days free trial or the Pro version of Driver Easy. It takes just 2 clicks, and you get full support and a 30-day money-back guarantee with the Pro version:
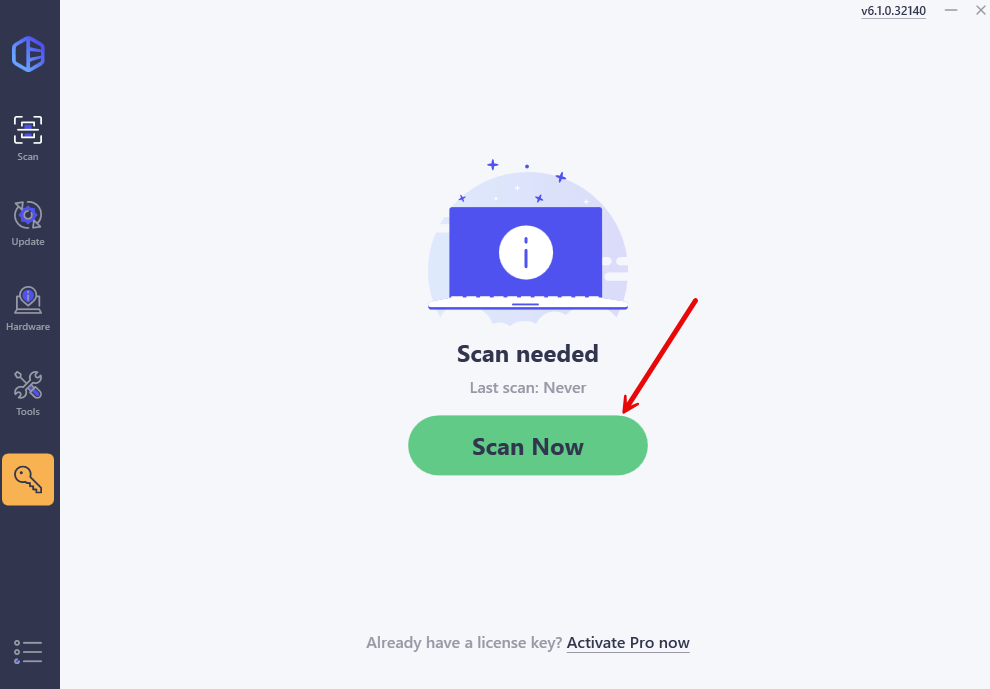
- Download and install Driver Easy.
- Run Driver Easy and click the Scan Now button. Driver Easy will then scan your computer and detect any problem drivers.
- Click the Activate & Update button next to the flagged device to automatically download and install the correct version of this driver.
Or click Update All to automatically download and install the correct version of all the drivers that are missing or out of date on your system (You’ll need the Pro version for this – when you select Update All, you’ll get a prompt to upgrade. If you’re not prepared to purchase the Pro version yet, Driver Easy provides a 7-day trial at no cost, granting access to all Pro features like fast downloads and easy installation. No charges will occur until after your 7-day trial period ends.)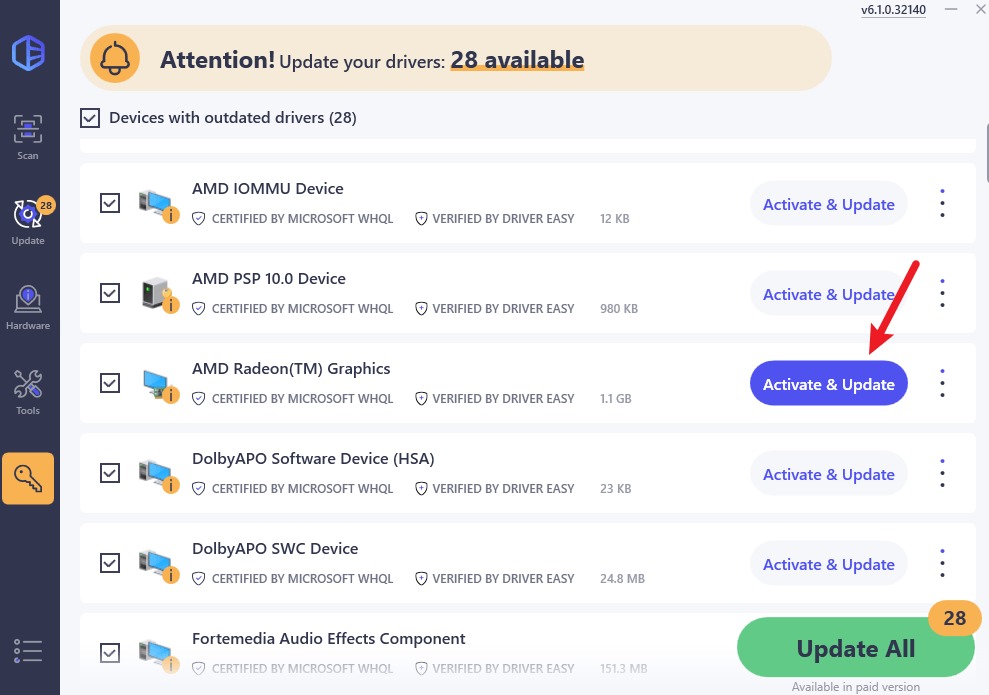
- Restart your computer for the change to take effect.
See if your PC is now detecting your GPU. If the problem remains, please move on.
3. Restore your BIOS settings to default
If you’ve previously overclocked your GPU, or you made certain changes in the BIOS, your PC might not detect your GPU either. To see if this is your case, you can try to restore your BIOS settings to default.
The exact ways of restoring the BIOS settings to default vary for different motherboard manufacturers. Here are instructional posts from some of the most popular motherboard manufactureres. Click to see the instructions for your computer:
If your motherboard is not listed above, you’ll need to go to the support page for your computer and see if you can find the correct instructions on the computer manual.
If restoring your BIOS settings to default still don’t help to make your PC detect your GPU, please move on.
4. Make sure your GPU is correctly seated
If the above software-related troubleshooting procedures don’t help your PC to detect your GPU, you may need to look at the hardware front. One of the most obvious ways to looks at would be the graphics card itself.
To make sure that the GPU is correctly seated in the correct PCIe slot, you can check its status in Task Manager like this:
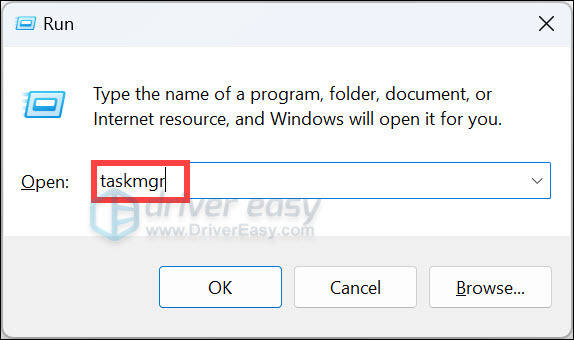
- On your keyboard, press the Windows logo + R keys simultaneously to open the Run box.
- Type taskmgr and hit Enter.
- Select Performance (the second icon).
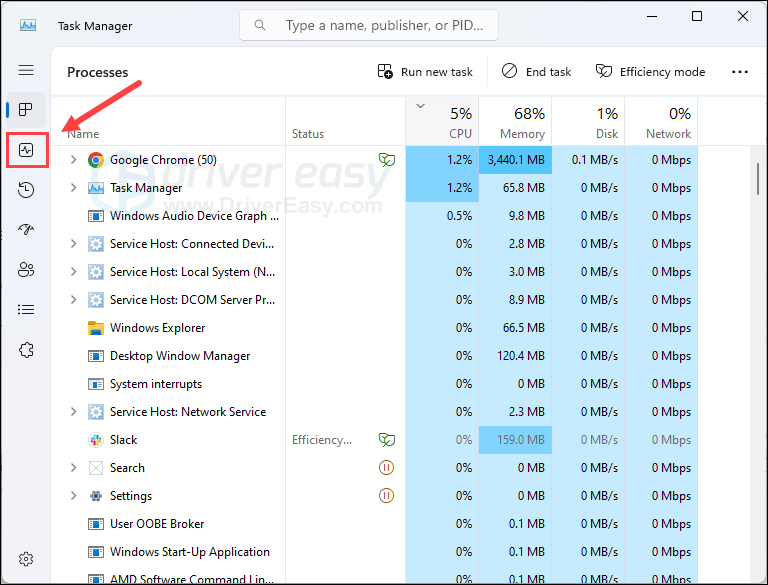
- If the GPU option is available, you should see the information about your computer’s GPU on the right side panel.

- When you can see such information, your GPU should be correctly seated.
But there are still possbilities that your GPU can be detected by your computer but is not correctly seated, so you may also want to check your computer case to make sure that your GPU is not lossen or wrongly inserted into the PCIe slots.
Final thoughts
If none of the above helps to resove the PC not detecting GPU issue for you, you may need to see if the GPU itself is at fault. If you don’t have enough time or energy to run such hardware tests, you can seek help from a hardware technician, and they’ll usually have some professional tools, which are more efficient in diagnosting hardware issues.
Thanks for reading the post. Hope your PC not detecting GPU problem is fixed after one of the above methods. If you have other solutions, please feel free to leave a comment below.