


If you’ve been dealing with a lot of computer freezing issue lately, don’t worry. It’s not often hard to fix at all…
Fixes for computer freezing
Here’re 7 fixes that have helped other users tackled the computer freezingproblem. Just work your way down the list until the problem is solved.
- Update your drivers
- Adjust power plan settings for your hard disk
- Delete the temp files
- Repair system files
- Adjust your virtual memory
- Run Windows Memory Diagnostic
- Perform a system restore
Fix 1: Update your drivers
This problem may occur if you are using the wrong or outdated device drivers. So you should update your drivers to see if it fixes your problem. If you don’t have the time, patience or skills to update the driver manually, you can do it automatically with Driver Easy.
Driver Easy will automatically recognize your system and find the correct drivers for it. You don’t need to know exactly what system your computer is running, you don’t need to be troubled by the wrong driver you would be downloading, and you don’t need to worry about making a mistake when installing. Driver Easy handles it all.
You can update your drivers automatically with either the 7 days free trial or the Pro version of Driver Easy. It takes just 2 clicks, and you get full support and a 30-day money-back guarantee with the Pro version:
- Download and install Driver Easy.
- Run Driver Easy and click the Scan Now button. Driver Easy will then scan your computer and detect any problem drivers.

- Click the Activate & Update button next to the flagged device to automatically download and install the correct version of this driver.
Or click Update All to automatically download and install the correct version of all the drivers that are missing or out of date on your system (You’ll need the Pro version for this – when you select Update All, you’ll get a prompt to upgrade. If you’re not prepared to purchase the Pro version yet, Driver Easy provides a 7-day trial at no cost, granting access to all Pro features like fast downloads and easy installation. No charges will occur until after your 7-day trial period ends.)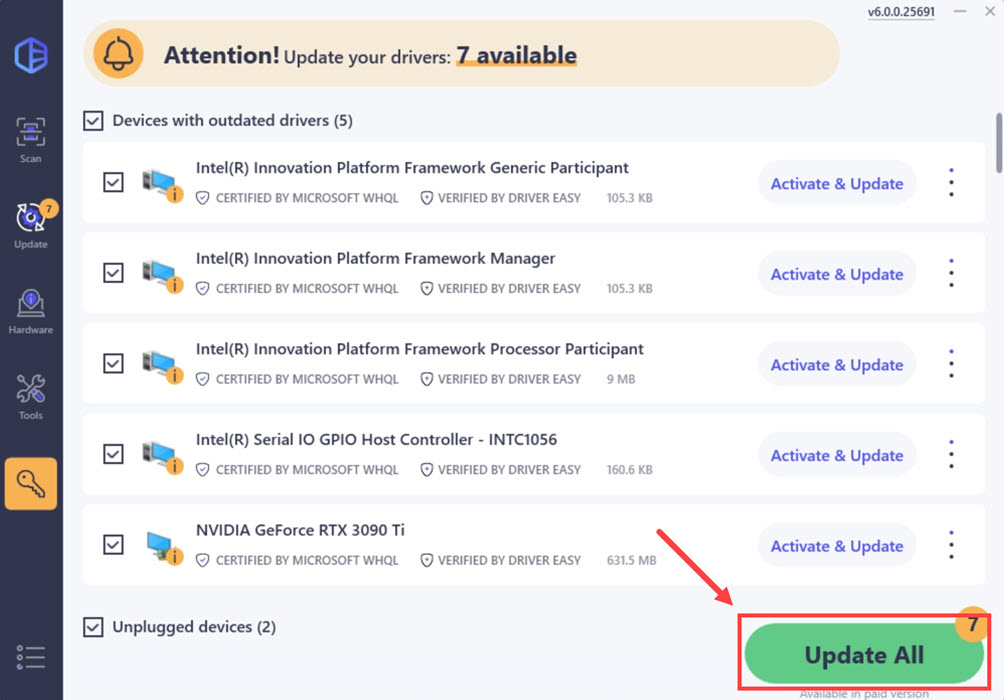
- After updating, restart your computer to take effect.
Check to see if your computer freezing problem has been resolved. If yes, then great! If the problem remains, please move on to Fix 2, below.
Fix 2: Adjust power plan settings for your hard disk
If you have an HDD, then it’s recommended to turn it on always according to user feedback. Here’s how:
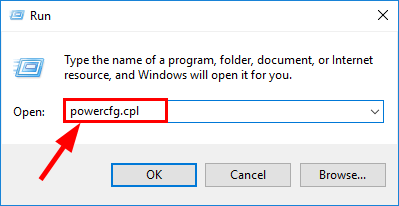
- Fix On your keyboard, press the Windows logo key and R at the same time, then type powercfg.cpl into the box and press Enter.
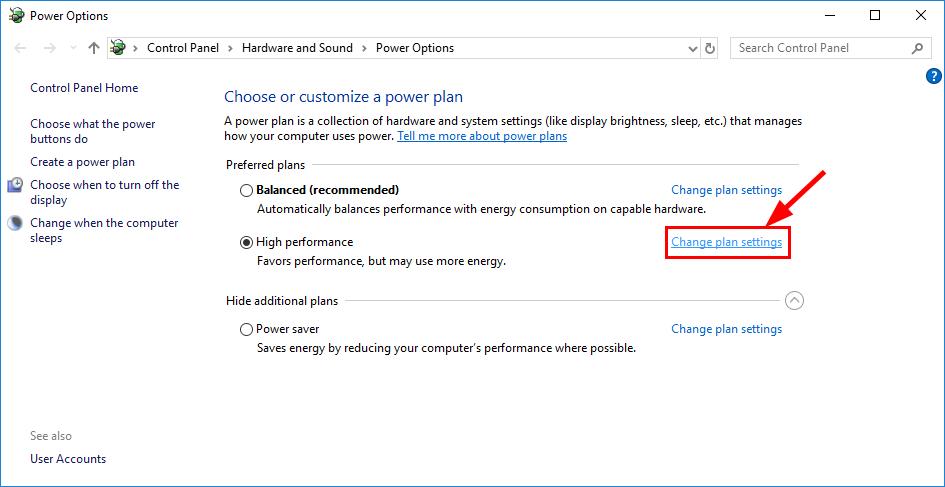
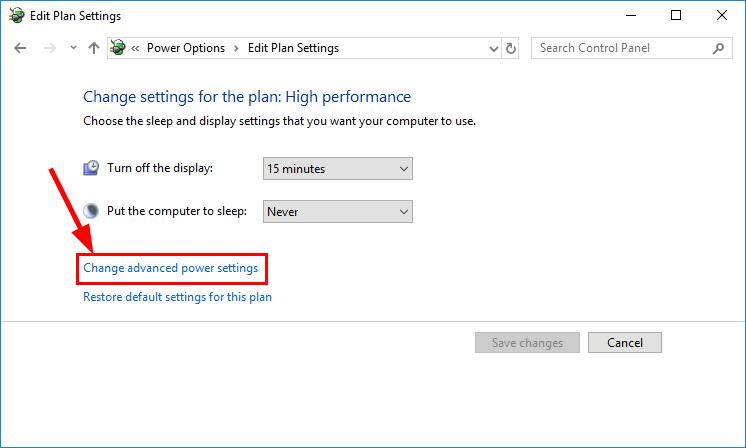
- In your preferred (chosen) power plan, click Change plan settings.
- Click Change advanced power settings.
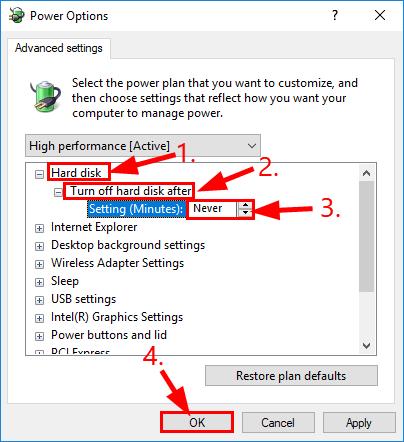
- Double-click on Hard disk > Turn off hard disk after. Then set the value of Setting (Minutes) to Never (by clicking the down-arrow) and click OK.
- Check to see if the computer freezing problem has been resolved. if yes, then congrats! If the issue persists, please try Fix 3, below.
Fix 3: Delete the temp files
Temp files, just like any other file, take up storage space in hard drives. Over time these piled up files can defragment the data in the drives and cause computer slowdown problem or even grind your computer to a halt (hence computer freezing). So your can delete the temp files as long as they’re not locked for use.
Here is how to do it:
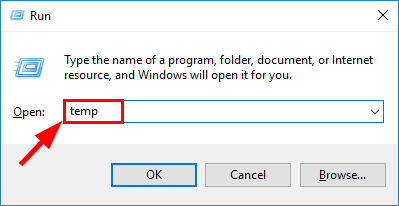
- On your keyboard, press the Windows logo key and R at the same time. Then type temp and press Enter.
- Press Ctrl and A at the same time and click Del to delete all the temporary files.

- Hope this solves your computer freezing issue. If it doesn’t work, then move on to Fix 4, below.
Fix 4: Repair system files
The computer freezing issue could be caused by missing, corrupt or damaged system files on your computer. Here’s how you can repair possible issues with your system files:
System File Checker (SFC) is a handy feature in Windows that helps scan your system files and repair missing or corrupted system files (including those related to BSOD). To run the SFC scan:
- On your keyboard, press the Windows Logo key
 , type in command prompt, and select Run as administrator. (If Windows prompts for permission, click OK to continue.)
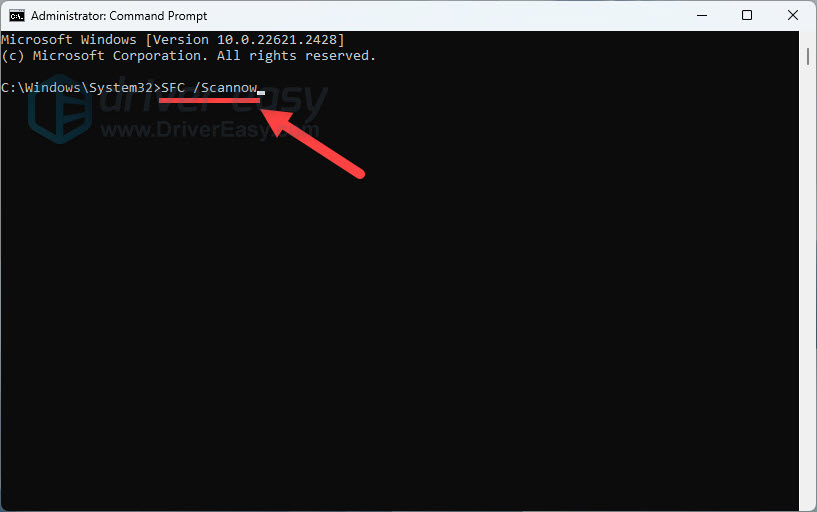
- Type in SFC /Scannow, and then press Enter.
- It’ll take some time for the SFC to repair the corrupted system files if it detects any.
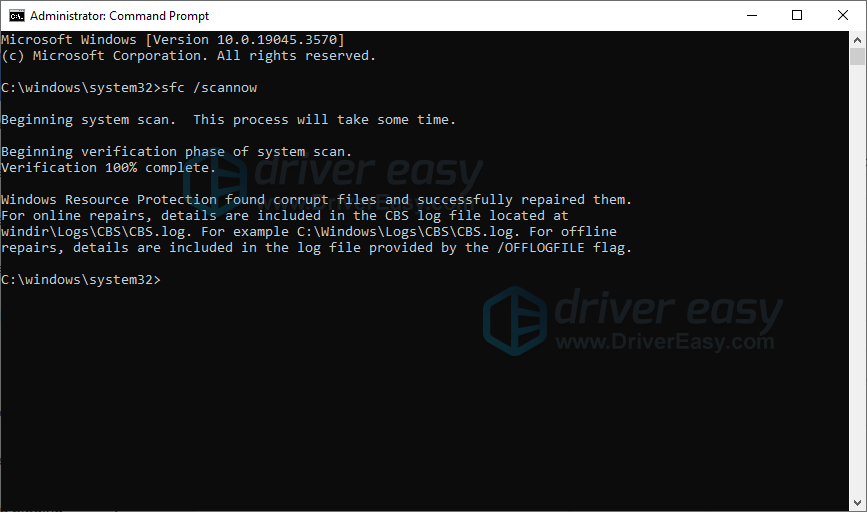
- When the process is completed, reboot your computer.
Check your computer to see if the screen freezing has been fixed. If yes, then congrats! If the issue still persists, please move on to Fix 5, below.
Fix 5: Adjust your virtual memory
Virtual memory is basically an extension of your computer’s physical memory. It is a combination of RAM and a portion of your hard drive. If your computer runs out of RAM when performing an intensive task, Windows will dip into virtual memory for temporary file storage.
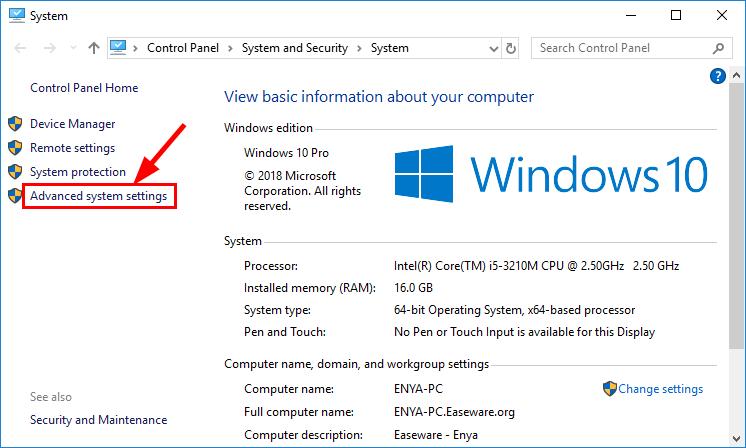
- On your keyboard, press the Windows logo key and Pause at the same time. Once in System, click Advanced system settings.
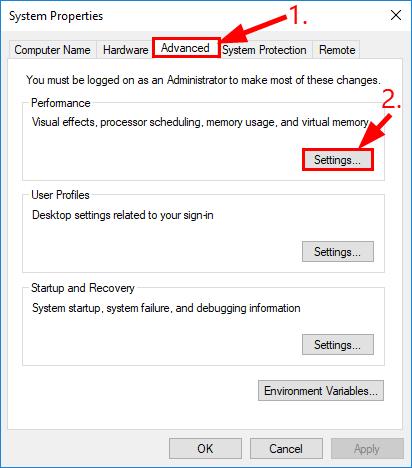
- In the Advanced tab, click Settings….
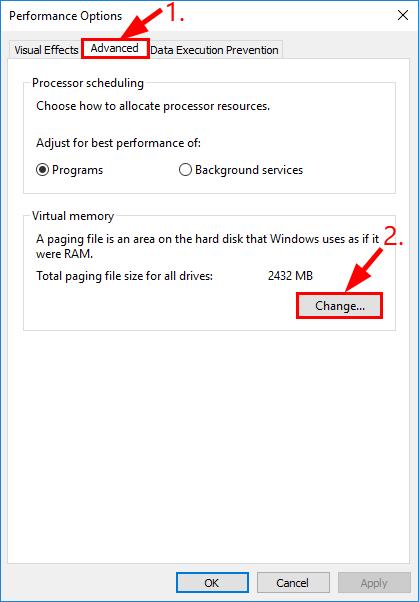
- Click the Advanced tab and click Change….
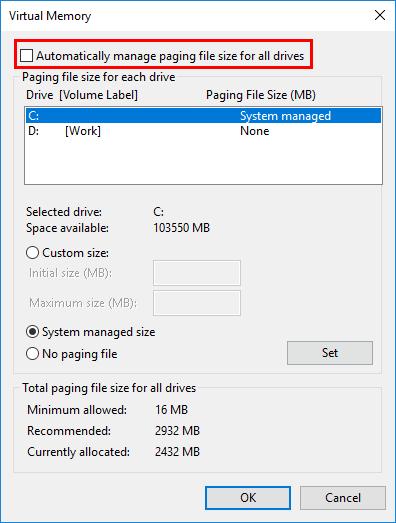
- Make sure the Automatically manage paging file size for all drives checkbox is un-ticked.
- Select your windows drive (the hard drive or partition that has Windows installed on it – usually C:), then click Custom size and enter an Initial size and Maximum size for your virtual memory:
- Initial size – This value varies, depending on your computer. If you’re not sure what value to use, just enter whatever the number is in the Recommended category.
- Maximum size – Don’t set this value too high. It should be about 1.5 times the size of your physical RAM. e.g. A PC with 16 GB (16384 MB) of RAM should have no more than about 16384 MB virtual memory (16384 MB x 1.5).
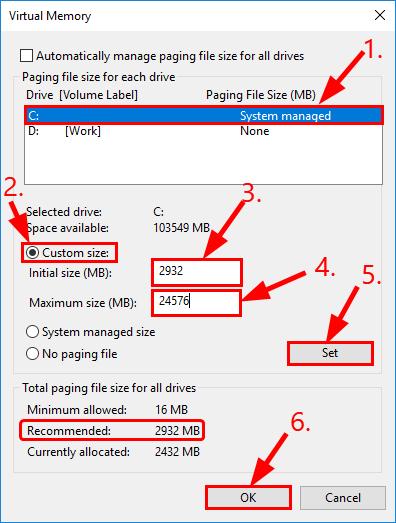 Once you’ve entered your virtual memory values, click Set, then click OK to continue.
- Check to see if your computer freezing problem has been fixed. If not, then move on to Fix 6, below.
Fix 6: Run Windows Memory Diagnostic
This problem may occur when you have a failing or faulty RAM sticks. Luckily there’s a built-in tool called Windows Memory Diagnostic to help you run memory tests to check if you have bad RAM. To do so:
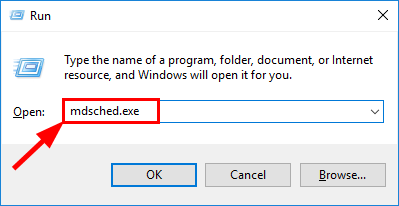
- On your keyboard, press the Windows logo key and R. Then type mdsched.exe and press Enter.
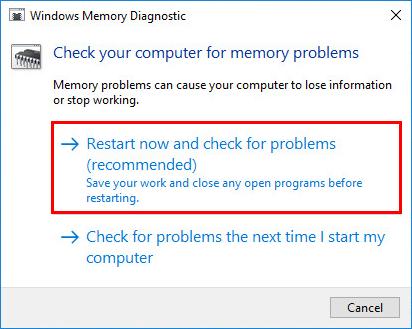
- Make sure you’ve saved and closed all the work on your computer and click Restart now and check for problems (recommended) if you want Windows to do a diagnostic test NOW.
- By default, Windows will boot into the Standard test mode *. Wait the whole process to finish while Windows runs the diagnostic test.*: There are three test modes in Windows Memory Diagnostic: Basic, Standard and extended. You can press F1 to check exactly what tests each test module includes, press the arrow keys to navigate among the test modes and press F10 to start the memory test you select.
- Once Windows reboots, check if you get an error report in the notification area:
- If you get a No memory errors were detected from Windows Memory Diagnostic message, then you can exclude bad memory as the root of the problem. Move on to Fix 6 for further troubleshooting.
- If you get a report of memory errors, then you might have to narrow down until you find the exact faulty memory stick and have it repaired to see if it fixes the computer freezing issue.
Fix 7: Perform a system restore
If all else fails, then you might have to resort to a system restore to revert your computer to a previous point where your computer was working fine.
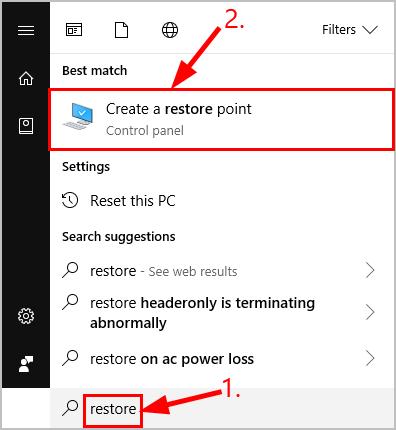
- On your keyboard, press the Windows logo key, type restore and click Create a restore point.
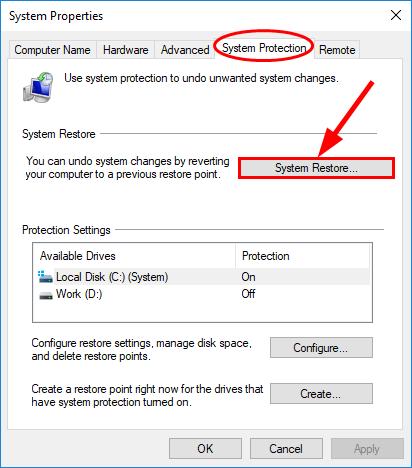
- Under the System Protection tab, click System Restore….
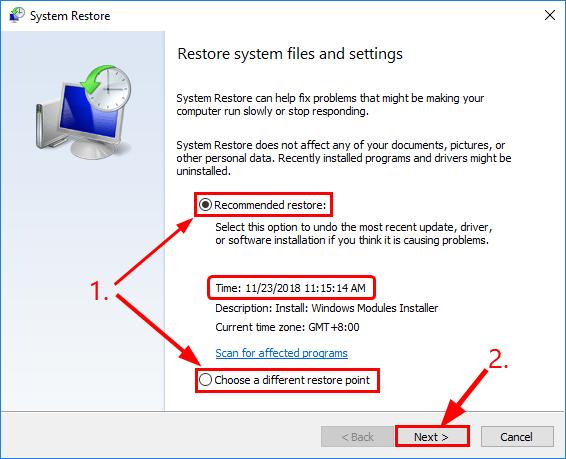
- Select between Recommended restore and Choose a different restore point depending on whether the date in recommended restore point would make your computer run smoothly without any lagging or freezing.
- Follow the on-screen instruction to run the system restore.
- Once your computer restarts, check if your computer freezing problem has been solved.
How have the fixes above helped you with the troubleshooting? Do you have any ideas or tips to share with us? Drop a comment below and let us know your thoughts, thank you. 🙂