


If you turn on your Lenovo laptop only for it to show nothing but a black screen, don’t panic. It’s often not hard to fix at all…
How to fix Lenovo Laptop Black Screen in Windows 11, 10 and 8
Here are 6 fixes that have helped other users resolve the Lenovo Laptop Black Screen problem. You may not have to try them all; just work your way down the list until you find the one that works for you.
- Reset the display mode
- Hard reset your Lenovo laptop
- Update your graphics driver
- Restart the explorer.exe process
- Disable fast startup
- Perform a system restore
Fix 1: Reset the display mode
Sometimes the black screen is only a glitch when the operating system loses its connection to the screen display. So whenever this happens, the first thing you can try is to press the Windows logo key![]() , the Ctrl key, the Shift key, and B at the same time. This will reset the connection so that the operating system regains the display.
, the Ctrl key, the Shift key, and B at the same time. This will reset the connection so that the operating system regains the display.
Once finished, check to see if you get the normal display back on your Lenovo laptop. If yes, then great! If it still gives you the black screen, please move on to Fix 2, below.
Fix 2: Hard reset your Lenovo laptop
Peripheral devices that are connected to your Lenovo laptop could also be the cause of the black screen issue. If this is the case for you, you may notice that the dots are spinning during the boot-up process. So you should perform a hard reset on your Lenovo laptop to narrow down the possibilities.
Here is how to do it:
1) Turn off your Lenovo laptop.
2) Unplug the power cord, remove the battery, and disconnect all external connected peripheral devices from your laptop.
3) Leave your laptop off for 30 seconds.
4) Press and hold the power button for about 60 seconds.
5) Put your battery back in the laptop and connect the power cord.
6) Turn on your laptop and check if it boots up properly.
- If it boots up fine, then congrats – you’re close to finding the culprit (i.e. one of the peripherals). You can then turn off your laptop, and plug in the peripherals one at a time until you can reproduce the black screen.
- If the screen is still black, the issue isn’t with the peripherals. You should move on to Fix 3, below to continue the troubleshooting.
Fix 3: Update your graphics driver
This problem may occur if you are using the wrong graphics river or it’s out of date. So you should update your graphics driver to see if it fixes your problem. If you don’t have the time, patience or skills to update the driver manually, you can do it automatically with Driver Easy.
Driver Easy will automatically recognize your system and find the correct drivers for it. You don’t need to know exactly what system your computer is running, you don’t need to be troubled by the wrong driver you would be downloading, and you don’t need to worry about making a mistake when installing. Driver Easy handles it all.
You can update your drivers automatically with either the 7-day free trial or the Pro version of Driver Easy. But with the Pro version it takes just 2 steps (and you get full support and a 30-day money back guarantee):
1) Download and install Driver Easy.
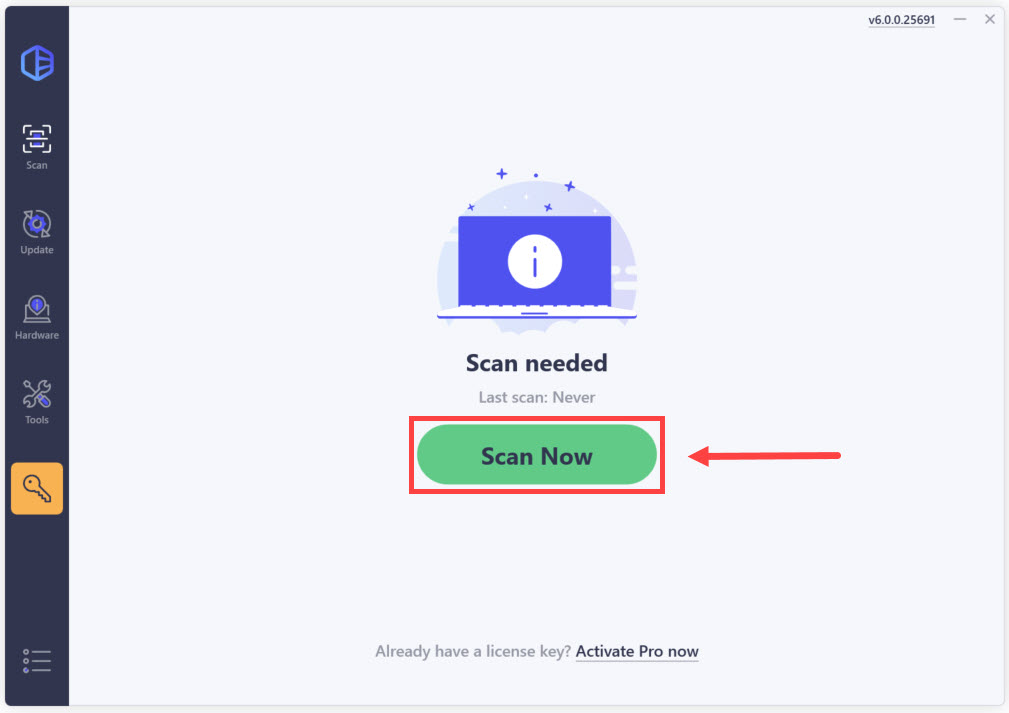
2) Run Driver Easy and click the Scan Now button. Driver Easy will then scan your computer and detect any problem drivers.
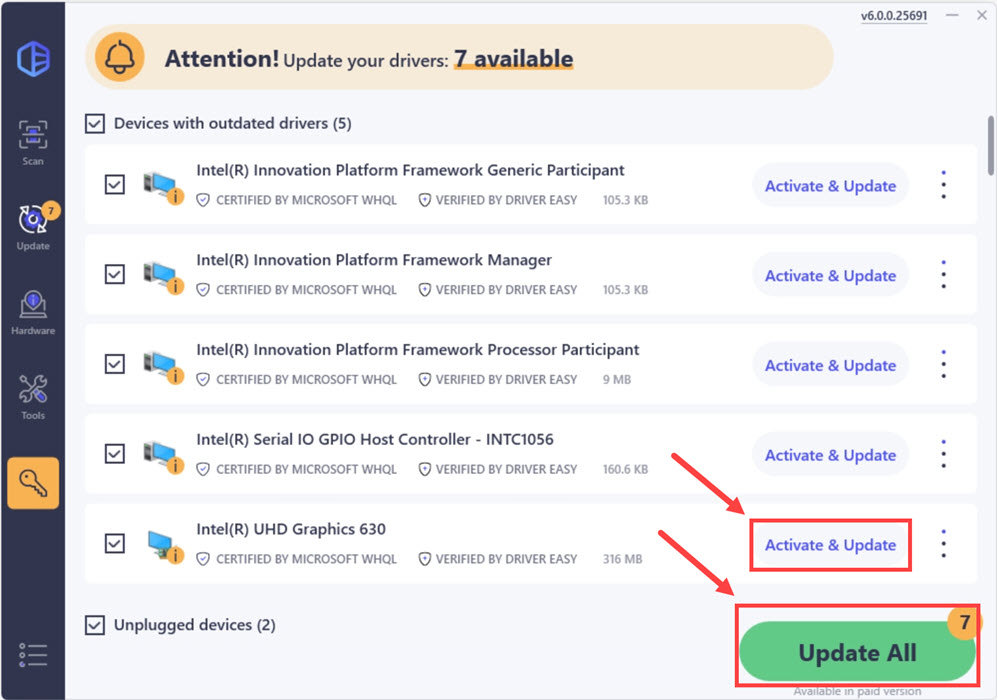
3) Click Update All to automatically download and install the correct version of all the drivers that are missing or out of date on your system.
(This requires the Pro version which comes with full support and a 30-day money-back guarantee. You’ll be prompted to upgrade when you click Update All. If you’re not ready to buy the Pro version, Driver Easy offers a 7-day free trial which includes access to all the Pro features such as high-speed download and one-click install. You won’t be charged anything until your 7-day trial has ended.)
4) Restart your computer for the changes to take effect.
5) Check to see if the black screen on your Lenovo laptop issue has been resolved. If yes, then great! If the black screen persists, please try Fix 4, below.
Fix 4: Restart the explorer.exe process
Explorer.exe manages the desktop, taskbar, and other processes on your laptop, so if it’s closed in your system, your desktop and taskbar will become invisible and your screen will go black. In this case, you will need to restart the process to see if it solves the problem.
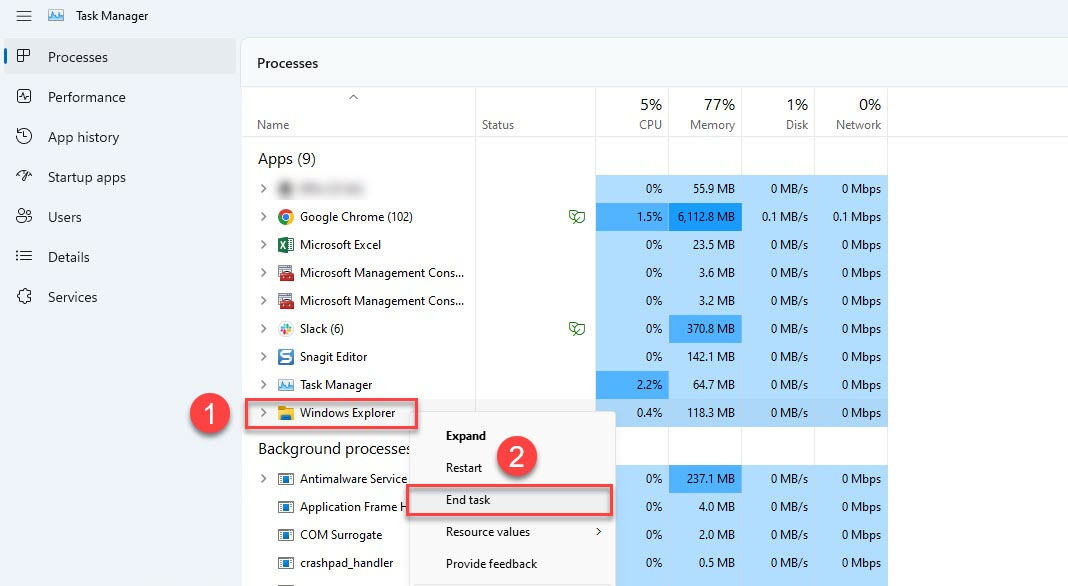
1) On your keyboard, press the Ctrl, Shift, and Esc keys at the same time to open Task Manager.
2) Locate Windows Explorer and click End task.
3) Restart your laptop to see if the black screen issue has been eliminated. If it’s still no joy, please move on to Fix 5, below.
Fix 5: Disable fast startup
Fast startup is a new feature in Windows 10 that enables your computer to boot up faster by saving the operating system state to a hibernation file. However, this does not always work perfectly and it sometimes can mess up with the startup process and cause the screen to go black.
So you can try disabling fast startup to see if it does the trick:
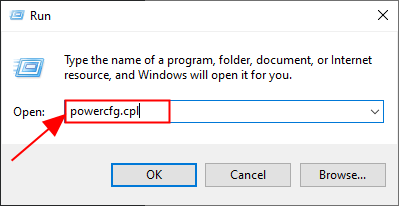
1) On your keyboard, press the Windows logo key and R at the same time, type powercfg.cpl and press Enter.
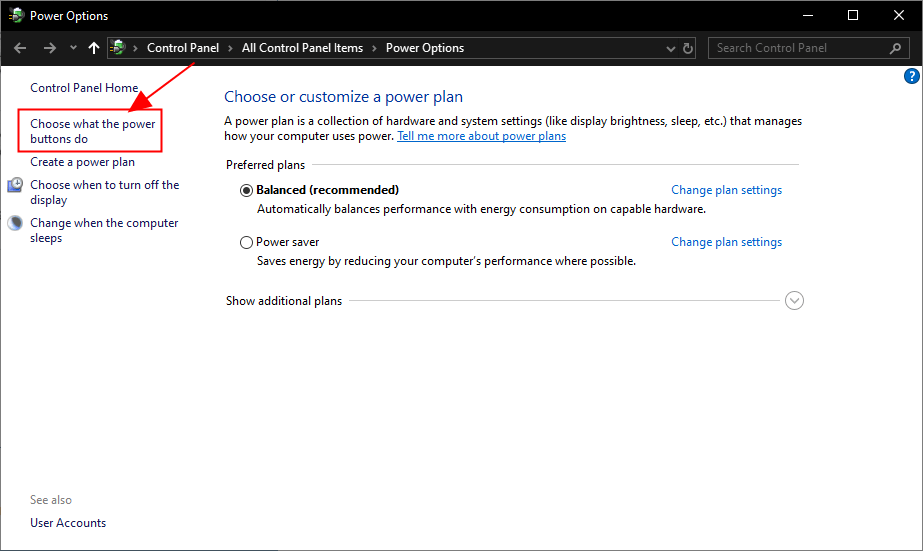
2) Click Choose what the power buttons do.
3) Click Change settings that are currently unavailable.
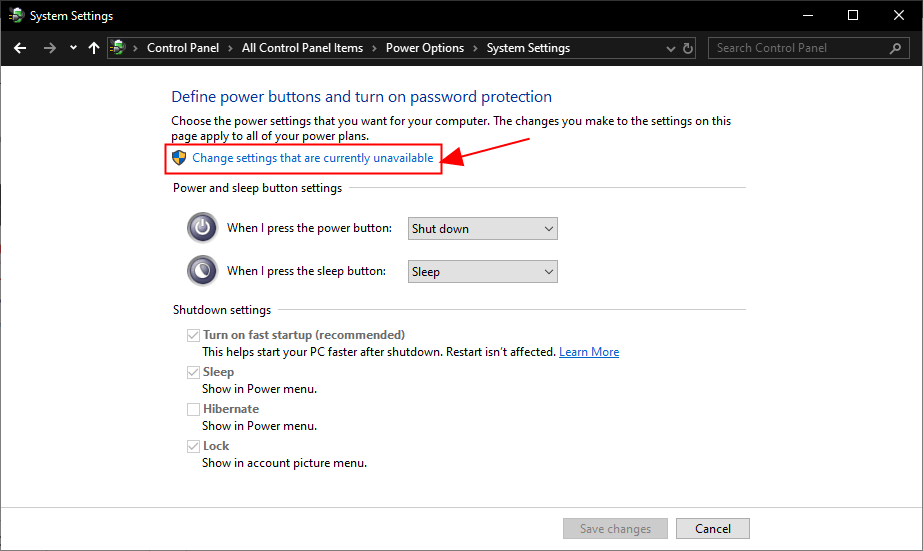
4) Un-tick the box for Turn on fast startup (Recommended), click Save changes, and close the window.

5) Restart your computer and check if your laptop screen displays properly.
Still got a black screen? Please try Fix 6, below.
Fix 6: Perform a system restore
If this black screen issue occurs only recently when you have made some changes to your computer, such as installing a new program or running a Windows update, chances are these changes are not very compatible with the operating system and trigger the black screen problem. So you should perform a system restore to revert your laptop to a previous state before these changes.
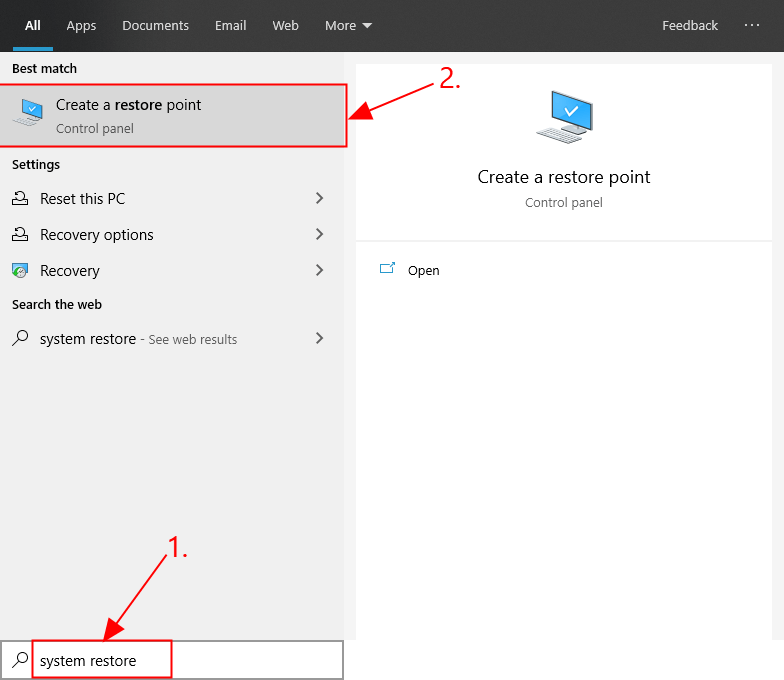
1) On your keyboard, press the Windows logo key and type system restore, then click on Create a restore point once it shows up as a matching result.
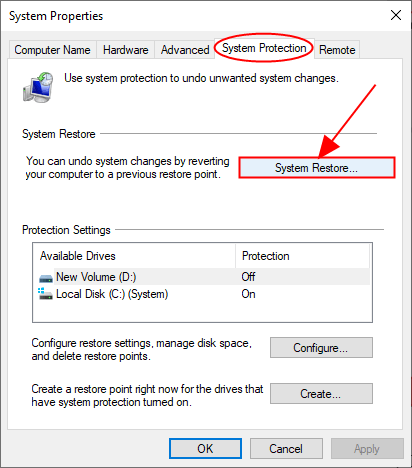
2) In the System Protection tab, click System Restore….
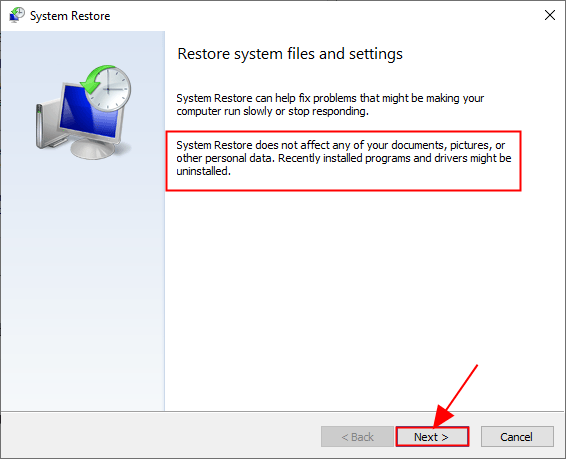
3) Read the on-screen descriptions about what a system restore will do and will not do and click Next to continue.
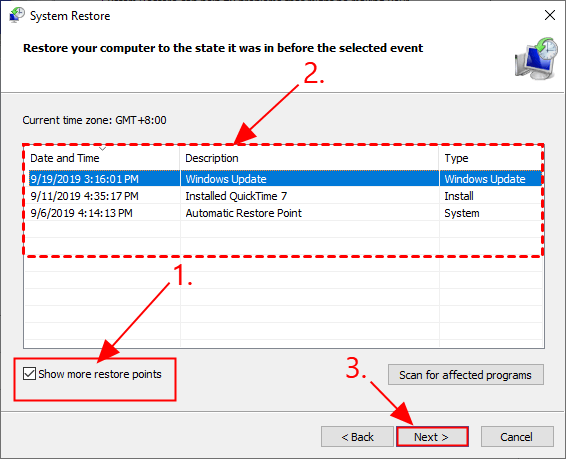
3) Tick the box for Show more restore points and select the restore point that you want to use to revert your computer to and click Next.
4) Follow the on-screen instructions to complete the system restore process.
5) Restart your computer to see if the black screen issue has been fixed.
Hopefully, the article has pointed you in the right direction in troubleshooting the black screen on the Lenovo laptop issue. If you have any questions, ideas, or suggestions, please let me know in the comments. Thanks for reading!