


Fixes to try
The following is a list of fixes that have resolved this problem for other Windows 7 users. You don’t have to try them all; just work your way down the list until you find the one that works for you.- Restore your screen rotation with a keyboard shortcut
- Restore your screen rotation in your display settings
- Update your graphics driver
Fix 1: Restore your screen rotation with a keyboard shortcut
This is the simplest way to fix your screen issue: Hold down the Ctrl and Alt keys on your keyboard, then press the up arrow key. This should change your screen orientation back to the normal one. If this didn’t work for you, you may need to try changing your screen rotation in your display settings.Fix 2: Restore your screen rotation in your display settings
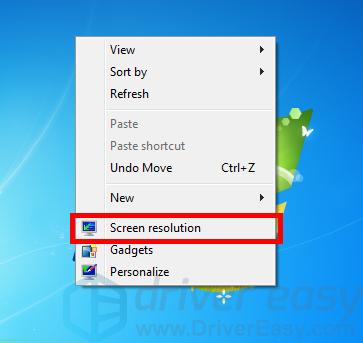
To change your screen rotation in your system display settings:- Right click an empty area of your desktop, then select Screen resolution.
- Click the Orientation drop-down menu, then select Landscape.
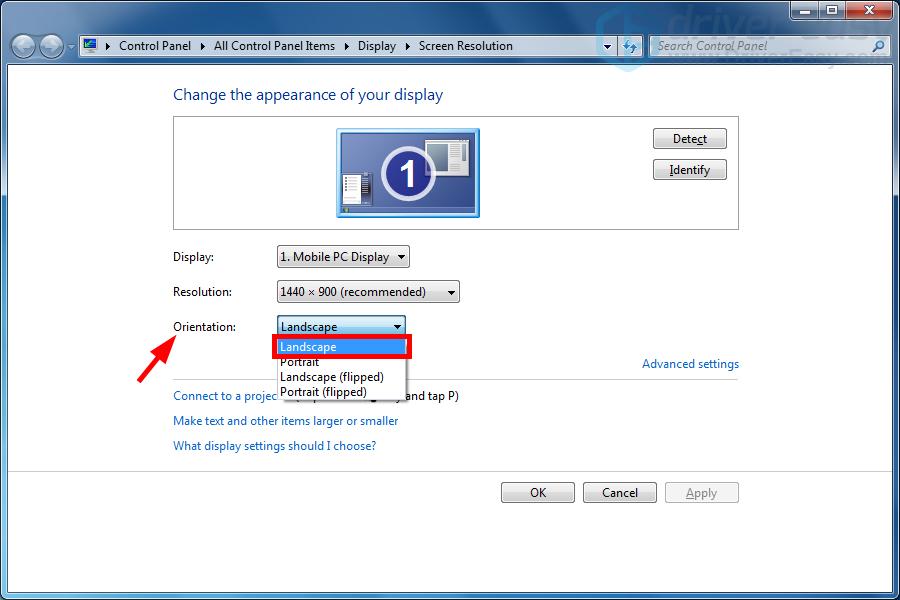
- Click OK.
Fix 3: Update your graphics driver
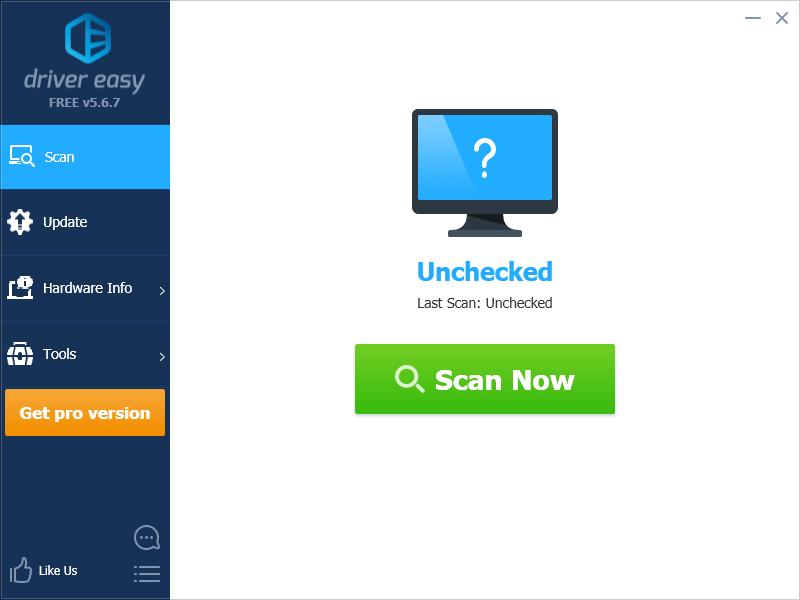
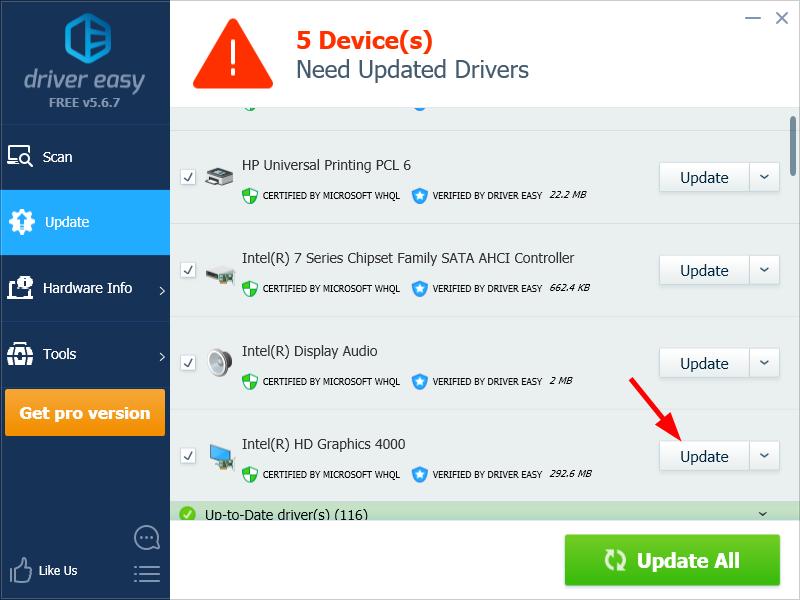
You may have a screen upside down issue even if you didn’t do anything wrong. This is because your graphics driver is not working properly. You should try updating your graphics driver to see if this resolves your problem. If you don’t have the time, patience or skills to update your driver manually, you can do it automatically with Driver Easy. Driver Easy will automatically recognize your system and find the correct drivers for it. You don’t need to know exactly what system your computer is running, you don’t need to risk downloading and installing the wrong driver, and you don’t need to worry about making a mistake when installing. Driver Easy handles it all.- Download and install Driver Easy.
- Run Driver Easy and click the Scan Now button. Driver Easy will then scan your computer and detect any problem drivers.
- Click the Update button next to your graphics adapter to download the latest and correct driver for it, then you can manually install the driver. Or click the Update All button at the bottom right to automatically update all outdated or missing drivers on your computer. (This requires the Pro version — you will be prompted to upgrade when you click Update All. You get full support and a 30-day money back guarantee.)
You can do it for free if you like, but it’s partly manual. - Restart your computer.
If you need assistance, please contact Driver Easy’s support team at support@drivereasy.com.
3
3 people found this helpful
0 Comments
Most Voted