


Does this look familiar?
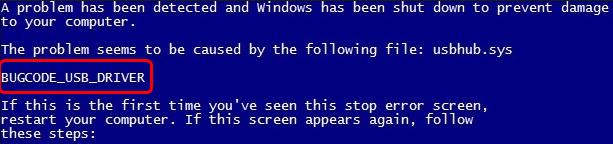
All of a sudden, you Windows PC turns into a blue screen and shows you this error code: BUGCODE_USB_DRIVER. You must be very annoyed and frustrated. Don’t worry. Usually this is an easy problem to fix.
5 easy & effective methods to fix BUGCODE_USB_DRIVER:
- Update your device drivers — the most successful
- Adjust the Power settings
- Install Windows update on your Windows 10
- Check your hard disk
Method 1: Update your device drivers — the most successful
A very common cause to Bugcode USB Driver is the old or broken drivers. In most cases, updating your device drivers can solve the error. It’s always the most successful method from users’ feedback.
Whether you choose to update the device drivers manually, using Windows Update, or you use a trusted third-party product, it’s essential that you have the latest correct device drivers for your operating system at all times.
If you’re not comfortable playing with device drivers, we recommend using Driver Easy. It’s a tool that detects, downloads and (if you go Pro) installs any driver updates your computer needs.
Driver Easy will automatically recognize your system and find the correct drivers for it. You don’t need to know exactly what system your computer is running, you don’t need to be troubled by the wrong driver you would be downloading, and you don’t need to worry about making a mistake when installing. Driver Easy handles it all.
You can update your drivers automatically with either the 7 days free trial or the Pro version of Driver Easy. It takes just 2 clicks, and you get full support and a 30-day money-back guarantee with the Pro version:
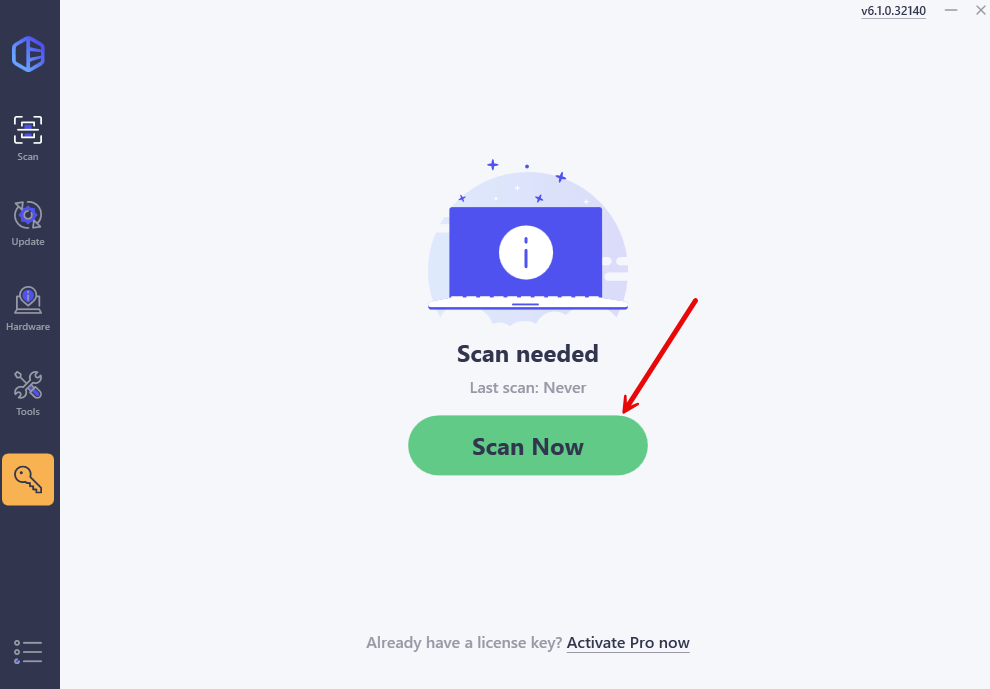
- Download and install Driver Easy.
- Run Driver Easy and click the Scan Now button. Driver Easy will then scan your computer and detect any problem drivers.
- Click the Activate & Update button next to the flagged device to automatically download and install the correct version of this driver.
Or click Update All to automatically download and install the correct version of all the drivers that are missing or out of date on your system (You’ll need the Pro version for this – when you select Update All, you’ll get a prompt to upgrade. If you’re not prepared to purchase the Pro version yet, Driver Easy provides a 7-day trial at no cost, granting access to all Pro features like fast downloads and easy installation. No charges will occur until after your 7-day trial period ends.)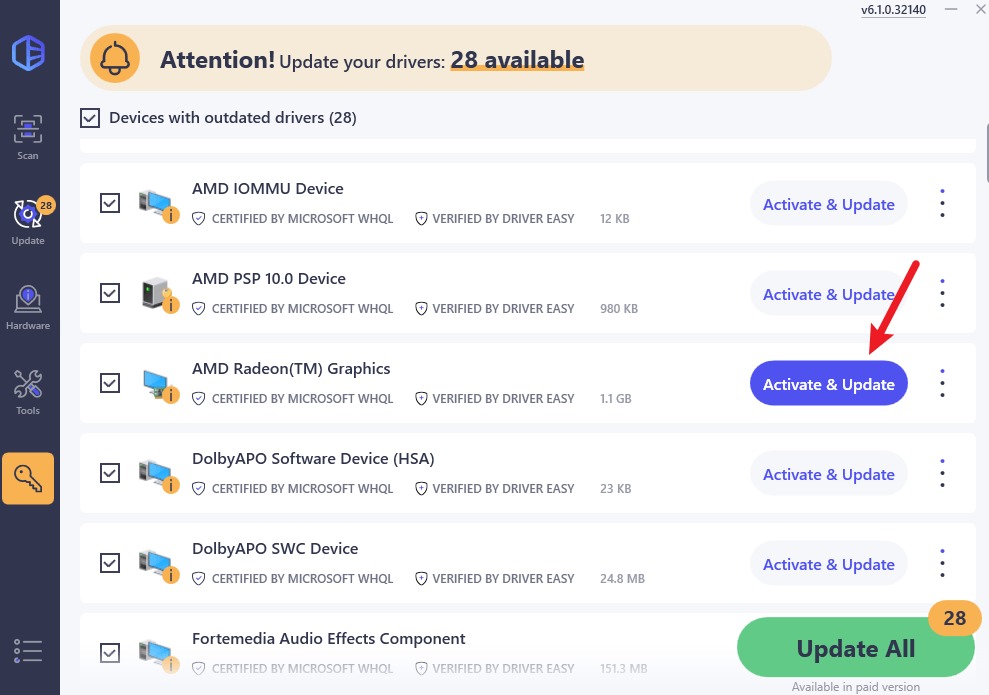
- Restart your computer for the change to take effect.
Method 2: Adjust the Power settings
Sometimes inappropriate power settings could also lead to the error. In such a case, you can disable the USB selective suspend setting. Follow the steps below then.
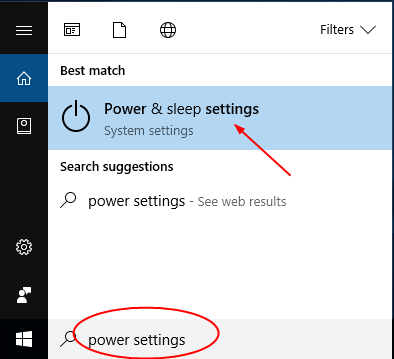
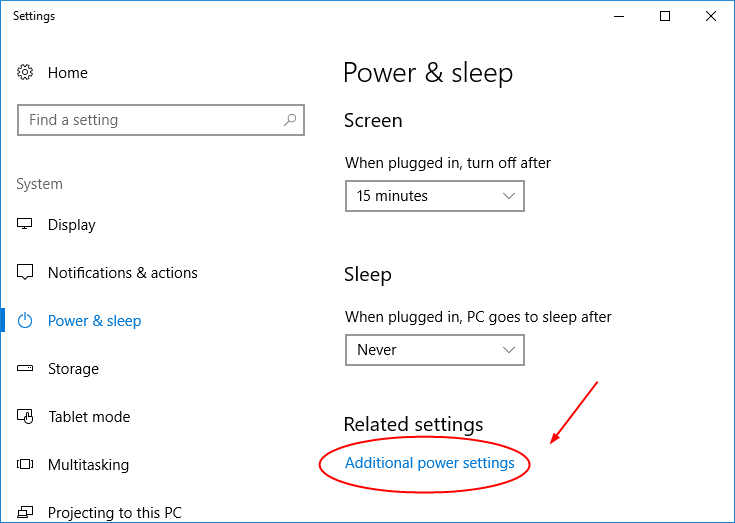
1) Type power settings in the search box from Start. Then click Power & sleep settings on the top result.
2) Click Additional power settings on the right pane.
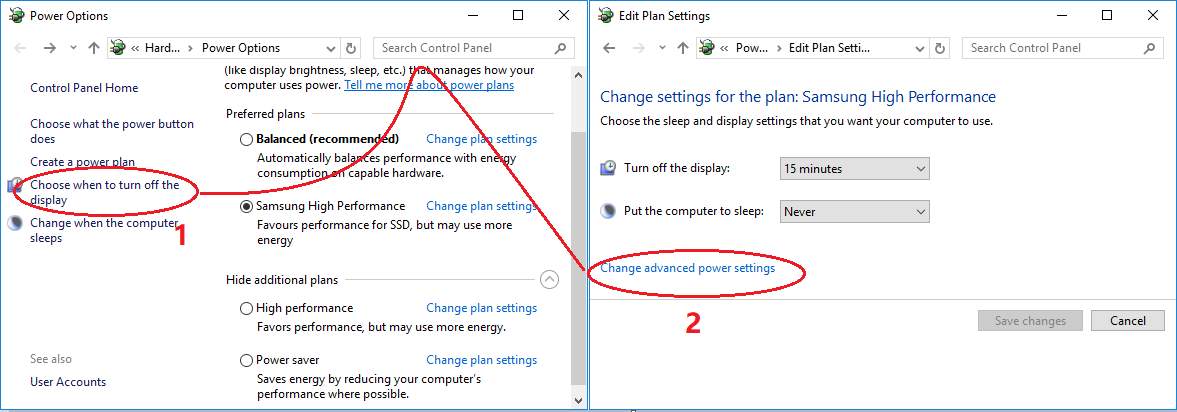
3) Click Choose when to turn off the display > Change advanced power settings.
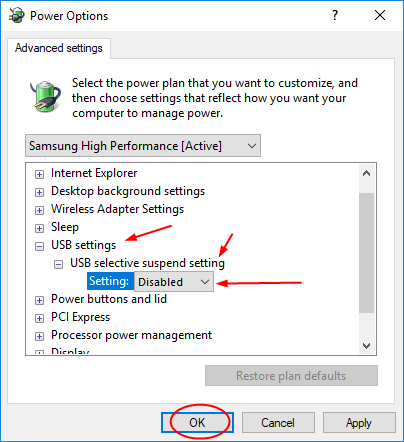
4) On the pop-up window, expand the dialog after each: USB settings > USB selective suspend setting. Then set it to be Disable from the drop-down menu. Click OK to save your setting.
Method 3: Install Windows update on your Windows 10
Windows update always includes bug fixes and adds new features. Installing the update helps some users fix the error. How to install is shown below:
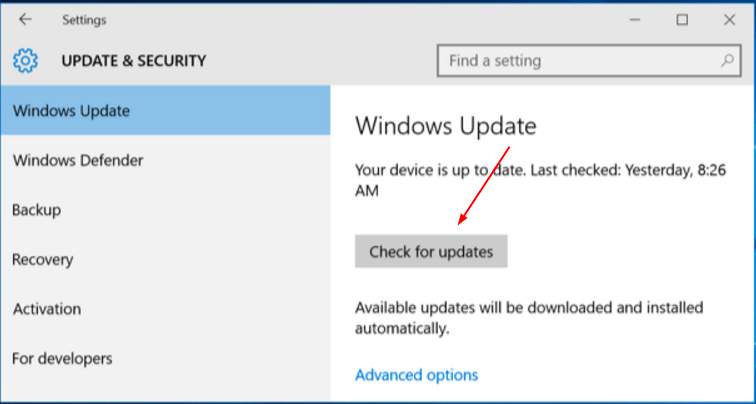
1) Type update in the Search box from the Start menu. Then click Check for updates on the top result.

2) On the pop-up page, click Check for updates.
Proceed to follow the on-screen instructions to install the updates.
Method 4. Check your hard disk
Damage or corruption of your hard disk could also bring the error. You can run check disk via the command prompt to fix it.
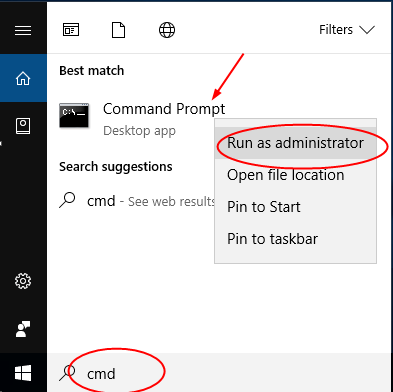
1) Type cmd in the search box from the Start menu. Then right-click on Command Prompt to choose Run as administrator.
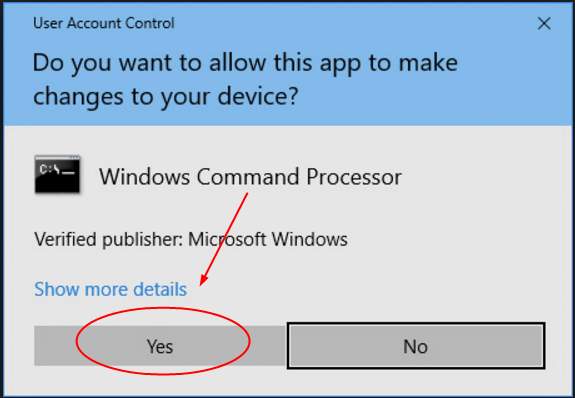
2) Click Yes when prompted by User Account Control.
3) On the open Command Prompt window, type chkdsk /f. Then press Enter on your keyboard to run it.

Now it would start checking the hard disk for the possible issues causing the BSOD error.
Fix 5: Repair corrupted system files
Missing, corrupt, or damaged system files may be the culprit for this BSOD error. To eliminate this issue as a possible cause, you can try the below to repair possible system file issues.
System File Checker (SFC) is a handy feature in Windows that helps scan your system files and repair missing or corrupted system files(including those related to BSOD). To run the SFC scan:
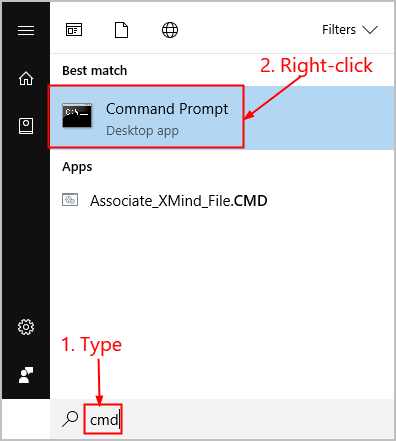
1) On your keyboard, press the Windows logo key and type cmd. Then right-click on Command Prompt and click Run as administrator.
2) Click Yes when prompted to confirm.
3) In the command prompt window, type sfc /scannow and press Enter.
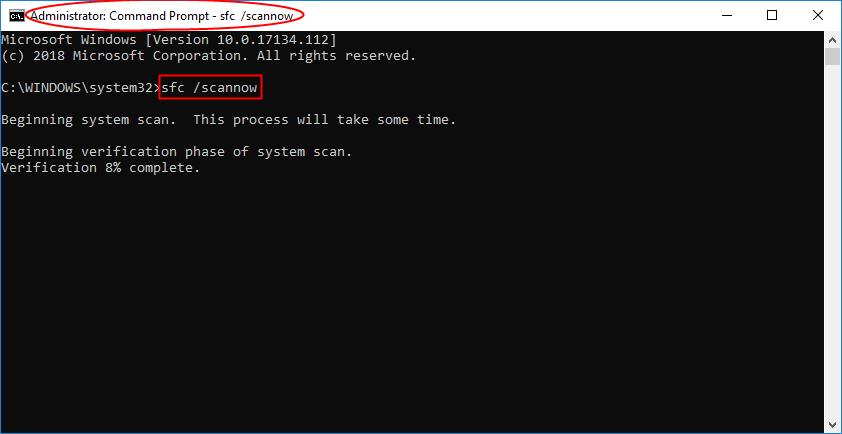
It’ll take some time for the SFC to replace the corrupted system files with new ones if it detects any, so please be patient.
4) Restart your computer for the changes to take effect.
5) Check your computer to see if the problem has been fixed.
That’s all there is to it. Have you solved the error? If you have any questions, please feel free to leave your comment below. And also if you have other methods to fix the error, share with us please, thanks.