






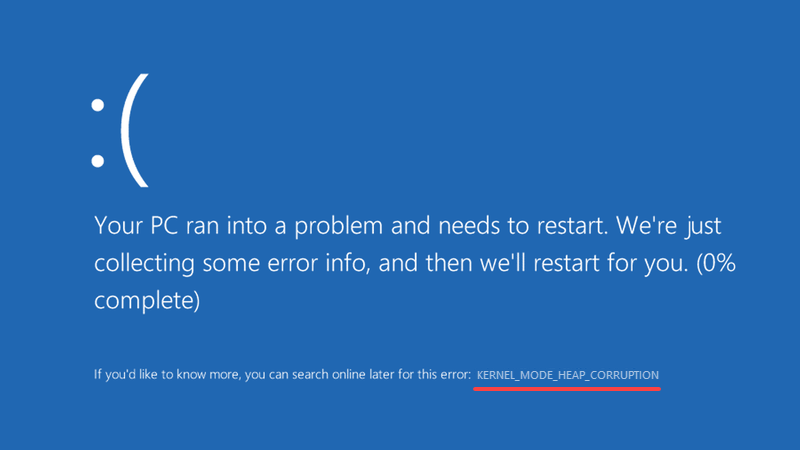
Getting the KERNEL_MODE_HEAP_CORRUPTION blue screen error on Windows? This BSOD usually points to a problem with a kernel-mode driver, corrupted system files, incompatible software, or faulty hardware. Graphics drivers are a common suspect, especially if the crash started after a driver or Windows update.
In this guide, we’ll walk you through practical fixes for the Kernel Mode Heap Corruption error on Windows.
Why am I getting the ‘Kernel Mode Heap Corruption’ error?
KERNEL_MODE_HEAP_CORRUPTION is a Windows stop code that appears when Windows detects corruption in memory allocated to the kernel-mode heap. In practical terms, this often means that a driver or another low-level component has accessed memory incorrectly.
Common causes include outdated, corrupted, or incompatible device drivers, software conflicts, hardware problems, corrupted Windows system files, or a recent Windows update.
The error can occur at different times. Some users encounter it while Windows is starting, while others see it when launching a game or another demanding application.
How to fix the ‘Kernel Mode Heap Corruption’ error
Here are 6 solutions that have proved useful to many Windows users. You may not need to try them all. Start with the simplest solutions and work your way down the list.
- Roll back or uninstall your graphics card drivers
- Update your device drivers
- Perform a clean boot to find software conflicts
- Check your RAM and other hardware
- Repair corrupted Windows system files
- Reset or reinstall Windows
Fix 1: Roll back or uninstall your graphics card drivers
Some Windows users have reported that they experienced this ‘blue screen of death (BSOD)’ error right after an update of their graphics card drivers (or a Windows Update). If that’s when you got the error, the new driver may be incompatible or corrupted.
First, try rolling back the graphics driver. If that doesn’t help, uninstall the graphics driver and then install a fresh version from the GPU manufacturer’s website.
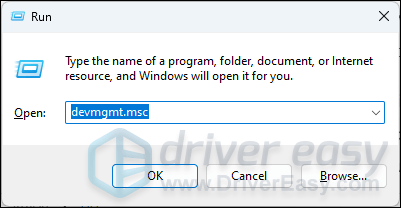
- On your keyboard, press the Windows key and the R key at the same time, then type devmgmt.msc and hit Enter.
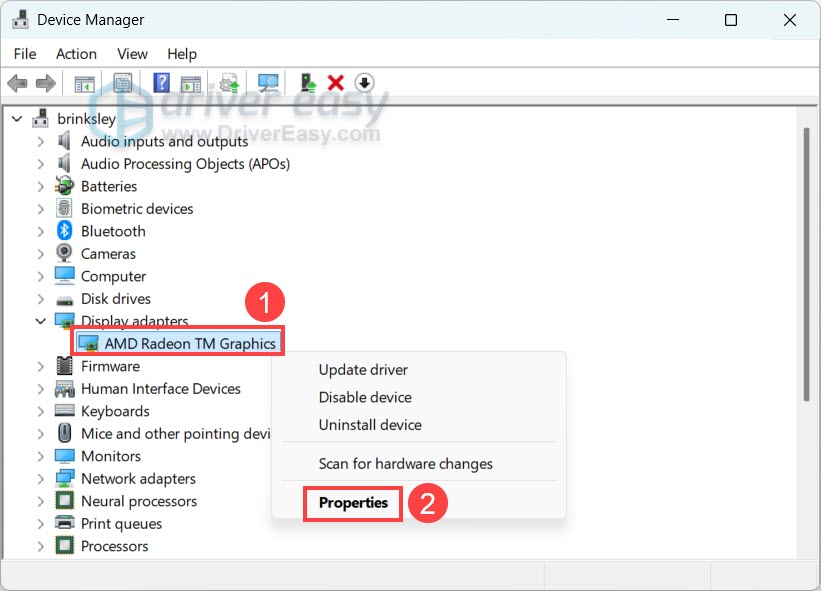
- Double-click to expand the Display adapters category, then right-click your display card and select Properties.
- Click the Driver tab. If Roll Back Driver is available, click it and follow the on-screen instructions.
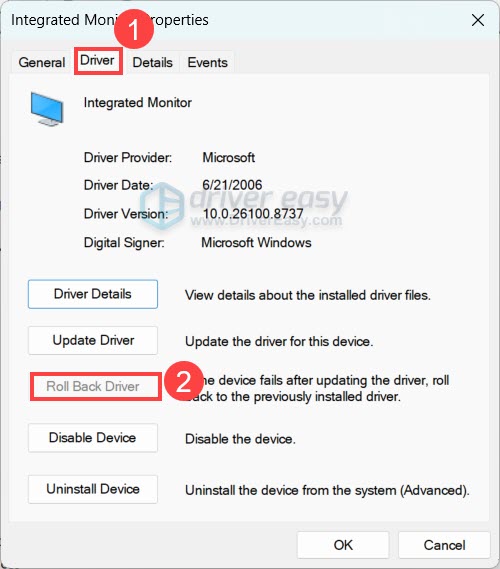
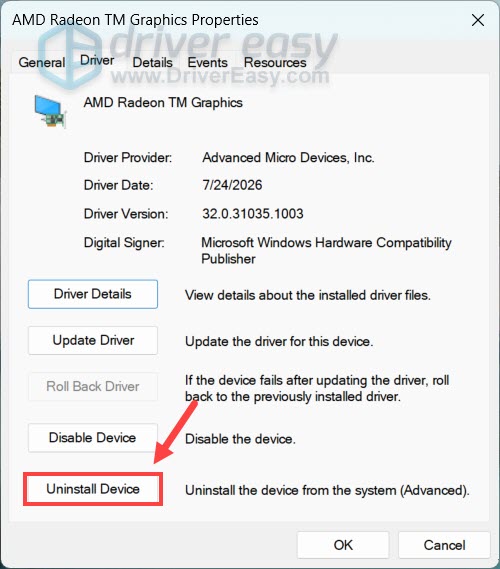
- If rolling back isn’t available or doesn’t resolve the problem, click Uninstall device.
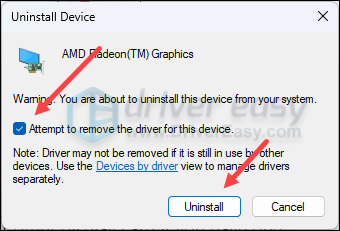
- Tick the box for Attempt to remove the driver for this device and click Uninstall.
- Repeat the same to remove the driver for your other display card if you have one.
- Restart your computer.
After restarting, Windows should automatically use a basic display driver. Your screen may briefly flicker, go black, or switch to a lower resolution. This is normal while the graphics driver is being reinitialized.
Test your computer to see if the Kernel Mode Heap Corruption error returns. If the system is stable, you can continue with Fix 2 below to install an up-to-date compatible graphics driver for your system.
Fix 2: Update your device drivers
A faulty or outdated driver isn’t limited to your graphics card. Network adapters, chipsets, storage controllers, audio devices, and other hardware can also cause system instability.
If you aren’t sure which driver is responsible, simply update your major device drivers. You can download the latest drivers directly from your PC or hardware manufacturer‘s official website. If you don’t want to identify and update each driver manually, you can do it automatically with Driver Easy.
Driver Easy will automatically recognize your system and find the correct drivers for it. You don’t need to know exactly what system your computer is running; you don’t need to risk downloading and installing the wrong driver, and you don’t need to worry about making a mistake when installing. Driver Easy takes care of everything.
- Download and install Driver Easy.
- Run Driver Easy and click the Scan Now button. Driver Easy will then scan your computer and detect any problematic drivers.

- Click Activate & Update next to each flagged device to update its driver. Or click Update All to automatically download and install the correct version of all the drivers that are missing or out of date on your system.
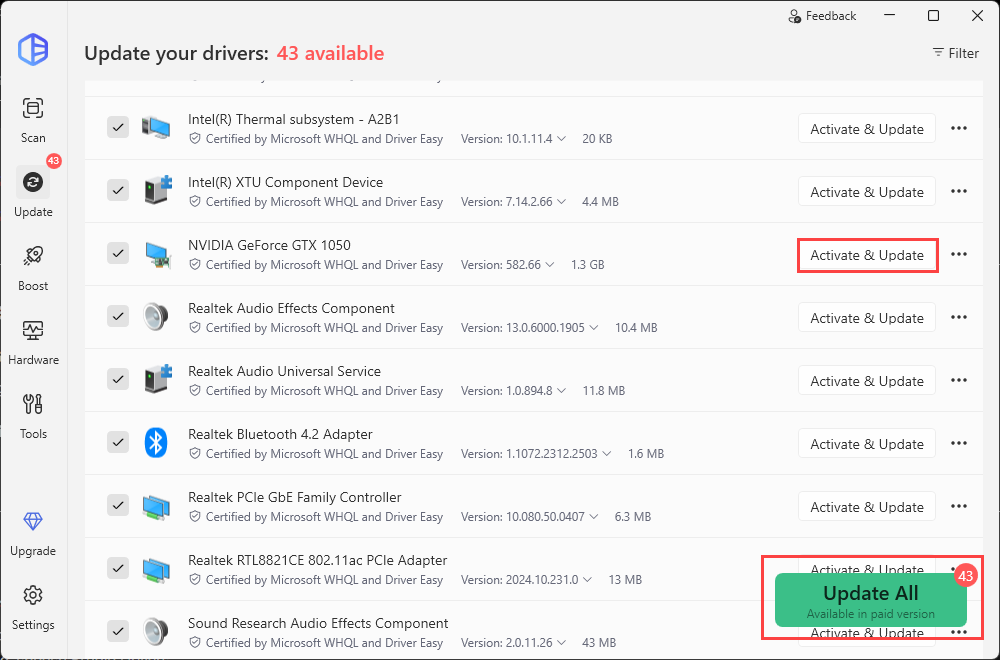
(This requires the Pro version, which comes with automatic driver updates, easy driver backup and rollback, plus full technical support. If you’re not ready to upgrade yet, Driver Easy offers a 7-day free trial which includes access to all the Pro features such as high-speed download and one-click install!) - Restart your computer for the changes to take effect.
If the BSOD started after a recent driver update, consider installing a previous stable driver version. Driver Easy allows you to easily test different driver versions. Simply click the three-dot button next to the device, select All available versions, and choose a version from the list.
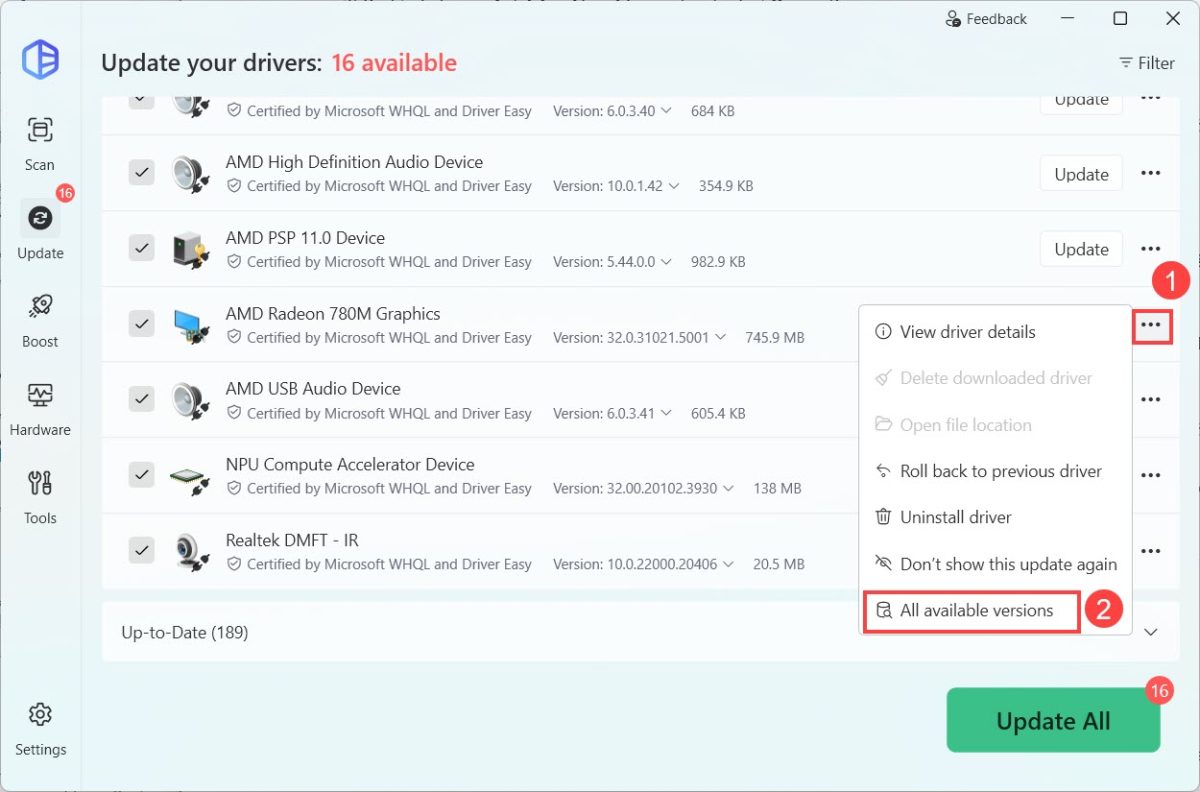
If the Kernel Mode Heap Corruption blue screen of death error remains, please move on to the next fix.
Fix 3: Perform a clean boot to find software conflicts
If the BSOD occurs when launching a particular application, game, or utility, a software conflict may be involved.
Instead of manually closing dozens of background processes, use a clean boot. This starts Windows with only essential Microsoft services and can help determine whether a third-party service or startup program is responsible.
1. Configure Windows for a clean boot
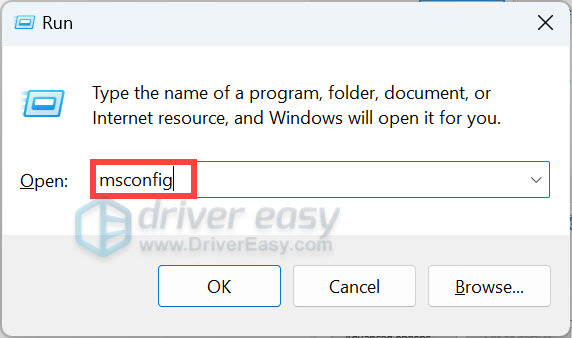
- On your keyboard, press the Windows key + R at the same time to open the Run command box.
- Type msconfig and press Enter.
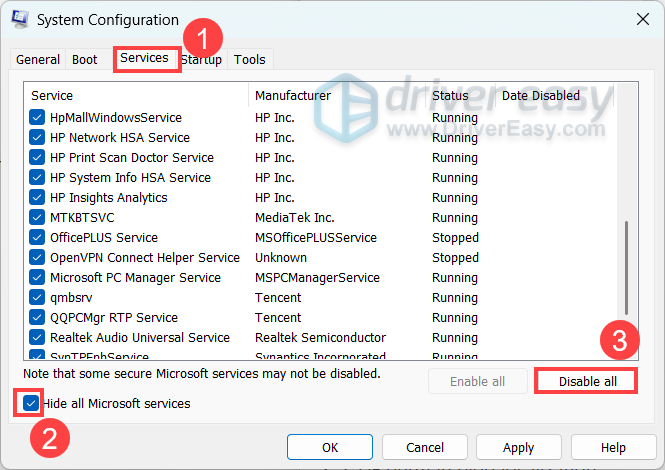
- Go to the Services tab, check Hide all Microsoft services, and click Disable all.
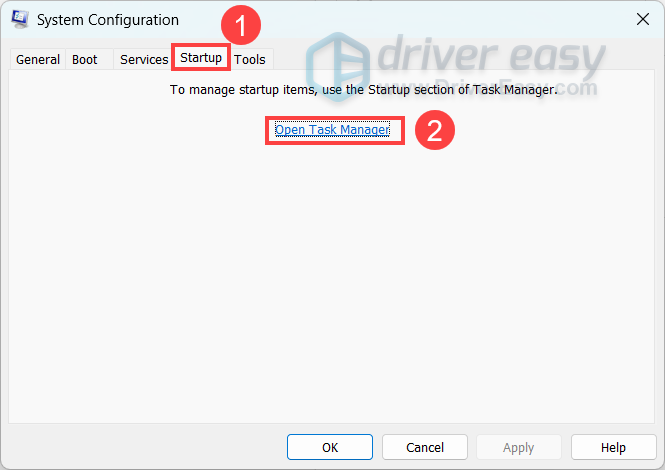
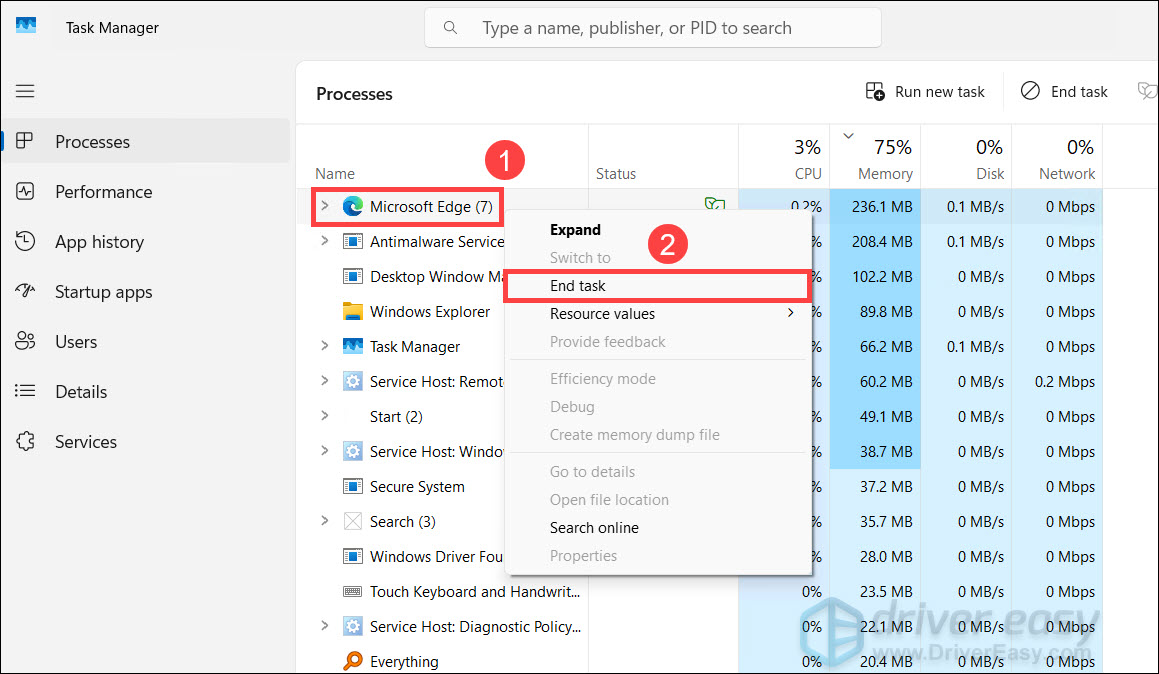
- Go to the Startup tab. Click Open Task Manager.
- Right-click any non-essential startup apps and click Disable.
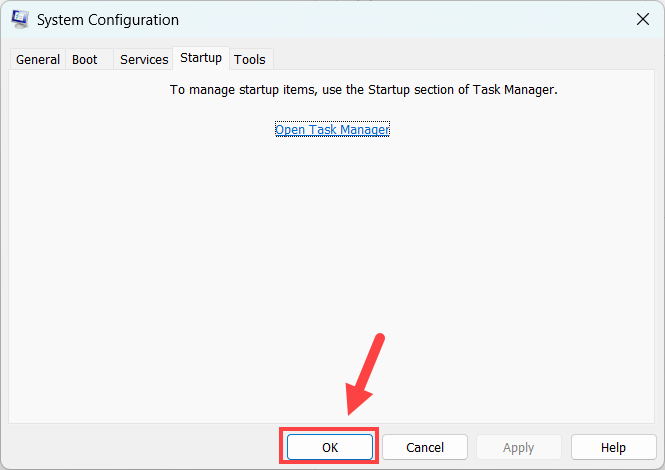
- Close Task Manager, go back to the system configuration tool, and click OK.
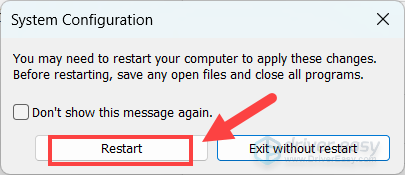
- Click Restart.
2. Test for the BSOD
After restarting, use the computer normally or launch the application that previously caused the crash.
- If the BSOD no longer occurs: A third-party service or startup application is likely involved.
- If the BSOD still occurs: Software conflicts are less likely to be the cause. Continue to Fix 4.
If the error disappears, you can identify the culprit by gradually re-enabling the disabled services and startup applications, restarting Windows, and testing after each group.
Once you identify the problematic application or service, update it, disable it, or uninstall it if necessary.
3. Return Windows to normal startup
After disabling or uninstalling the conflicting software or services, return to the normal startup to see if the error stops.
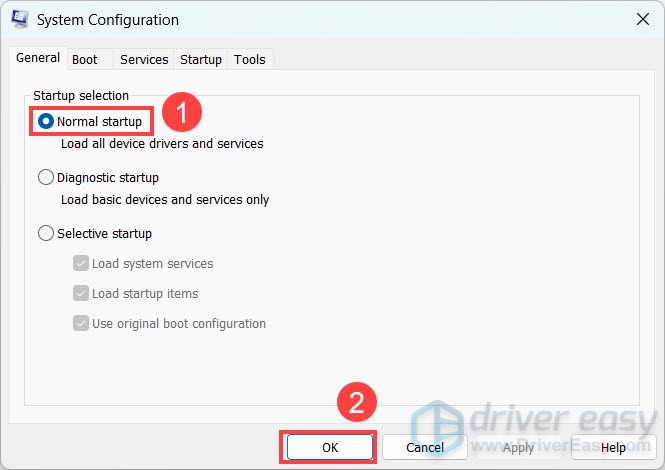
- On your keyboard, press the Windows key + R at the same time to open the Run command box. Type msconfig and press Enter.
- On the General tab, select Normal startup and click OK.
- Restart your computer.
Fix 4: Check your RAM and other hardware
Hardware problems can also trigger KERNEL_MODE_HEAP_CORRUPTION, particularly unstable or faulty RAM.
Start with Windows’ built-in memory diagnostic tool. If the test reports errors, your RAM or another memory-related component may need further investigation.
1. Run Windows Memory Diagnostic Tool
The Windows Memory Diagnostic tool will check to see if there’s a problem with your Random Access Memory (RAM):
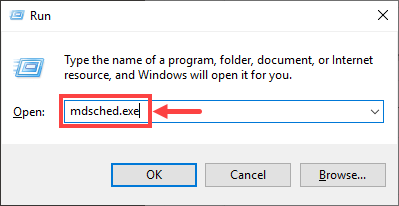
1) On your keyboard, press the Windows logo key and R at the same time to invoke the Run dialog box. Type mdsched.exe and hit Enter.
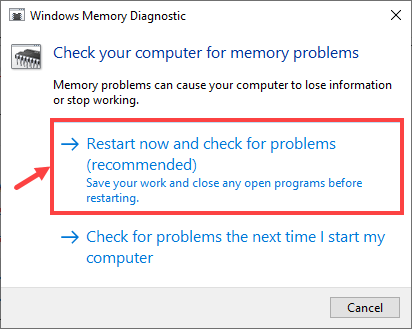
2) Select either Restart now and check for problems (recommended) to check your memory straight away, or Check for problems the next time I start my computer if you want to keep working and do the memory check later.
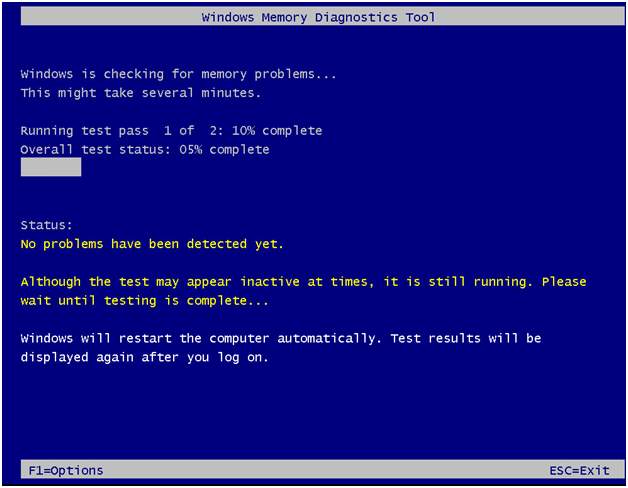
3) When the Windows Memory Diagnostic Tool actually runs, you’ll see the following screen that indicates the number of passes it’s doing, along with how far it has progressed.
If Windows reports memory errors, shut down the computer and check the RAM modules. If you aren’t comfortable opening your PC, contact the computer manufacturer or a qualified technician.
A clean Windows Memory Diagnostic result does not completely rule out an intermittent RAM or hardware problem. If the BSOD continues, especially under heavy workloads, consider running a more comprehensive memory test or having the hardware professionally checked.
2. Check for overheating and hardware instability
Overheating, unstable overclocking, and faulty hardware can also cause repeated BSODs.
Check whether:
- The CPU or GPU is reaching unusually high temperatures
- Your PC is dusty or has restricted airflow
- You recently enabled CPU/GPU/RAM overclocking
- The problem started after installing new hardware
- The crash happens mainly during gaming or other heavy workloads
If you’ve enabled an overclock or memory profile, temporarily return the hardware to its default settings and test again.
It’s not that easy to tinker with the hardware if you’re a computer newbie. You need to disassemble the computer chassis, look for problems in each separate component, and find ways to fix them – all by yourself. If you don’t have much interest in learning the skills, you should contact a local technician for further help.
If you’ve checked for hardware issues and you’re still getting the error, take a look at the next fix.
Fix 5: Repair corrupted Windows system files
If the hardware appears to be working properly, corrupted Windows components or system files may be contributing to the Kernel Mode Heap Corruption error. You can use Windows built-in tools to repair the corrupted system files.
1. Run DISM
Deployment Image Servicing and Management (DISM) is an in-built Windows tool that can identify if your Windows installation is corrupt and repair it if it is:
1) On your keyboard, press the Windows logo key and R at the same time to open the Run dialog box. Type cmd and press Ctrl+Shift+Enter to run Command Prompt as administrator.
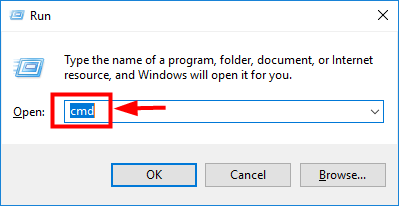
If prompted for consent, click Yes.
2) In Command Prompt, type the following command (note that there’s a space to the left of each slash “/”):
dism.exe /online /cleanup-image /restorehealth
After that, hit Enter on your keyboard. Then the DISM tool will begin to scan for any problems and try to fix them.
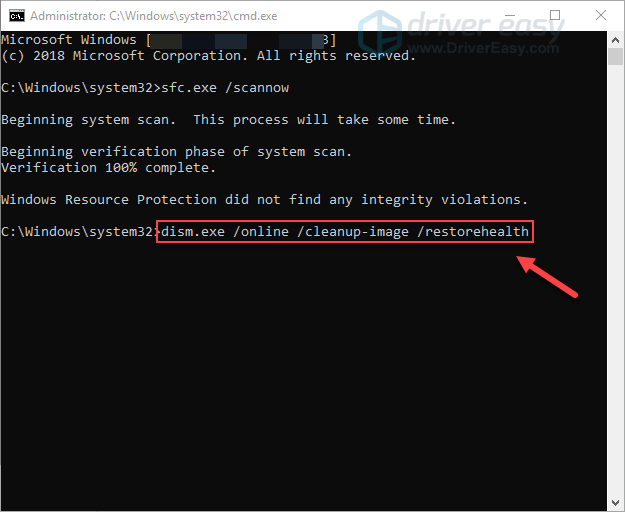
Wait for the process to complete. Then, reboot your computer and see whether the Kernel Mode Heap Corruption error still occurs. If it does, try the next fix below.
2. Run System File Checker
After DISM completes, run SFC.
1) On your keyboard, press the Windows logo key and R at the same time to open the Run dialog box. Type cmd and press Ctrl+Shift+Enter to run Command Prompt as administrator.
2) When Windows asks for permission to make changes to your device, click Yes.
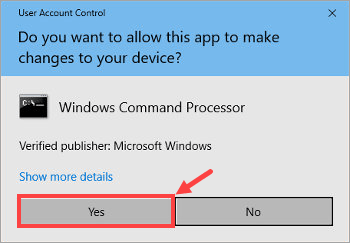
3) In the Command Prompt, type the following command (note that there’s a space between sfc and /):
sfc /scannow
After you finish entering the command, hit Enter on your keyboard. Then the sfc tool will begin to scan all system files and repair the corrupted or missing ones.
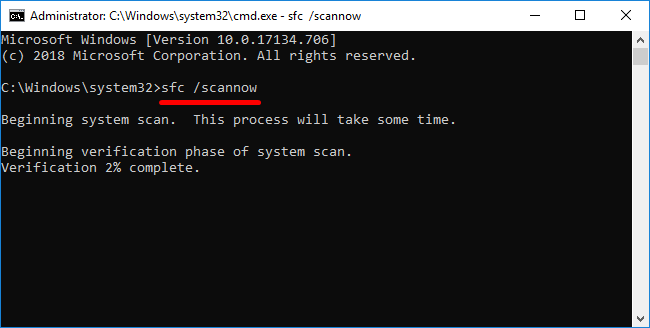
4) Wait until the verification process is completed. If you’re seeing errors during the scan, check out this documentation for further troubleshooting. If the verification process is successful, restart your computer for the changes to take effect.
Fix 6: Reset or reinstall Windows
If you’ve tried the fixes above and the Kernel Mode Heap Corruption error continues, Windows itself may have a deeper software problem. At this point, you can consider Reset this PC or a clean Windows installation.
Option 1: Reset this PC
Resetting Windows will revert your system to its initial state as if it’s your first time turning on the computer. It removes all the apps that didn’t come with your PC, but you can decide whether to retain your personal data or not.
In Windows 11, go to Settings > System > Recovery > Reset this PC.
In Windows 10, go to Settings > Update & Security > Recovery > Reset this PC.
Follow the on-screen instructions and choose the appropriate reset option.
Option 2: Perform a clean installation
A clean installation is more thorough but also more disruptive. Depending on the installation method and options you choose, it can remove applications, settings, and personal files from the Windows installation drive. You’ll generally need installation media, such as a USB flash drive.
If you need detailed instructions, see our guides:
After resetting or reinstalling Windows, install the latest Windows updates and essential device drivers, then test the system before reinstalling all your third-party applications.
The Kernel Mode Heap Corruption error is commonly associated with low-level software or hardware problems, with problematic drivers being one of the first things worth checking.
If the error started after a graphics driver update, roll back or reinstall the graphics driver first. Consider resetting or reinstalling Windows after the less disruptive troubleshooting steps have failed.
Hopefully, one of the fixes above helps you get rid of this KERNEL_MODE_HEAP_CORRUPTION blue screen. If you’ve found another solution that worked for you, feel free to share it in the comments.

