


Razer Barracuda X is a solid choice for those who play on multiple platforms. Although users have reported a few problems with its microphone, they can be easily fixed. If your Razer Barracuda X mic is not working on PC, check out the fixes below.
Try these fixes…
- 1: Make sure the connection is solid
- 2: Set your headset mic as the input device
- 3: Enable your mic for recording
- 4: Turn on microphone access on your PC
- 5: Update your audio driver
Fix 1: Make sure the connection is solid
Razer Barracuda X can be connected wirelessly or with a wire (via a 3.5 mm port or a USB port.) You need to make sure your headset is securely connected to your PC. In addition, the microphone is detachable from the headset itself. If you can hear sounds in your headset but the mic won’t work, check if your mic is connected correctly to your headset.
If you’ve checked the basics of the headset itself but the microphone still doesn’t work, try the next fix.
Fix 2: Set your headset mic as the input device
When you connect Barracuda X to your PC, the device normally gets automatically recognized as the output device. But it doesn’t always work like this with the input device option. You may need to manually set your headset mic as the input device. Here’s how:
on Windows 10
- Press the Windows logo key to open the search bar. Type in sound input then click Sound input device properties.
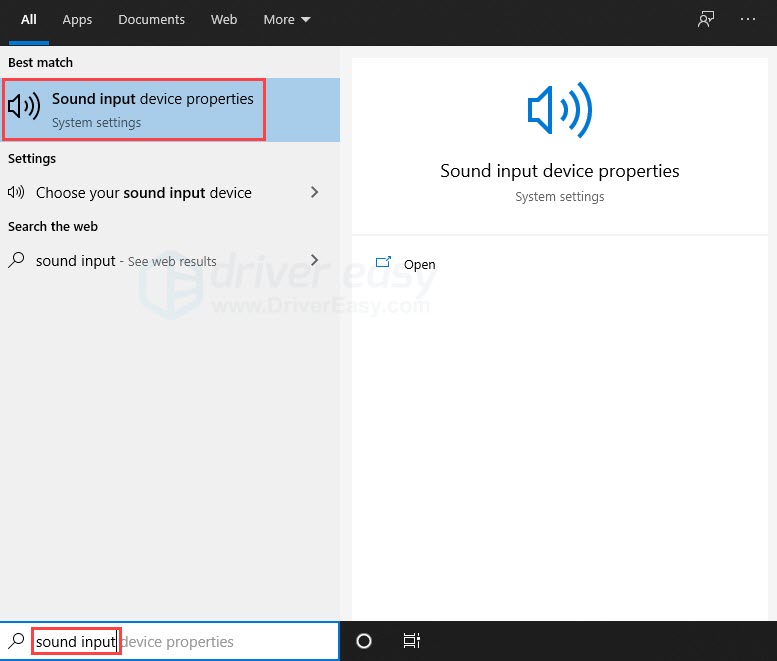
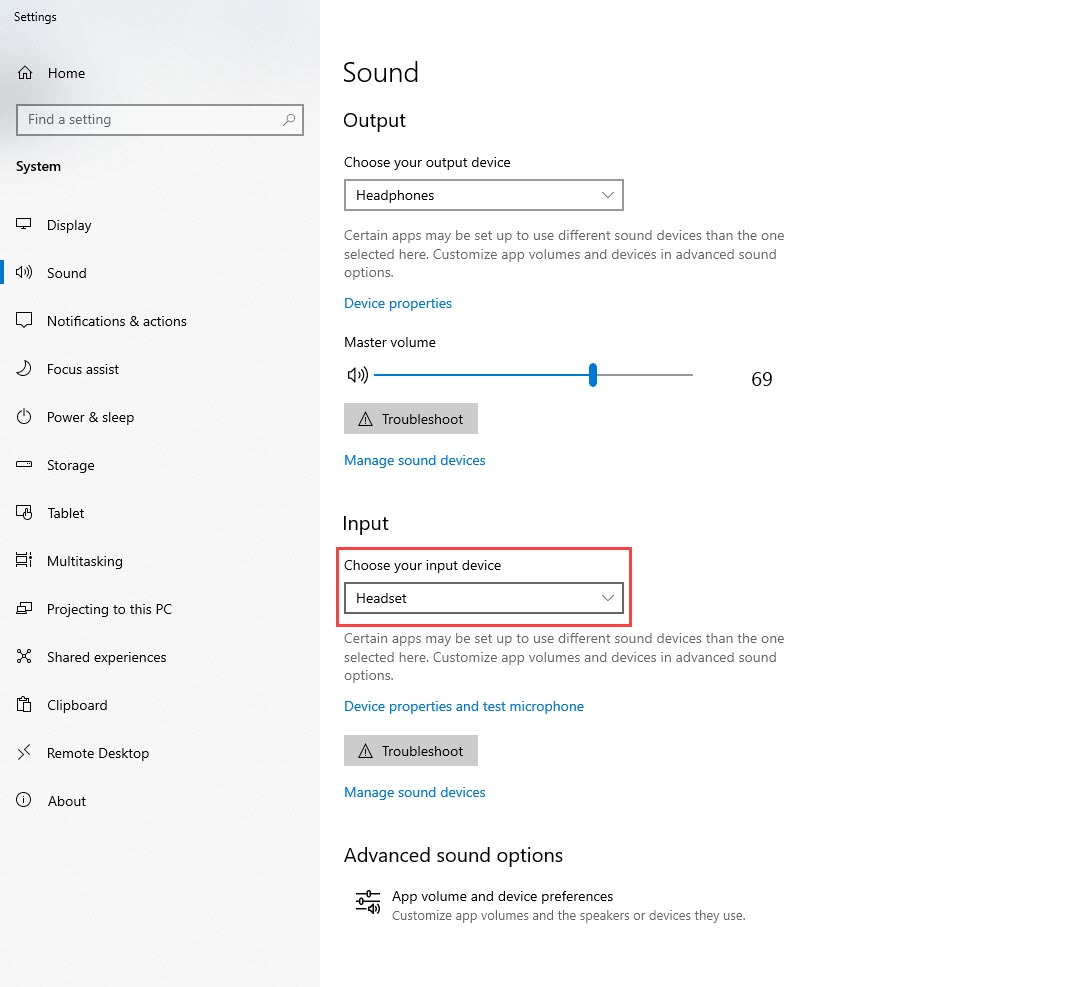
- Select your headset as the input device. It may display as Razer Barracuda X or Headset.
- Test your mic to see if it works now.
on Windows 11
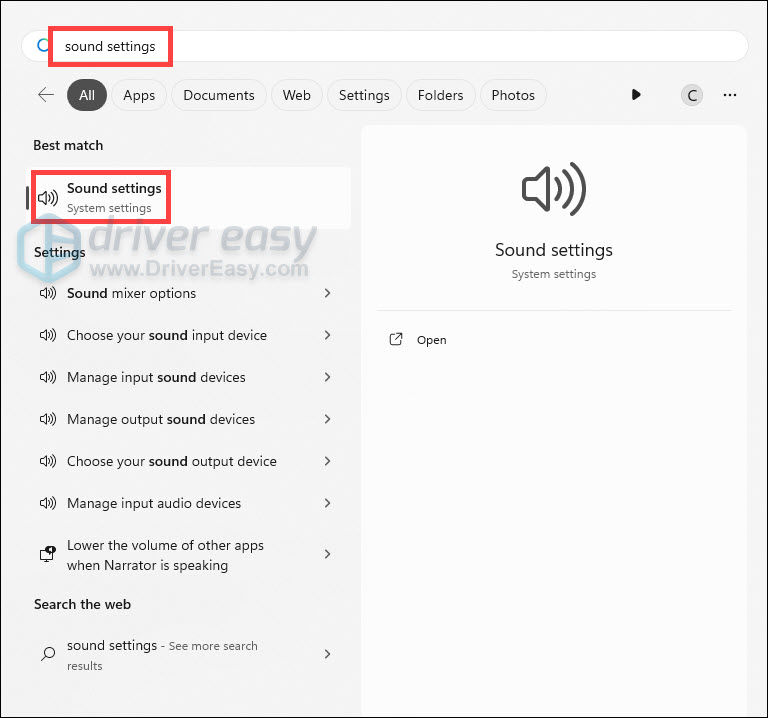
- Press the Windows logo key, then type Sound settings. Click it from the list of results.
- In the section of Choose a device for speaking or recording, select the correct microphone device.
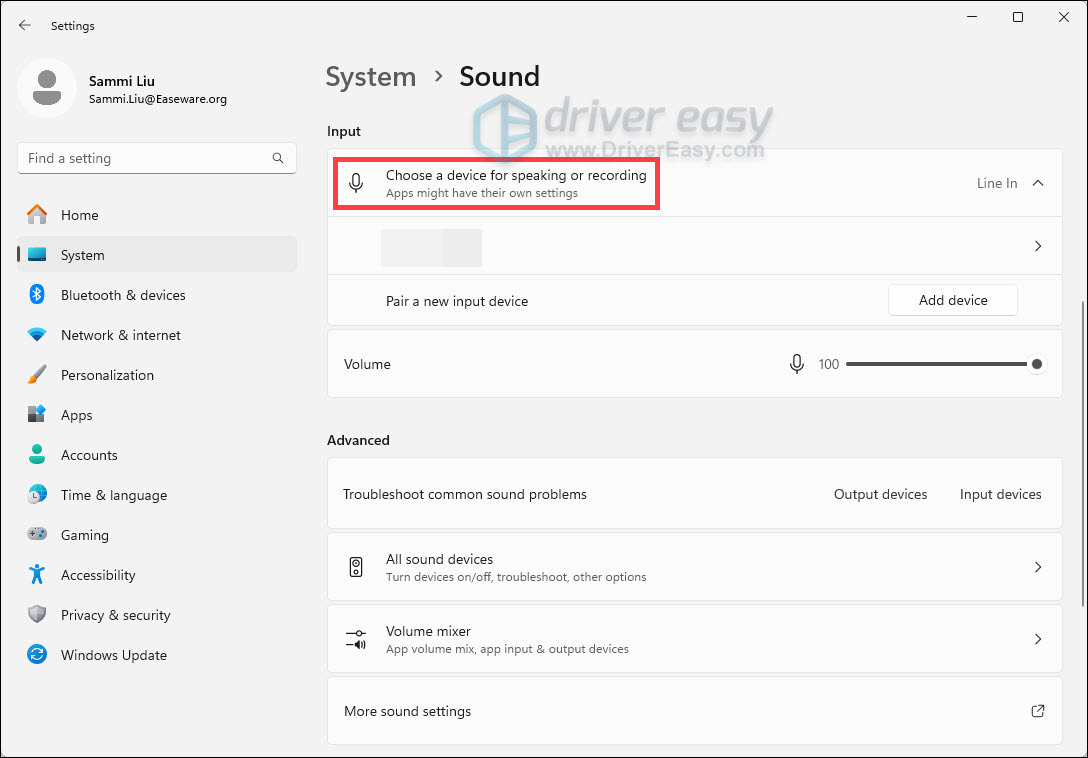
- Scroll to the bottom, and click More sound settings.

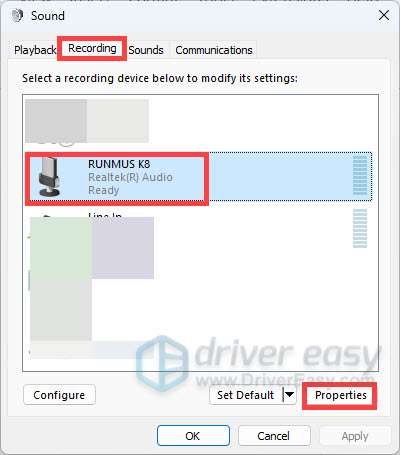
- Select the Recording tab, then select your microphone device and click Properties.
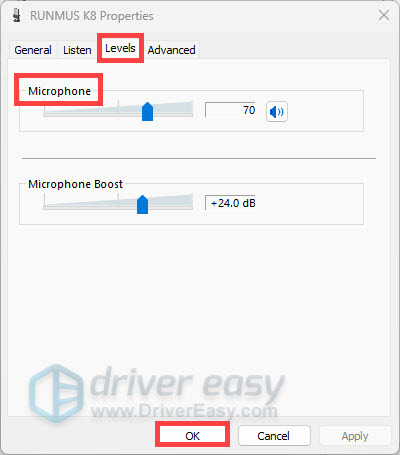
- Select the Levels tab, use the slider bar to adjust the volume level, and make sure that it’s not set to the mute mode. Then click OK to save the changes.
If your microphone is already set as the input device but it still won’t catch your voice, try the next fix.
Fix 3: Enable your mic for recording
When your Razer Barracuda X is correctly connected to your PC but the microphone won’t work, you need to check if the mic is enabled for recording. If this feature is turned off, your PC won’t be able to use your headset mic. Here’s how to set it up:
on Windows 10
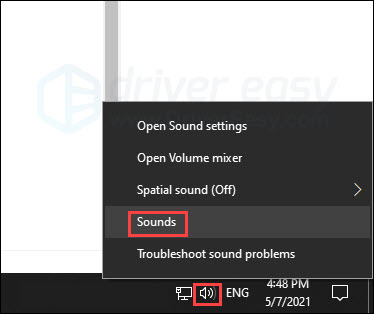
- Right-click the little speaker icon on your taskbar, then click Sounds.
- Go to the Recording tab and find your headset. If you don’t see it, right-click an empty area then select Show Disabled Devices.
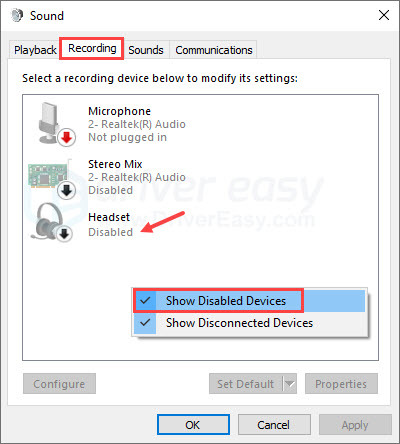
- Right-click your headset device, then click Enable.
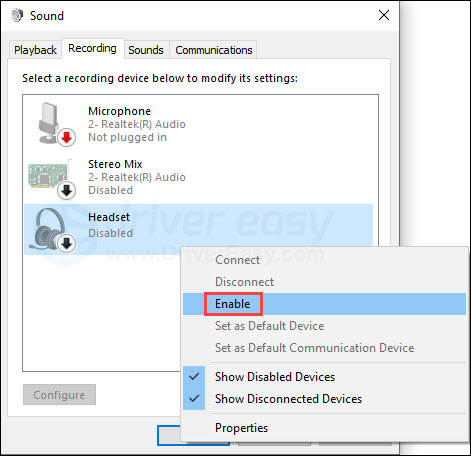
- Click Apply then OK.

on Windows 11
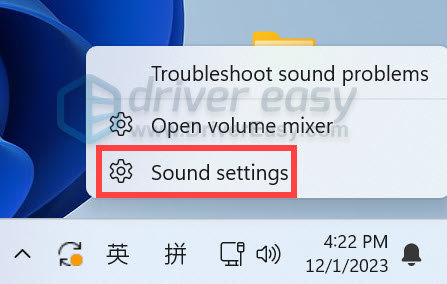
- On the taskbar, right-click the sound icon and select Sound settings.
- Scroll down and find More sound settings, click on it.
- Select the Recording tab and find your headset. If you don’t see it, right-click an empty area then select Show Disabled Devices.
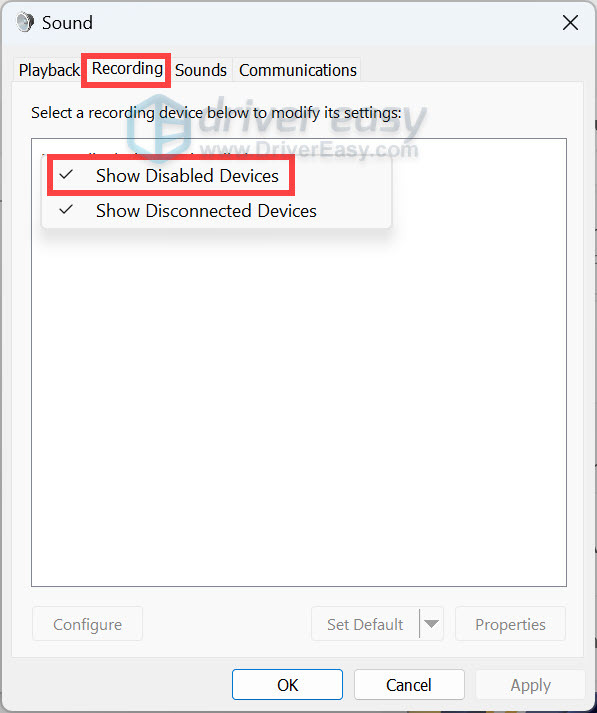
- Right-click your headset device, then click Enable.
- Click Apply then OK to save the changes.
If this doesn’t help, move on to the next fix.
Fix 4: Turn on microphone access on your PC
If you’ve configured all the settings of your headset but the mic still won’t record your voice, then the problem may be with the microphone settings of your PC. Here’s how to turn on the microphone access on your PC:
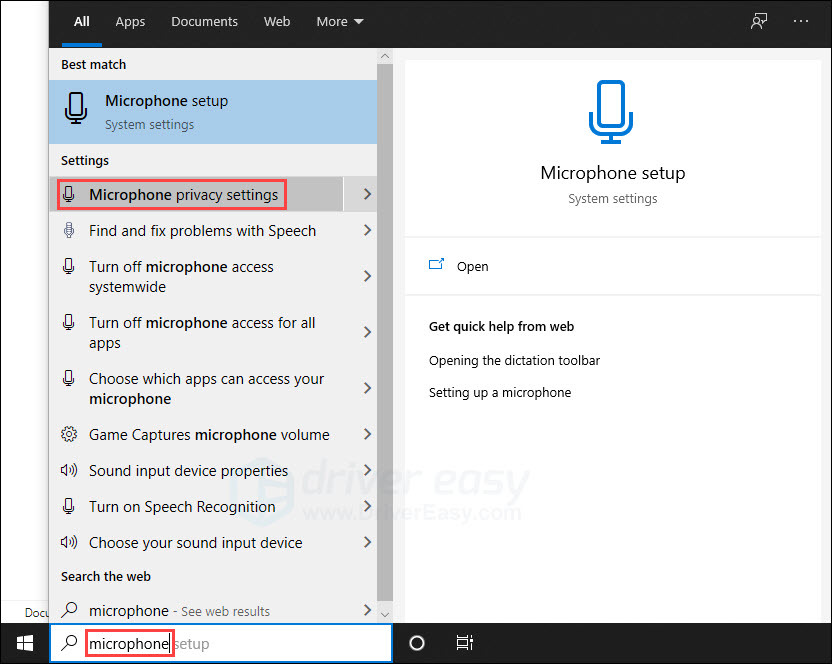
on Windows 10
- Press the Windows logo key or find the search bar on your taskbar. Type in microphone, and click Microphone privacy settings.
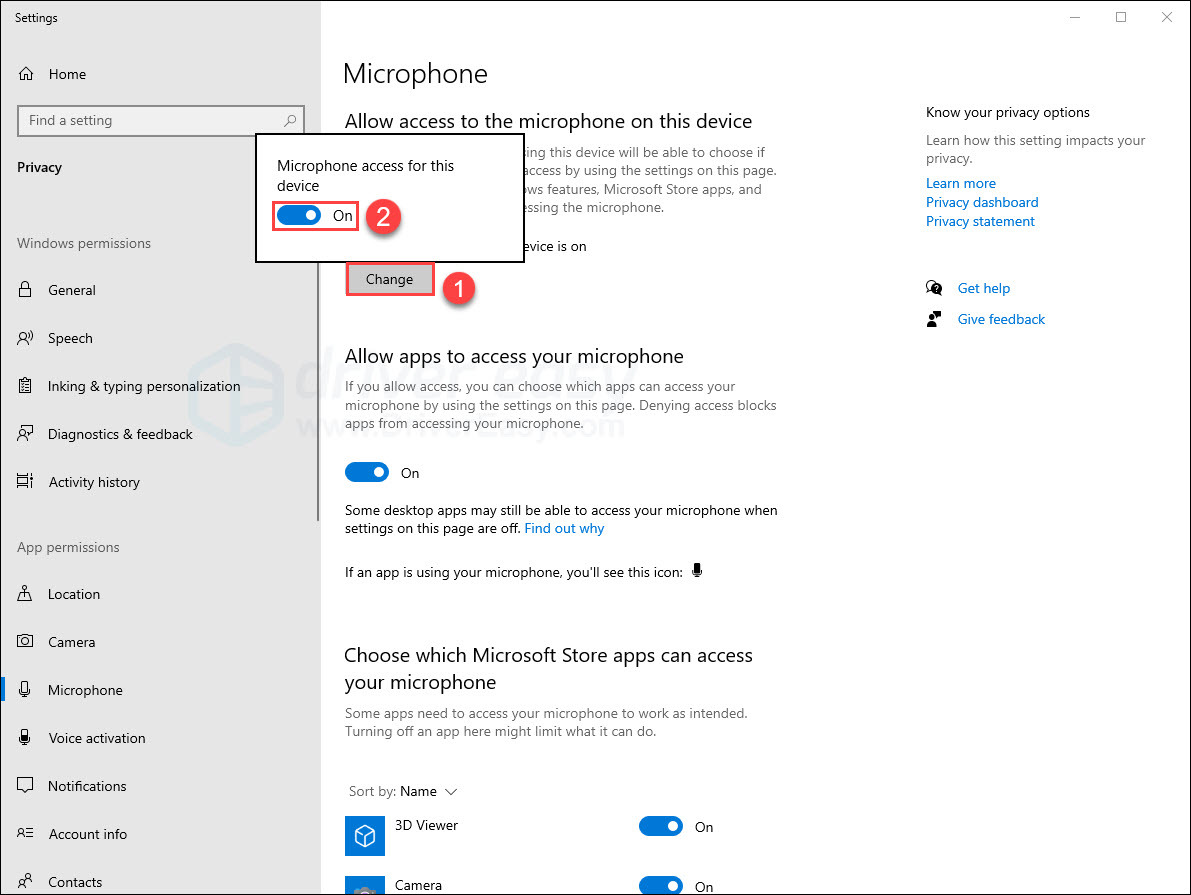
- Click Change, then turn on the microphone access for this device.
on Windows 11
- On your keyboard, press the Windows logo + I keys simultaneously to open Settings.
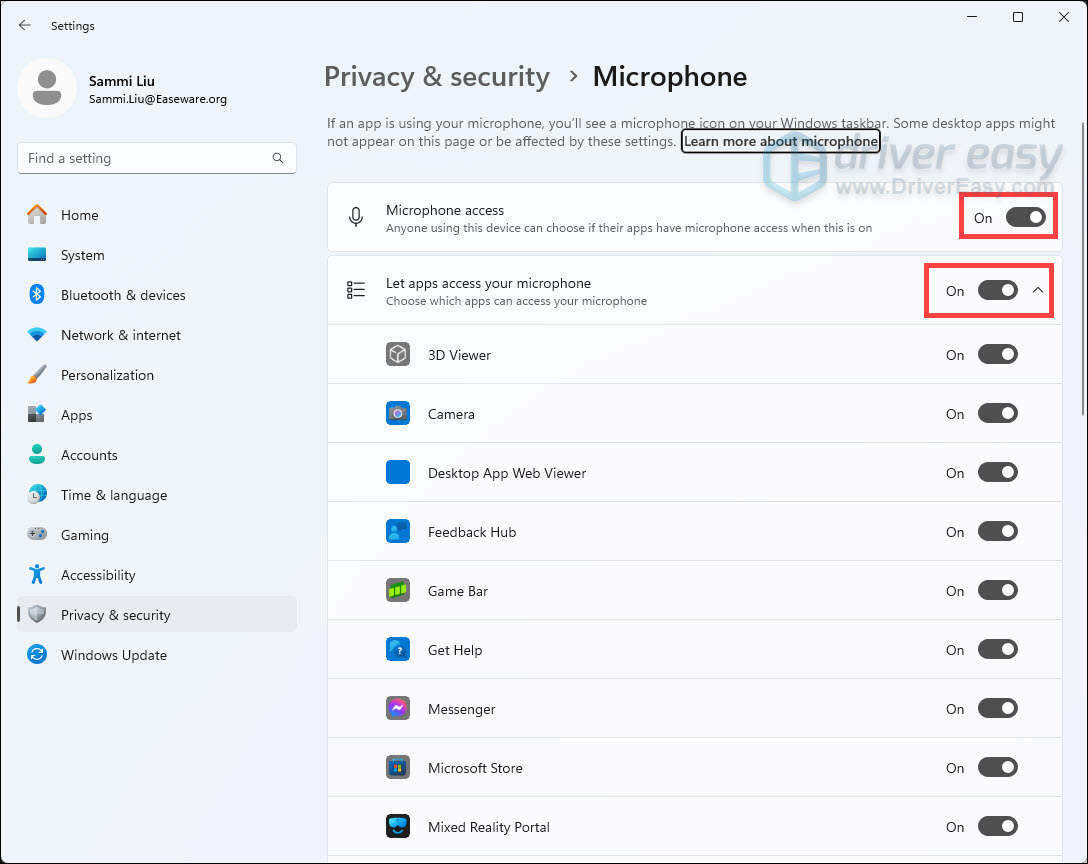
- Select Privacy & security from the left panel. Then scroll down to the section App permissions, click on Microphone.

- Toggle on Microphone access and Let apps access your microphone.
Also, make sure that you toggle on Let desktop apps access your microphone.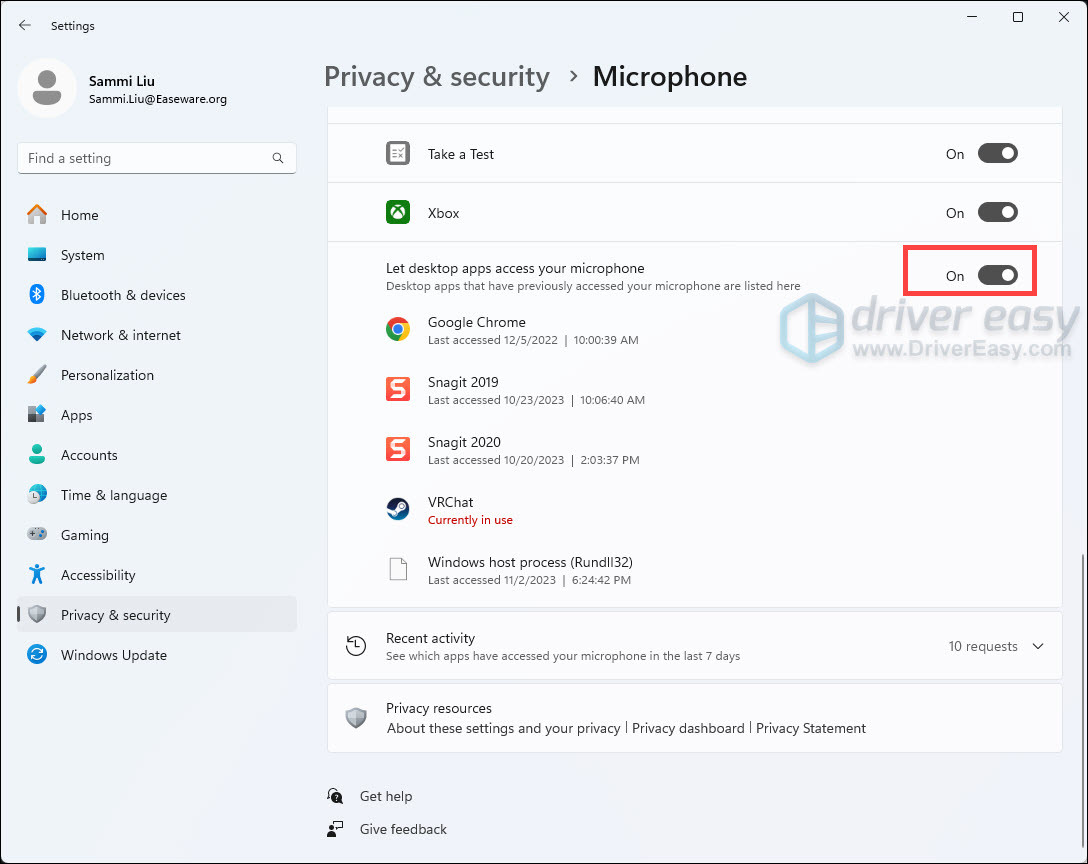
If this doesn’t work, there’s one more fix you can try.
Fix 5: Update your audio driver
If you’ve tried the above fixes and nothing worked, it’s likely that you need a new audio driver. A faulty or outdated audio driver may trigger random audio problems and compatibility issues with sound devices.
There are two ways to check if you have the latest audio driver and update it if needed: manually and automatically.
Manual driver update – You can update your audio driver via Device Manager (a Windows feature). Note that although Windows will automatically search for the available updates for your audio driver, you may get no results since Windows doesn’t update its database very often.
Automatic driver update – If you don’t have the time, patience, or computer skills to update your driver manually, you can, instead, do it automatically with Driver Easy. Driver Easy will automatically recognize your system and find the most recent driver for your exact sound card as well as your Windows version. Then it will download and install the driver correctly.
You can update your drivers automatically with either the 7 days free trial or the Pro version of Driver Easy. It takes just 2 clicks, and you get full support and a 30-day money-back guarantee with the Pro version:
- Download and install Driver Easy.
- Run Driver Easy and click the Scan Now button. Driver Easy will then scan your computer and detect any problem drivers.

- Click the Activate & Update button next to the flagged device to automatically download and install the correct version of this driver.
Or click Update All to automatically download and install the correct version of all the drivers that are missing or out of date on your system (You’ll need the Pro version for this – when you select Update All, you’ll get a prompt to upgrade. If you’re not prepared to purchase the Pro version yet, Driver Easy provides a 7-day trial at no cost, granting access to all Pro features like fast downloads and easy installation. No charges will occur until after your 7-day trial period ends.)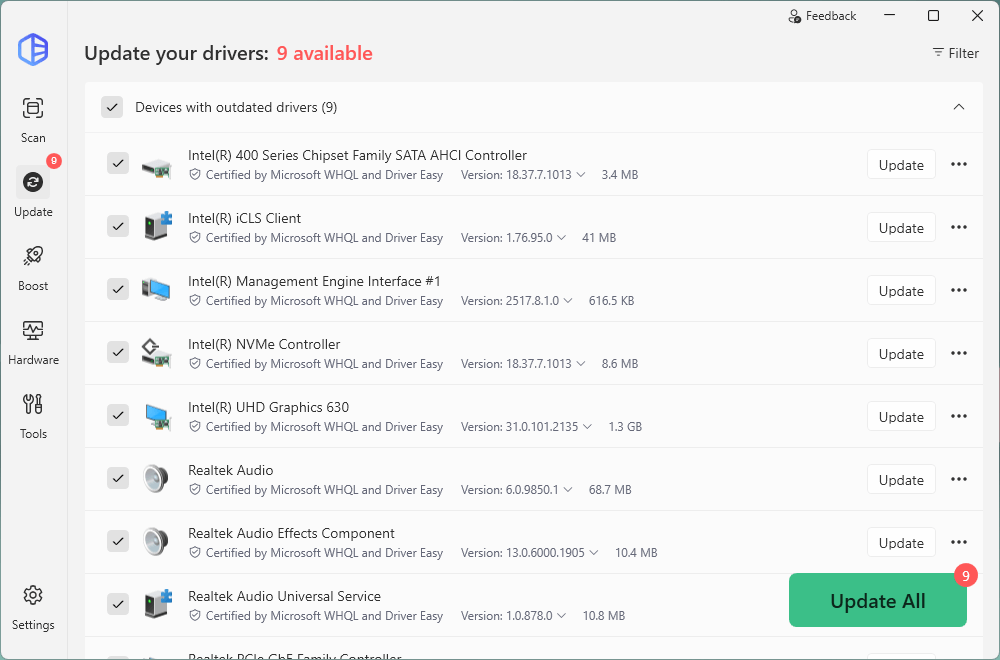
- After updating, restart your computer to take effect.
Hopefully this article is helpful! Please feel free to leave a comment if you have any questions or suggestions.